It’s time to explore watercolor techniques, and once you start, you’ll want to keep playing with watercolor all day long.
Seriously, forget anything else you had planned – we’re going on a WATERCOLOR ADVENTURE. Grab that watercolor helmet, cause it’s gonna be a bumpy ride.
Put on your watercolor armor, cause we’re getting dangerous. Sorry.
Actually, whenever I break out my watercolors, I am surprised at how versatile they are. They don’t need to always be lovely washes, although that is certainly a fun way to use them.
Depending on what you do with them, or what you add to them, you can get all sorts of cool effects. (Like using stencils with watercolors.)
Supplies I Used
Here’s a quick list of supplies I used, and you can read more about them after the techniques. (There is a big difference in watercolor brands, and you don’t want to suffer through the low-pigment, waxy watercolors.)
- Watercolor paints – These are my current absolute favorites
- Watercolor paper – Hot press for smooth, and cold press for textured. I buy several of these pre-cut packs to have around at all times, but I absolutely recommend having a large sheet or 2 of premium watercolor paper sitting out to test colors, make basic watercolor doodles, and try new techniques on. It’s fun to watch the paper evolve into a piece of weird art.
- Paintbrushes – It pains me to recommend cheap brushes because a good-quality brush makes ALL the difference. If you need to go budget right now, try these brushes, but every once in awhile splurge on one or a set of these awesome brushes (they also have a lifetime guarantee.)
- Coarse salt
- Rubbing alcohol
- Droppers – you can use these simple droppers or grab these containers which are great for storing mixed fluid paint
- Spray bottle
- Paper towels
- Tissue paper
- Washi tape – ooh look at these pretty designs
- Rubber cement
- Frisket (masking fluid) – I have not mastered this stuff yet, but I will be buying this pen next.
- Black ink – this is truly waterproof when dry.
- Stencils – Oh my goodness these would be so fun with watercolors. Spray the back with a little repositionable glue before using to minimize seepage.
- Bamboo skewers and/or bamboo reed pen
- White crayon – these are great!
- Brush markers
- Sponge
- Pencil
- Straw
- Plastic wrap
- Liquid castile soap
Watercolor Techniques
Now let’s move on to the techniques, so you can try them yourself.
Stencil and Resist Techniques
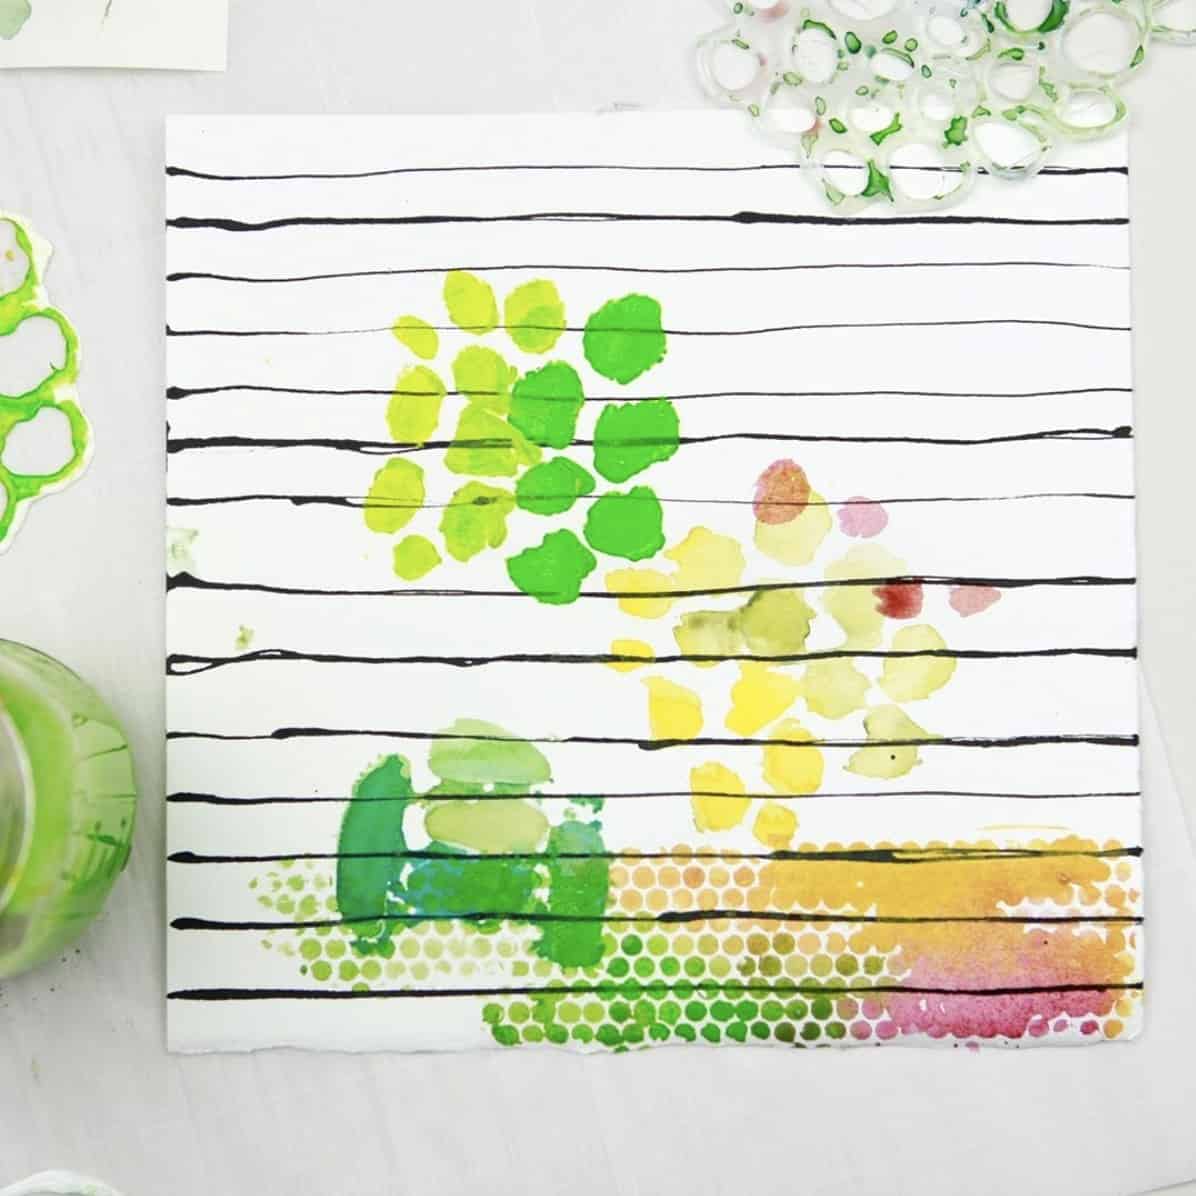
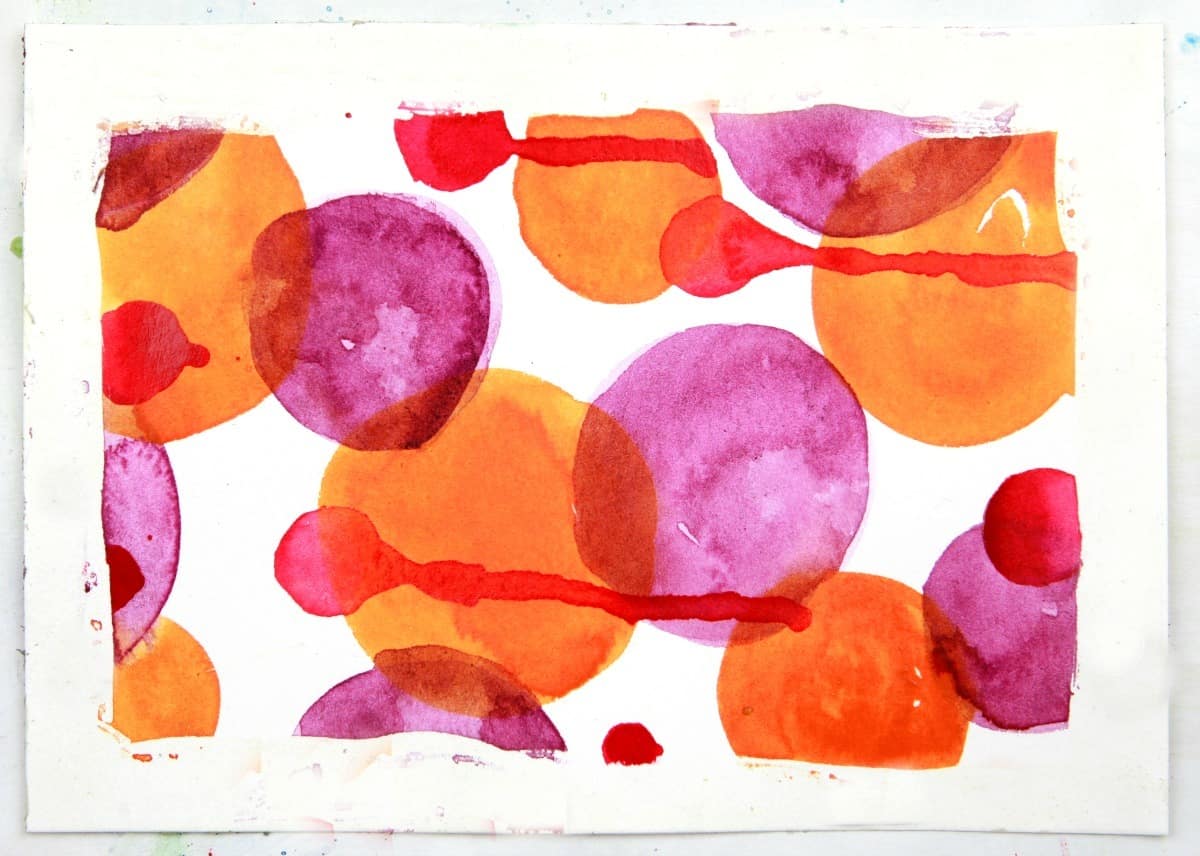
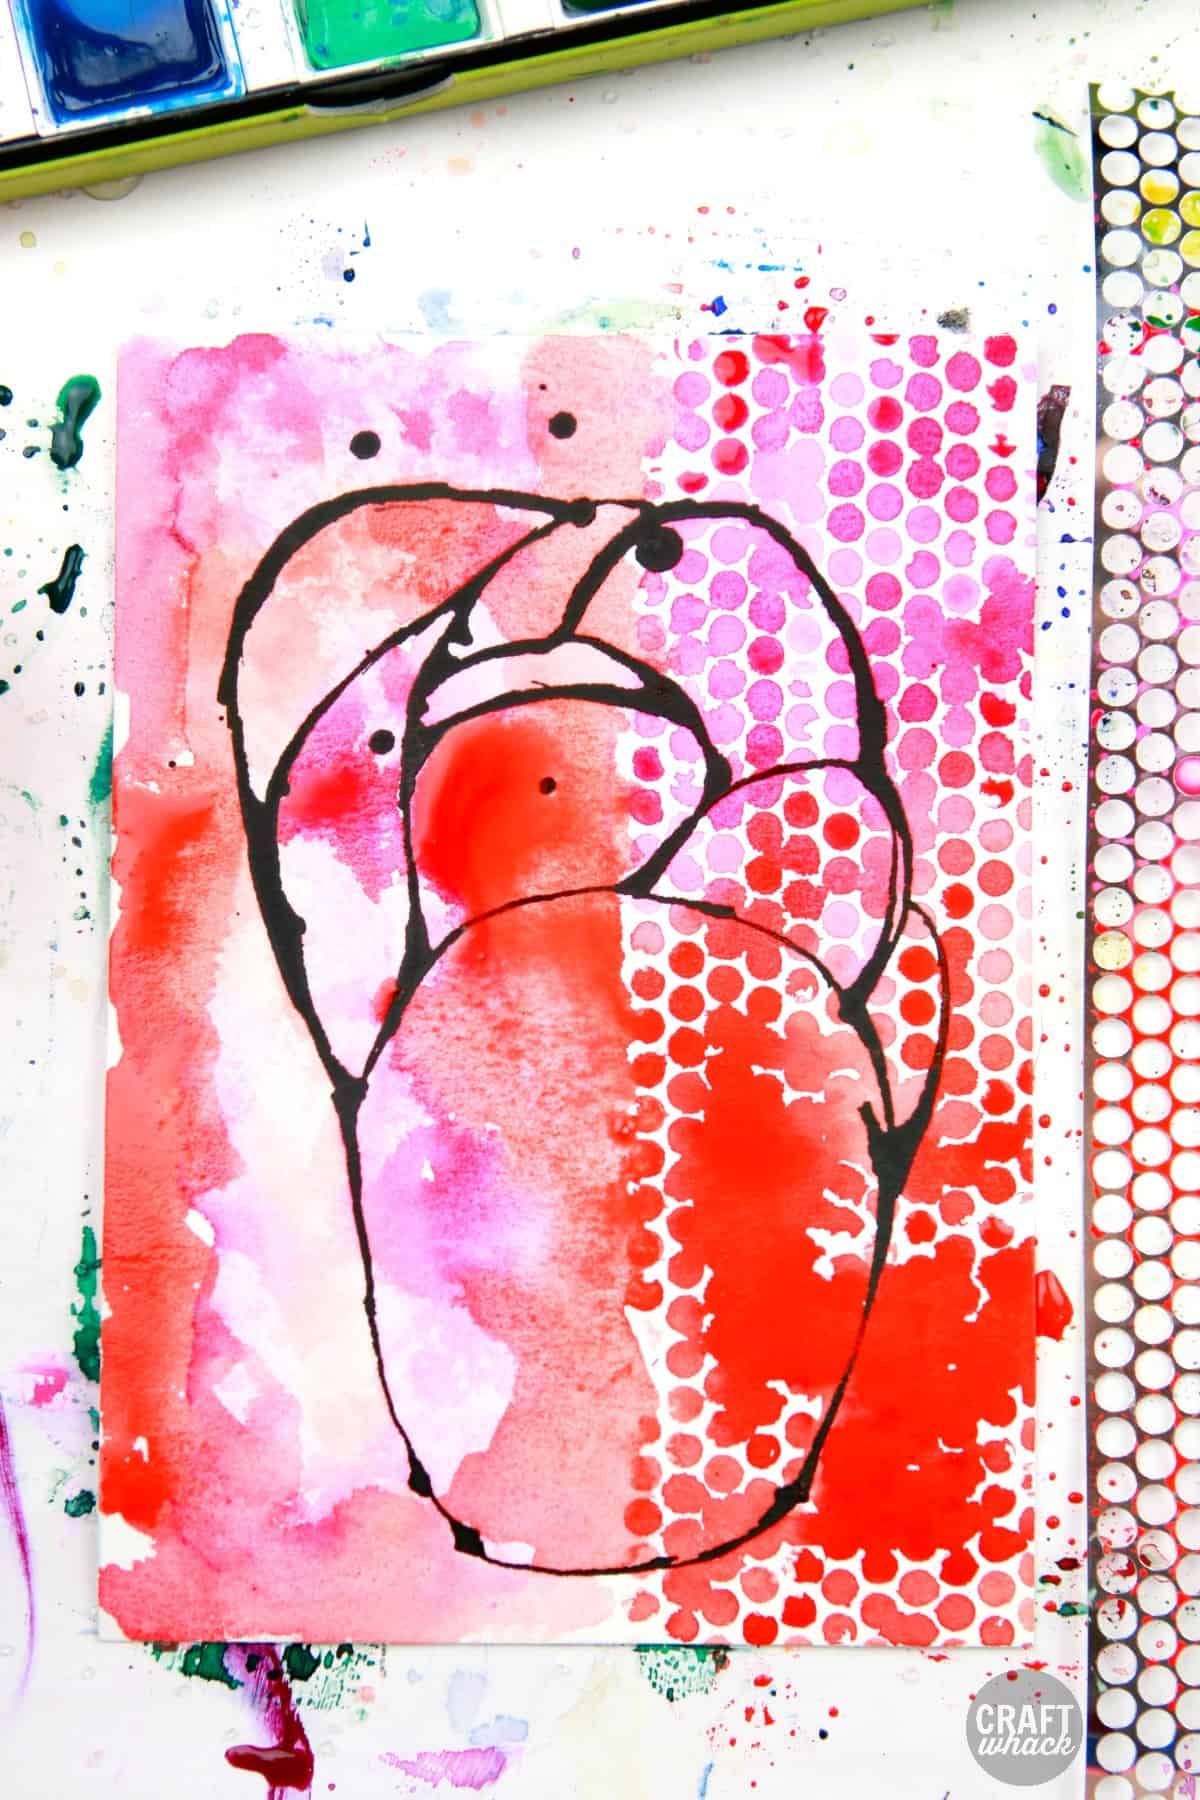
After I inked some lines on this paper, I used my homemade acrylic gel medium stencil for the blobby shapes and wide metallic ribbon with holes for the small dots.
Obviously I need to work on the gel medium stencils a bit. (That top stencil is made from hot glue, which totally sucks with watercolor. It’s too bulky and the watercolor just seeps right under.)
My favorite stencil project with watercolors so far is these doilies and sticky stencils. Love ’em.
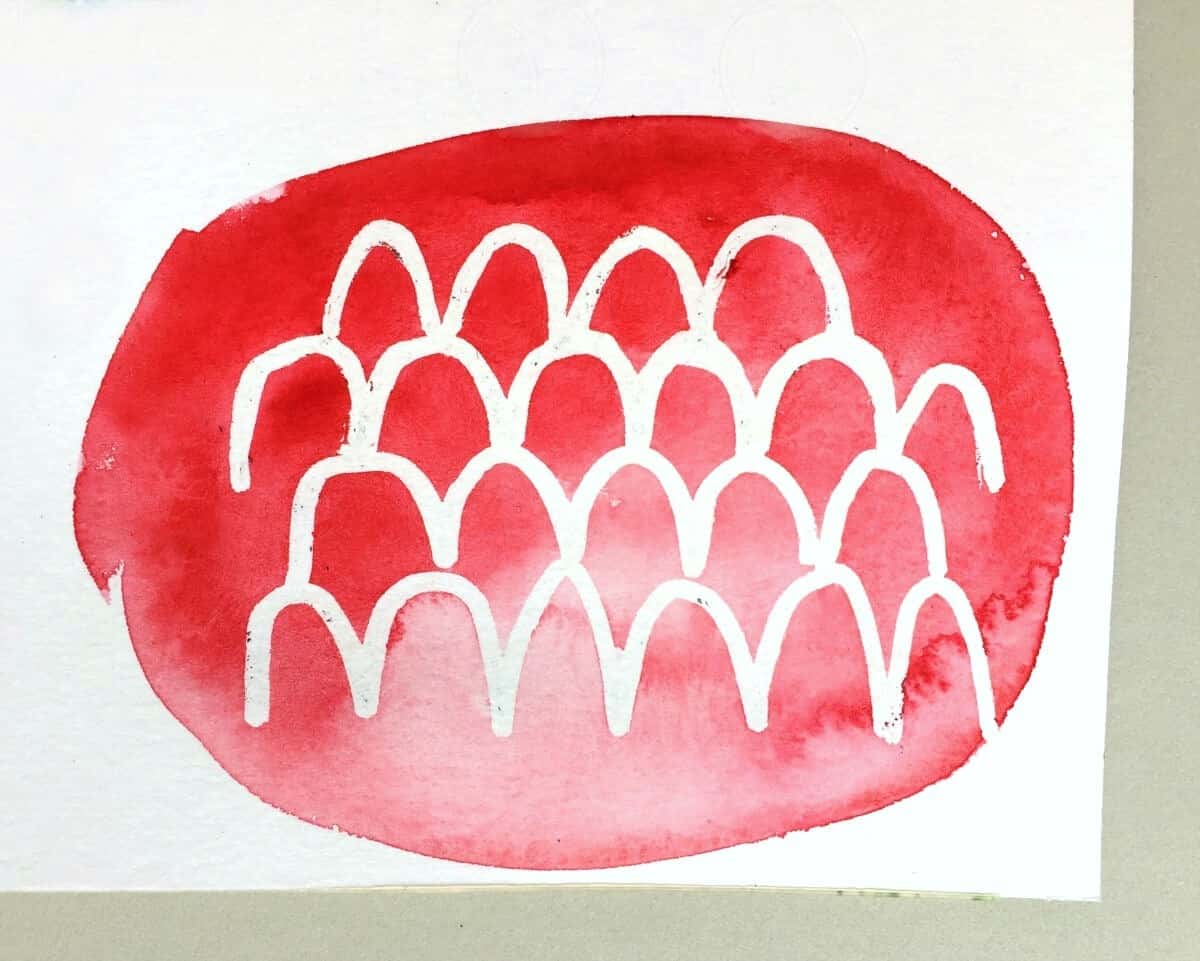
Frisket Resist Pen – This is so satisfying because of its precision. Draw where you want the paint to resist; let it dry. Paint over it; let it dry. Rub or peel the frisket away.
(Hint: don’t let the frisket sit on the paper for too long after the paint is dry, or it eventually sorts of sinks into the paper and is impossible to Rub away.)
This is a great technique to combine with some of the other watercolor techniques below.
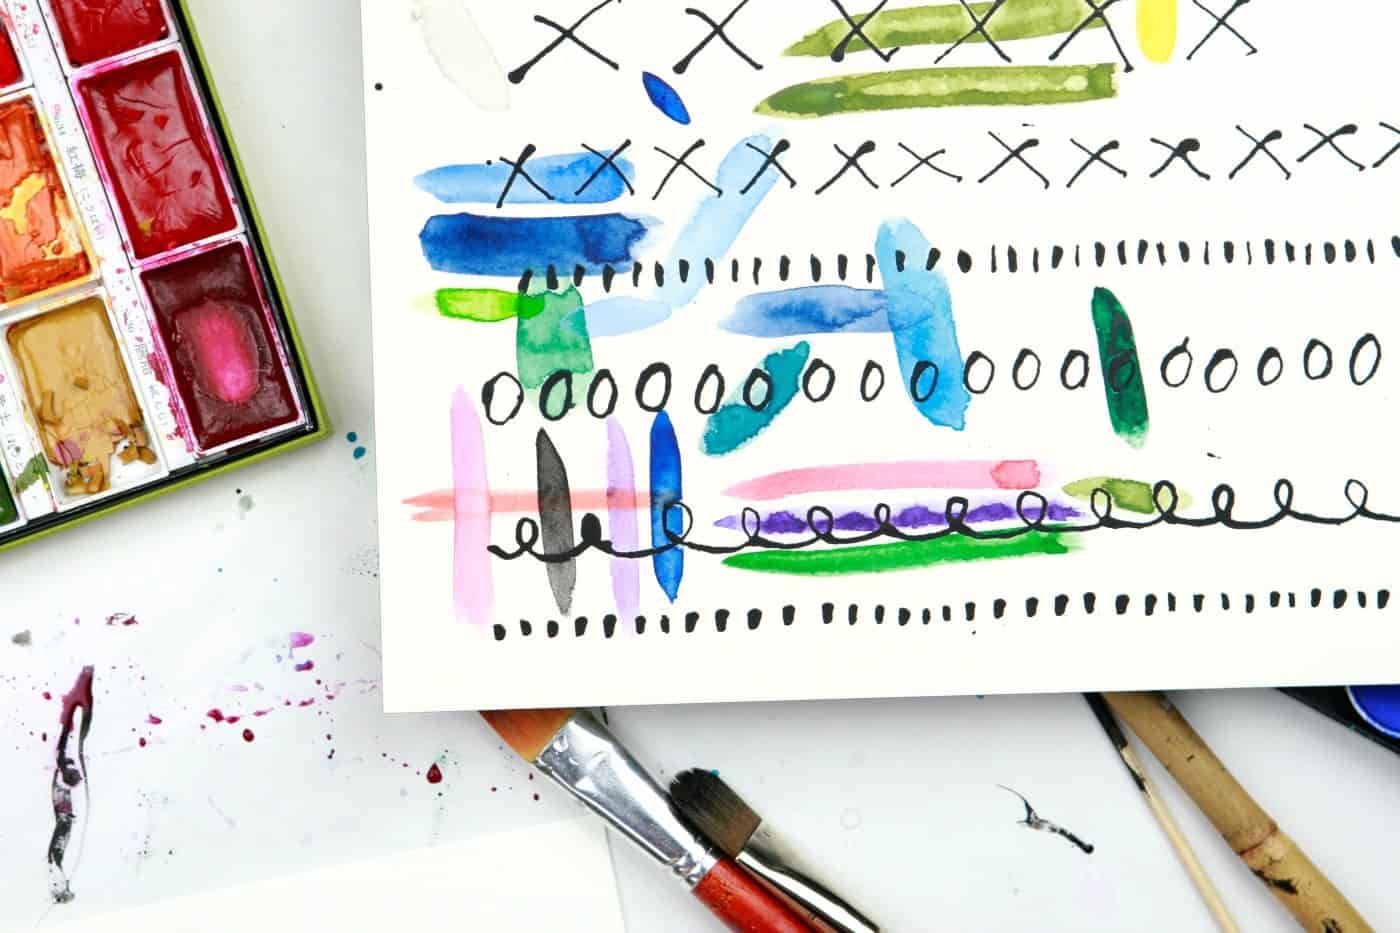
Tape Resist – One of my favorite techniques to use with any paint. Lay down areas of painters tape, paint over them, then remove the tape when the paint is almost dry. (Sometimes if you leave the tape on too long it rips up some of the paper.)
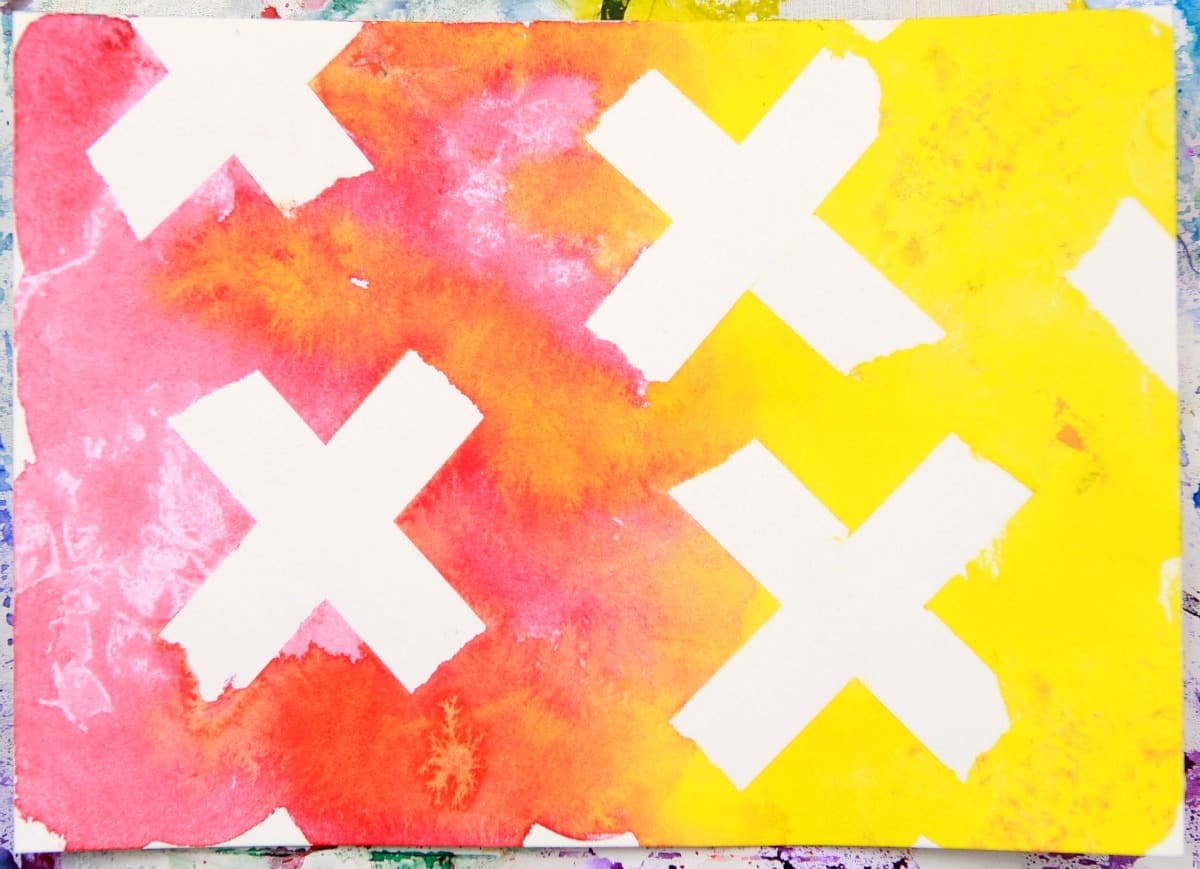
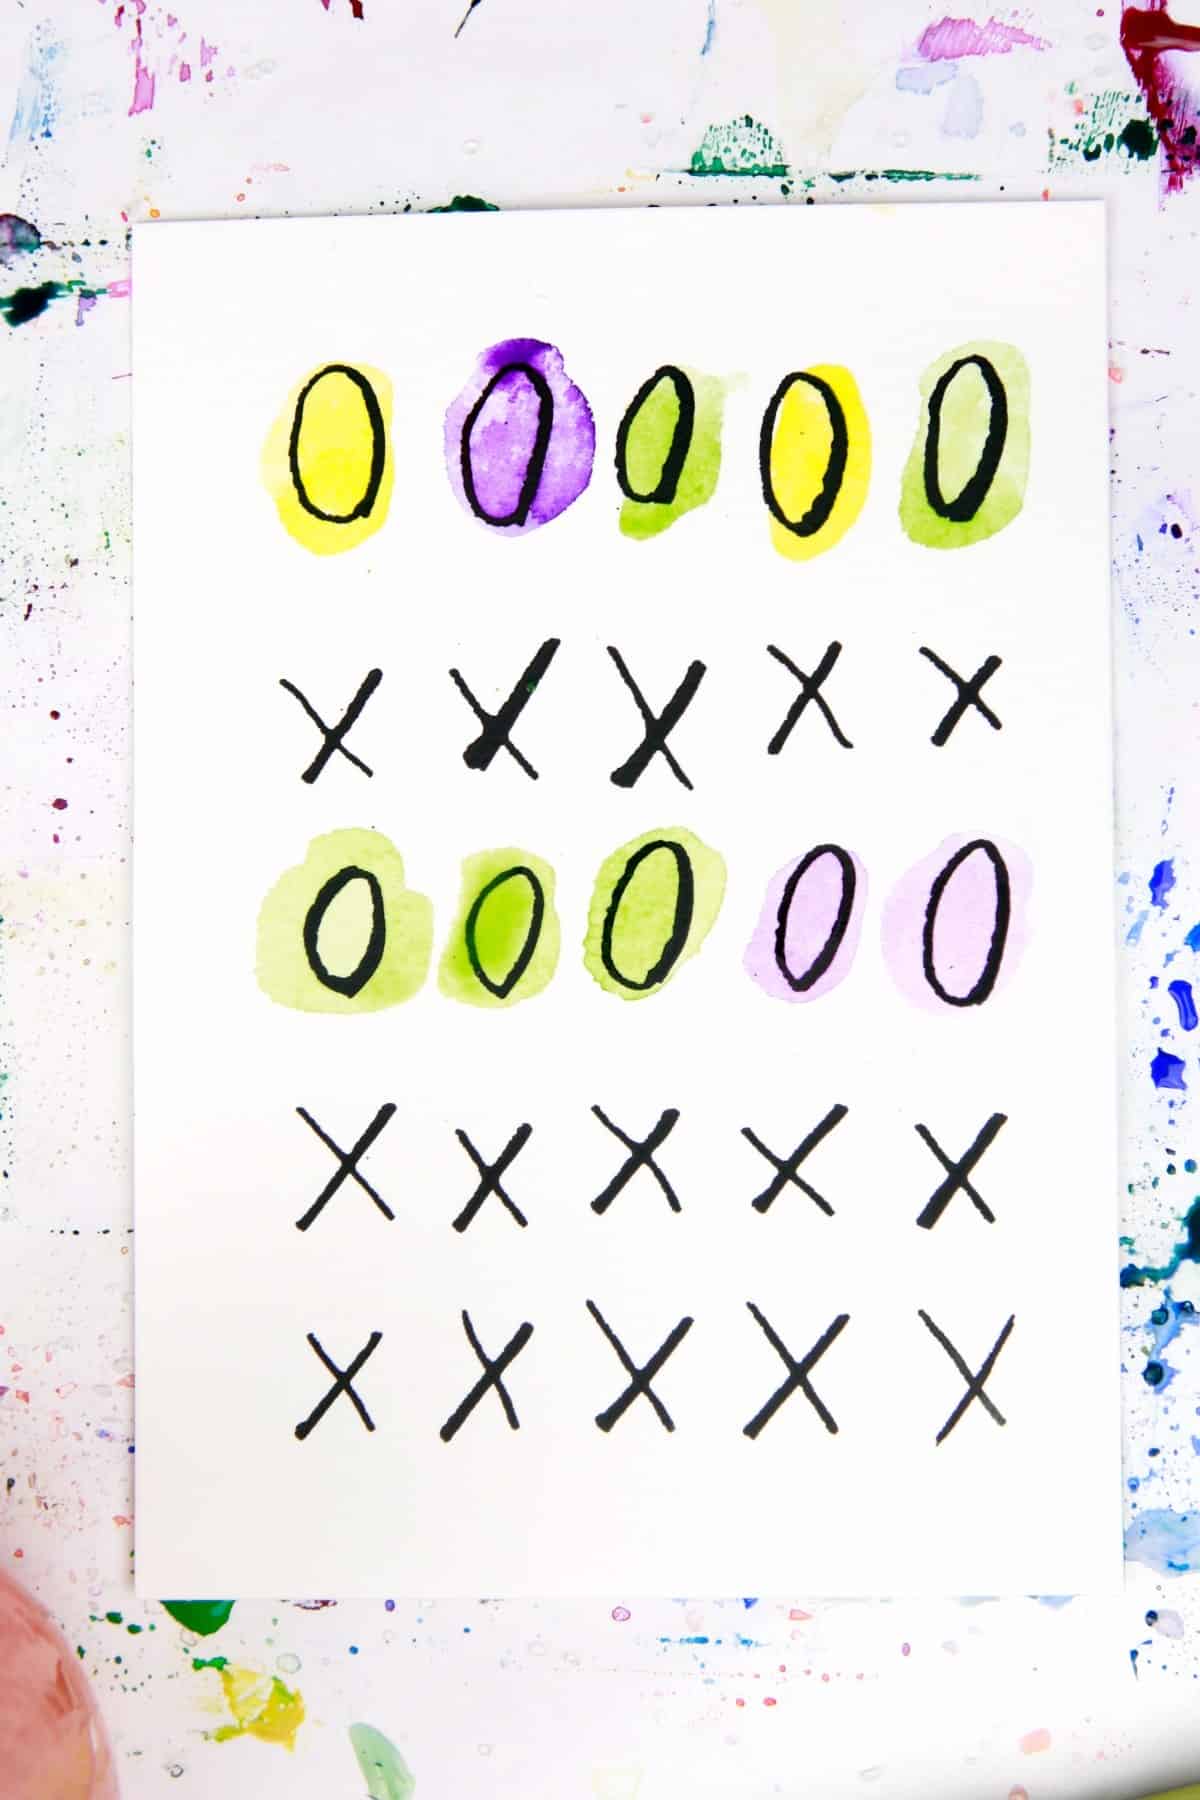
Washi tape x’s with lots of very wet watercolor over and then slightly blotted with paper towel.
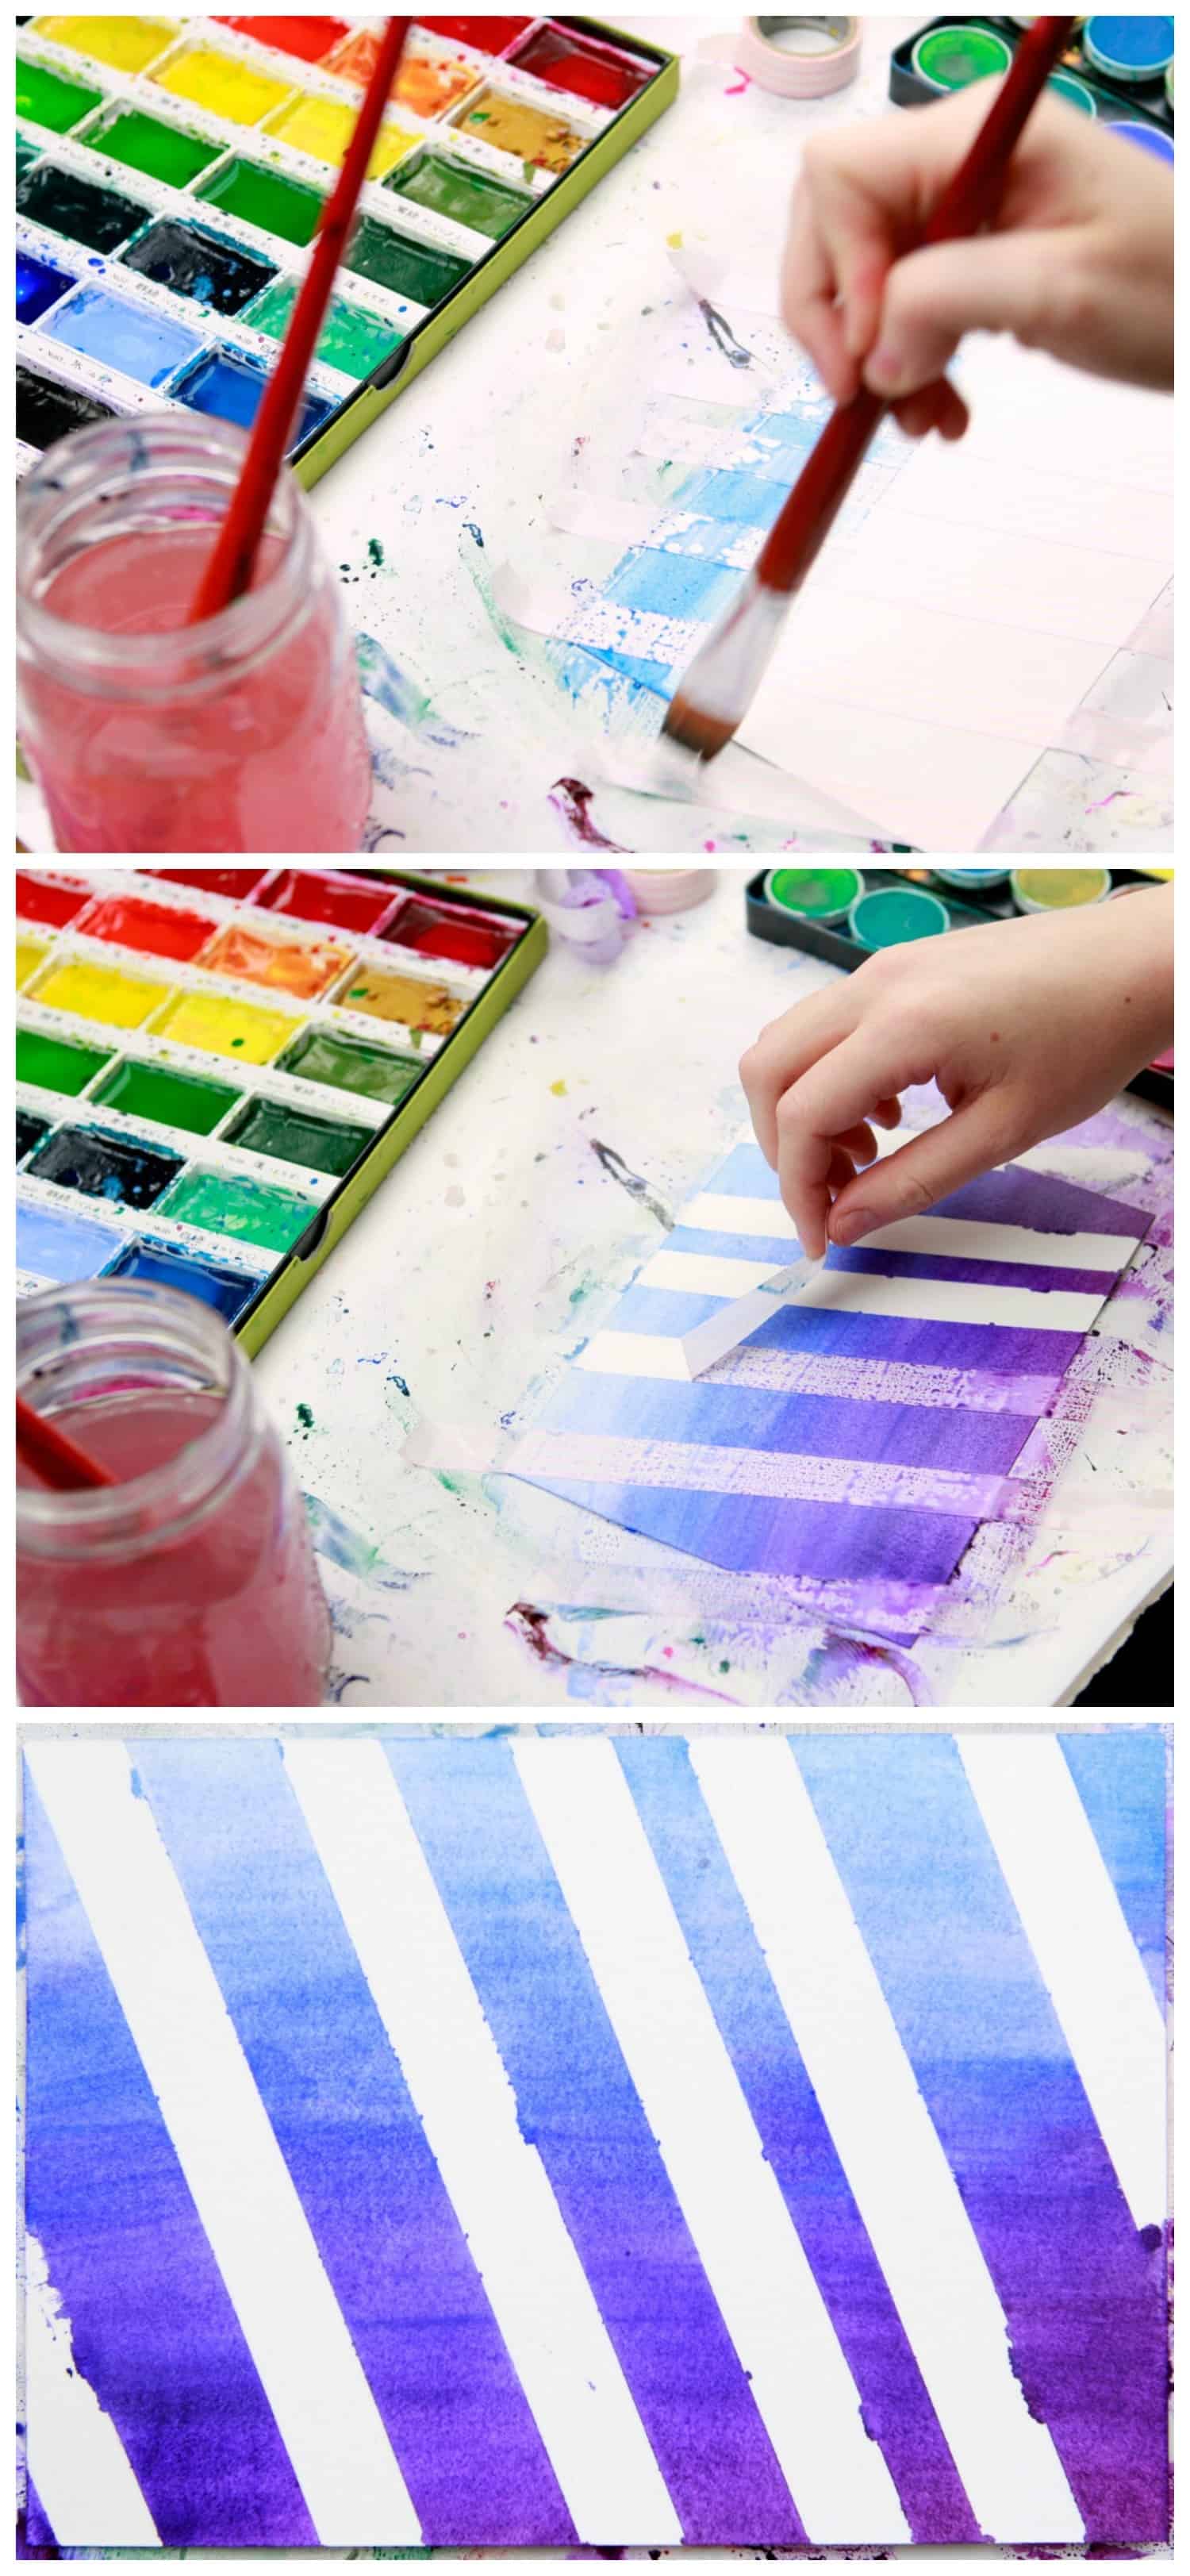
More washi tape with a lovely graduated background.
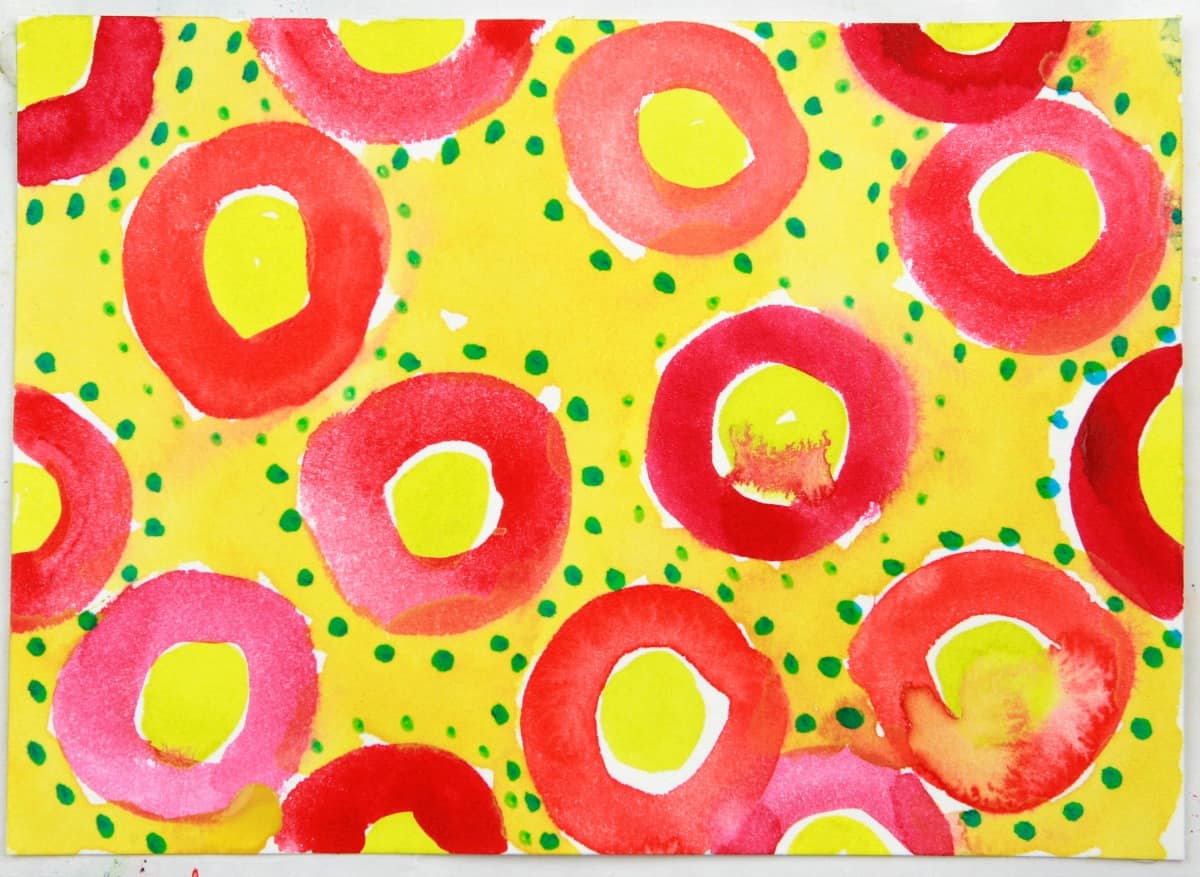
The frame around these dots was made using rubber cement. I brushed it on thickly, let it dry, watercolored, then rubbed off the rubber cement.

Wax Resist – Good old fashioned crayon resist. Draw with your white crayon, paint over it. So wonderful.
Watercolor and Ink
I adore drawing with ink and bamboo, so I used a bamboo skewer and a bamboo reed pen to draw in ink for a little mixed media action with the watercolor.
I’ve found that some links that say they are waterproof will actually still smear when you watercolor over them. Blick Black Cat ink is my current favorite and no smears.
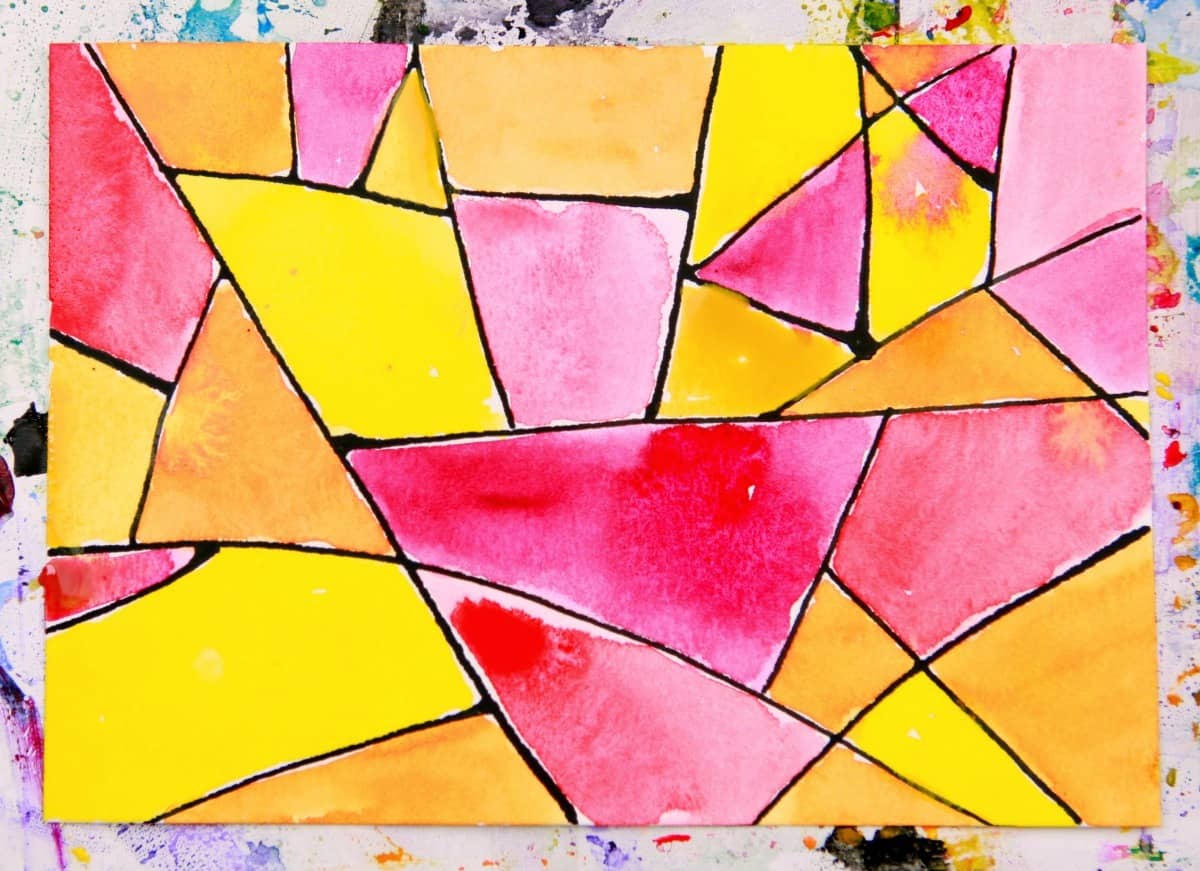
This stained glass-looking piece was made by drawing ink lines, letting them dry, then coloring in the spaces with watercolor. I like the little spots where the colors are visiting each other.
You can use little accents of watercolor here and there to great effect if you just want to highlight small areas of your drawing with color. XO, baby.
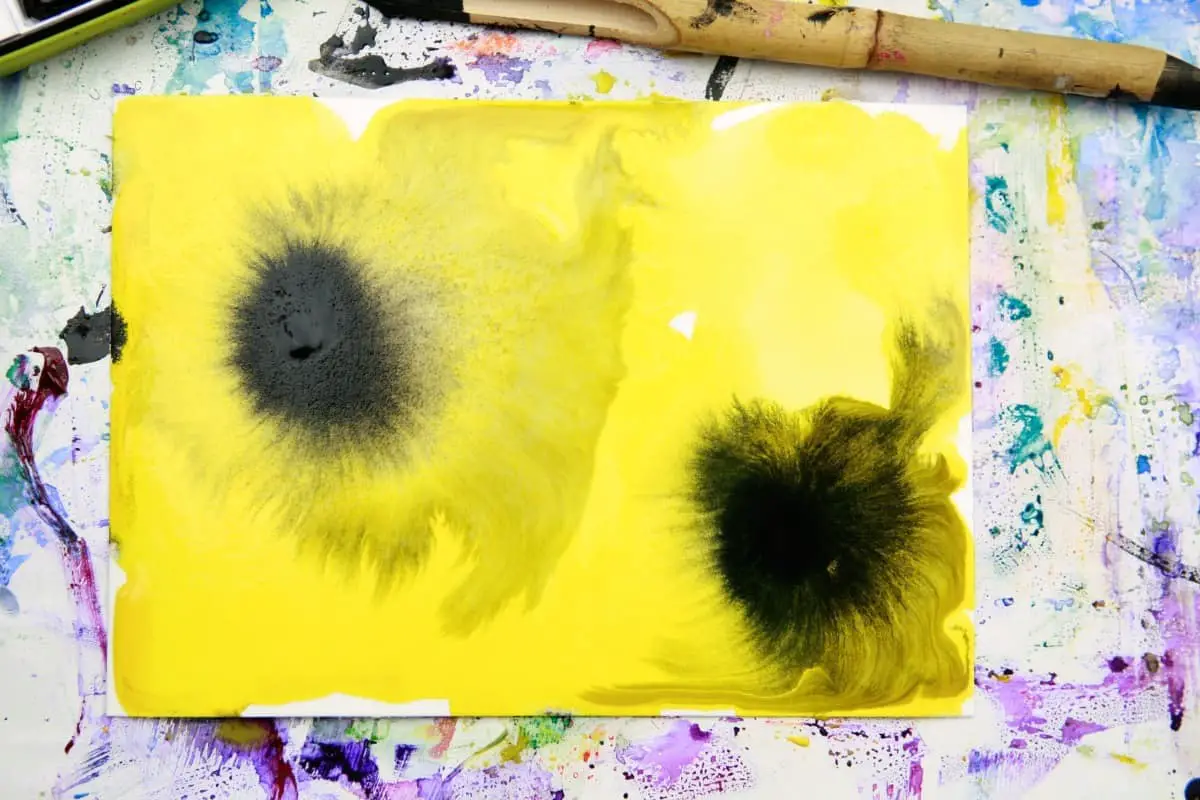
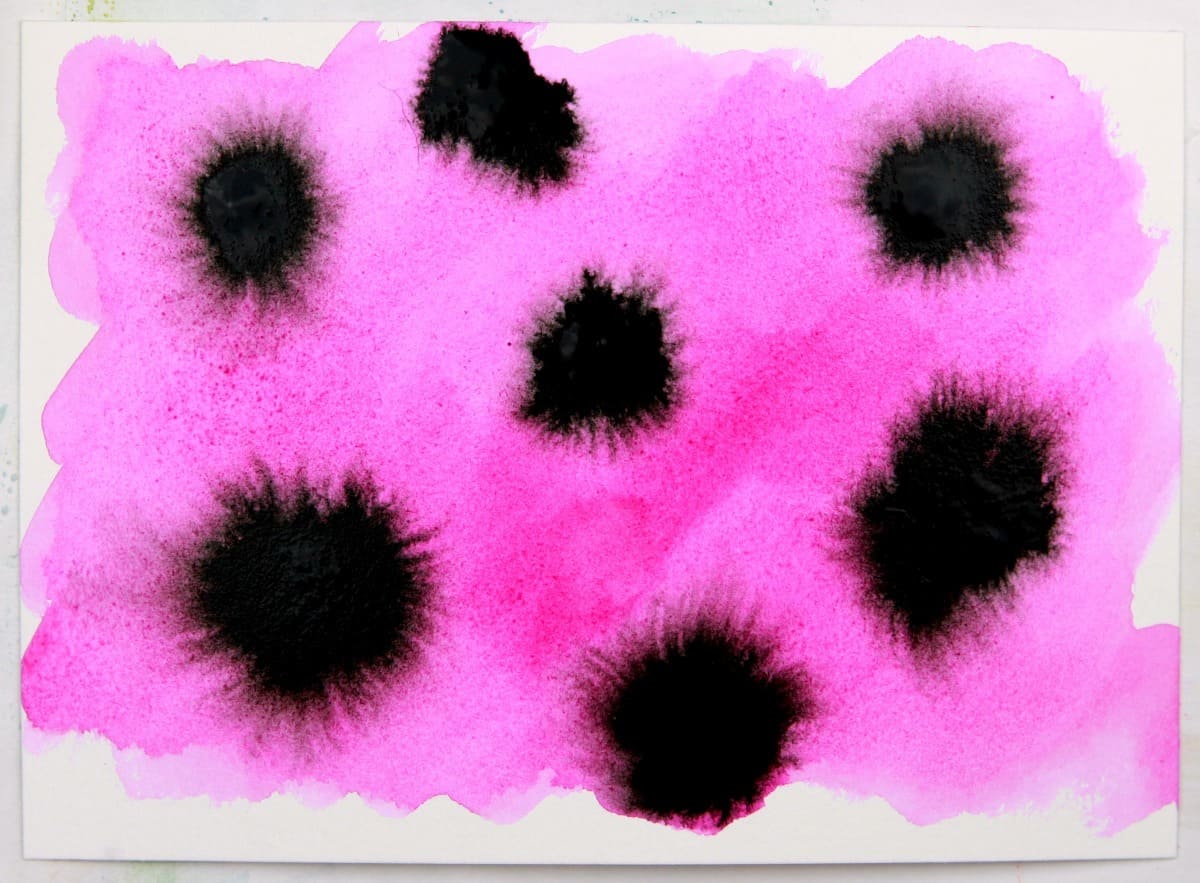
This is way fun to do. Glop on a lot of wet watercolors and then use an eyedropper to drip in a spot or 2 of India ink. I feel like somehow the yellow one should be turned into sunflowers.
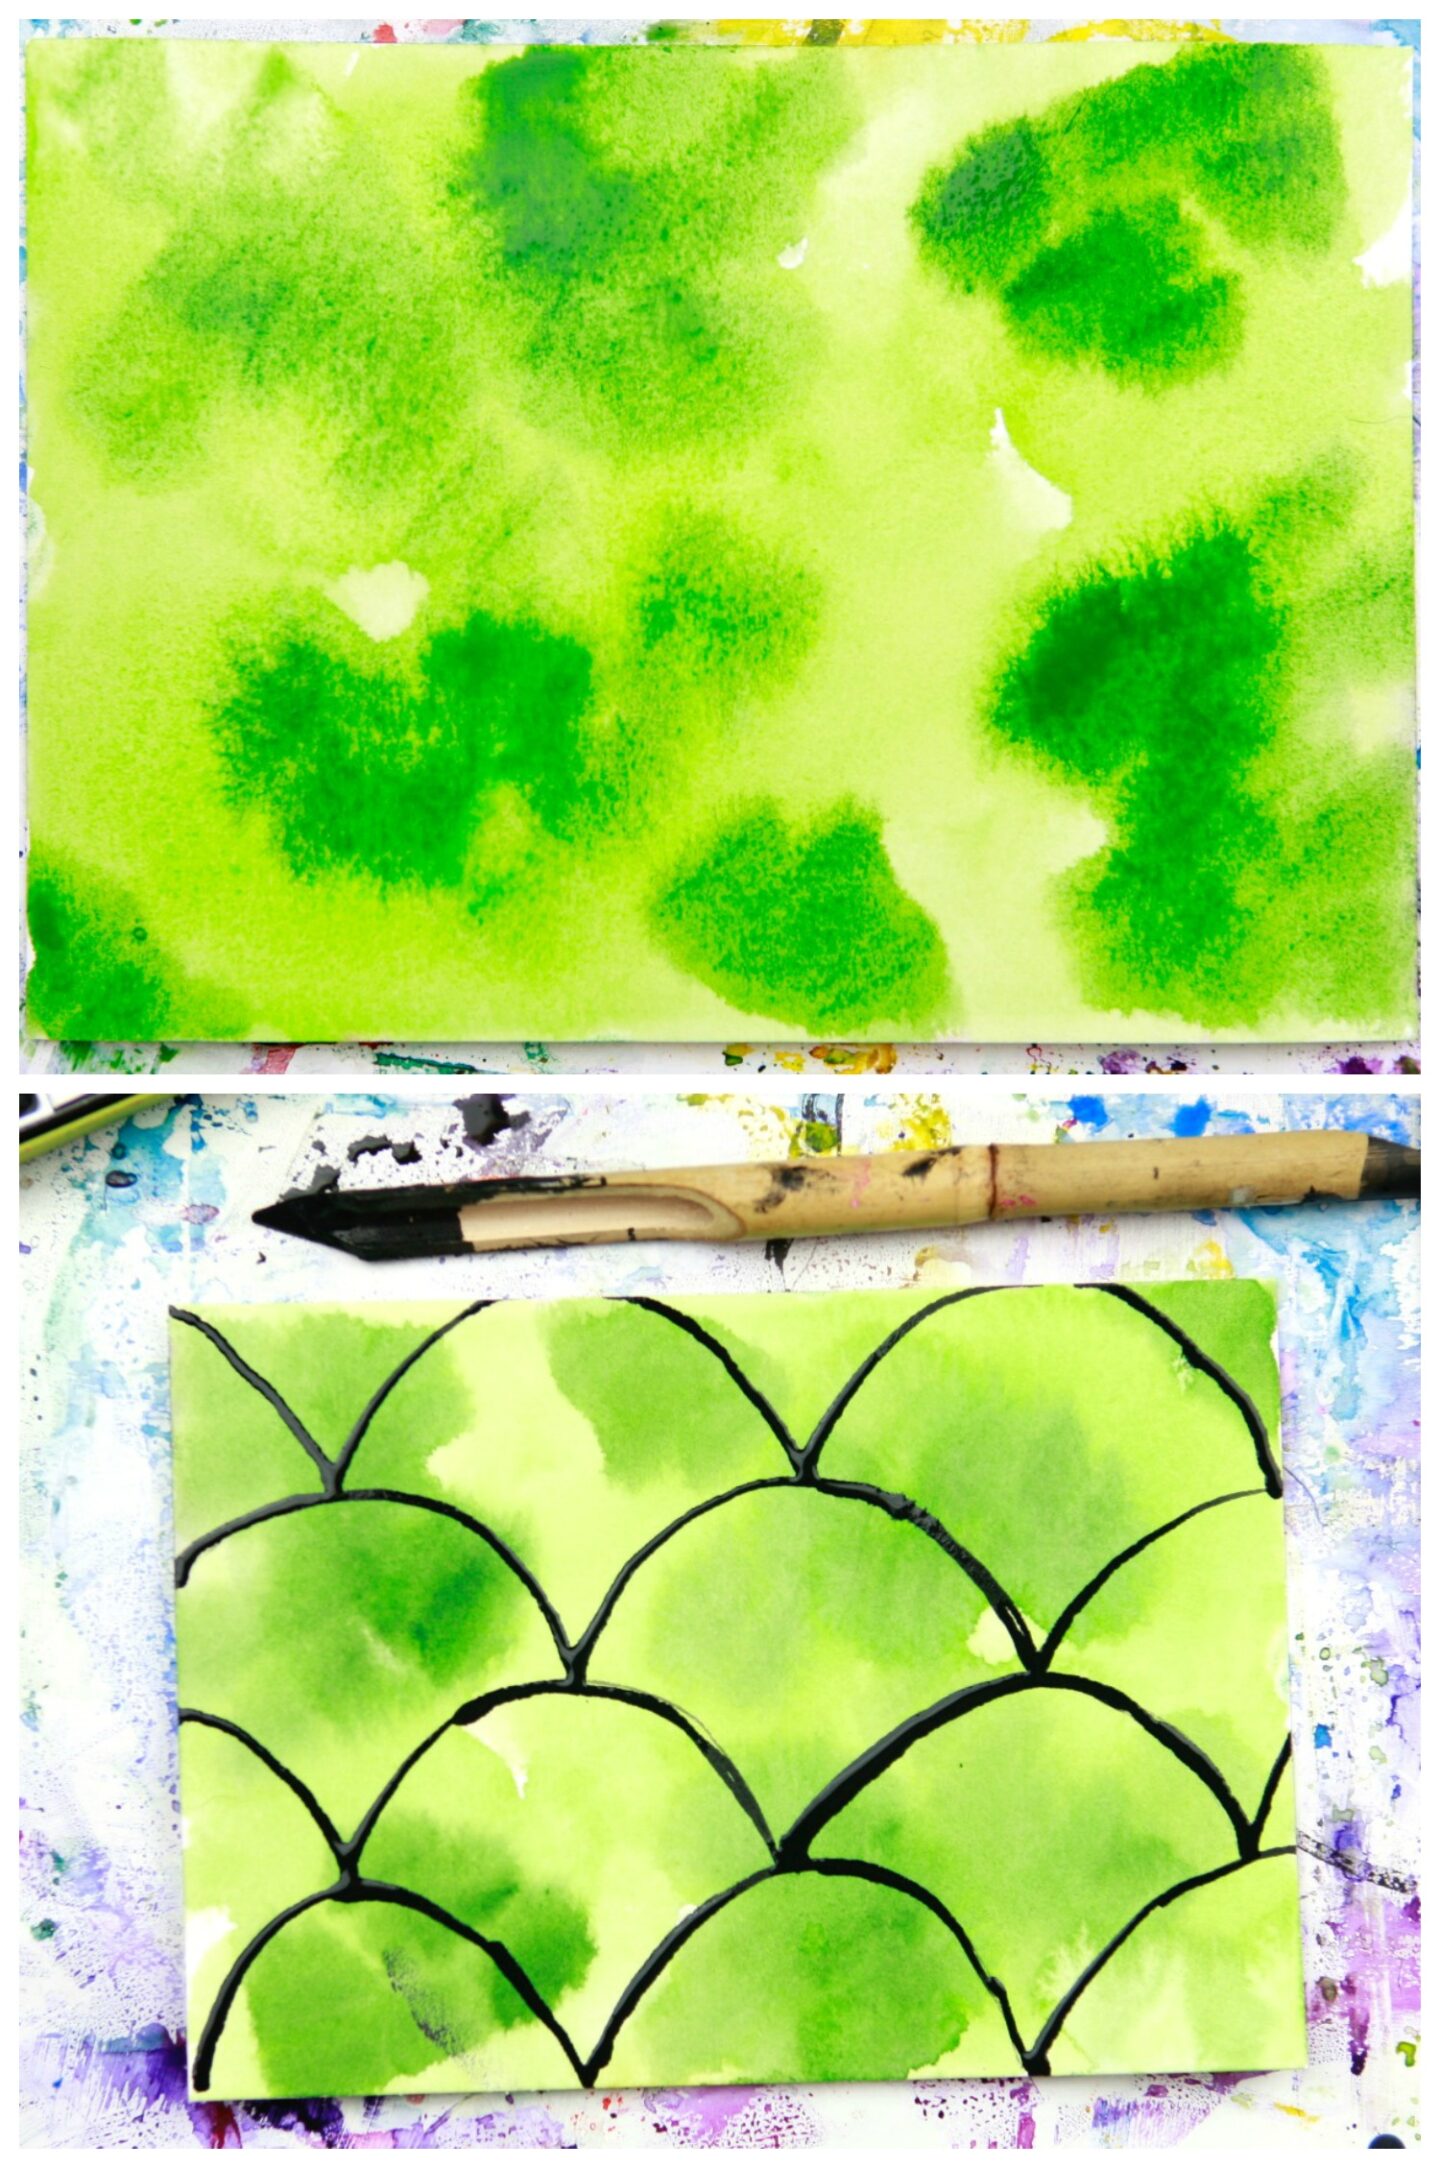
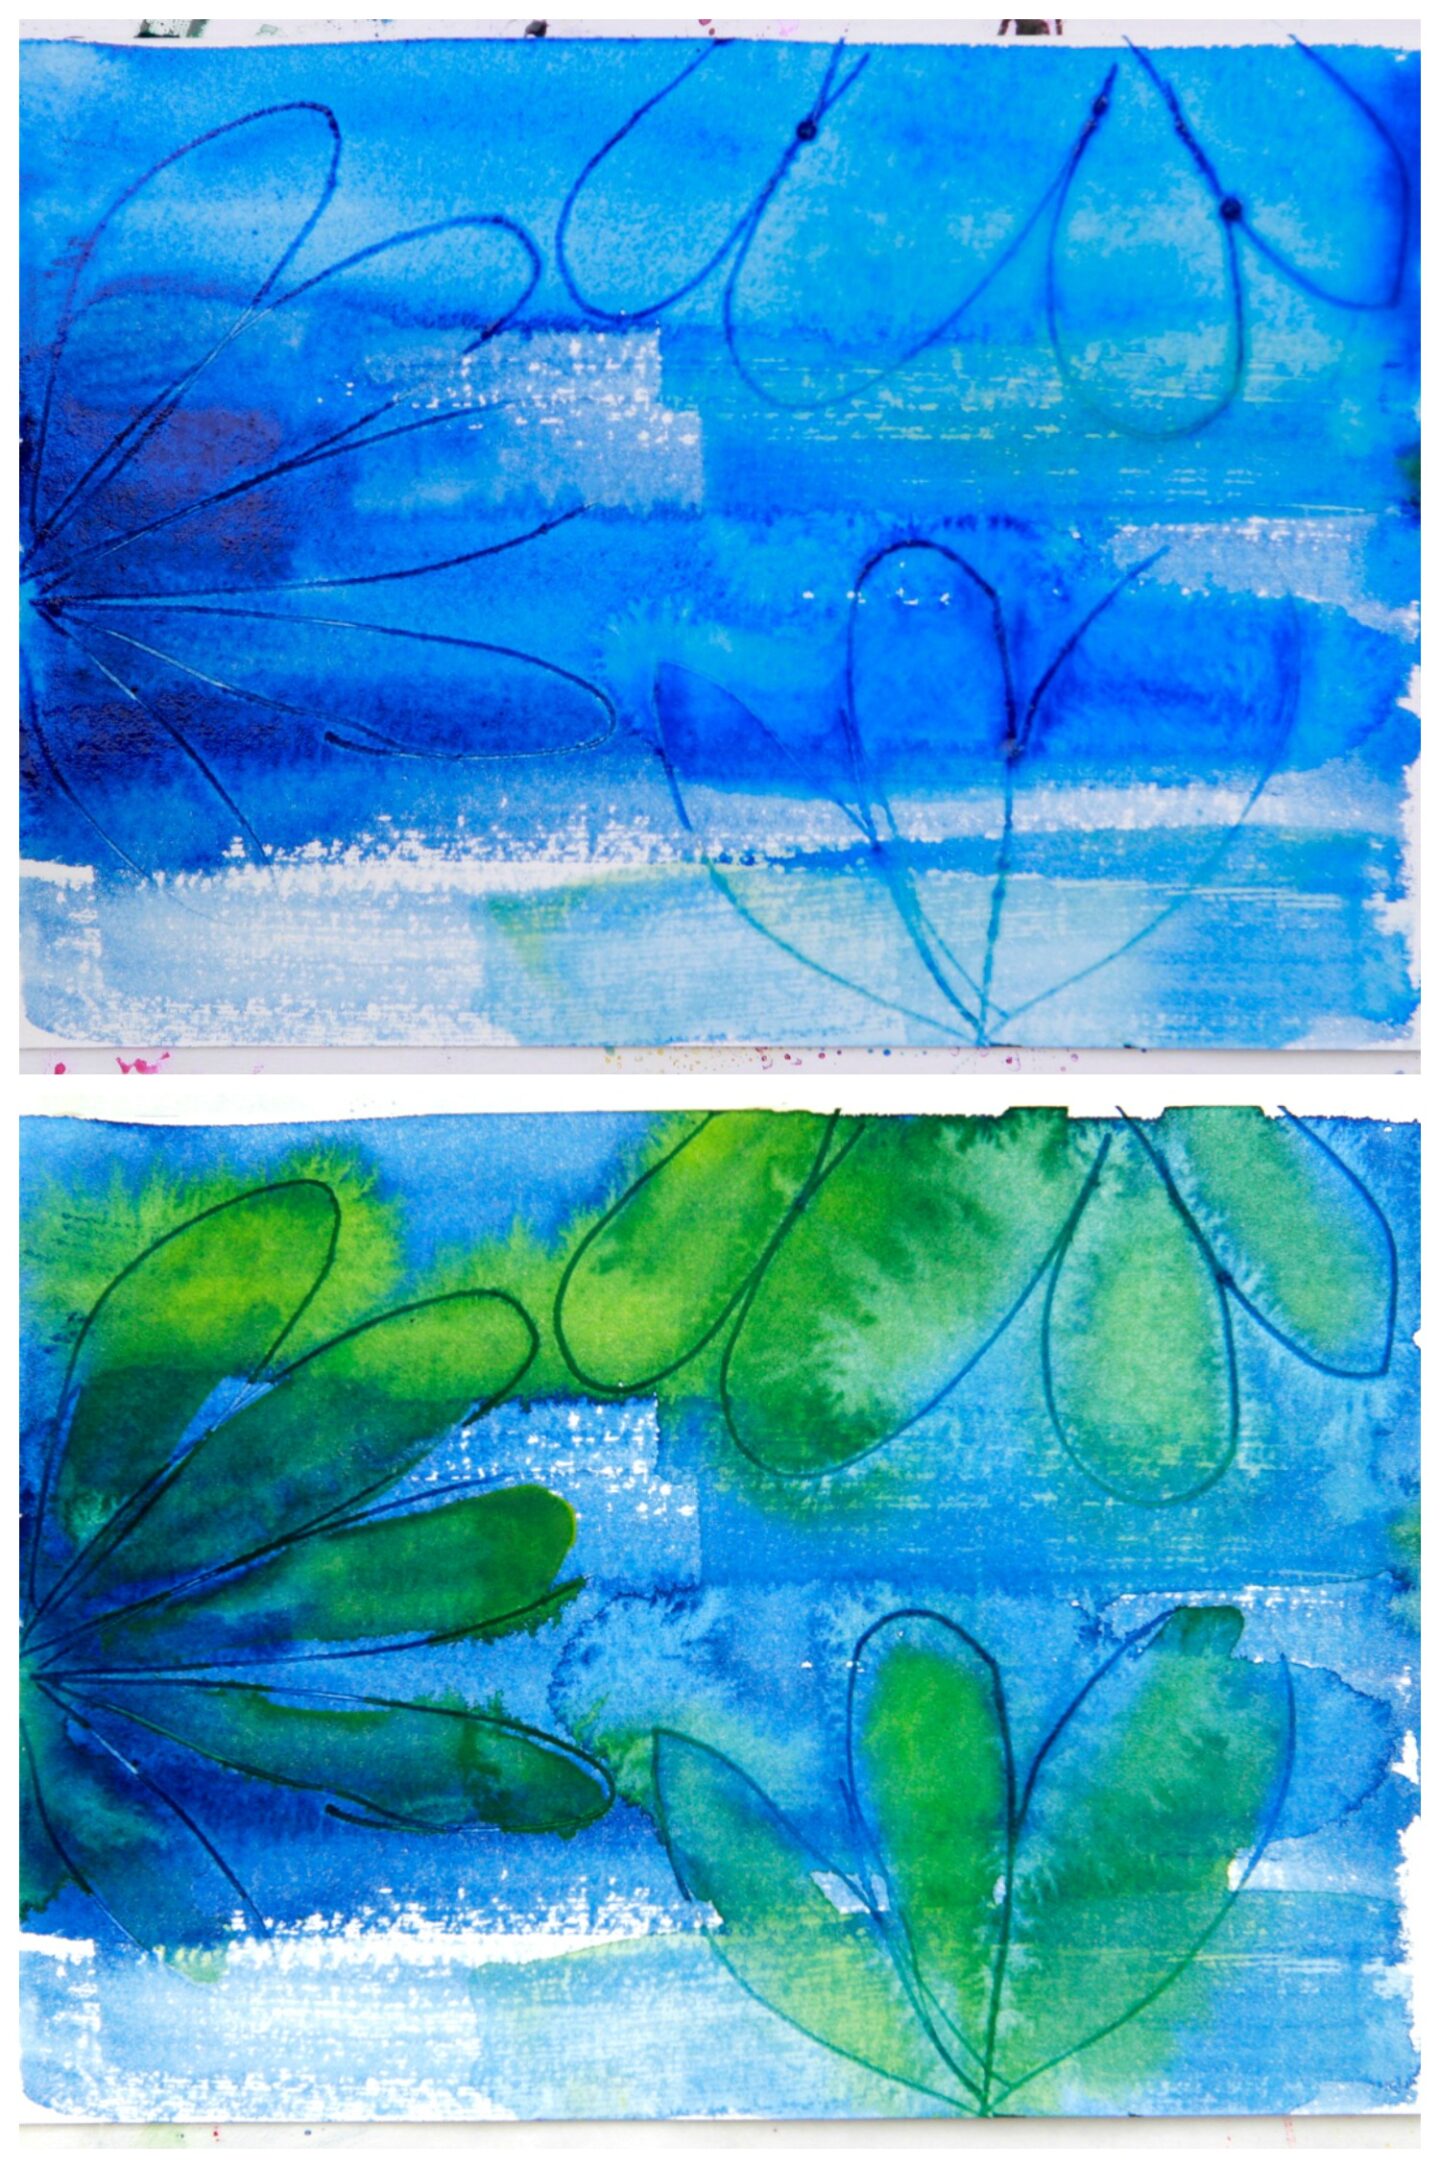
Wet on wet greens, let them dry, then draw over the background. Such a simple watercolor technique, but so fun.
Lifting and Texturing
You can achieve some good texture in watercolor by ‘lifting’ areas of paint away right after you lay them down.
I love wadded up paper towels for this, but you can also use tissue paper, sponges, really anything absorbent.
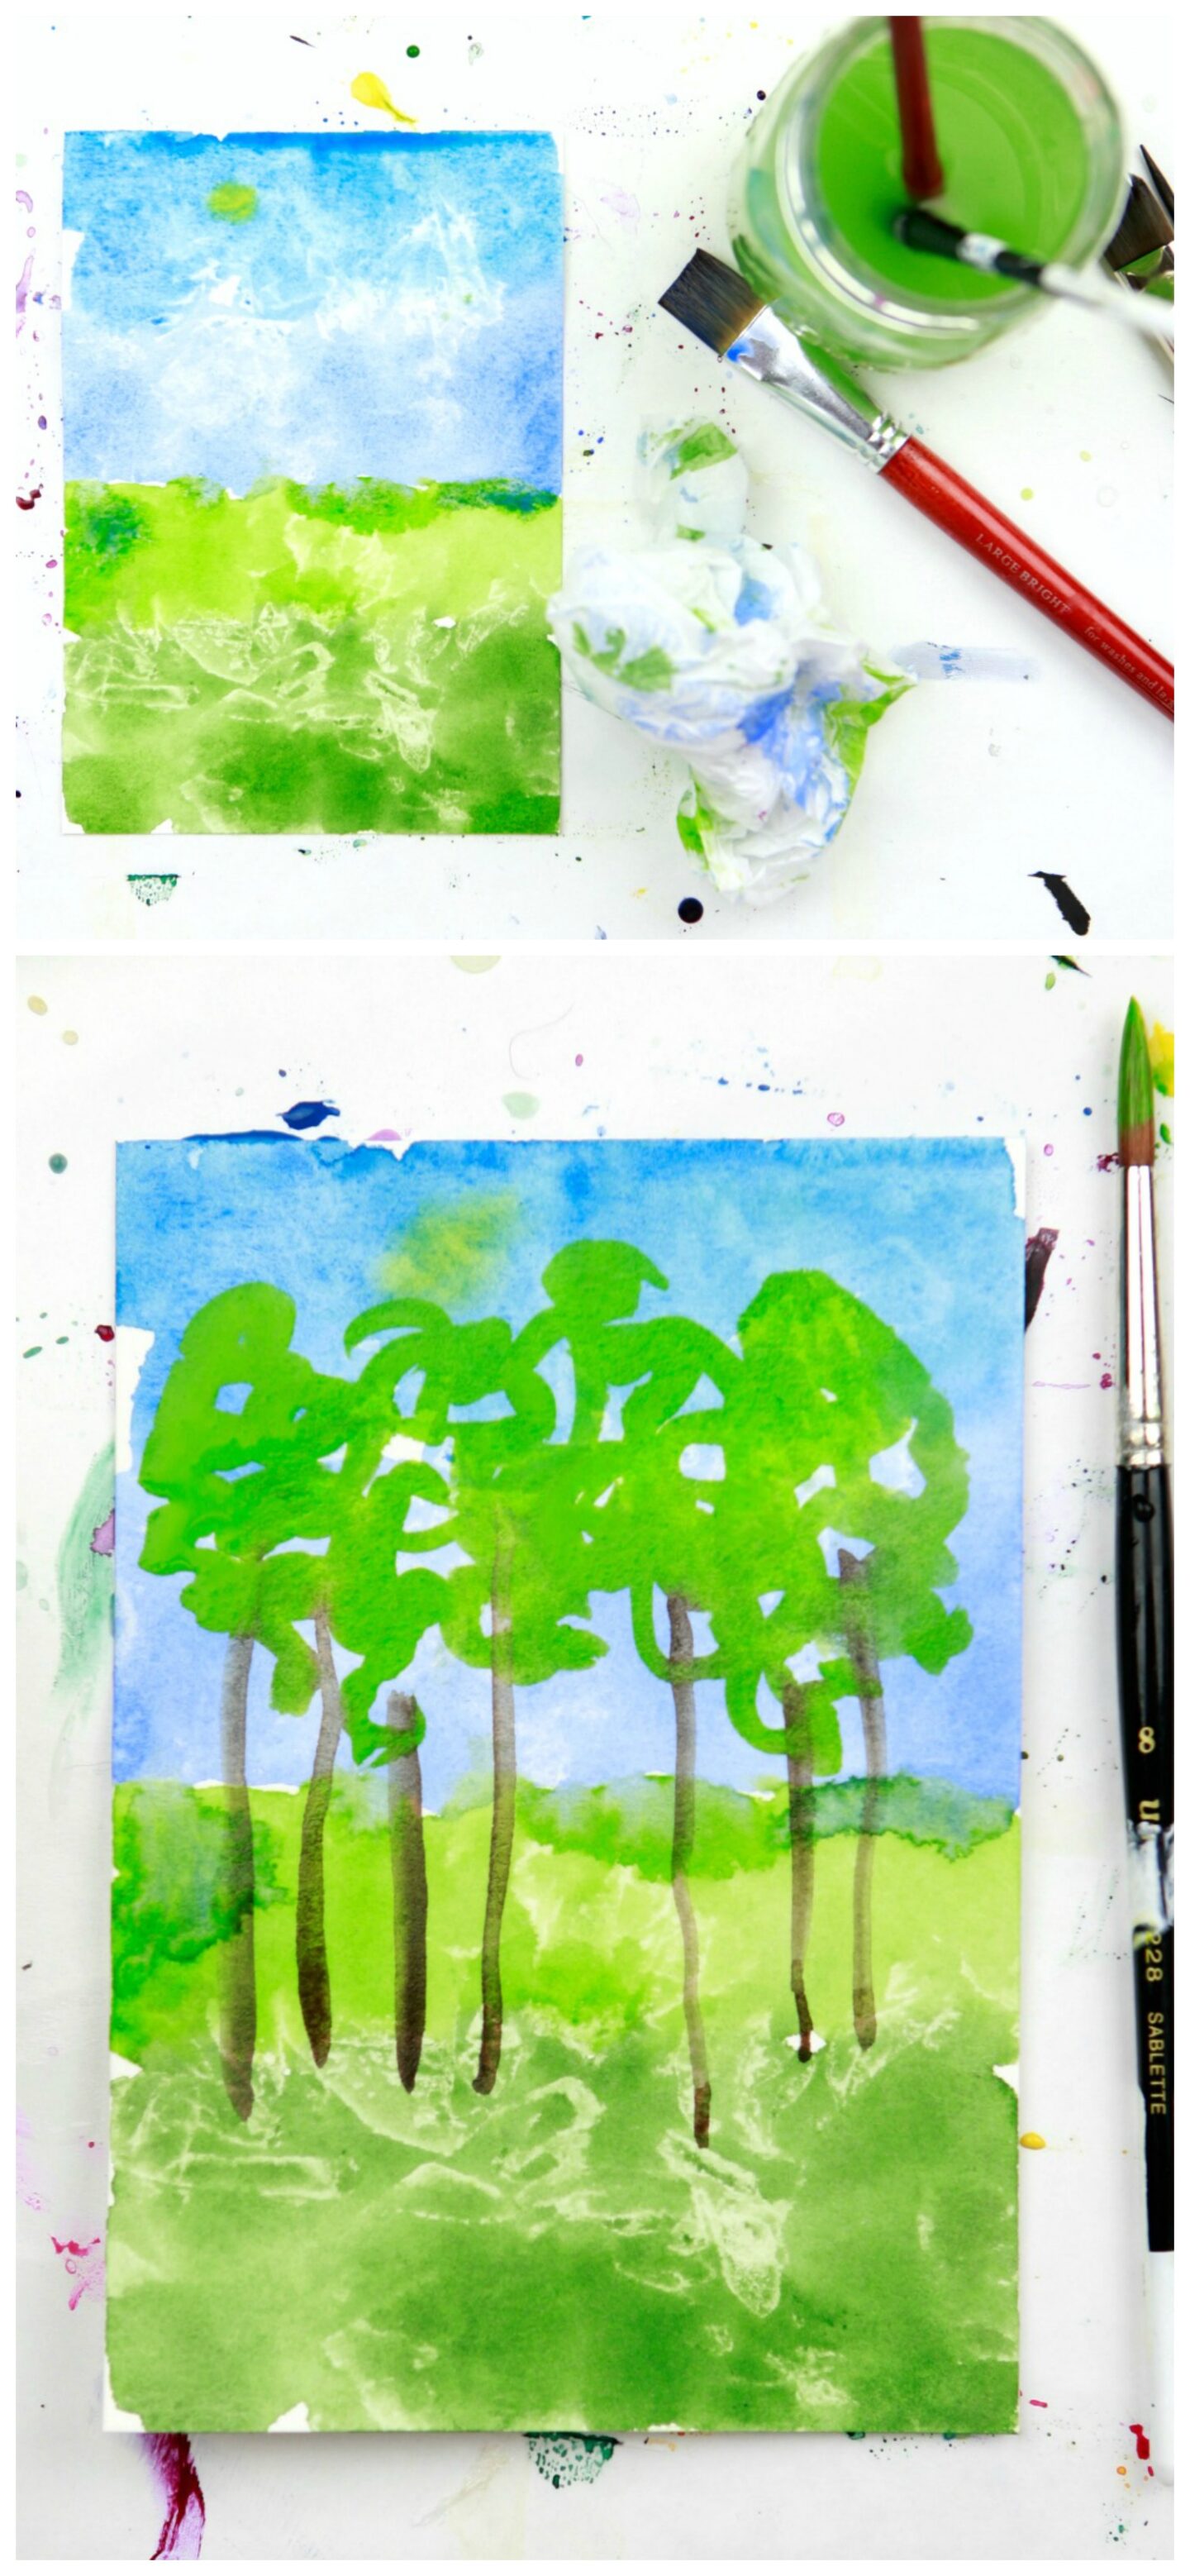
This one was made with blue and green paint and tissue paper. After it dried I painted these super-rad trees.
Wow, am I loving the way dripped alcohol looks on watercolor. I quickly layered on a couple of greens and dripped rubbing alcohol on with a squeeze dropper bottle.

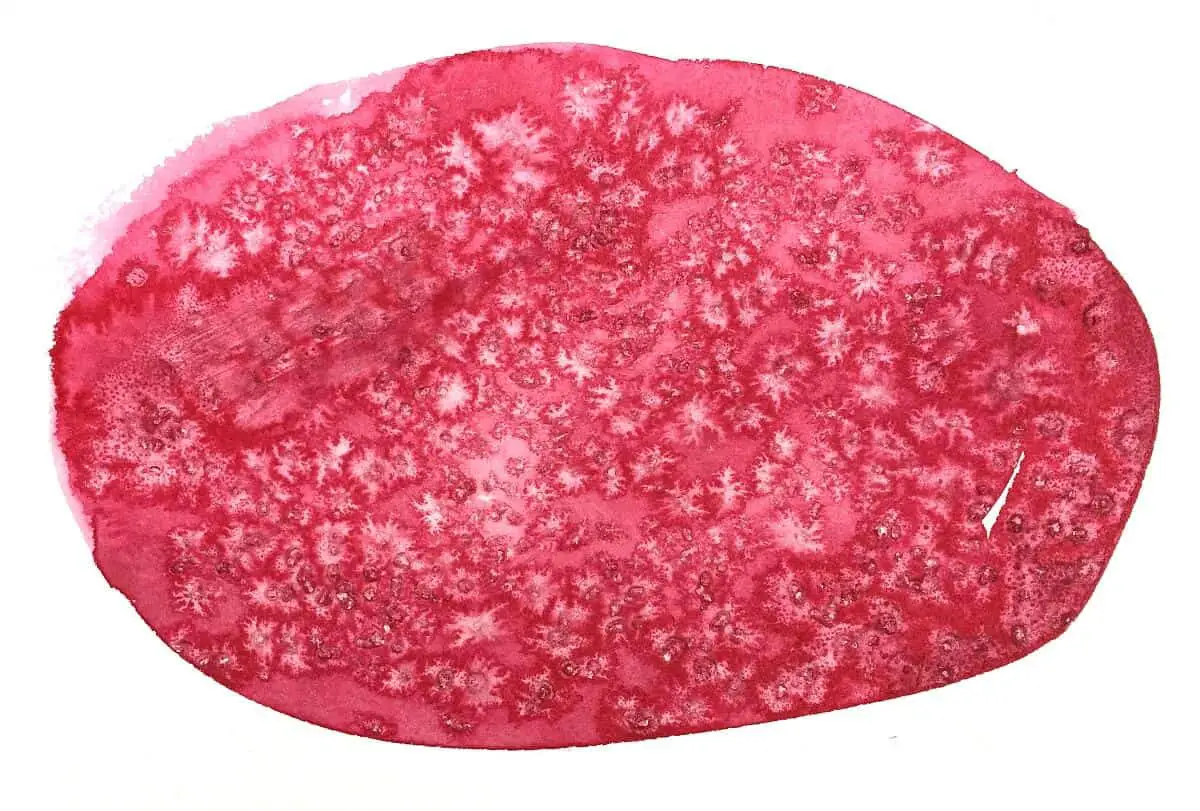
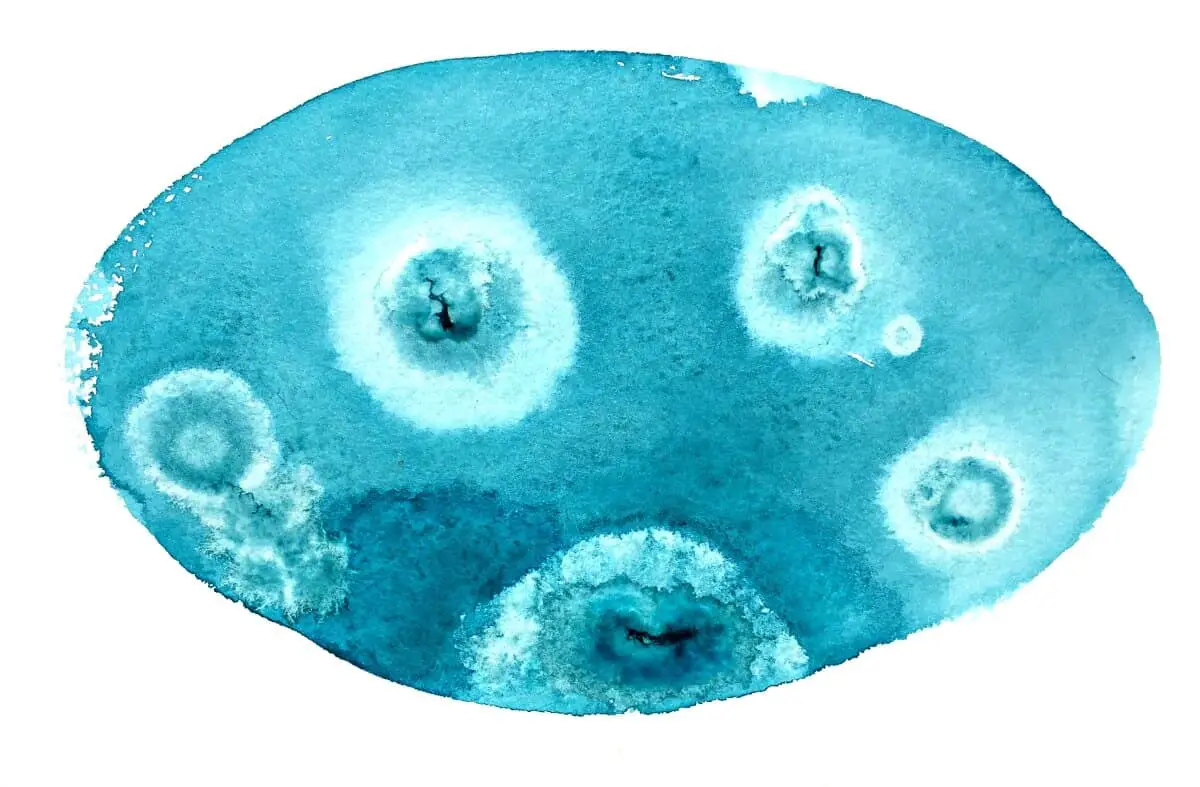
Plastic Wrap On Wet Paint – Lay plastic wrap down over an area of wet watercolor and reposition some areas with your fingers, adding in some pleats.
Let the paint dry before you remove the plastic wrap. Doesn’t this look like a microscope sample?!?
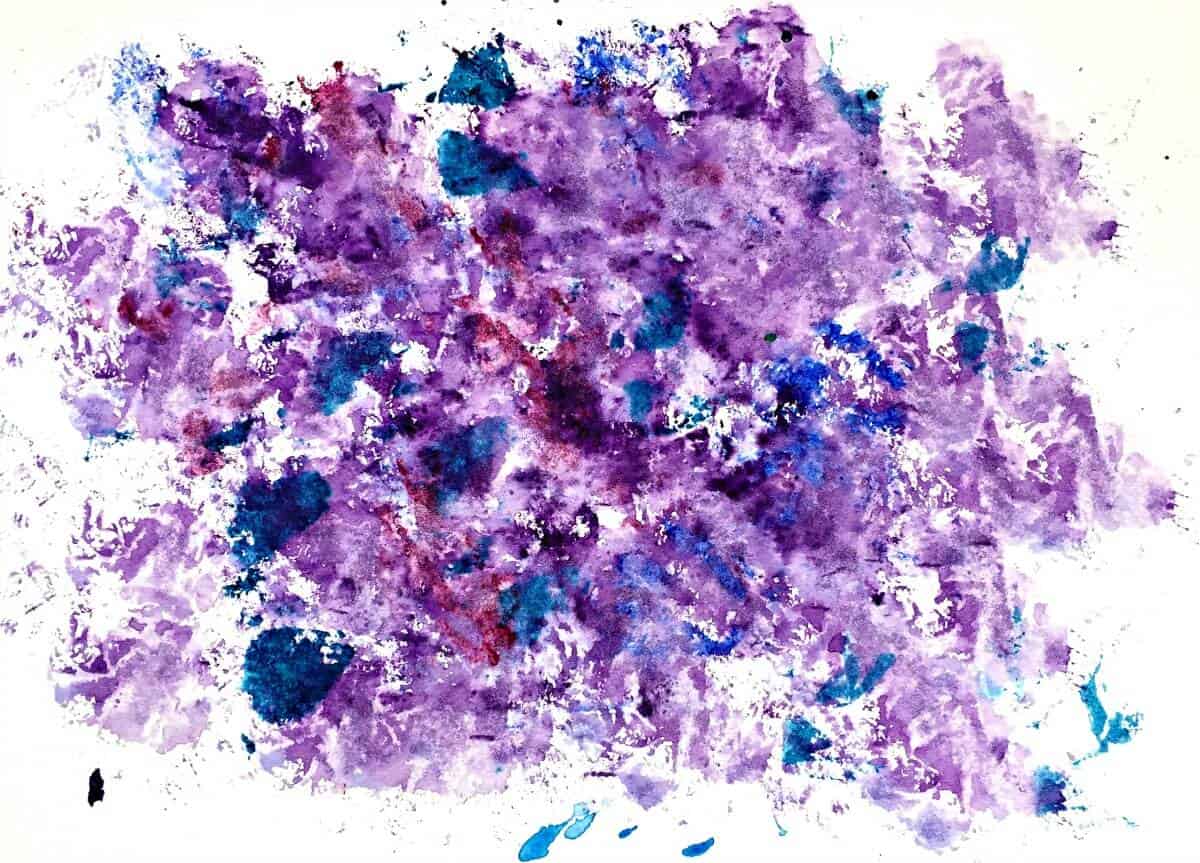
Salt on Watercolor – Paint the watercolor in a thick, wet area and sprinkle coarse salt on it immediately.
I used sea salt. Let the salt dry, and then brush it off. It can be annoyingly stubborn to wipe off, so I recommend using a paper towel to wipe it off instead of your poor little fingers.
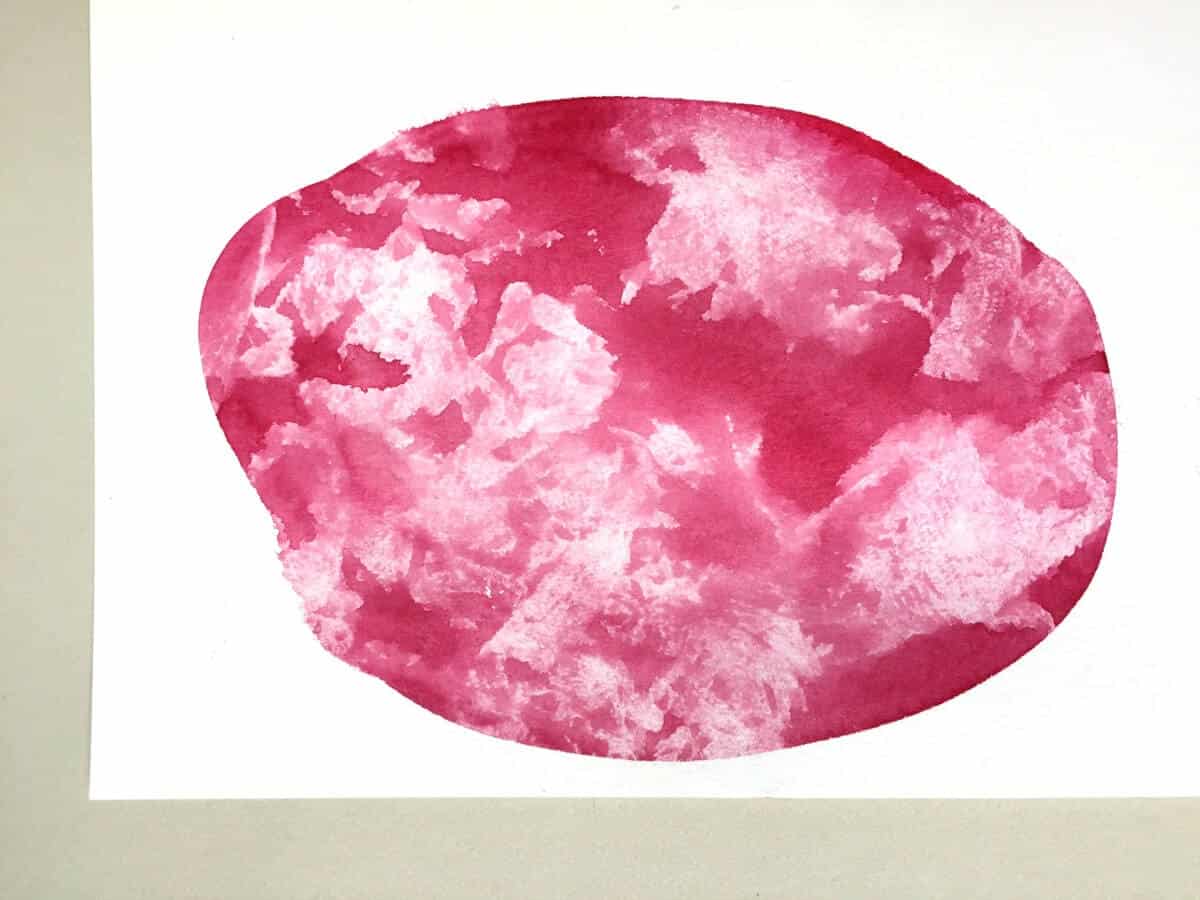
Paper Texture – Paint your watercolor, then while it is still wet, use a wadded up paper towel to gently blot some areas away to create texture. This is one of my favorite watercolor techniques.
The Dab – Moisten your paper towel, bunch it up and dab it into some wet watercolor, then dab it onto your paper.
Layering Watercolor
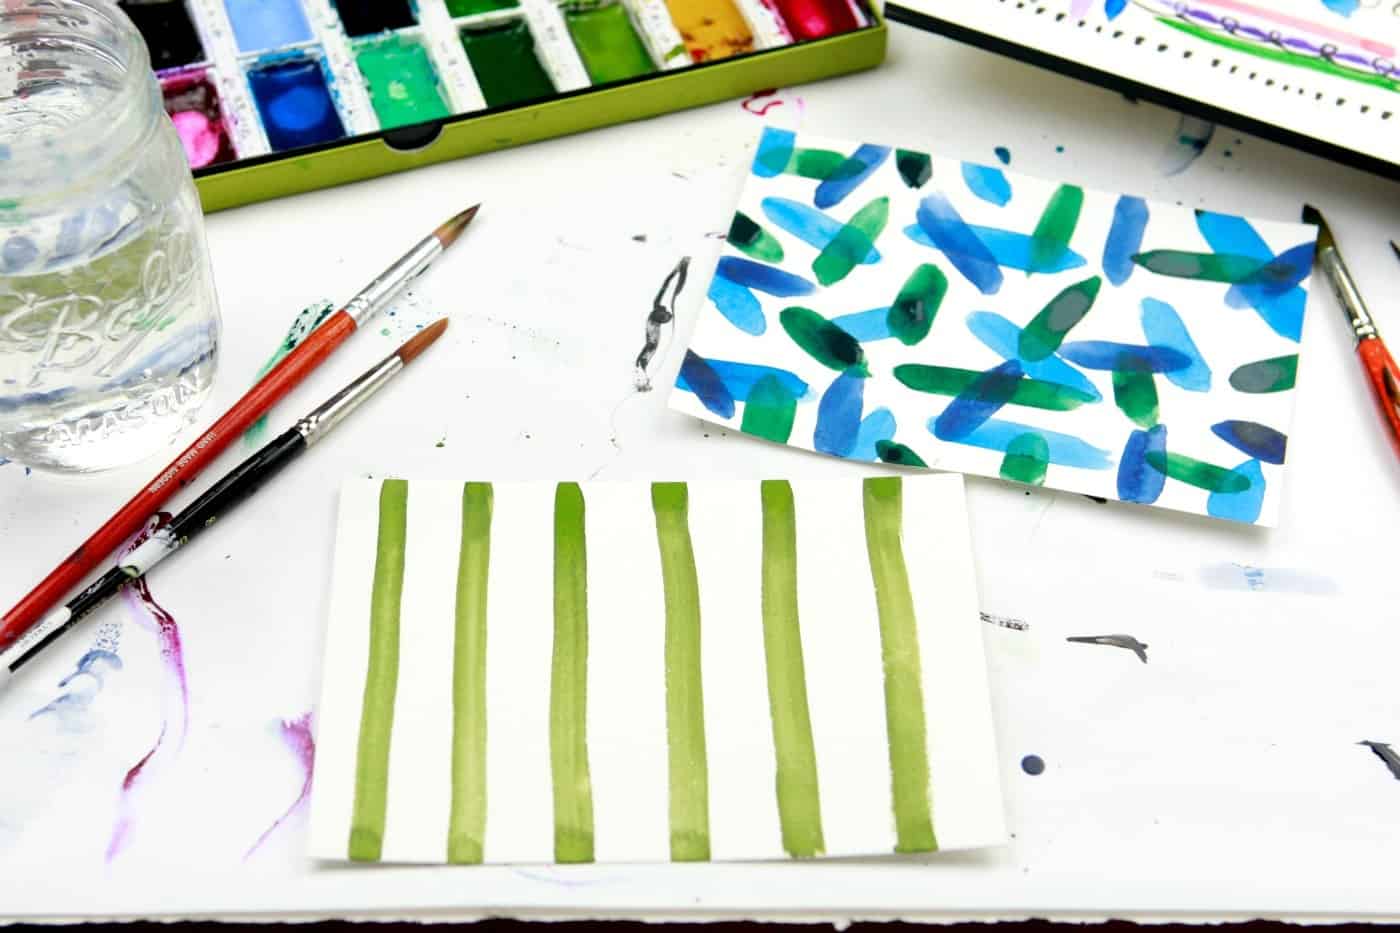
Layering watercolor shows off its inherent transparency, and you can get some Gorgeobeautiful results. Just remember to have the patience to let the layers dry in between painting.
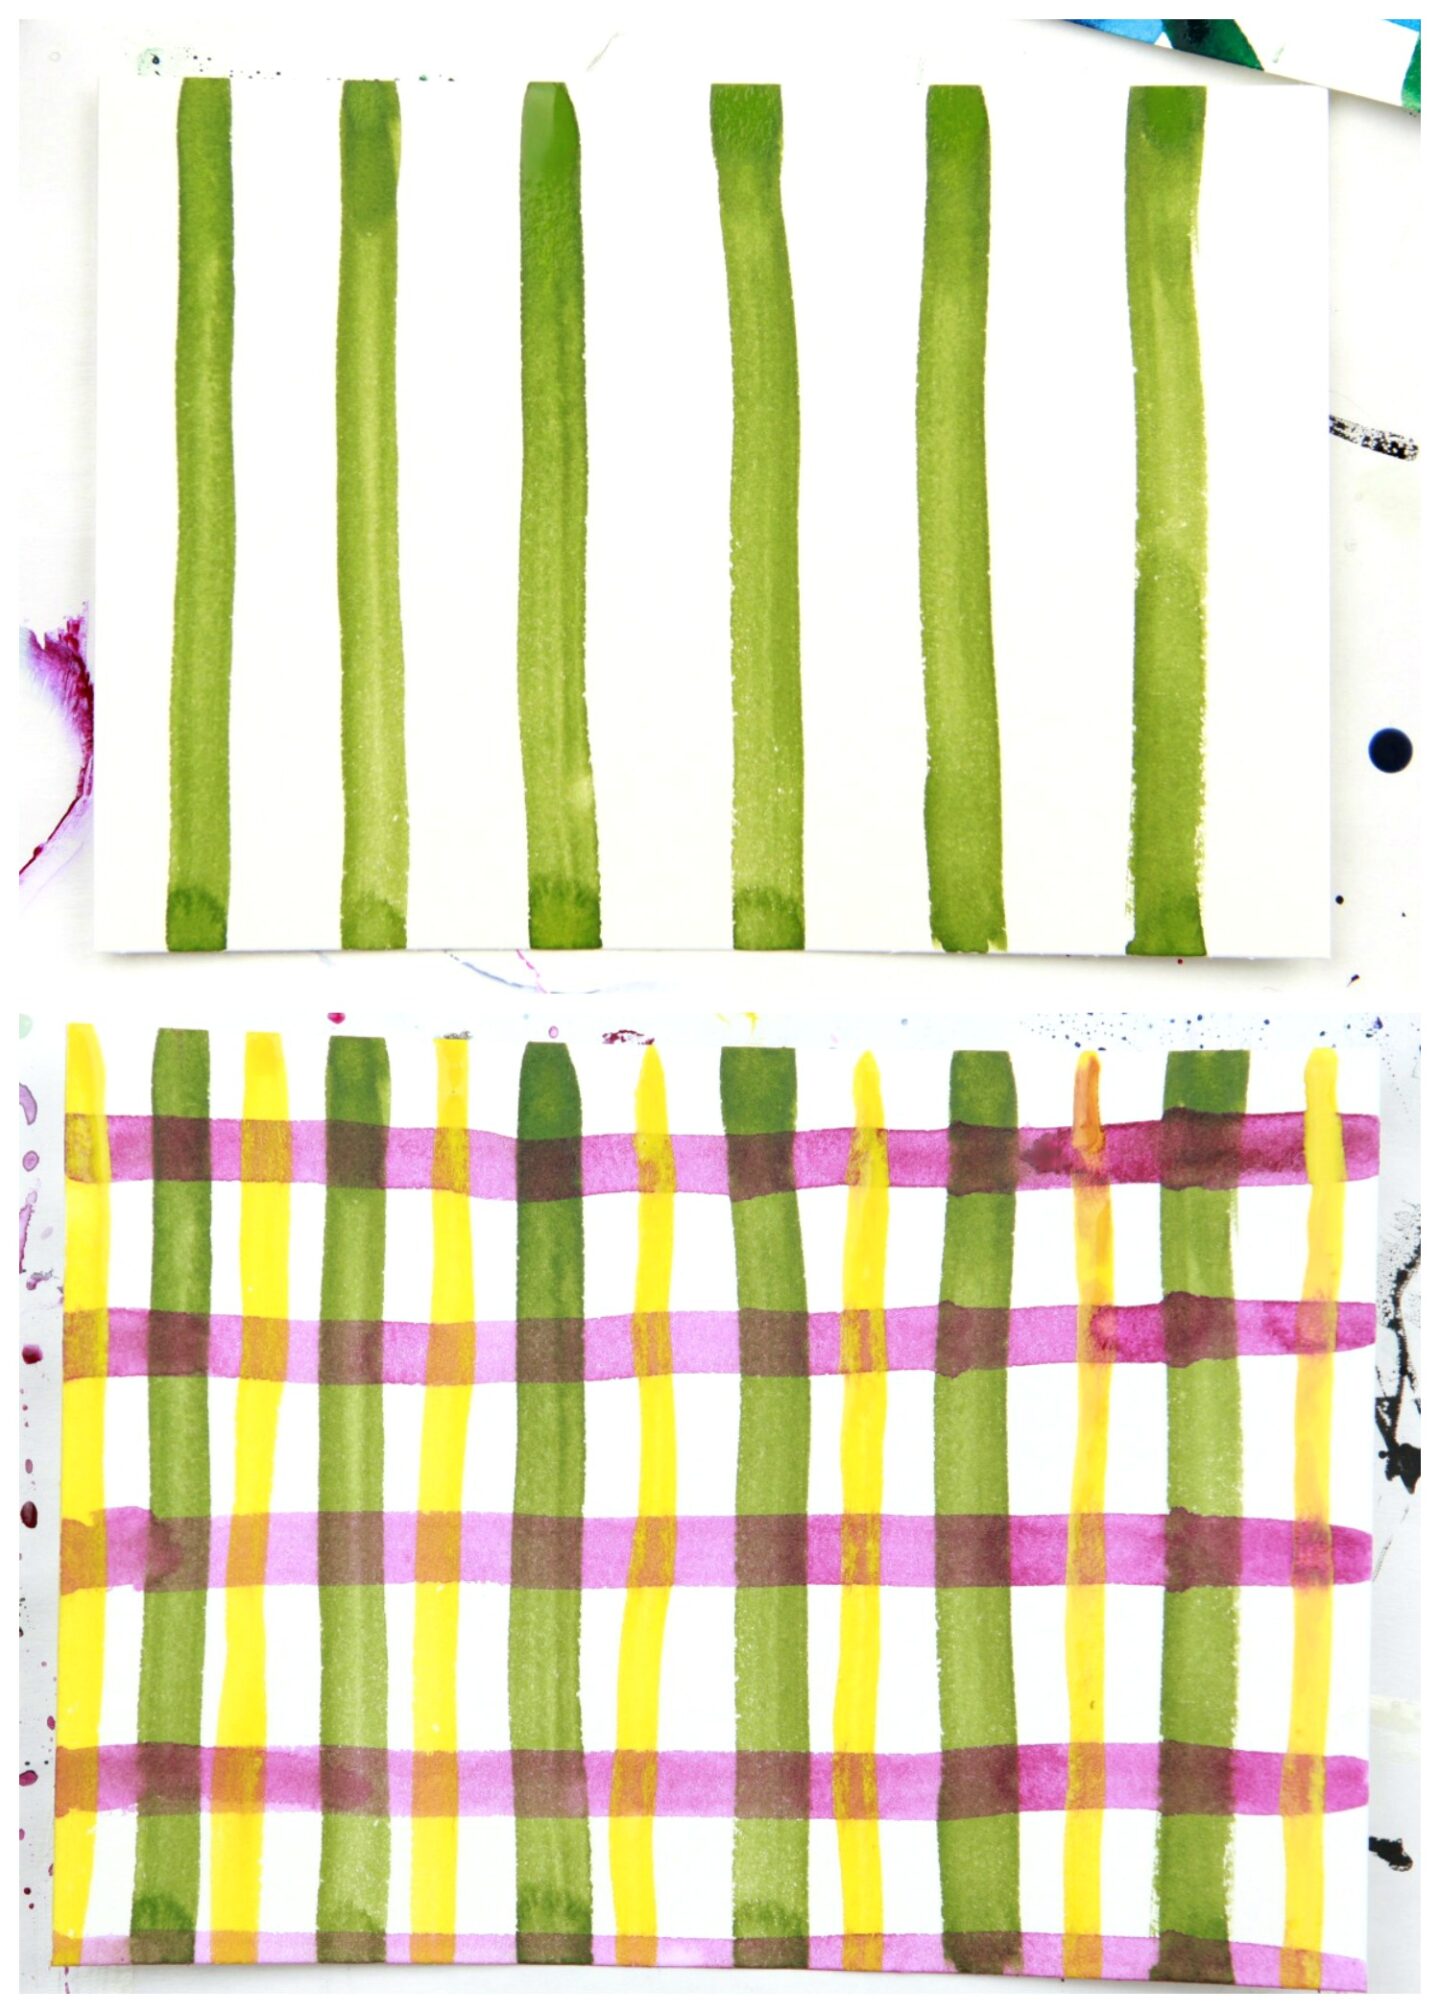
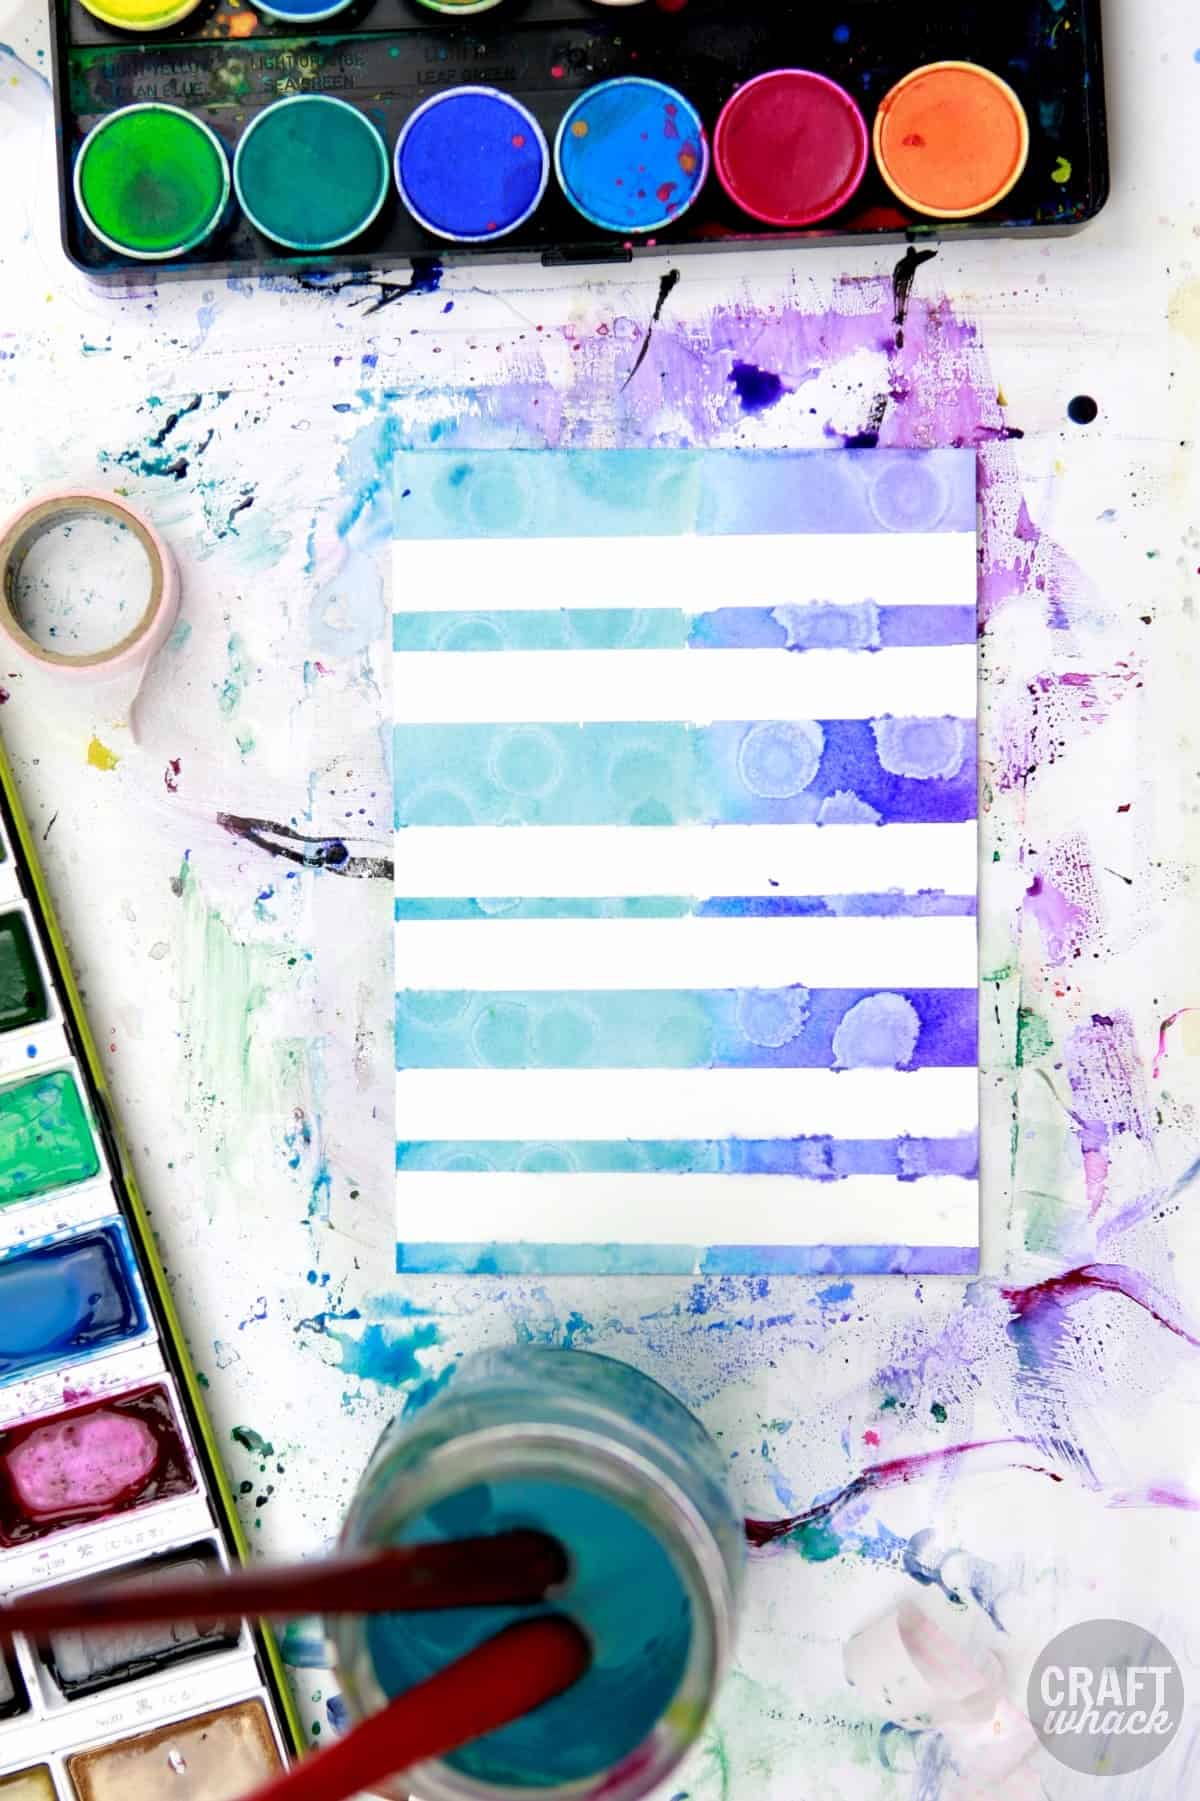
Plaid! Plaid for days.
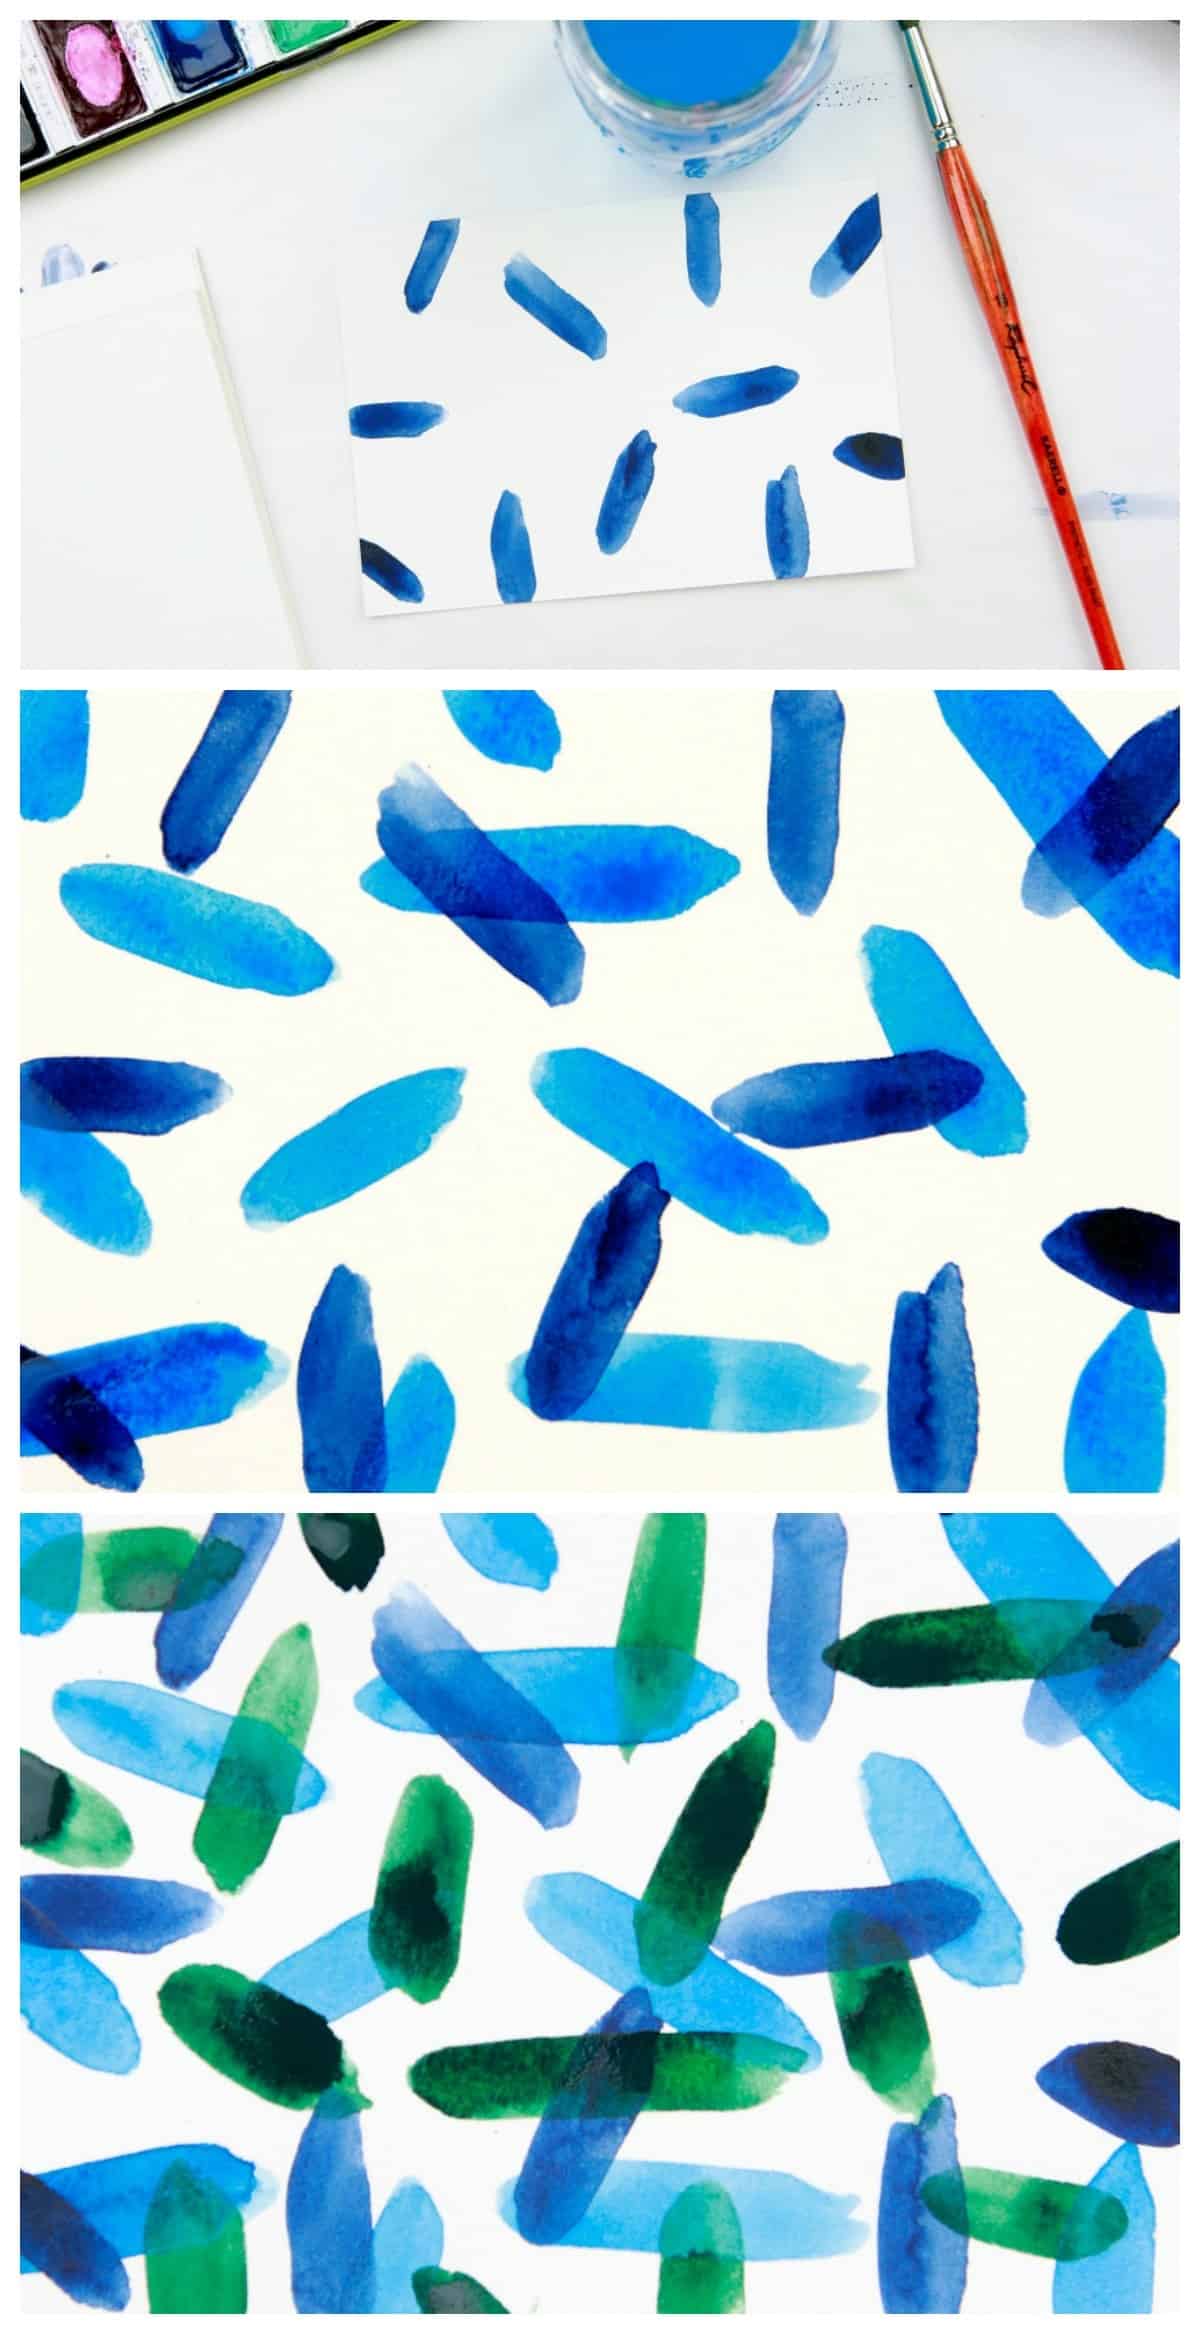
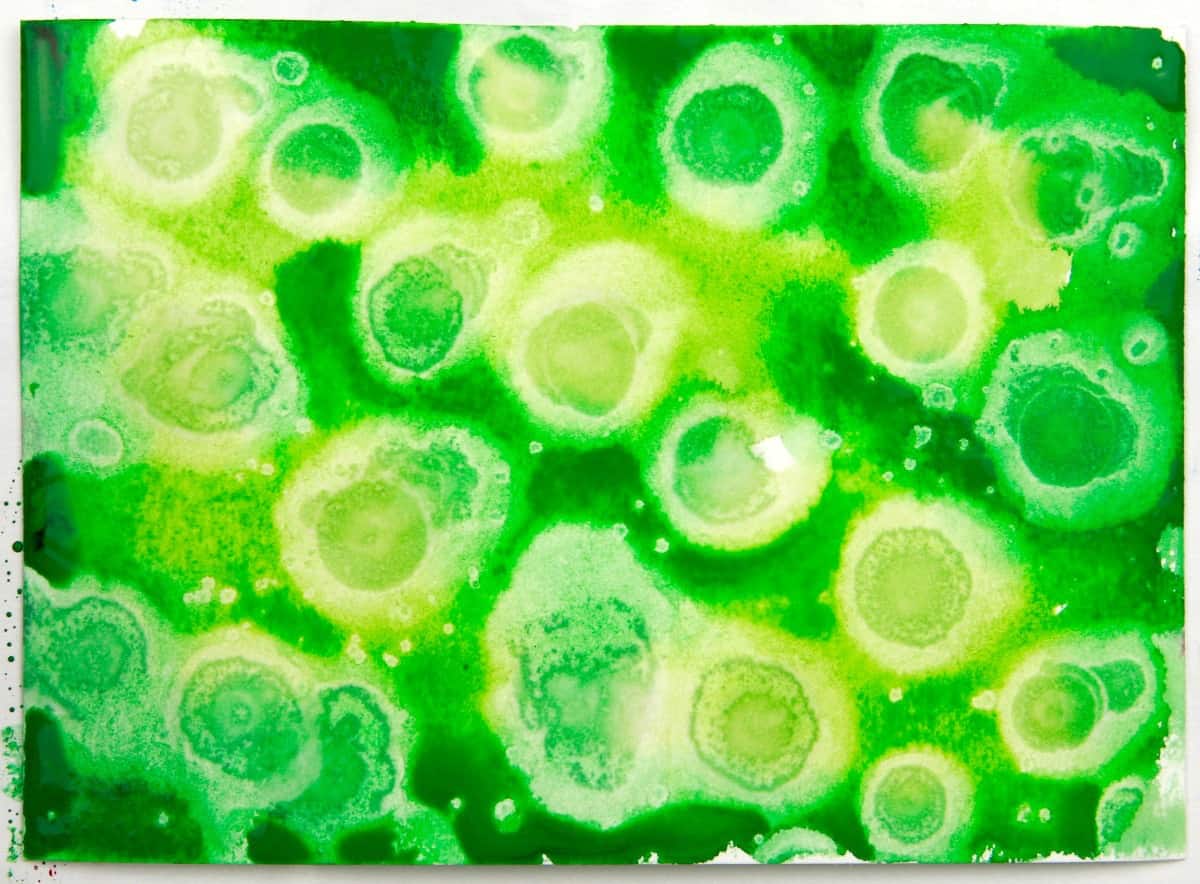
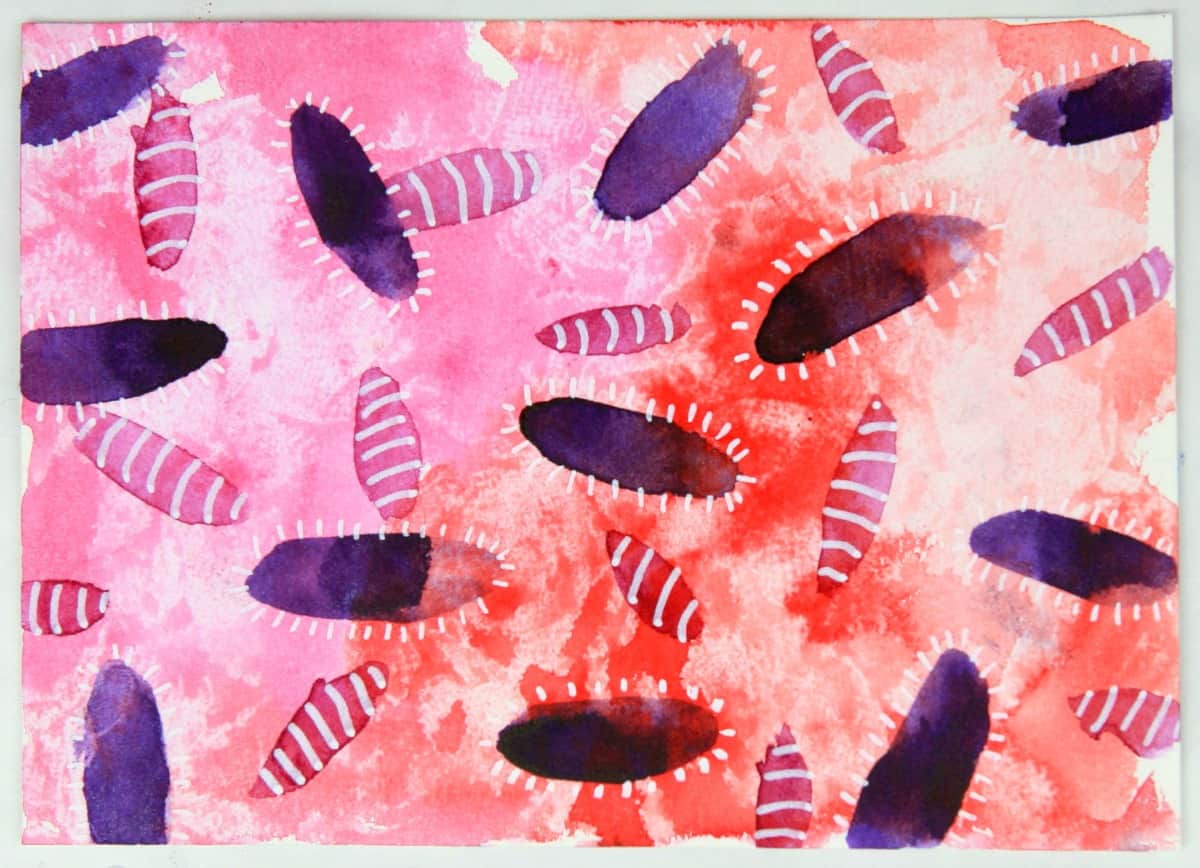
Layered microscopic creature-looking shapes. Let each layer dry before adding the next.
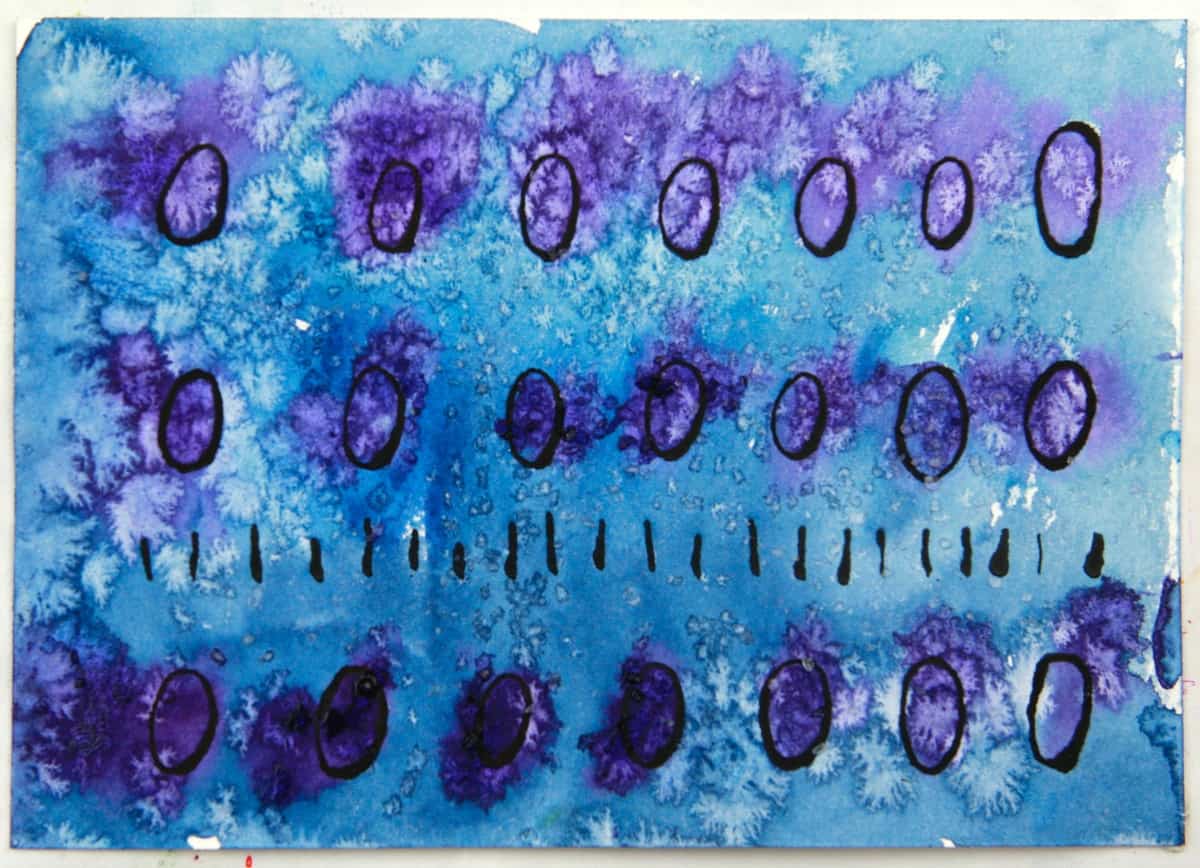
Wet-painted oval with darker lines of the same color painted over after it had dried.
Sponge Painting – Brush the watercolor on a sponge and dab it on the paper. I added a few layers with 2 different colors.
Honestly, I’m not a fan of this technique, because it reminds me of all that faux finishing and sponge painting that was all the rage in the ’90s.
Wet Watercolor Techniques
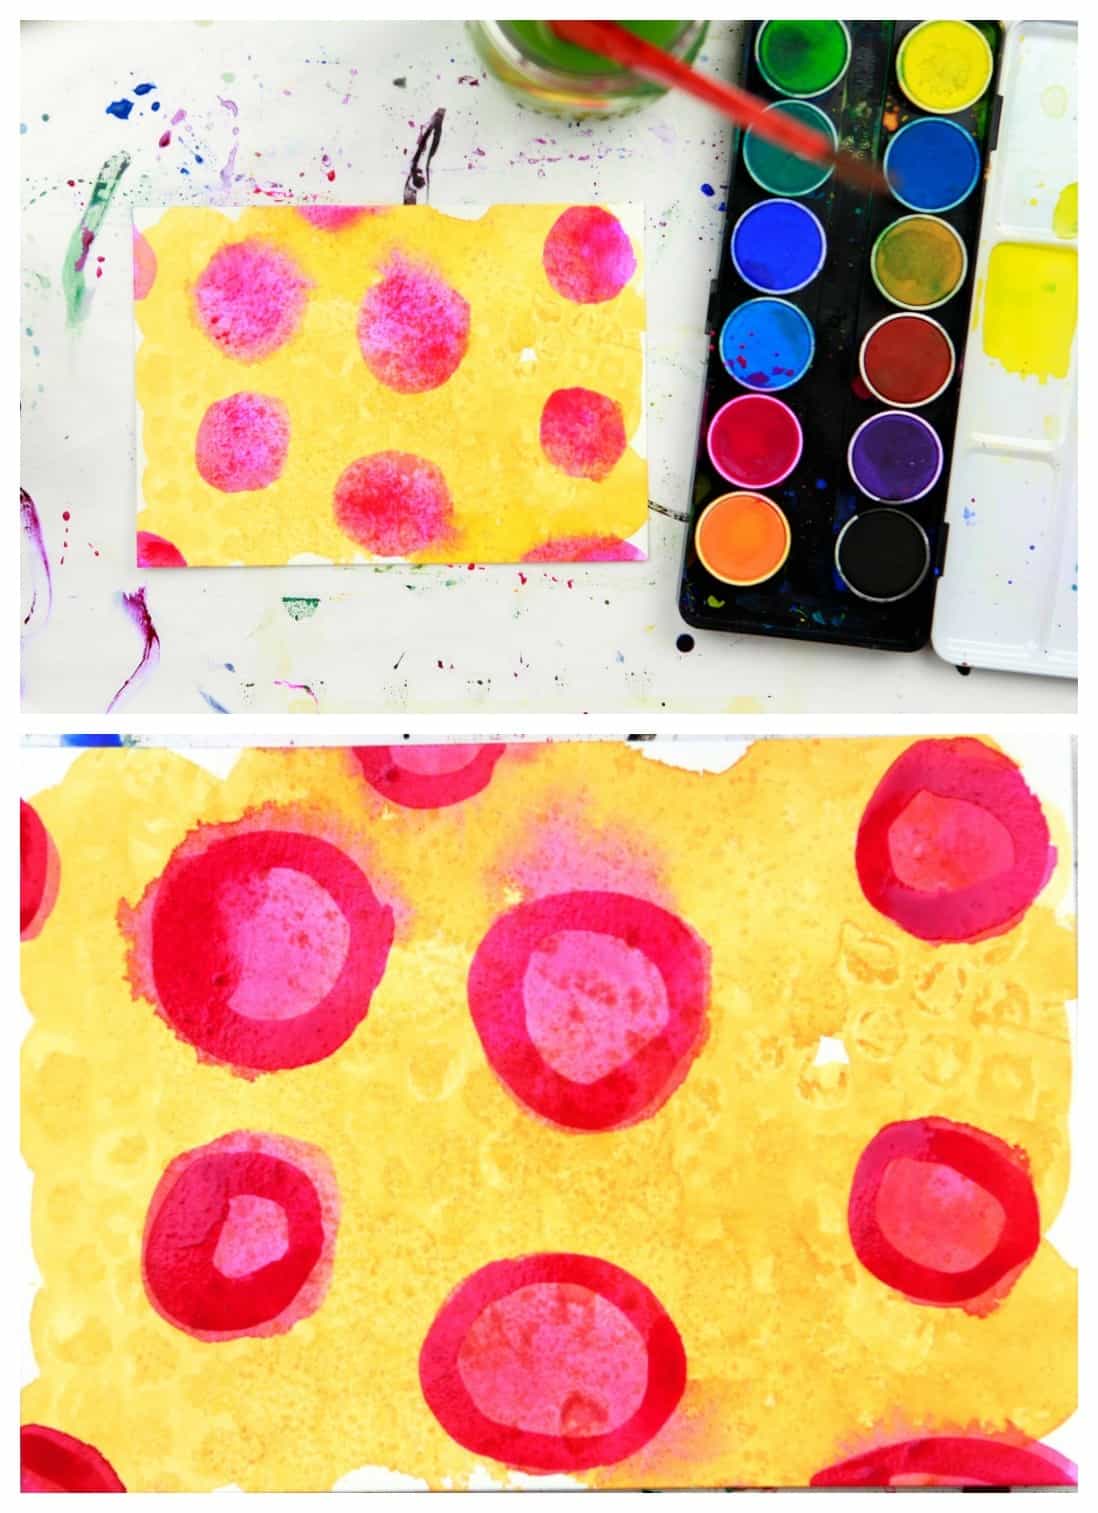
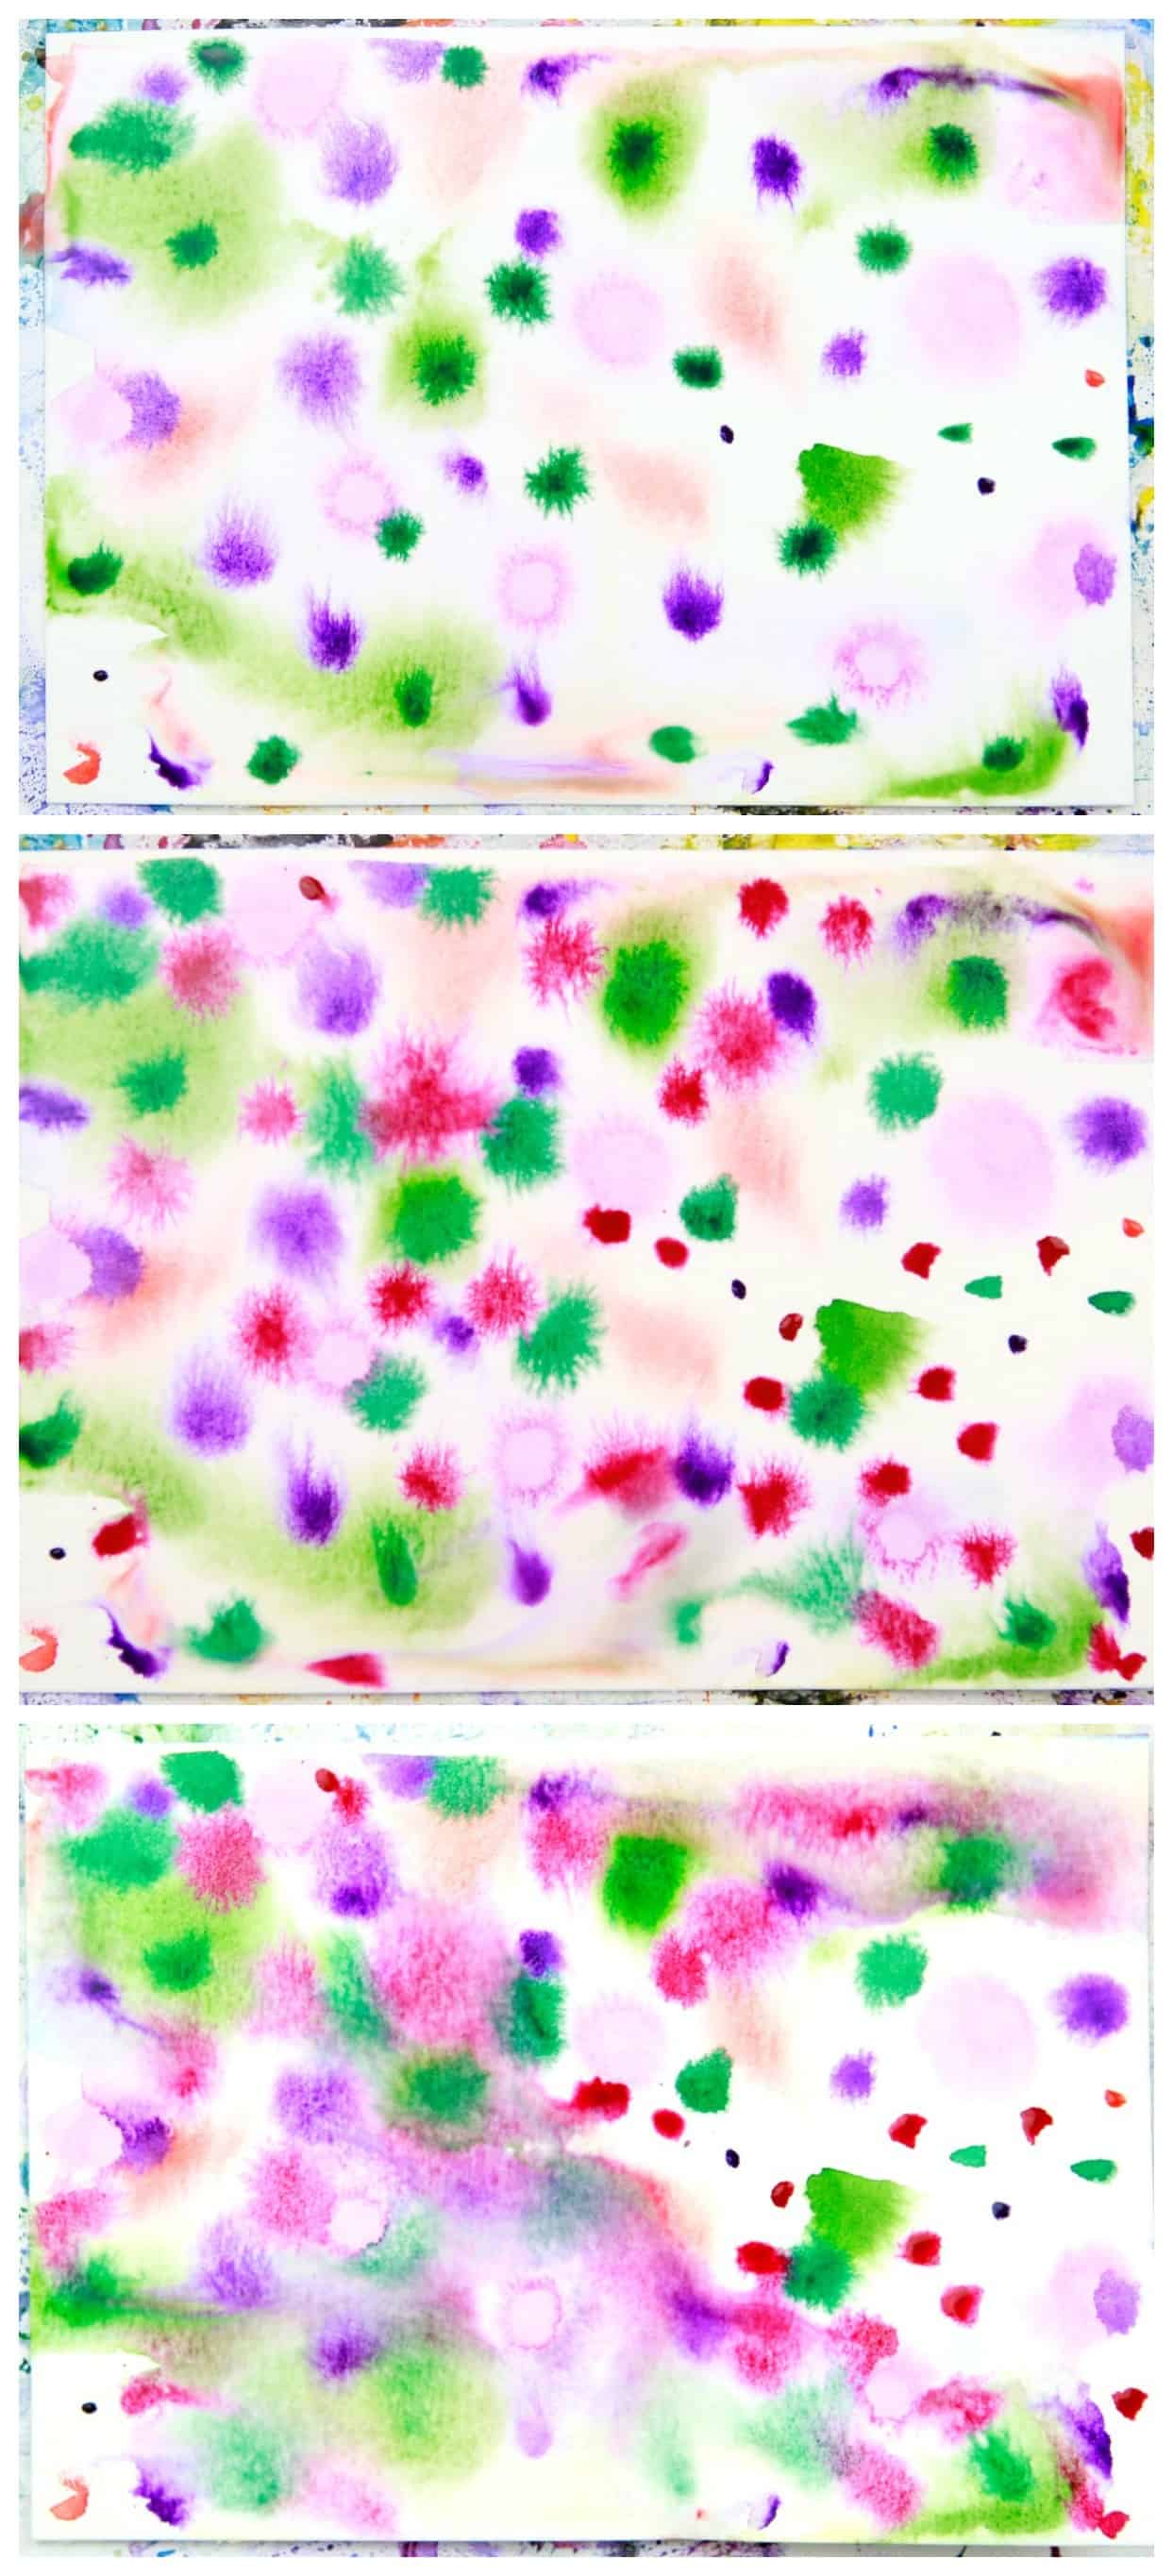
I piled on that yellow, then sprayed it with a fine mist of rubbing alcohol. Before it was all dry I added pink dots. After they had dried, I drew the pink circles.
This is the same idea as above, but the paint isn’t layered, so the colors keep their original purity. I also felt the need to draw little turquoise dots with my Tombow brush marker.
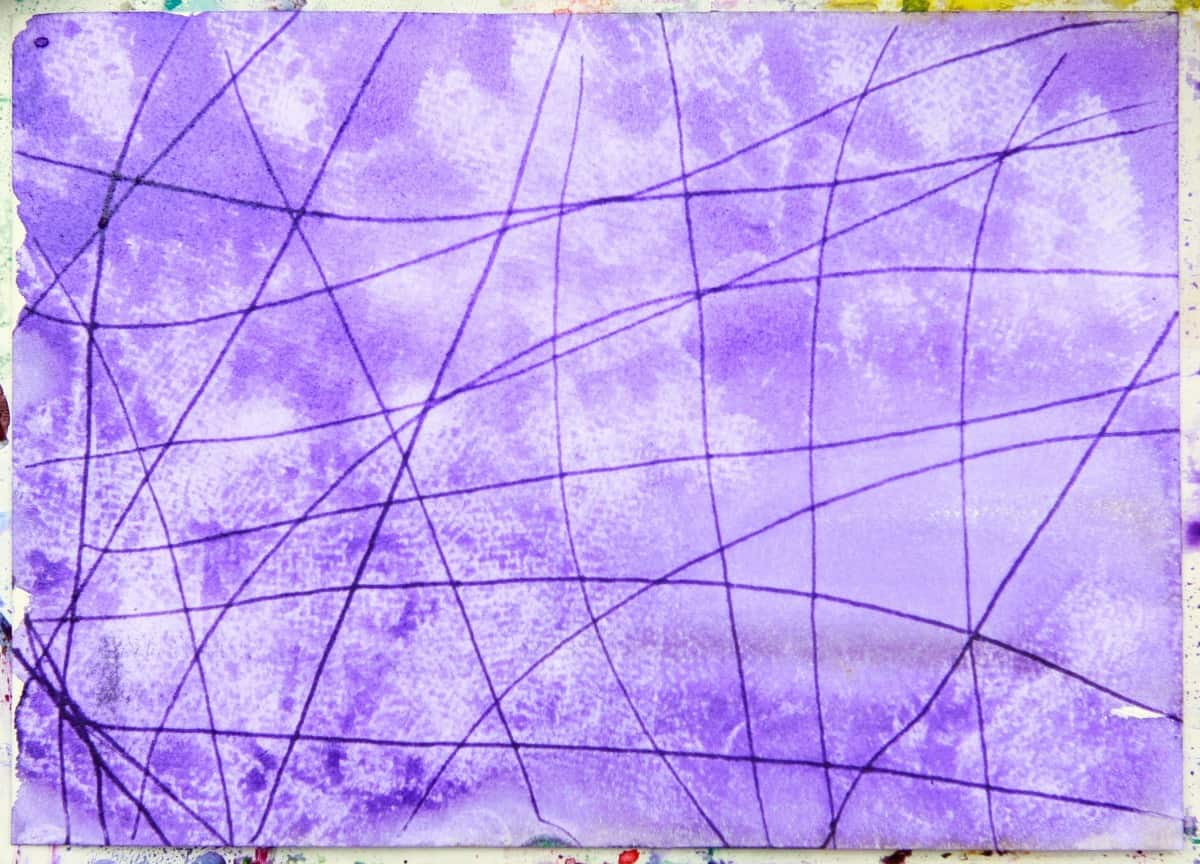
Incising lines is a loose, cool way to draw on watercolor. You have to make sure you paint it nice and wet, then use a semi-sharp tool to draw into the paper.
The paint will gather and look darker in the lines. I used a bamboo skewer.
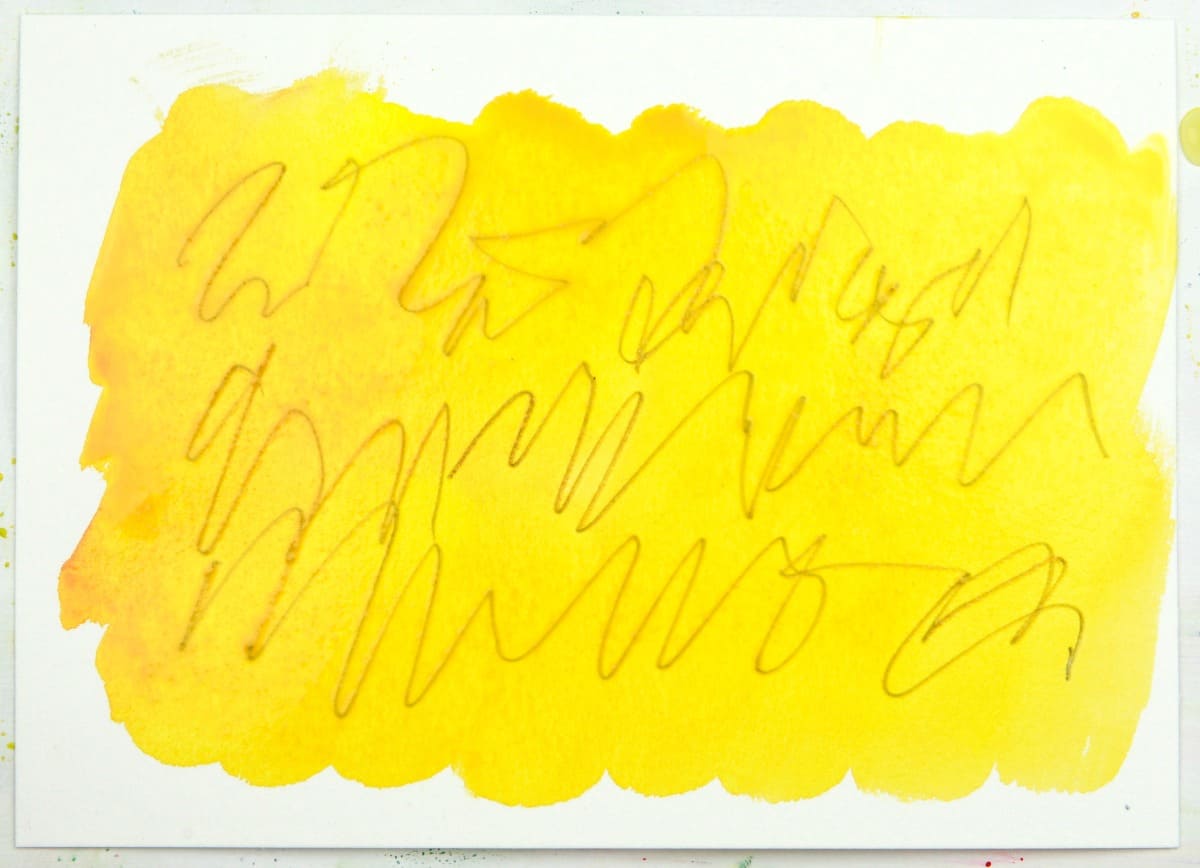
More incising on wet paint, but this time I used a drawing pencil.
Paint on the water- Brush on a puddle of plain water, then dab slightly moistened watercolor into it. Watch it spread. Urge it on: go, little paint, go!
You’ll see when you do this that as the background water dries, the paint spreads out less, so you’ll get some lighter, washy paint and some darker, more contained paint.
I couldn’t leave it alone and tipped the paper around to make the paint run together in spots.
I went back in after it had dried and added more dots to give it another layer.

Another one using the same technique, but fewer colors, and the watercolor closer together. Again, I went in with dots after the background had mostly dried.
Castile Soap Drips – I spread out a good puddle of paint, and then dripped 5 drops of Castile soap from a trial size bottle. Not sure what made me try this, but it looks AWESOME.
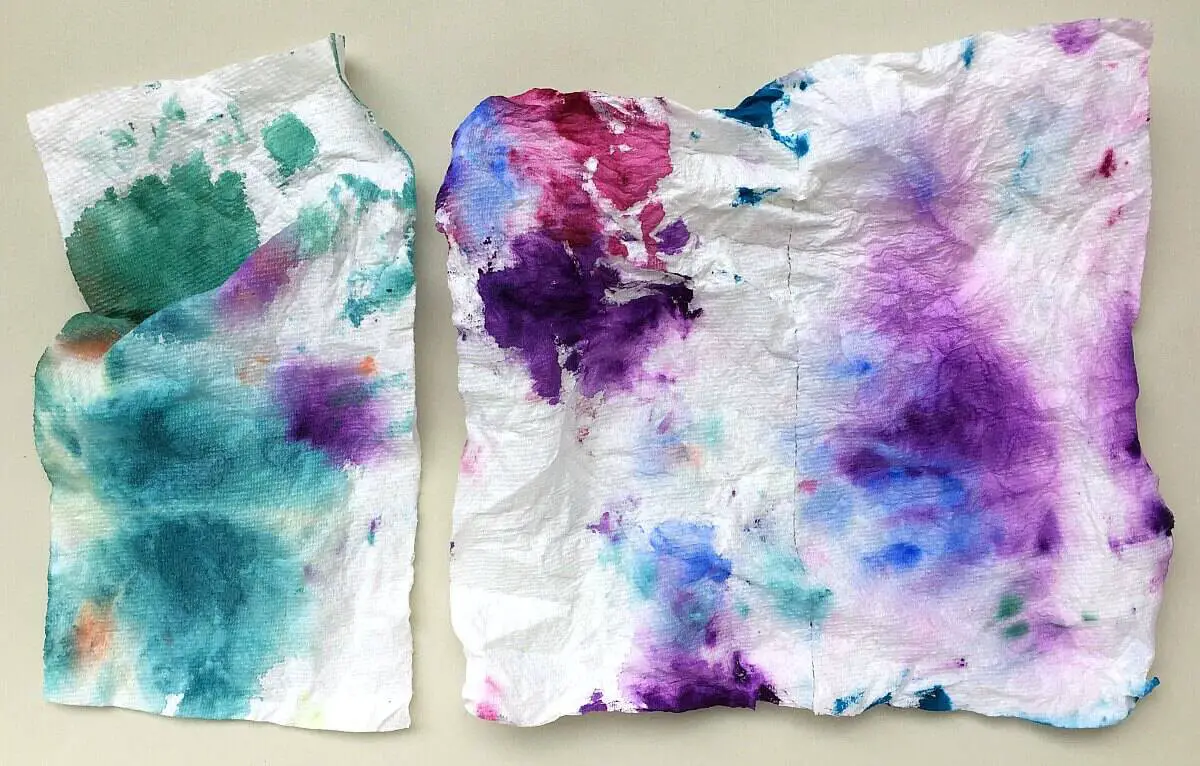
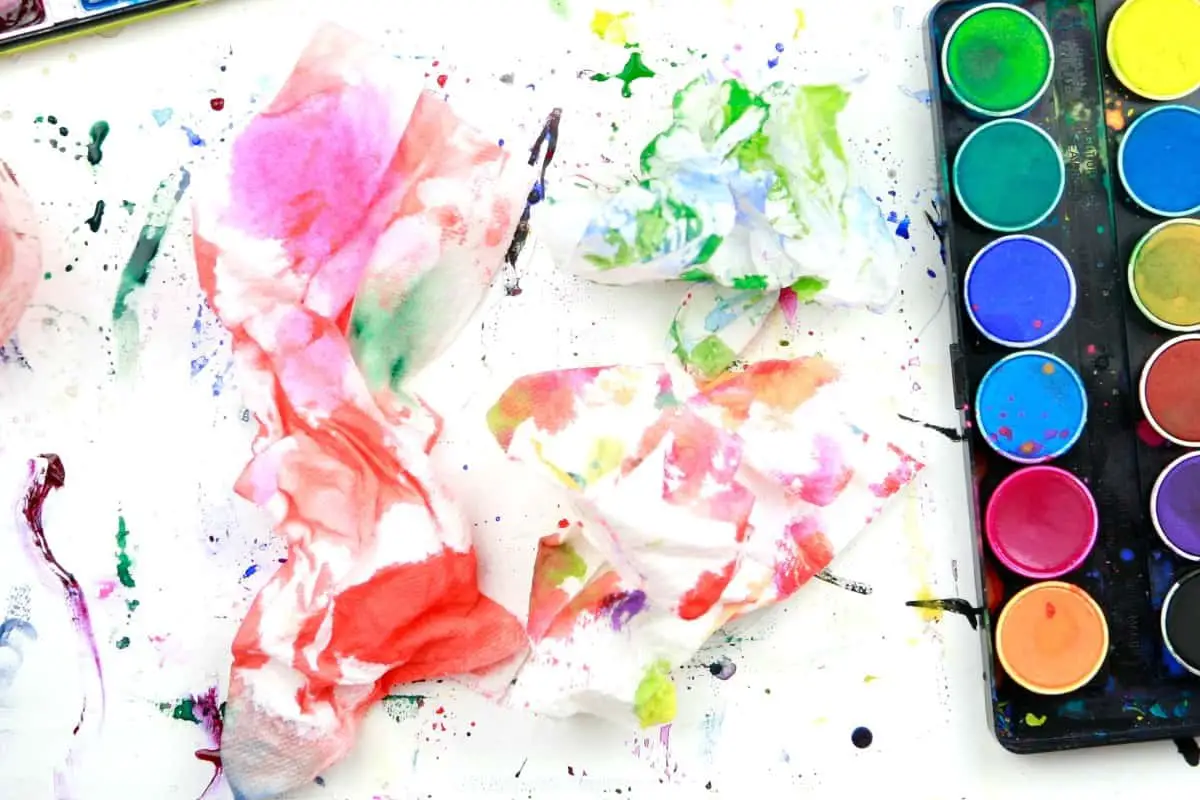
Paper Towel Tie Dye – Most likely you will have several paper towels that have been beautified by blotting off your paintbrushes.
Here are my ideas for these: Mod Podge them down to a piece of watercolor paper, cut them up and collage with them, rip them up and glue them into your art journal, draw on them, wad them back up and whip them at your neighbors.
Techniques Combined
Here we go! This is where the watercolor magic happens. Take your different techniques and see what you can do with 2 or more of them together.
This is washi tape resist with rubbing alcohol dripped on.
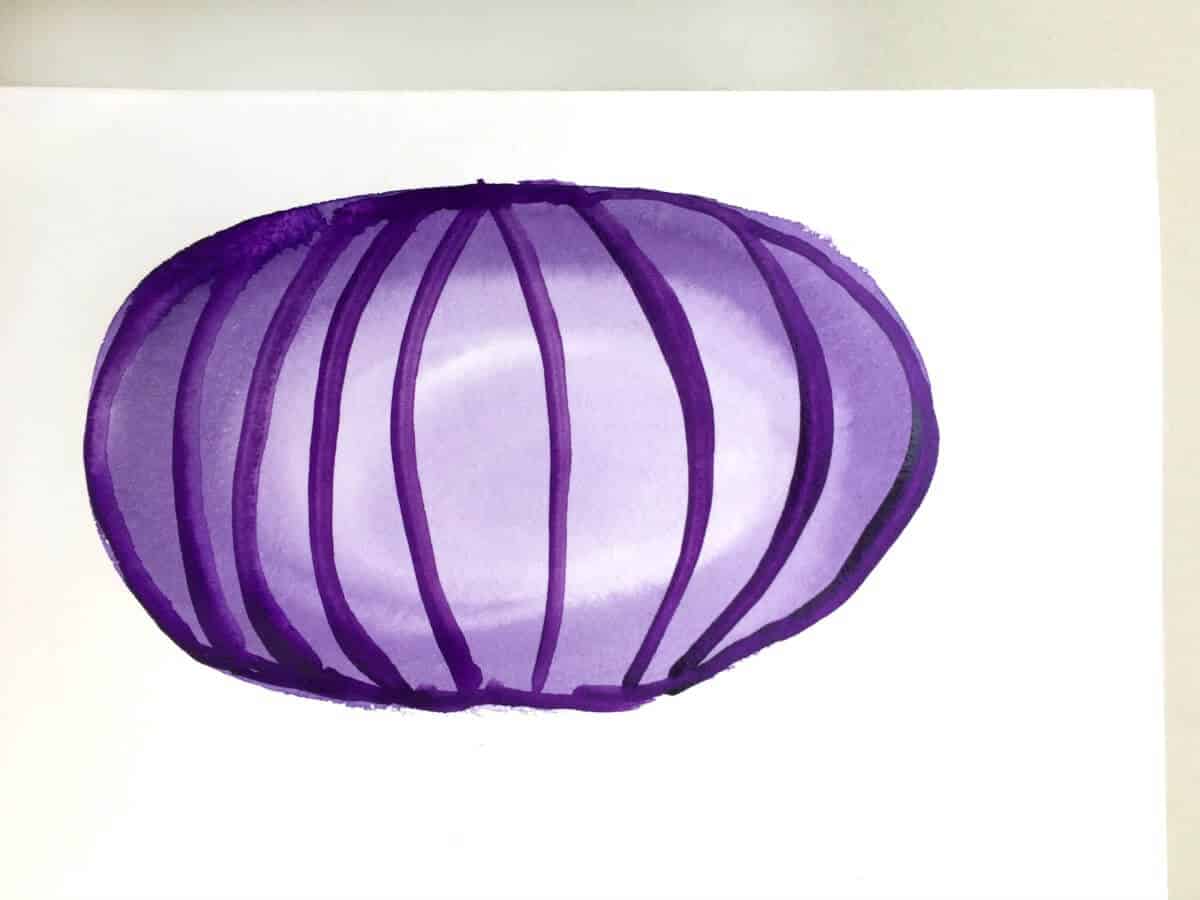
Purple paint brushed all over the surface, incised lines, paper towel blotted.
I love this one. I drew the shape with ink, ket it dries, then used that ribbon as a stencil on one side, and painted a couple of colors on super-wet on the left side.
This one was made by blotting the wet paint with paper towel, then painting shapes when the background had dried. When those had dried I tried my brand new white Posca pens!
First I made the little ink drawings, then I painted blue heavy washes over the whole thing.
Then I touched each of the ovals with purple and finally sprinkled coarse salt over the whole thing.
Let the painting dry completely before brushing the salt off, and be prepared for a fight.
The salt likes to stay on the surface, so I usually use a dry sponge or edge of cardboard to help brush the salt off the surface.
Where To Use These Awesome Watercolor Techniques:
- Art journals
- Backgrounds for collages or other paintings
- Homemade cards
- DIY artwork for your walls
- Use one or several techniques on a piece of paper, then cut the paper into shapes for a college project
- Cute little paper ornaments
- Make paper sculptures out of them
- Cut some into strips and weave with them
More Cool Watercolor Ideas
More Details About the Supplies I Used
As you can tell, I’m passionate and particular about art supplies. I recommended a bunch at the top of this post, and below are some clickable images to some things I mention.
Watercolors – These are my favorite pan watercolors. They have lasted me forever, and the colors are lush and rich. The paint flows like a beautiful waterfall. If you click through and look at the bigger photo of them, that dark color right next to the Sienna Brown – looking color is my favorite. It’s like a deep, rich plum-red, and I want to marry it.
Paper – If you aren’t sure whether you like painting on textured or smooth watercolor paper, buy some small pieces of each to try out. For the longest time, I thought I hated textured watercolor paper, but it was just because I kept buying the cheap paper. What a difference in good-quality and cheap paper…… (this is a hint.)
Masking Fluid – This stuff is so. damn. much. fun to use with watercolors, because nothing can give you the perfectly preserved white paper as it can. But! It can be tricky and annoying. If you leave it on the paper to dry for too long, it will be impossible to remove. Also, sometimes it clogs pens. I haven’t tried this yet, but I will be buying this masking fluid bottle/pen next, and also a bottle of masking fluid with these silicone brushes as seen in this awesome watercolor techniques video:
Tombow Dual Brush Pen Art Markerss2-PACK – Pik-Up Rubber Cement EraserBest-Test Premium Paper CementMolotow GRAFX Masking Fluid Pump MarkerWinsor & Newton Art Masking FluidStrathmore Ready CutSable PaintbrushesBlack Cat InkDroppersWashiKuretake Gansai TanbiStencil Template Set
Comments
0 comments