I adore block printing because it’s a versatile printmaking technique that can be adapted to beginners and pros, but is also really fun to do and can look great even if you don’t have a lot of experience.
Let’s go way deep into all things block printing and you’ll be ready to get started in no time.
What is Block Printing?
Block printing is when you take a block (wood or otherwise), and carve away parts of the surface.
You are carving away the negative space of your design (everything surrounding it). Then you use an ink-covered brayer (roller) to roll color over the surface and press the block down on a piece of paper. The ink only sticks to the areas you did not carve away, and that is the image that is printed on the paper.
Block printing is versatile, as you can use wood, linoleum, or rubber-like blocks to print from, and water or oil-based inks. You can print on any surface that will take the print, but most people stick with paper or fabric.
Block printing is usually thought of as less detailed than other printmaking techniques, based on the carving process. But! As you can see by the Durer print below, you can get pretty detailed with block printing as well.
A (Very) Short History of Block Printing
- Woodblock printing originated in China “in antiquity” (source)
- German artist Albrecht Durer revolutionized the art of printmaking (including wood block) at the turn of the 15th century with his exceptional talent.
- Linoleum blocks were first used by German Expressionist artists for printmaking at the start of the 20th century. (source)
- Matisse and Picasso popularized the use of linoleum to make prints in the 1900’s (source)
- Many kids are taught to block print in art classes – usually using linoleum or rubber blocks.
- Block printing refers to any print made my carving a block made out of wood, linoleum, or rubber.
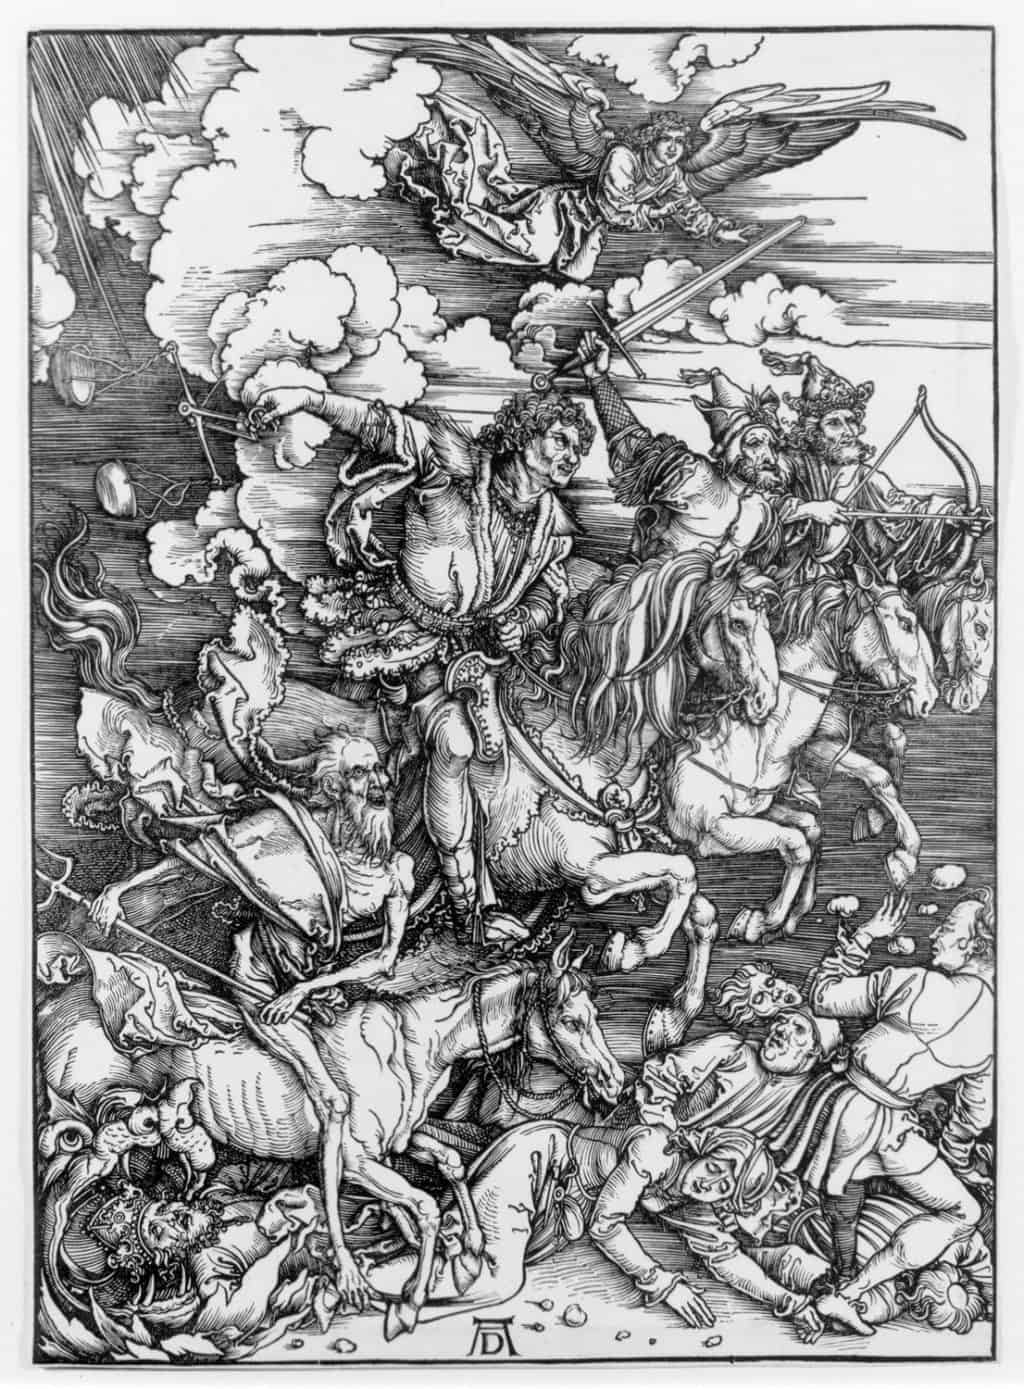
The Four Horsemen of the Apocalypse by Albrecht Durer, 1498. The Metropolitan Museum of Art
Block Printing Supplies
Blocks
When I started block printing, we only had the linoleum blocks to carve, and I remember so vividly the thrill of using an actual carving blade, and learning to carve away from me so as to not gouge my finger. I learned to bank the linoleum block up against a wooden bench hook (that catches on top of your table so you have more control over the block while carving).
At some point someone came up with a rubber-like block printing plate, which is softer and easier to carve than linoleum. I’ve found that most artists who are way into printmaking still prefer to use the linoleum, while the rubber blocks are favored by people who want to either use their designs more like stamps, or just really don’t want to be bothered with carving linoleum.
Linoleum vs Rubber Blocks
Linoleum Printing Blocks
- Rigid linoleum unmounted or mounted (on MDF fiberboard) to make them sturdier.
- Available in 2×3″ up to 36×36″ or Blick offers theirs by the roll. The rolls can be cut with a utility knife.
- You can add your own backing to the unmounted linoleum
- Linoleum is probably better for detailed work since it tends to cut a little cleaner than the rubber.
- Linoleum hardens with age
- Warming the surface with an iron will soften it for easier cutting
Rubber Printing Blocks
- Easily cuttable to different sizes and shapes
- Cut very easily without needing to warm the surface
- May not be as easy to cut detailed shapes on unless you have super-sharp tools
I have seen some really cool prints carved from craft foam, so this is an option, but I won’t dive into that here.
Inks
Don’t make the mistake of ruining your tools by using acrylic paint! I keep separate brayers for gelli plate printing and block printing because acrylics are really hard on brayers and plates, but exactly what you need for gelli plate printing.
I’ve used traditional oil-based inks, cheapie stamp pads, and water-based inks, and I really like the Speedball water-soluble inks for printing on paper, and Speedball Fabric and Paper Block Printing Ink for fabric.
My pick for water-based ink for beginners
My pick for block printing on fabric
Oil vs Water-Based Inks
You need to use the oil-based inks on fabrics as they will stay permanent after they’re printed, but whether you use oil or water ink on paper is a matter of preference. The water soluble inks will clean up nicely with soap and water, and so do the Speedball oil-based inks linked above. Some other oil-based inks require solvents to clean up.
Oil-based inks take longer to dry than water-based, which can actually be a good thing while printmaking, so you don’t have to work as fast. The colors in the oil-based inks can look a bit more saturated as well.
Water-based inks can be misted lightly with water to extend the drying time a little longer, but can run if they get wet after they dry. Spray the finished piece with a spray fixative to set it.
Printing Surfaces
Printmaking paper is your best friend here. I have been using Rives BFK for years and it’s my favorite, but there are obviously some other good printmaking papers out there, like Stonehenge.
If you are printing on fabric, the Speedball inks I mentioned print well on cotton, polyester blends, linen, rayon, and other synthetic fibers, just not rayon.
More Tools
Brayers:Good brayers
are as important as your other tools. You’ll want a few different sizes if you are making different sized prints.
Tracing paper: For transferring images onto your plate (see below)
Newsprint or printer paper: For test prints! Pull a few test prints before you print onto your good paper or fabric.
Palette: You will need a smooth surface to roll out your inks with brayers. I’ve used glass, plexiglass, and the shiny side of freezer paper (taped down) successfully.
Blades: U and V – shaped blades carve the material away from your plates, and come in different sizes to make bigger or finer cuts. Speedball sets are great for beginners and students, but if you want a higher quality I would go with palm-grip carvers.
Optional: Burnishers or a baren (for rubbing the back of the paper after you lay it on top of a plate), bench hook (they hook onto the edge of the table and hold your plate in place while you cut it), sharpeners for the blades (not optional if you will continue to use your cutters!) carbon paper as an alternative to the pencil transfer method.
Choosing an Image
If you are a beginner, I recommend choosing something simple, not too much detail or crazy lines. You want to get a feel for the cutting and the inking, and you don’t want to take 5 hours to sit and carve an intricate design if you don’t have a good feel for this technique yet.
Or just ignore me and go for it, but take your sweet time!
Make sure you aren’t just printing images off the internet or copying them from books if you will be selling or giving out your finished prints. Artists and illustrators work hard on their original images and it’s bad karma to just grab their work.
If you aren’t using your own artwork, The Graphics Fairy has some wonderful free images on her site, and you can find clip art for sale on Etsy and Creative Market.
Transferring the Image
There are several ways to transfer your image to your plate, and I usually use the pencil transfer method, but 2 that you can use with laser prints or copy machine copies are heat transfer and Acetone transfer.
Pencil Transfer: Start with a pencil-drawn image or use a pencil to draw over your printed image. Flip it over and lay it face down on your printing plate. Draw over the lines again with pencil, or burnish it onto your plate with the back of a spoon or a bone folder. This will transfer the pencil drawing onto the surface of your plate.
Heat Transfer: Use with Laser prints or copy machine copies, but not inkjet prints which use a different type of ink. Here is a video showing how to do this method, but essentially you’ll need an iron and a piece of scrap aper to transfer the image.
Acetone Transfer: Place your print face down onto your block, and dab at it with a cotton ball doused in 100% acetone. Lift the print off while it is still wet (check a part of it to see if it has transferred onto the plate first.) Be careful with this method to not breathe in the Acetone fumes. Also don’t expect to keep your gorgeous manicure looking good with this option….
Cutting the Plate
Using a small v-shape gouge, carve a shallow cut around your design at first, and go back in if you want to cut deeper. This helps you keep control of your cuts, and will help sort of prep the drawing for more cuts around your main shape.
Push your cutting tool smoothly; don’t wiggle it as you push.
Always keep your blades very sharp or you’ll make a mess out of your plate.
Inking the Plate
Squeeze out a line of ink onto your palette, and roll it out in a big even rectangle with your brayer. This will distribute it evenly onto your brayer so you can roll it onto your plate evenly.
It might take a few test prints to build up enough ink on your plate for a good print. Sometimes the ink has to soak in a bit to the surface of the plate.
Proof it!
Make a test print, called a proof, on your newsprint or printer paper. Usually you will see some areas that print that you don’t like the look of, and you can go back in with your cutting tools to remove. Keep making proofs until you’re happy with the result. it’s tempting to jump right to the good paper, but you’ll end up just wasting it if you don’t take your time with the practice prints.
This will also give you a good feel for how much ink and pressure you need when you are pulling a print.
Read Related Article: Best Screen Printing Machine
Making Your Prints
Usually for larger prints I like to place the paper down on the block and rub the back of the paper with a baren. You can use the plate like a stamp and press it right down onto the paper, too, but I would do this with smaller prints.
Hang your prints up on a clothespin line to dry.
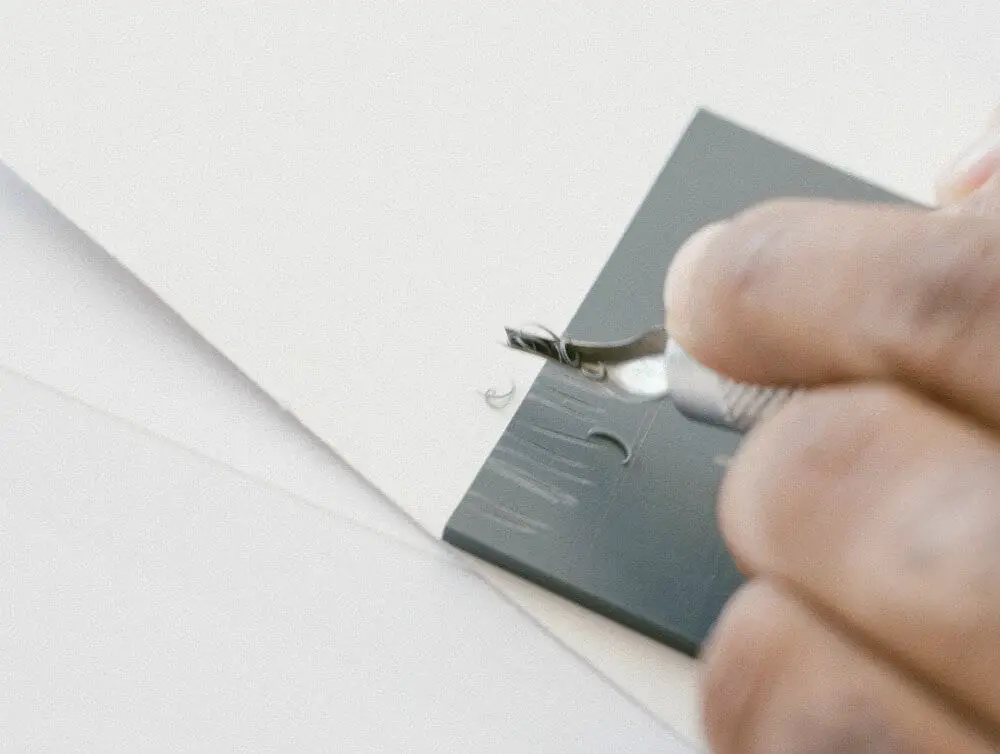
OOoooooh, this beautiful video shows the whole process from transfer to carving to printing. You can see that she paints the surface of her block before carving in order to see the cuts better. Her design is really intricate, so this is helpful especially for small cuts.
I don’t know why she wets her paper before printing, but it’s really relaxing to watch this video, and you’ll learn a lot by watching her process:
Block Printing on Fabric
If you want to make t-shirts or pillowcases, or cute little dish towels, block printing is AWESOME on fabric.
Pre-wash your fabric to get out all the sizing and shrink it to whatever size it wants to be. Pin it taught to cardboard so it’s nice and flat while printing.
Let it dry for up to a week, and then set the ink into the fabric by throwing your pieces in the dryer for about 20 minutes.
Tips for Block Printing
Maybe this is obvious, but don’t forget that whatever you are carving will print backwards on the paper. This works perfectly if you re transferring something from a piece of paper, because when the paper is face down, you are transferring the image backwards anyway.
If you are a beginner at lino printing, choose a fairly simple image so you can used to the feel of cutting and printing before you tackle an elaborate design.
You can draw directly onto your plates, but this is awkward. It’s easier and cleaner to transfer a drawing using carbon paper or the tracing paper method:
- Trace over a printout or image using pencil on tracing paper
- Flip the paper over, lay it on top of your plate and go over the pencil lines once more to transfer them to the plate.
You can use ink pads for small carved plates that you want to use as stamps.
This is an incredibly detailed tutorial for sharpening your gouges.
Try rolling two shades of a color next to each other on your plate for an easy way to add another color to your prints.
Block Printing With Kids
Older kids can handle carving the rubber plates as you see fit, but you can introduce younger kids to a form of block printing: buy some foam craft sheets and ‘draw’ onto the surface with a knitting needle or skewer. Roll ink or paint over the foam and press it down onto paper.
Beautiful Block Prints for You to Ogle
Here’s the start to a collection of block prints for you to be inspired by! I tried to add a good mix of styles, and I’ll keep adding as I find more.
Learn More about Block Printing
Here’s a tutorial on block printing on t-shirts if you’re interested in that.
Block Print: Everything you need to know for printing with lino blocks, rubber blocks, foam sheets, and stamp setsSee on AmazonBlock Printing: Techniques for Linoleum and WoodSee on AmazonLinocut for Artists and DesignersSee on Amazon
Speedball Lino CuttersBuyPalm-grip CarversBuyBarenBuySpeedball Mounted Linoleum BlockBuySpeedball Speedy-Carve BlockBuy
BrayerBuySpeedball Fabric inkBuyRives BFK Printing PaperBuyInking Plate/Bench HookBuyFlexcut SlipstropBuy
Speedball Deluxe Block Printing Kit
Comments
0 comments