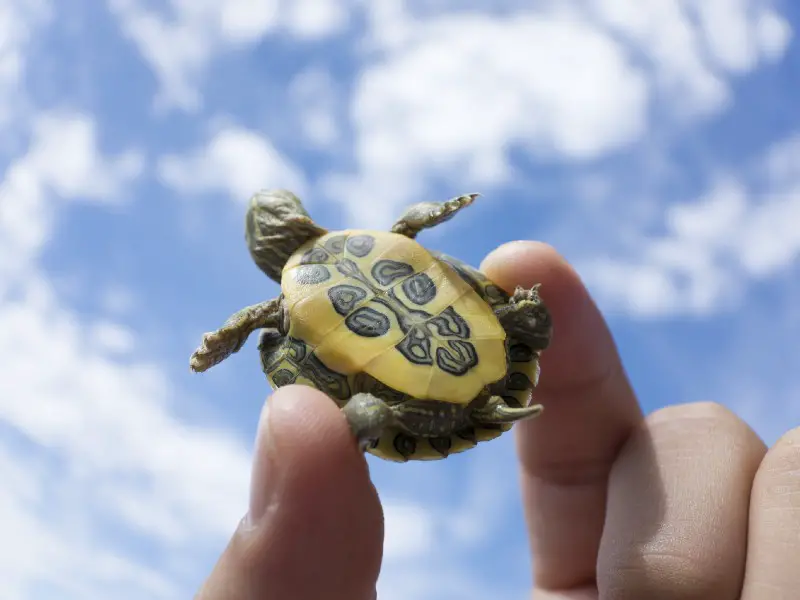
Kids love animals, and they love crafting animals ““ and many kids adore sea turtles. These amazing creatures have beautiful shells and are very tranquil, and they are also often discussed in terms of conservation.If you want to get your child thinking about turtles and sea life in general, there are some wonderful sea turtle crafts you can create, while talking to your child about the challenges that these beautiful creatures face, and what we can do to make a difference.
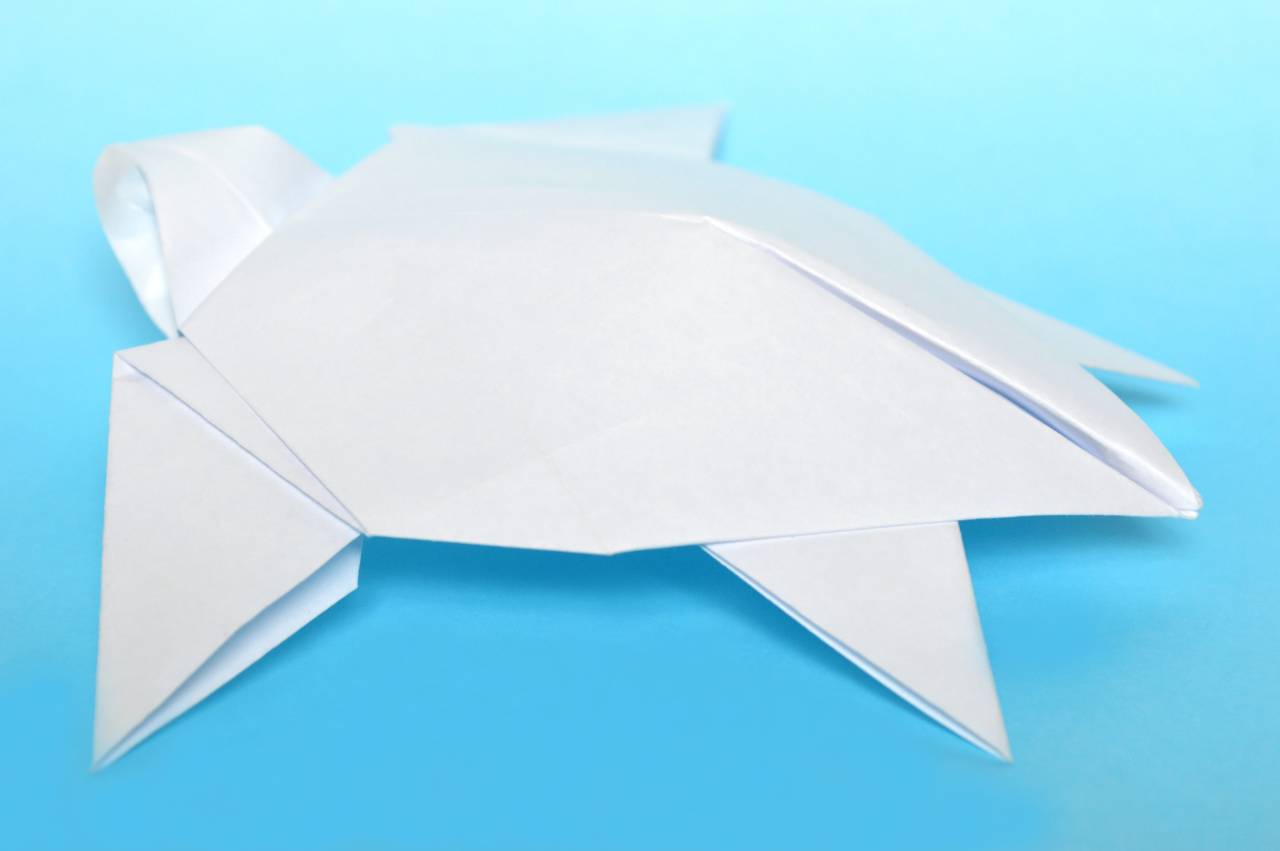
Floating Turtle
 Source: https://soeasybeinggreen-blog.com/sea-turtle-facts-kids/A good turtle ought to float and be waterproof, and many crafts aren’t ““ so let’s start with the one that is. Your child can take this in the bath with them or splash it around in rock pools at the beach (be careful they don’t lose it or you won’t be helping the turtles at all!).
Materials
To make a floating turtle, you will require:
- 1 jelly cup, preferably with contours
- Green, white, and black acrylic paint
- Corks
- Green foam
- Googly eyes
- Scissors
- Glue gun
- Craft knife
- Cutting board
Step 1: Paint The Jelly Cup
Get your child to paint the jelly cup in a variety of green shades (mixing in the black and white paint). You can also incorporate other colors if they want to do patterns on the shell ““ just make sure they let the paint underneath dry first.Always make sure your child is wearing old clothes before they start using acrylic paints.
Step 2: Cut The Corks
While your child is painting the jelly cup, take your two corks, and use the craft knife to cut them in half. You can then shape them into more realistic flippers if you want to, or just leave them as corks; your child won’t mind.
Step 3: Add The Corks
Glue the corks to the underside of the jelly cup to make the turtle’s flippers. They don’t need to be painted; the natural color should look lovely against the green cup. Use the glue gun to get a good, firm bond between the cork and the cup.
Step 4: Cut Out The Head
Cut a little head and neck out of green foam, and help your child stick-on googly eyes (or draw eyes with a pen).Next, cut a small, curved triangle to make the turtle’s tail, and stick both of these to the jelly cup. The turtle is now finished, and all you need to do is take him to some water and watch him float!
Sea Turtle Paper Plate
 Source: https://iheartcraftythings.com/sea-turtle-craft.htmlPaper plates are great for a lot of different crafts, but they are particularly good for turtles ““ because you can use the depth of the paper plate to create a 3D shell that your child can then decorate. This is also a fairly hands-off craft that your child can do most of alone.
Materials
For your paper plate sea turtle, you’ll need to source:
- 1 Paper plate
- Green, brown, white, and black paints
- Paintbrush
- Black pen
- Green card
- Scissors
- Glue
Step 1: Cut Out The Flippers And Head
Put your paper plate next to your green card so you can use it as a guide on how big to make the flippers. Remember that these don’t need to be perfect for a kid’s craft.First, cut two ovals from the green cards for the back flippers. These can be reasonably small as quite a bit of the flipper would be beneath the shell.Next, draw a curve, and add some ridges as you curve back around on the other side. A turtle’s front flippers are quite angular and should have a smoothed-out right-angle in them. Make them nice and broad.You can cut around one flipper to make the other if you are having trouble getting them even.Finally, draw a simple head with a little bit of the turtle’s neck, and if you like, a little triangle for a tail.
Step 2: Paint The Plate
Turn the plate so that the bottom is facing up, and it sits proud of the table. Next, get your child to paint this surface. You can draw some guides for the pattern for them using the marker (take a quick look at some turtle shells online if you need some help), or just let them decorate however they want to.Your child will probably want to mix some colors to get some variation; let them experiment as much as they like, and help out if they’re struggling. This part of the craft may be done independently with slightly older children.
Step 3: Glue The Head And Flippers
Attach the flippers to the underside of the plate, checking how they look when the craft is the right way up before you fix them in place. If you are using white glue, slip a paper clip over them to hold them in place while the glue dries.Glue the head at the top of the plate, and the tail at the bottom. Next, draw some eyes and a mouth on the turtle’s face (or let your child do this if they are old enough) and some little lines on the flippers, and the turtle is complete!
Button Turtle
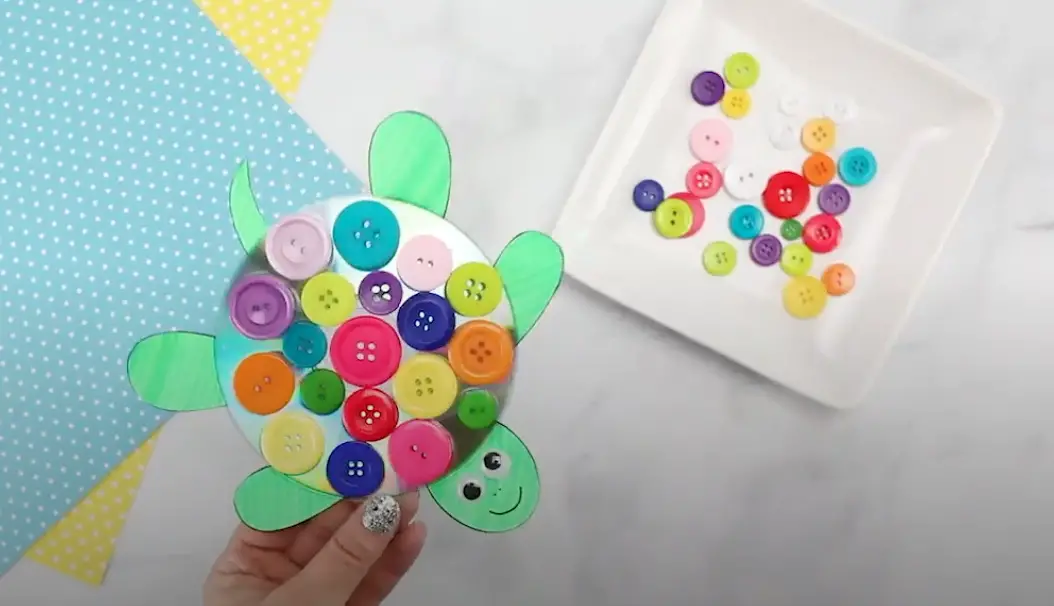 Source: https://www.firefliesandmudpies.com/cd-button-turtle-craft/
Anyone who likes to be creative with things that they already have around the home will love this turtle craft, because it makes use of scrap bits and pieces and turns them into something bright, colorful, and beautiful. Who wouldn’t love this amazing ocean craft?
The CD is a great way to create the shape of a turtle shell and use up an item that you may not otherwise have much purpose for. Scratched CDs or outdated computer discs can all be turned into this fantastic craft as a good way to recycle them and let your child have fun at the same time.
The turtle craft is also nice and simple, which is appealing for many parents. Even a young child can help work out which buttons to put where. However, it probably will require some supervision, as you may want to use hot glue to stick the buttons down.
The turtles that come out of this craft will each be wonderfully unique, and your child can have fun arranging the buttons until they get the perfect setup. They can name their turtle if they like, and this activity is a great opportunity to do a bit of teaching about turtle shells and how they are formed.
For a rainy day, this is a wonderful, simple craft that does not involve a huge amount of mess and cleanup, so give it a try.
Turtle Stamp Craft
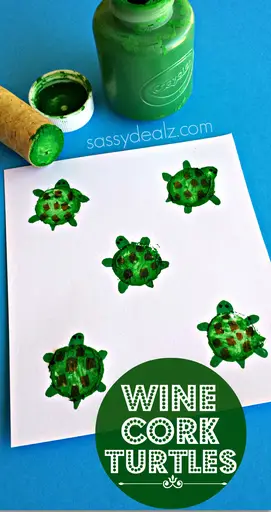 Source: https://www.craftymorning.com/turtle-craft-kids-using-wine-cork/If you want to create an easy craft with your little one, this is great fun and can be used to decorate homemade wrapping paper or cards.
Materials
To create turtle stamps, you’ll need:
- 1 large sheet of light blue paper
- Dark and light green acrylic paint
- 1 cork (or similar round object)
- Round pencil with no eraser
- Black fineliner (optional)
Step 1: Stamp Turtle Shells
First, you are going to help your child to dip the end of the cork into some dark green acrylic paint, and then stamp this onto the paper. Lift it off to leave a clean circle of dark paint, and you have your first turtle shell.
Step 2: Add Flippers And Heads
Dip the round end of your pencil (not the point) into the light green paint and help your child to add four little flippers and the head to your turtle shells. They may find it easier to guide the pencil while you hold it, depending on how good their motor skills are.Make as many turtles as they want, all swimming around the blue paper at different angles.
Step 3: Touch Up (Optional)
When the paint has dried, use the black fineliner to finesse the turtles a bit, adding some details such as eyes, or creating patterns on their shells, and defining their flippers a little more distinctly. You don’t have to do this; the craft will be charming anyway.If your child wants to add some dabs of pale paint to the turtle shells, this is also a fun option that can be done with a fine paintbrush.
Conclusion
Sea turtles make for some wonderful crafts, and you can utilize any different medium to create them, from paper plates to buttons to foam. Enjoy crafting some of these majestic creatures with your little one!
Comments
0 comments