
Kids need to stay busy and summers can be a challenge to keep young minds and hands occupied since there is so much free time. Those who are around age 12 are unique because they are in between childhood and teen so they are going through a lot of adjustments. Introducing them to fun crafts for 12-year-olds may be what they need to build their confidence and spur their creative spirit. Crafts will also keep them busy, teach something new and produce something that makes them proud of themselves. How to Select Fun Crafts for 12-Year-OldsParents can’t just pick any craft for their pre-teen child. It needs to be something they will succeed at without a lot of parental instruction and a craft that won’t take endless hours to complete. It should also be useful. That means a craft should be something that can be used around the house, decorate the child’s room, or be given as a gift. Boys and girls can often work the same crafts, but you may want to change the colors or style to suit each child. Being aware of your child’s interest is key in selecting the right craft for them. Here are a couple of other tips for parents wanting their child to have an interest in crafts.Be sure to allow mistakes. Crafting is supposed to be fun and constant corrections don’t make it fun. Show them how to cover up mistakes, or work around them, rather than demand they do it over to make it perfect.Be sure to offer praise. Kids thrive on praise and that may be what keeps them motivated to finish the project.
Top 10 Crafts for 12-Year-Olds
Hundreds of crafts exist for young people but some are better than others. Crafts exist in every category from art, to jewelry, to sewing, to home decor and hands-on projects. Any of them are worthwhile. Here is a list of ten fun crafts for 12-year-olds.
Decorative Yarn Lettering
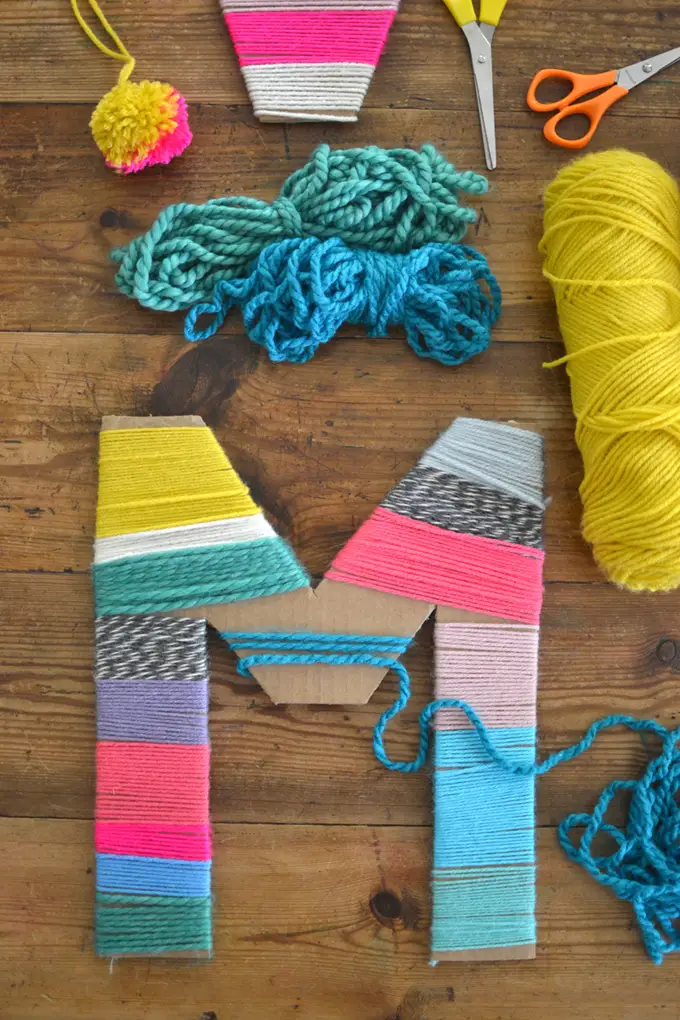 Source:https://www.artbarblog.com/13-crafts-for-teens-and-tweens/This is an easy craft that can be modified for any child. The idea is to wrap cardboard letters in yarn for display on their bedroom wall. It can be one letter for their name or a word or phrase that inspires them. It is a super easy craft that makes for a great start to creating unique things. You will need yarn of their favorite color or colors, cardboard, stencil letters, glue, and scissors. Trace the stencil onto cardboard and cut it out. Wrap the letter with the yard until no cardboard shows. Affix any loose yarn ends with glue to the cardboard.
Making God’s Eyes
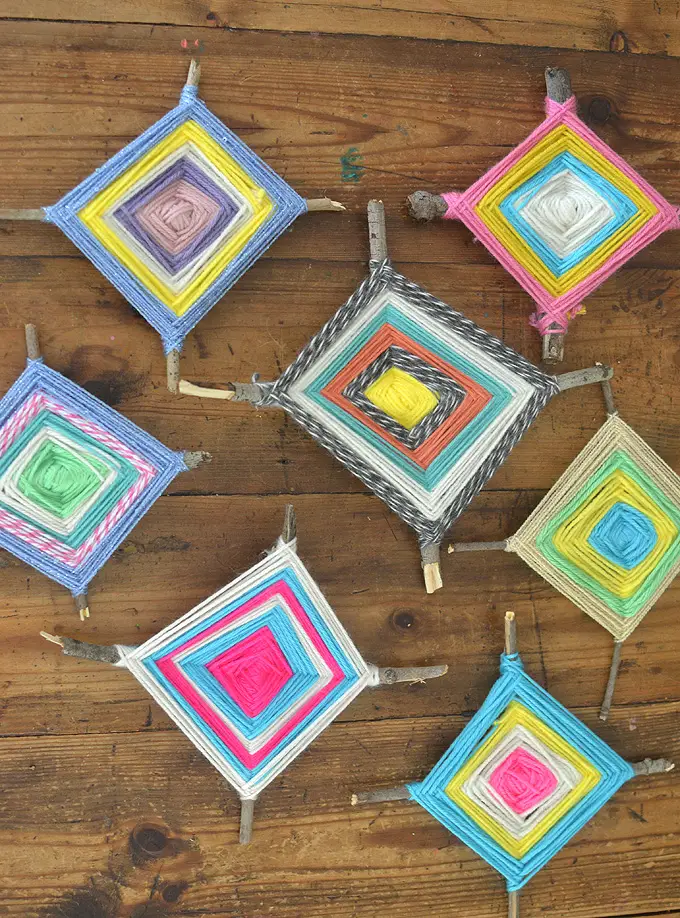 Source:https://www.artbarblog.com/13-crafts-for-teens-and-tweens/This craft was done by school students 50 years ago or more. The fun part about this craft is picking out the colors. You can customize them to suit different holidays like Thanksgiving, Christmas, or Easter or you can pick your favorite colors. You will need popsicle sticks, floral wire, glue, at least three or four different colors of yarn, scissors, and glue. Make the popsicle sticks into a cross and glue the center of them together. Further, secure them by wrapping some floral wire around the center of the cross to hold them together. Then, take the first color of yarn and begin wrapping it around the cross center, weaving it in and around the sticks until it forms a small square. Cut the yard and affix with glue. Repeat the process with the next color as it encompasses the square’s edges. Cut with scissors and affix the end with glue. Repeat this process with additional colors until you get closer to the end of the popsicle sticks. Leave about an inch of the sticks to show. Make sure all look yard ends are glued down. You can use God’s eye to hang as a bedroom decoration or as a Christmas tree ornament.
Stamped Shoes
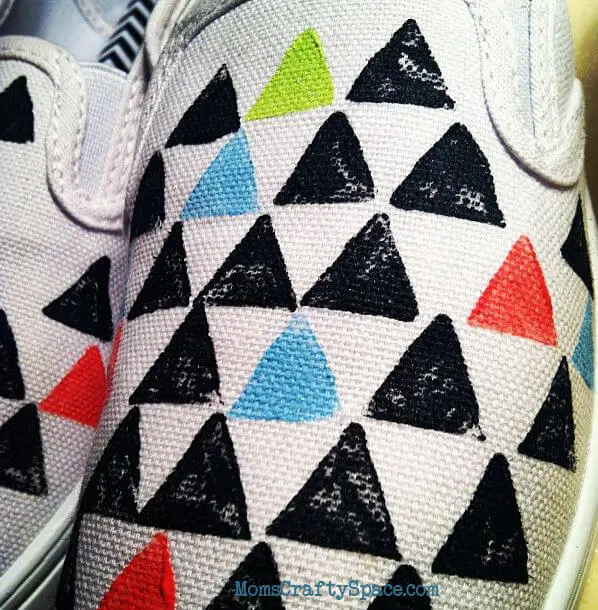 Source:https://www.happinessishomemade.net/geometric-patterned-stamped-shoes-tutorial/This project could be the right one for either boys or girls. It comes from some 1980s style inspiration. These skater-style shoes resemble Vans or Toms but are much more personalized. For this project, you will need Tulip Soft paints, Tulip Puffy dimensional paints, a carving block of any style, and white slip-on shoes. Here is a hint on the carving block: pick one that will look good in rows or layers. For instance, triangles work well. This is a little more complicated than most projects. It does serve a two-fold purpose in that it is a great creative project and will result in something kids can wear. It is also an awesome project for parents to do with their kids so all can end up with a family tribe of shoes!To do this project, first ack the shoe toes with newspaper to make them firm. Then, pour out the paint colors you want for this project. You can use one color or several. Dip the stamp in the paint and start placing patterns beginning on the toe in a staggered pattern. Keep the same pattern and number of stamps on each shoe to be consistent. Do only the top canvas. You can add one to the heel or one on each side, but don’t overdo it.If you want to add other colors, leave spaces for those. You can also use glitter paints for some extra sparkle. Finish up with the other colors. Let it dry.
Huge Paper Bag Stars
 Source:https://www.artbarblog.com/13-crafts-for-teens-and-tweens/This incredibly fun craft can be used to decorate for a birthday party, used as decorations in a kid’s room, or to decorate a classroom. The great thing about this craft is that it can be customized to fit both boys and girls with different color paints, accessories, and added features. For instance, where some kids may see these as stars or flowers and paint them with bright pastels, others may envision wheel rims or mechanical workings and choose darker colors or metal paints to draw out their design.This project only requires three things initially before you get to the decorating part. You will need paper lunch bags, a hot glue gun, and scissors. The bags can be any color or can have patterns as long as it’s a folded lunch bag.It takes seven bags to make one star but many people can buy these bags in bulk for under $10 for 100 bags or more. Put seven bags in a stack, all facing the same way. Make sure the bag’s openings are at one end. At the top, use the glue to make a letter T. Place a bag on top. Repeat the process until all bags are glued together. Now, about three inches from the top, make a diagonal cut up each side so the middle of the top forms a point.Use your hot glue gun to form another T on the outside of your bag stack. Fan out the bags and connect the two outside bags that are now glued together. You now have a star! The fun begins now as your kids can decorate them with paint, glitter, or however they like. These can be used to hang from the ceiling, along a wall, can be grouped to create a large backdrop, or even make more elaborate things like arches for parties.
Geometric Watercolor Painting
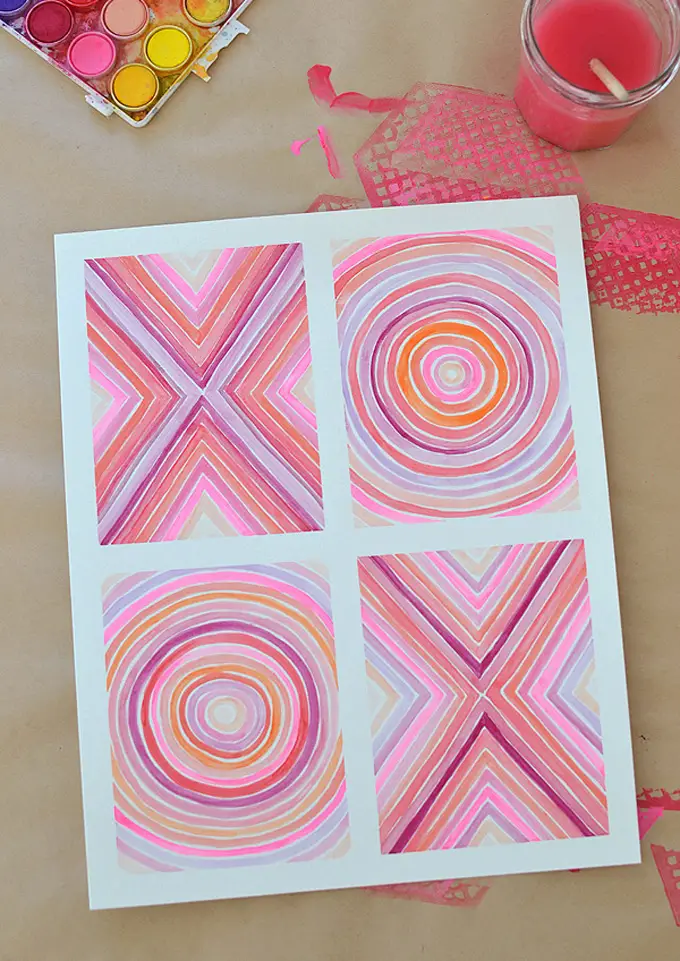 Source:https://www.artbarblog.com/13-crafts-for-teens-and-tweens/This project gets your child interested in art and painting. It also makes a good piece to frame and hang in their room. Here is an advantage of this project. Children who need some extra help in math or geometry can learn a lot by applying their knowledge to this project.This project requires a solid piece of poster board. It can be any size, but a smaller size is best. It should be a standard size that will fit in a frame. You will also need four-color paint choices that work well together, painter’s tape, a pencil, a compass, and a ruler. The hardest part about this project is picking which geometric designs to use. For the best results, pick two and use each twice in the project. Measure the poster board – both height and width to find the center. Mark the center, the middle of the board’s edges of both the height and width with a pencil. Take the painter’s tape, run it across to the pencil marks to form a cross. This creates four panels the child will paint in. Now, take up the outside edges so there will be 1 inch of white space to frame the picture.Use the compass to trace any half circles or circles and a ruler to make the other geometric designs. Now, go back over the pencil marks with the watercolor paints, repeating the patterns in different colors until the whole panel is filled. Let it dry. Remove the painter’s tape. You have a masterpiece.
Decorative Leaves
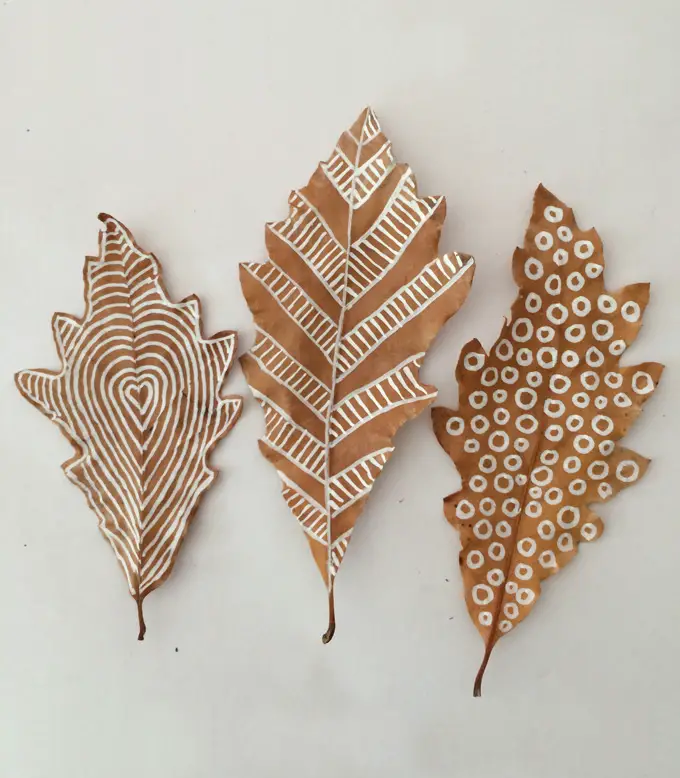 Source:https://www.artbarblog.com/13-crafts-for-teens-and-tweens/Who says crafts have to end in summer? Using a white chalk pen to embellish leaves is a great fall project. The leaves can be used to decorate tables or even blue to posterboard to hand on the wall as autumn decor.All you need for the project are two things: leaves and a white chalk pen. The secret to this is to pick leaves that aren’t too dried out because they will crumble. Collect four or five leaves and let children use the chalk pen to decorate as they wish.
Tissue Paper Art
 Source:https://whereimaginationgrows.com/tissue-paper-collages/This is an excellent way to introduce children to abstract art and the use of color. It is also something they can frame and hang on a wall when it’s done. All you will need for this project is a posterboard, different colors of tissue paper, glue, and scissors. A pro tip is you can use all that old tissue paper from holiday gifts you have stuffed in your closet. Have children cut the tissue paper into different shapes. They can use rulers, compasses, cups, or other things to make these shapes or just do it freehand. The child should then arrange the shapes on the poster board how they think it looks best. Then they glue them down. Let it dry.
Washer Necklaces
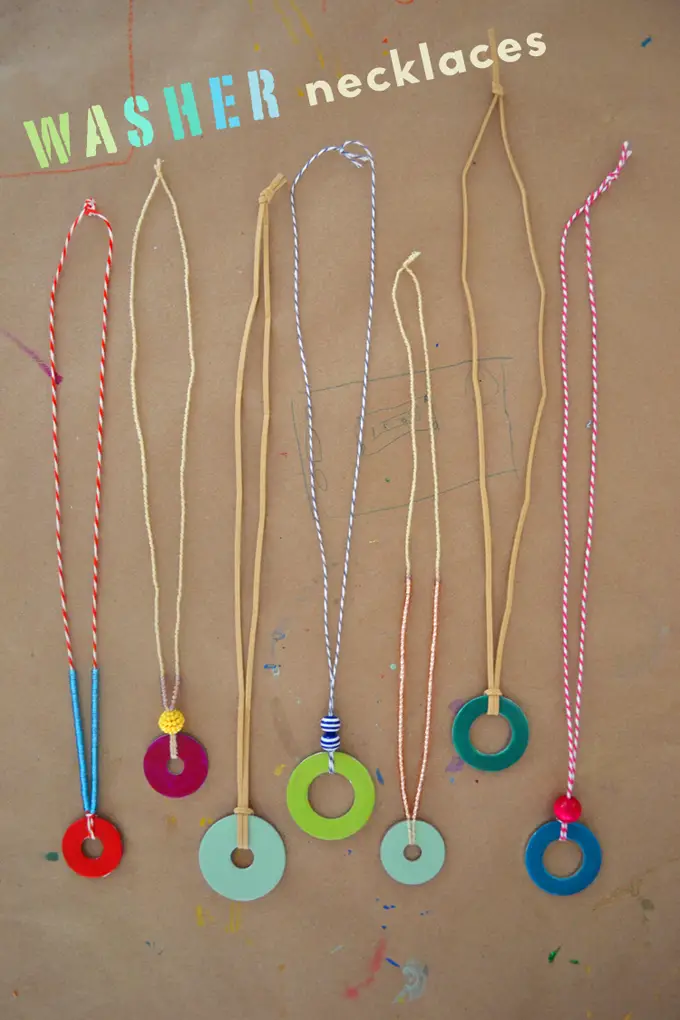 Source:https://www.artbarblog.com/13-crafts-for-teens-and-tweens/These are fantastic to use as a craft item because they work well for boys and girls. The result is modern necklaces kids can wear and feel cool. All you need are washers bought at the hardware store. Size and type don’t matter as you can use both big and smaller ones. You can use either craft paint or nail polish to add color. For boys, they may want metallic spray paint, also found at the hardware store. Finally, you will need a cord or string to use as the hanging part of the necklace. All kids have to do is paint the washer on both sides and let it dry. However, they can make it more elaborate by adding words, designs, or other items to the washer once the paint dries. Then you just secure it to the rope using a loop knot. Instant necklace!
Decorated Flower Pots
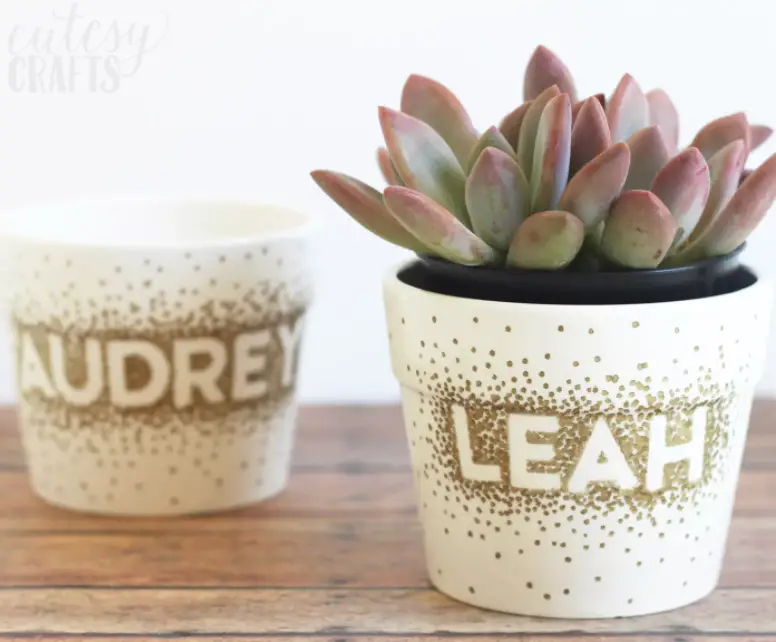 Source:https://www.thesprucecrafts.com/crafts-for-tweens-1254269This craft will not only inspire arts and crafts creativity but also will help your child gain an interest in gardening. After all, you can continue the project by then urging them to help you plant using the pots!This project requires small to medium flower pots, art paints, glitter spray paints, sticker letters, paintbrushes, stencils, sponges, and painter’s tape. There are several directions you can take this art project and you may want to let your child decide their art method.Method 1: Adding lettersHave your child put their name or an inspirational word on the pots using the sticker letters All they need to do is place the letters on the pot, then paint over them and around the surrounding space. They may want to use the spray glitter paint for a glamorous look.They can use a ruler to place letters evenly in a line. Once the paint is dry, peel off the letters and the white space shows the word. They can finish decorating the pot using dots, lines, and other patterns as they wish. Method 2: Patterned paintHere, your child uses painter’s tape to create designs on the pot. They place it in rows, painting spaces in between in a color variety. A more complicated pattern is a latticework design where the empty spaces create diamond shapes that can be painted. Once the tape is removed, the lasting effect is an interesting, clean paint effect. Method 3: Sponge paintingSponge painting is one of the easiest and most fun ways to decorate a pot. Here you will need at least two or three complementary colors. Dip the sponge into the base color and dab the pot all over, but don’t worry about filling up every space. Take a sponge and a secondary color to fill up the vacant spaces. Use a third sponge and color to add dimension. Your child may decide to combine methods to create an interesting pot that you will love forever. Remember, there are no hard and fast rules so let their imaginations soar!
Personalized Beach Towels
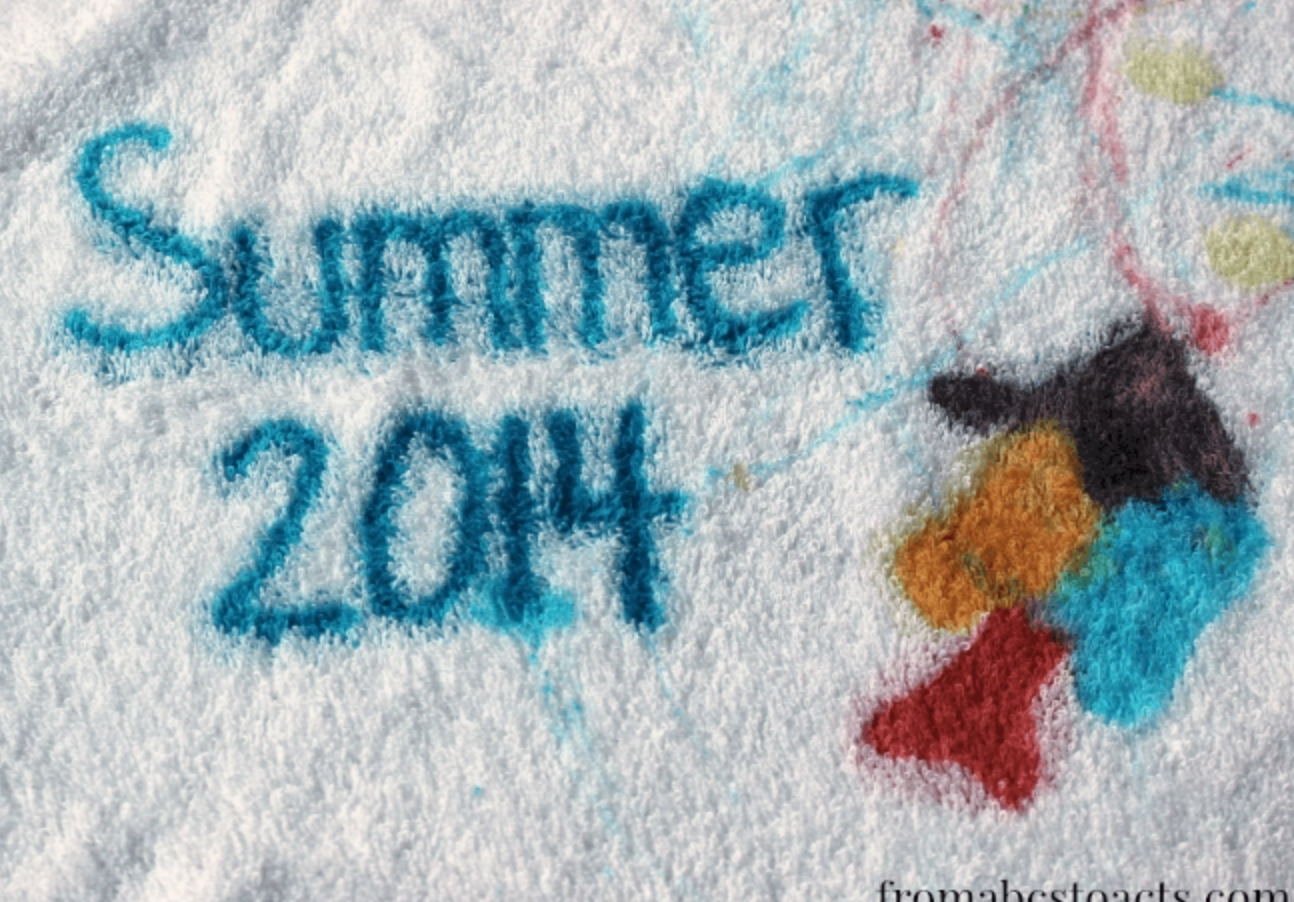 Source:https://fromabcstoacts.com/diy-kids-summer-beach-towel-think-outside-the-toy-box/A beach towel featuring your child’s favorite colors may be the thing to keep them motivated to join family outings on the shoreline this summer! This can easily be done using some cheap white beach towels, water, disposable cups. paintbrushes and Kool-Aid. Yes, Kool-Aid drink mix. Just make sure the drink mixes are different colors. Put some of the drink mixes in each of the disposable cups with each cup hosting a different color. Stir in a tablespoon of water into each cup. Make it just enough to dissolve the powder without thinning out the color.Layout the town on a table or floor to paint. Be sure there is plastic or newspaper underneath in case the paint bleeds through. A plastic tablecloth works well. The disposable kind is super cheap and will spread out nicely. Use paintbrushes and go crazy, but you don’t have to stop there. You can use sponges, shaped sponges you get at the craft shop, and stencils. Here is a pro-tip. It is best to use gloves if you are sponge painting as hands can get easily stained. For sponge painting, experts say using a paintbrush to apply the paint to the sponge before it is set on the towel seems to work best.Let the towel dry for 24 hours so the colors are set. Otherwise, it could leave stains on skin and other fabrics.
Conclusion
Doing crafts with your kids is fun for both you and them. It also shows them you aren’t just a parent as you can be creative and enjoy these projects too. It also provides some time to talk to them and learn more about them, their likes, dislikes, and their expectations of themselves. Crafts are a way to draw a family together too if everyone participates. These fun crafts for 12-year-olds could start a family tradition that will make their teen years much more enjoyable and peaceful.

Comments
0 comments