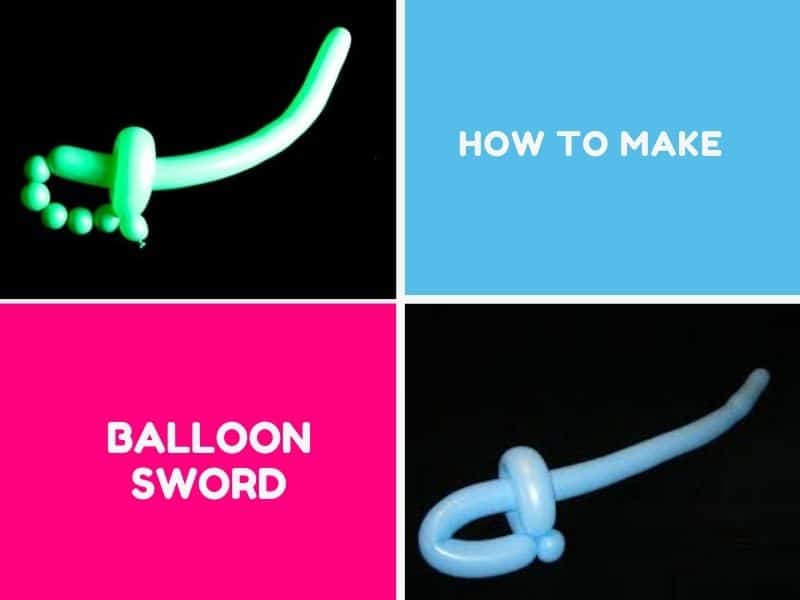
Who doesn’t love balloon swords? They’re perfect fun for kids’ parties, inexpensive, bright colors, and easy to make. What could be better? Get practicing, and soon you and your friends or your kids can be play-fighting with totally harmless and very cool-looking weapons.
You Will Need:
First, let’s gather up the materials necessary for a great balloon sword.
- One 260-sized, high-quality balloon
- A balloon pump (you can blow the balloons up yourself, but it is not easy to do! A pump makes this much quicker, especially if you’re going to be making an army of swords for a party)
Step 1: Attach The Balloon To The Pump
Put the mouth of the balloon over the nozzle of the pump and pull it firmly into place, making sure it’s on all the way around. You don’t want it to come off when you’re halfway through blowing it up.
It can help to give the balloon a little stretch in your hands first; this often makes it easier to blow up.
Step 2: Pump Up The Balloon
Begin pumping air into the balloon, but leave the last inch or so at the far end of the balloon uninflated. This is important because it will give you the flexibility to start twisting the balloon into shape later. If you fill the balloon too full, it’s likely to pop when you start twisting and shaping it.
Once the balloon is full besides the last inch, pinch the end, take it off the pump, and tie a knot to keep the air in. This is a bit fiddly; if it slips, simply add some more air if any has escaped and have another go.
Once inflated, you should be able to gently press on the balloon and not have your fingers touch each other through the balloon. If they can, you need more air in it.
Step 3: Begin Twisting The Handle
About five inches from the knot, make a simple twist in the balloon. To do this, gently pinch it in the place you want to make the twist, and then use your other hand to turn the balloon in the other direction. Hold the balloon gently as you twist to avoid bursting it.
You will need to keep hold of both sides so that the twist does not undo itself.
Step 4: Continue Twisting The Handle
About three inches above your first twist, make a fold in the balloon. You are then going to make another twist. Pinch the unfolded part at the same level as your previous twist, and then twist the balloon gently round to create another basic twist.
Your two twists should be easy to line up, with a “˜v’ shape in the balloon above them where you created your fold. On one side, you’ll have the initial five-inch length with the twist which you made in the previous step, while on the other side, you’ll have a twist with most of the balloon below it, which is going to form the blade.
Wrap your new twist over the first twist you made, and twist them firmly around each other, turning the “˜v’ around in several complete circles. This makes a loop and forms part of the handle of the balloon. Your first twist will be the grip, while the fold-twist you have just done forms part of the hand-guard.
See Related Topic: How to Make a Paper Mache Mask
Step 5: Redistribute Air
Take an opportunity to squeeze some of the air down into the space you left uninflated at the start. This will make the balloon sword look better, and will also ensure the balloon doesn’t end up too tight, which will increase the risk of it bursting as you carry on twisting it.
Step 6: Fold The Second Part Of The Hand-Guard
For the next part of the hand-guard, you’re going to repeat essentially the same process. Again, three inches up, create a fold, pinch the balloon, and then twist. Now, twist this new pinch in with your main handle.
This should hold the twist in place, and you have now made the sword’s handle, complete with a cool-looking handguard.
Step 7: Adjust The Hand-Guard
Now that your handguard is complete, gently tug and adjust it so that it is at right angles with the sword’s “blade.” This will make it look much more convincing when it’s wielded as a weapon. If any of the uninflated tips is still looking a bit flat, just gently squash the blade around until the air redistributes and it’s all inflated evenly.
Conclusion
It couldn’t really be easier to make balloon swords, and you can churn out a quick batch for a party in just a few minutes once you’ve had some practice! Remember to use a firm pinch wherever you want to make a twist, and to leave some air in each balloon so they won’t pop too easily.
Comments
0 comments