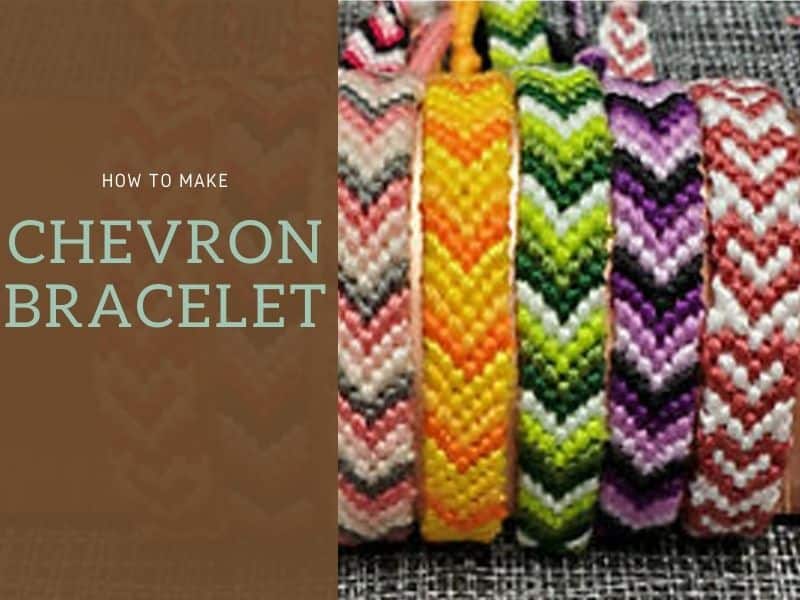
Chevron bracelets are bright, beautiful, and the perfect accessory for any outfit on any day of the week. You can’t get a much more casual, colorful look when it comes to jewelry, and they’re also wonderfully inexpensive to make. They make great gifts for that special someone too ““ a token of your friendship they can wear forever!
You Will Need:
Fortunately, chevron bracelets don’t require a lot of materials, and if you’re a crafty sort of person, you might already have some of them at home. If not, they’re very readily available.
- A tape measure
- Sharp scissors
- Strong yarn or embroidery floss in two complementary colors
- A safety pin
Step 1: Cutting Your String
Measure out two pieces of your first color, approximately 6-ft long. Do the same for your other colors. They should all be approximately the same length. Line them up so the ends match. It might seem like a lot of thread, but you might be surprised by how quickly it’s used up while making the bracelet.
Step 2: Tie A Loop
Fold your string in half and tie an overhand loop of around ½ inch near the middle of the fold. An overhand knot is the best kind for this. Don’t worry if the loop doesn’t end up exactly in the center of the fold, but get it close if you can. You should have approximately the same lengths of thread on either side of your loop.
Step 3: Fasten The Loop
You need to secure the loop before you can carry on working on the bracelet. Thread it over your safety pin and pin it to a fabric surface which won’t pull around. You might use a sofa cover, or even the leg of the pants you’re wearing. Don’t pin through the fabric you’re worried about damaging, though!
If you don’t have suitable fabric available, you can tape the safety pin to a hard surface, such as a folder or a clipboard.
Step 4: Arrange Your Threads
You have more than one option here. You can arrange the threads so that you have four of the same color on the inside and two each of the other colors on the outside. This will give you a wide chevron effect when you’ve finished.
![]()
For example, if you were making a blue and green bracelet, you would have: Blue, blue, green, green, green, green, blue, blue.
Alternatively, you can have the threads alternating. If you choose to do this, make sure you still have matching colors on the outside. For this, you would have: Blue, green, blue, green, green, blue, green, blue.
Step 5: Start Knotting The Bracelet
Take the first thread on the left-hand side in your hand. Create an angle in it that allows you to make a “4” shape over the second thread. Once you have done that, weave the first thread under the second thread and pull it up through the “4” and tug it to create the first half of your knot.
Once more, create a “4” shape, loop the first thread under the second thread, and then pull it up through the “4” and tug it tight to complete the knot. This is known as a “forward knot” and it forms the foundation for what we’re going to be doing for the whole bracelet.
Step 6: Continue Knotting The Next Threads
Take the first thread again, and repeat the previous step but with the third thread, rather than the second one. You want to make two “4”s and tie two knots again, completing a forward knot.
Repeat this again with the fourth thread.
Step 7: Begin Knotting On The Other Side
Now you’re going to do the same thing from the other side. Take the outermost thread on the right, loop it so that it creates a backward “4” shape over the next thread, and then loop it under the second thread and pull it through the “4.” Pull it tight and you have created the first part of a “backward knot.”
Repeat this and pull the knot tight. You have now made a full backward knot.
Step 8: Continue Knotting On The Other Side
Repeat the above step with the next two threads, knotting the threads firmly and evenly. Take your time; it’s important to make the bracelet look neat and the knots even. You don’t want to have to undo the whole thing later!
Step 9: Continue Knotting Both Forward And Backward Knots
The two threads in the middle are now the two threads that started on the outside. Using those, tie either a forward or a backward knot. It doesn’t matter which you choose, but it’s best to keep doing the same throughout the bracelet to produce a smooth look.
To do a forward knot, take the left-hand thread, create a “4” over the right-hand thread, and knot it, and then repeat the step. To do a backward knot, do the same thing but starting with the right-hand thread, creating a backward “4” over the left-hand one.
Now, you should have a neat “v” of knots at the top of the bracelet, right by your loop and safety pin.
Step 9: Start Repeating The Above Steps
Repeat the above steps to begin adding rows of knots to your bracelet. Try to tie your knots firmly and tightly, keeping them as even as much as possible to give a smooth overall effect to the bracelet. If you aren’t happy with a knot, simply undo it and try again; it’s better to fuss over a knot than to have to undo it later.
Work slowly and methodically, and remember to do a double-knot for each thread. It helps to keep the threads spread out so there isn’t any confusion about which one is which as you work. This will stop you from accidentally duplicating threads or mixing up the order.
Pause every so often to check that your colors are working correctly. Checking regularly will mean you don’t have to undo a lot if you go wrong.
You should end up with double rows of each color as you work, creating lovely stripes chevrons.
Step 10: Braid The End
When you are happy with the length of your bracelet, separate the threads into two. Push one half to the side and work on the other half initially.
Take two threads from the half you’re working on, and pinch them together. Take the other two threads and use them as individual threads. Braid them for 3-4 inches, and then tie a tight knot. Check you’re happy with it before you trim the ends.
Take half of the threads you set aside and repeat the same process, trimming the ends off when you’re done.
Read Related Topic: How to Make a Paper Mache Mask
Step 11: Tie It Off
Take the safety pin out of the loop; your bracelet is now finished!
Fit the bracelet around your wrist or a friend’s wrist, and then thread one of your braided ends through the loop. Tie it to the other braid, and admire your work.
Conclusion
You now have a beautiful chevron bracelet. You can repeat this in any colors or styles, or experiment with different braiding patterns once you’re feeling confident. These bracelets are great fun to make and can be used as thoughtful gifts for the people you love.
You May Also Like: How To Make A Balloon Sword
Comments
0 comments