Your guide to finding easy and quick ghost craft ideas.Are you looking for some exciting ghost craft ideas for your next Halloween party or simply for a spooky-themed party? Well, you have definitely arrived at the right place! When it comes to ghosts, there are plenty of fun and creative craft ideas available to make them. Some of them may require additional materials and time whereas some are easy and quick to make. In this article, we’ll cover both types of ghost crafts to help you find the one that will bring about the Halloween spirit! So, let’s begin.
Sponge Ghosts
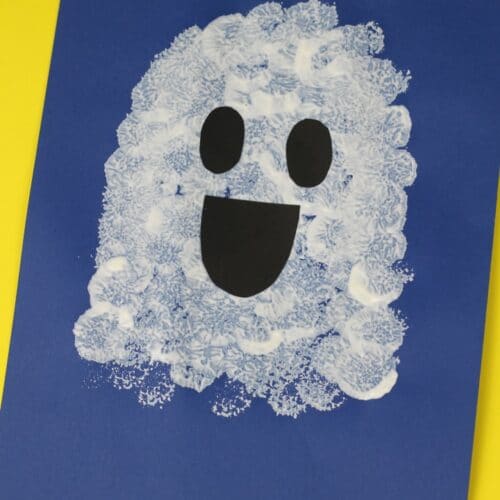 Source: https://www.craftsonsea.co.uk/easy-ghost-craft-for-kids/If you want a craft that even a very little child can help you with, sponge ghosts are a great one to do. They do use acrylic paint, so make sure you both wear some old painting clothes and you cover any surfaces with newspaper before you get started.
Materials
To make sponge ghosts, you’re going to need:
- White acrylic paint
- 1 round sponge
- Black card
- Black paper
- White chalk
Step 1: Draw A Ghost Outline
To help guide your little one, draw a ghostly outline on the black card using your white chalk. This will give them a guide on where to dab their sponge and will make the overall craft neater. You don’t need to make it very neat; just give them a curved outline with a wavy bottom edge to follow.
Step 2: Make Some Sponge Prints
Pour out some white acrylic paint and show your child how to dip the sponge in and then print it onto the card to leave a print. It may take a few practice tries for them to understand how much paint to load onto the sponge to get a good print, but it doesn’t matter; the craft doesn’t need to be perfect.Get a sponge yourself, and help them to cover the whole ghost outline in little white sponge prints. When it is finished, set it aside to dry for a while. Use this time to clean up the paint and any sticky fingers.
Step 3: Add Eyes And A Mouth
Next, cut two ovals from the black paper, and a happy mouth. When the paint is dry, get your child to help you glue these onto the ghost’s face, and then you can cut the ghost out if your child wants to ““ or leave it on the card as a finished piece.Add a name and date, and the ghost craft is done!
Simple Fabric Ghosts
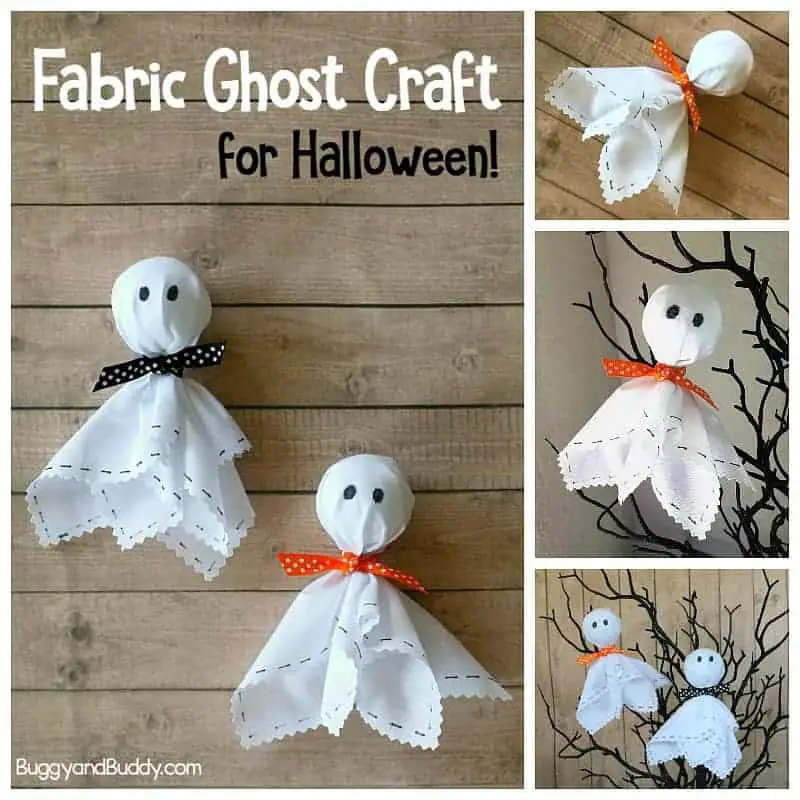
 Source: https://buggyandbuddy.com/ghost-craft/Another lovely simple craft, this is great if you’re teaching your child how to sew ““ and it’s still a quick and easy project. It’ll look fantastic come Halloween, and can be used year on year without being annoying to store.
Materials
To make a fabric ghost, you’re going to the source:
- White fabric (handkerchiefs are a good option if you want to make this a no-sew craft)
- White cotton reel
- 1 needle
- Elastic bands (preferably white)
- Styrofoam balls
- Scissors
- Pinking shears
- Black marker
- Ribbon (optional)
- Clear fishing wire
- Glue
Step 1: Cut The Fabric
First, you’re going to cut a square of white fabric. If you don’t want to sew for this craft, you can use pinking shears to reduce the chance of the fabric fraying.Your fabric should be large enough to wrap around the ball and then leave a good skirt for the ghost’s body beneath the ball. Check you are happy with the size before you proceed with the craft.
Step 2: Hem The Fabric
Help your child thread the needle and then carefully hem the fabric. If this is too slow, you can either use a sewing machine or pinking shears or choose a fabric that won’t fray much. Another option is to use handkerchiefs, which will already be edged.
Step 3: Make The Ghost’s Head
Open your fabric square out and place the Styrofoam ball in the center. Next, gather the four corners in and pinch the fabric beneath the ball. This is the ghost’s head. Wind an elastic band around it to hold the fabric in place.Next, you can tie some clear fishing wire around and remove the elastic band if it’s spoiling the look of the ghost, or you can cover the band up with some festive ribbon. The ribbon can look very cute on the ghost, and this is a fun way to add a bit of color to the craft.If you do choose to use the ribbon, you could also consider adding a little bow at the top of the ghost’s head to give it a little more individuality.
Step 4: Draw The Face
Before you draw anything on your ghost, test the black marker on a scrap of your fabric to see if it bleeds. You want to use a marker with a controllable flow, or you risk ruining the ghost.Once you are satisfied, draw a face on the ghost. Get your child to choose different expressions for different ghosts, and try to make them all look, individual. You can draw just eyes, or include a mouth as well.
Step 5: Hang Up The Ghost
Add a dot of glue to the top of the ghost’s head and glue the clear fishing line in there. Alternatively, you can tie a loop of the fishing line around the ghost’s neck. You can then hang the ghost up anywhere to sway in the breeze and spook your guests!
Paper Cup Ghost
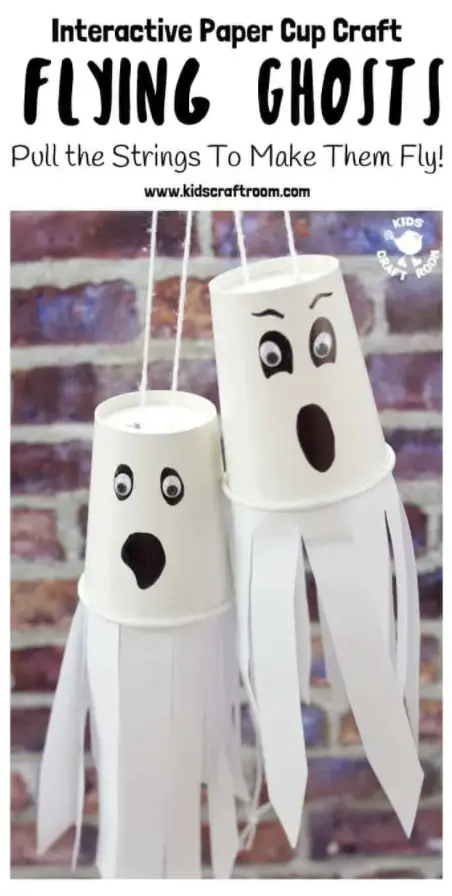 Source: https://kidscraftroom.com/paper-cup-flying-ghost-craft/
Do you love Halloween and letting the kids help decorate? If so, these paper cup ghosts are the perfect activity to do with the little ones, because they are simple, fun, and don’t need a huge amount of complicated materials.
You just need to buy some plain white paper cups, some white tissue, and a marker pen, and you’re all set to create some spooky ghosts with your child. Most of these items are very readily available at local stores, and should keep your child quiet for hours while they create the ghosts.
Once completed, the ghostly cups can be hung overhead to distress all your guests with their waving tendrils and spooky faces. You can make a whole host of ghost cups with your child, so that there is a fleet waiting to attack unsuspecting visitors.
You can even hang these up in a tree to startle people who walk by. Your child might like to paint scary faces on some, and friendly or happy faces on others to create some variety and make each ghost unique.
Cleanup after this activity should be relatively simple, and it mostly utilizes paper, so it’s an inexpensive craft to do. It is also suitable for a range of ages, which is great if you have more than one child, or you want to do this in a classroom setting.
Materials
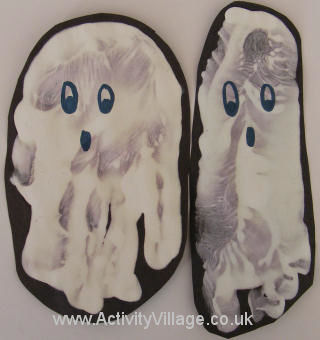 Source: https://www.activityvillage.co.uk/handprint-and-footprint-ghosts (I adapted this idea)You will need:
- Black paper or card
- White paint
- Glow in the dark paint
- Googly eyes
- Scissors
- Glue
- Black pen
- Clear fishing line (optional)
Step 1: Mix The Paint
Mix some glow-in-the-dark paint with your white paint, and then help your child to get a good amount on their hand. You may need to use a paintbrush to spread it across their palm, especially if you are helping a little child.Help them to make several prints on the piece of paper, replenishing the paint on their hand each time. You may want to add some of your own handprints to get ghosts of different sizes, too.For a fun twist on this idea, what about letting your child make some ghostly glowing footprints too? This will produce a very different-looking ghost, and most kids will love the idea of using their feet as well as their hands.
Step 2: Stick On The Eyes
Get your child to glue the googly eyes onto the ghost, and then help them to draw a black mouth underneath. Again, varying the expression between ghosts is good fun. If you don’t have googly eyes, you can just use the black pen to draw the eyes on instead.
Step 3: Cut Out And Hang Up (Optional)
Cut loosely around the ghosts (leaving some of the black cards so they are on a background still) and then glue a little fishing line to the tops and hang them up. Put them somewhere that they will catch plenty of sunlight so they can charge up ready for dark! The result should be a cluster of ghostly, glowing shapes.
Ghost Balloons
Source: By Studio DIY @ Balloon Time, “DIY Silly Ghost Balloons” (https://www.balloontime.com/party-ideas/holidays/halloween/silly-halloween-ghost-balloons/)Let’s start with the easiest ghost craft that you could go for. Ghost balloons are the best idea if you want to bring about the spooky feel at the party without putting in a lot of effort.
Materials Required:
- White balloons (Go For Helium Balloons)
- Ribbons
- White Tissue Papers
- Scissors
- Black Marker Pen
- Two-sided tape
Steps to Follow:
Step 1: Prepare the Balloons Firstly, you have to get helium balloons and tie a ribbon on their ends. Then, take a tissue paper and fold it lengthwise in half. Then, place it widthwise and again fold it but in thirds this time. Once you have folded the paper, take a scissor, and cut the edges in a scalloped manner. Then, unfold the entire tissue paper and once again, cut it into two halves along the length of it. You get one-half for each ghost. Similarly, do many as per your requirements. Step 2: Stick the Tissue Paper to the Balloon In this step, take 2-3 pieces of two-sided tape and stick it on the non-scalloped side of the tissue we prepared in step 1. Then, stick it to the balloon’s center. Make sure you place it gently and properly!Step 3: Draw the Spooky FacesNow, this is the final and the best step! Take out your marker and start drawing scary faces on the tissue!In this step, you can also make use of other cut paper items to make tongues, sunglasses, or whatever accessories you want. And well, that’s all you need to do for ghost balloons. Once you’re done, you can place them wherever you want – entrance of your house, driveway, etc. to scare the people!
Light-Up Ghosts
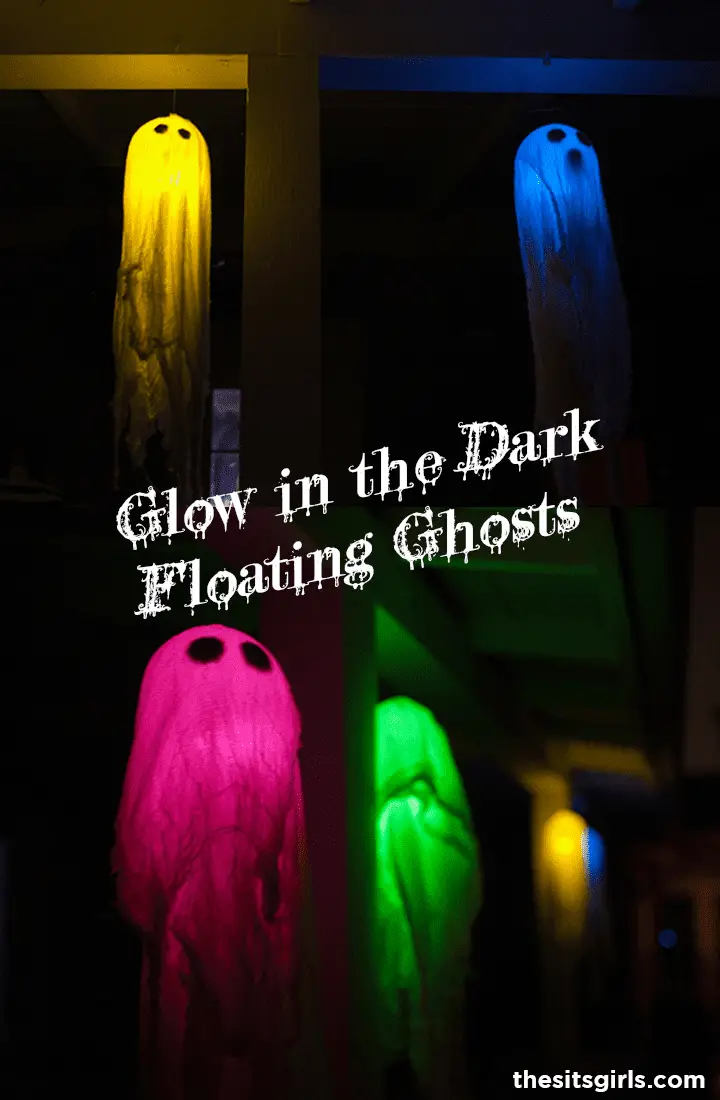 Source: By Leah Letherby @ The Sits Girls, “DIY Glow in the Dark Floating Ghosts” (https://www.thesitsgirls.com/diy/floating-ghosts/)Do you want to do an extremely creative and unique ghost craft? Well, light-up ghosts are here to light you up with their creativity.
Materials Required:
- 1 Transparent Christmas Ornament (large)
- 1 Glow Stick (per light-up ghost)
- 5 to 6 Feet of Cheesecloth
- Black Paper
- Scissors
- Two-sided tape
Steps to Follow:
Step 1: Prepare the Christmas Ornament First of all, take the Christmas ornament and remove the top of it. Then, inside it, place one glow stick properly. For more lighting effects, place two to three glow sticks inside one.Then, put the ornament top back on it again. Step 2: Prepare the Eyes of GhostIn this step, make use of black-colored paper, cut it into circles, using a scissor. These will help as eyes. Then, take one piece of two-sided tape on one circle and place it on the ornament. Similarly, do the same to get the other eye. Step 3: Make Use of the Cheesecloth In this step, take the cheesecloth and cut it halfway into different lengths to give them a “˜spooky’ look. Then, simply put the cloth over the ornament with the glow stick. And voila! You now have your very own light-up ghost. You can then simply hang it wherever you want.
Easy Leaf Ghosts
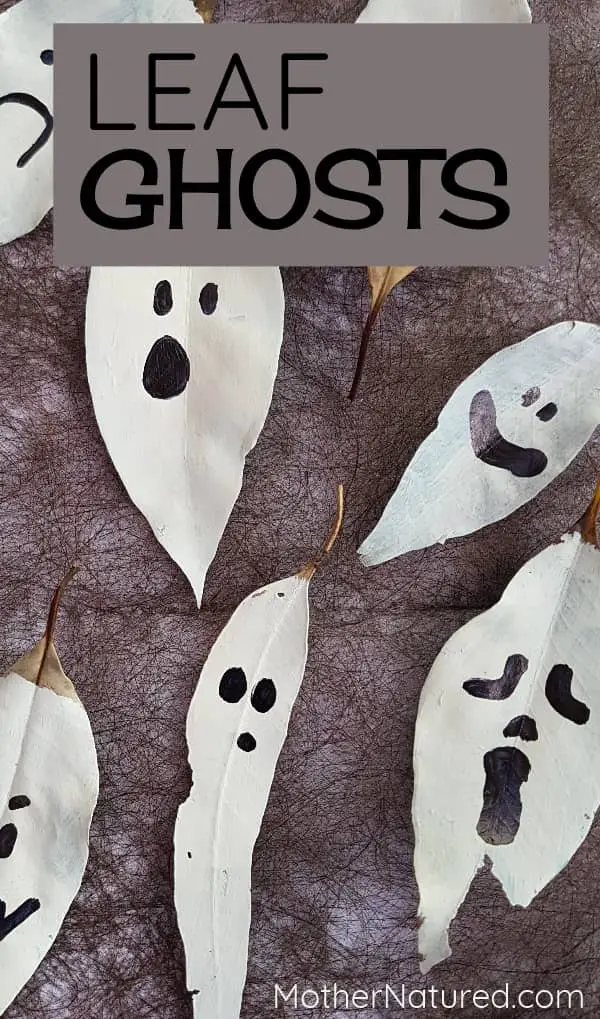 Source: By Penny Whitehouse @ Mother Natured, “Spooky Leaf Ghosts for Halloween” (https://mothernatured.com/nature-crafts/leaf-ghosts/) Leaf ghosts are the perfect craft idea for all those wanting to go eco-friendly this year and want to do some quick backyard cleaning activity too!
Materials Required:
- Some leaves
- White acrylic paint and paintbrushes
- Black marker
- Strings
Steps to Follow:
Step 1: Collect Leaves From Backyard This is a fun and productive activity for all the parents with kids out there! All you have to do is collect different types of leaves from your backyard or a park. After collecting them, wash them gently and let them dry for some time.Step 2: Paint the LeavesTake a paintbrush and your white acrylic color. Then, start painting the leaves with acrylic paint. Keep in mind that you may require to apply two coatings to get the perfect white color. Step 3: Draw Faces On Them! Lastly, let your creative juices flow, and draw different faces on the different types of leaves. Step 4: Tie Them to the String The last step is to tie all the “˜ghost leaves’ that you have created to the string. For this, simply take the leaf petiole and tie it to the string. One by one tie all of the leaves to the string at an equal distance. Once it is done, you can simply hang the string wherever you want!
Adorable Ghost Bags
If you’re holding a party, especially a ghost-themed one, then ghost bags are an excellent idea if you’re planning to give return gifts or other goodies. They are also great for sending Halloween goodies to your loved ones.
Materials Required:
- White paper
- Scissors
- Glue
- Black marker
- Washi tape
Steps to Follow:
Step 1: Prepare the Bag Firstly you need to prepare the bag. For this, take two papers and cut them in a U-shape. Make sure that they are cut equally. Then, apply glue on the U-shape of one piece of paper. Make sure you don’t apply it on the bottom as one end has to be open. Then, take another paper and stick it to the first one. Apply gentle pressure to make sure that both the paper are glued together. Once you have joined the two papers, simply cut the bottom into a scalloped manner. Step 2: Design It The Way You WantThen, take your marker and start drawing ghost faces on different bags! If it looks plain, you can make use of washi tapes and make them patterned too. Step 3: Fill Them With Whatever You Want!Once you’re done, just fill the bags with whatever you want, candies, cookies, etc!
Paper Plate Ghosts
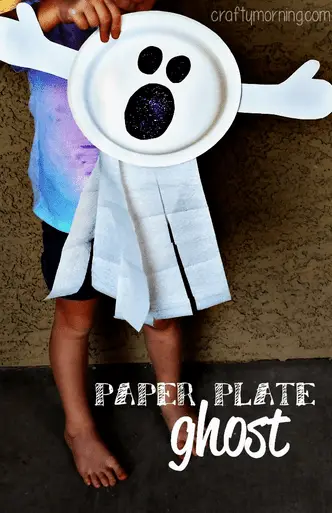 Source: By Michelle @ Crafty Morning, “Paper Plate Ghost Craft for Kids *Fun Halloween Art Project!)” (https://www.craftymorning.com/diy-ghost-paper-plate-kids-craft-fun/)If you have got some spare paper plates at home, then you should definitely try out this easy ghost craft!
Materials Required:
- Paper plates
- White paper
- Toilet paper
- Black paper
- Glue
- Tape
- Scissors
Steps to Follow:
Step 1: Start Working on the Paper Plates First of all, take a paper plate. Then, get the black paper and cut it into two circles (for eyes) and one big circle (for mouth). Then, glue them properly on the backside of the paper plate.Step 2: Prepare the Ghost HandsIn this step, take the white paper, and draw one hand on it. Similarly, take another paper and draw another hand. Then, simply cut it into a proper shape and there you have your ghost’s hands!Step 3: Cut the Toilet Paper Strips Now, you just need to take three strips of toilet paper of equal length. Then glue the strips to the front side of the plate (opposite to the one having the face). Take scissors and cut the strips into uneven lengths till you reach the middle of those strips. This will give the ghosts a scarier look! And well, this is it! Once you’re done, you can stick it anywhere with two-sided tape!
Ghost Straws
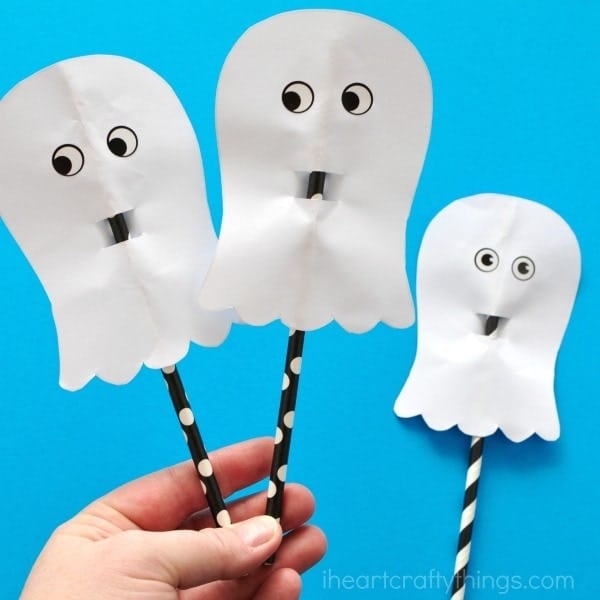 Source: Inspired by Caroline @ iHeartCraftyThings, “Simple and Easy Paper Ghost Craft” (https://iheartcraftythings.com/easy-paper-ghost-craft.html) Ghost straws are also another amazing ghost craft that you can use for any scary or Halloween party. Let’s see how you can make these easy straws.
Materials Used:
- Black straws
- Paper
- Scissor
- Black marker or sketch pen
Steps to Follow:
Step 1: Make Paper Ghost In the first step, take a paper and draw a ghost-like figure on it. Then, cut it properly using scissors and ensure that you get the perfect shape! Then, on top of it, start drawing eyes but wait, don’t draw the face yet! Step 2: Make Two Slits in the Paper Ghost Vertically Now, fold the paper ghost that you have created into two equal halves vertically. Take scissors and cut two slits in the middle of the folded side. Unfold the paper ghost. You’ll find small opening slits in the middle. Step 3: Insert the Straw Into The SlitsNow, slowly, insert the straw into the slits from the backside (the side without the drawn eyes). Once you’re done, you’ll have the ghost straws!
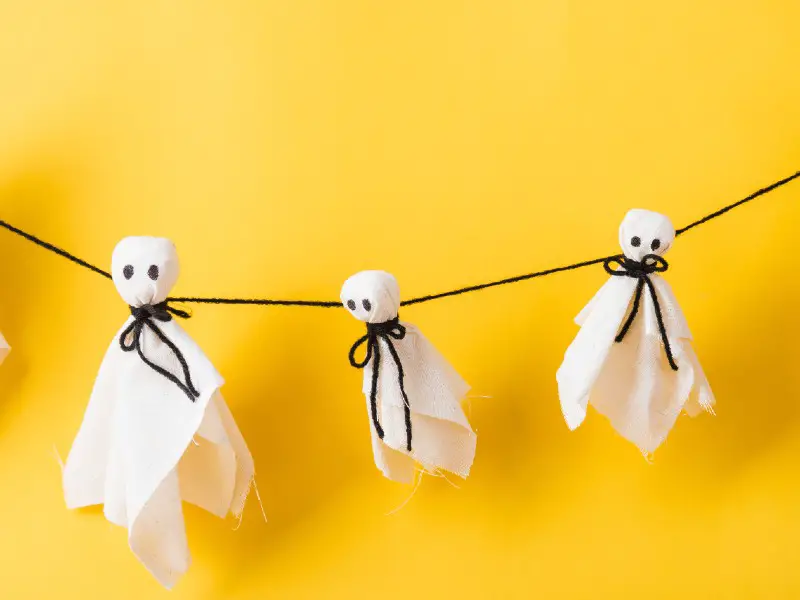
Fabric Ghosts
 Source: Inspired by Chelsey @ Buggy & Buddy, “Friendly Ghost Craft for Halloween” (https://buggyandbuddy.com/ghost-craft/)If you want small and adorable ghosts hanging on the tree or any other place, then you can opt for simple fabric ghosts.
Materials Needed:
- White fabric (like Muslin Cloth)
- Styrofoam balls
- Black marker (should work on fabric)
- Fancy ribbons
- String
Steps to Follow:
Step 1: Cut Fabric Into Equal Length Firstly, you need to cut the fabric into an equal length to get a square figure. You can go for 8 inches x 8 inches. For larger ones, consider opting for a bigger square. Then, when you have the square fabric, cut the ends into a zig-zag manner. This may take time so if you don’t have enough time, feel free to skip this step. Step 2: Make Use of Styrofoam Ball Then, right in the center of the square fabric, place the styrofoam ball. Once you have placed it, gather the entire fabric around the ball such that you get the circular head of the ghost. Now, make use of a ribbon to tie the fabric right below the styrofoam ball together such that it is all bunched together. Step 3: Draw the Face Once you get the ghost-like figure, draw any type of face that you like on the head, using the black marker! After this, simply tie the string on the circular head of the fabric ghost and hang it wherever you want!
Conclusion
Ghost crafts can be very inventive and will help your child to think about the different craft mediums and why they are effective ““ for example, using tissue paper to create trailing tendrils. Many ghost crafts can be hung up and will double as a decoration at Halloween, so these are great to do with kids.
Comments
0 comments