Making custom water bottles with your Cricut machine is a rite of passage for any Cricut crafter. Not only are they so easy to make, the opportunities are endless to put your creative touch on something you use every day. You’ll want to gift these to everyone you know!
Cricut Water Bottles
All you need to make these Cricut water bottles are your Cricut cutting machine and some vinyl, plus a couple of tools you probably already have on hand.
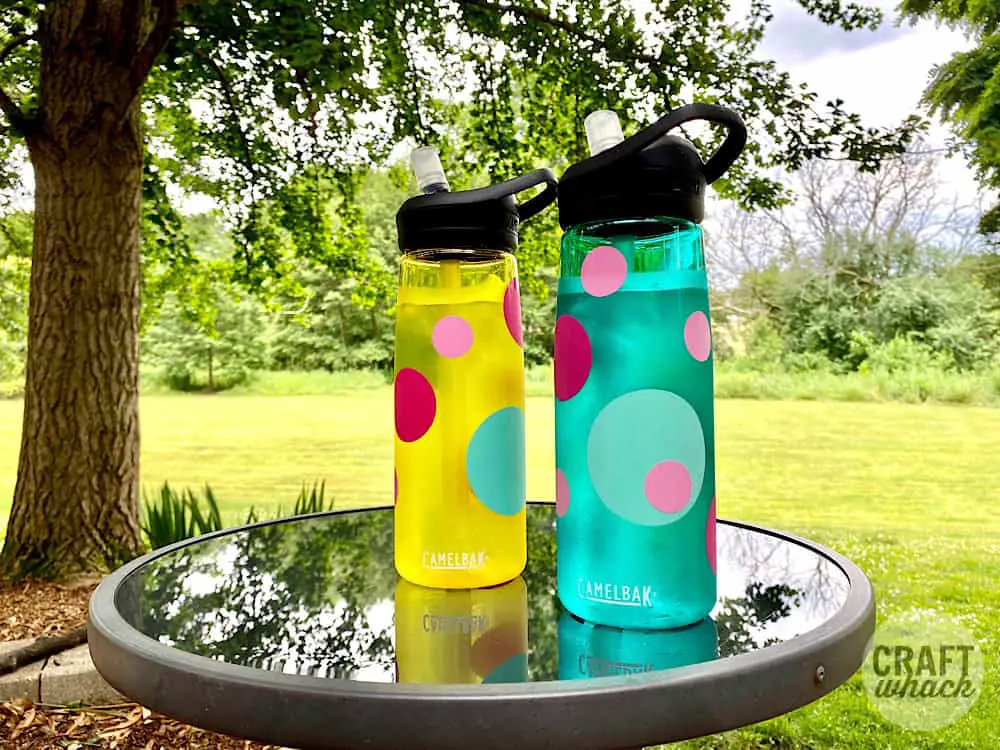
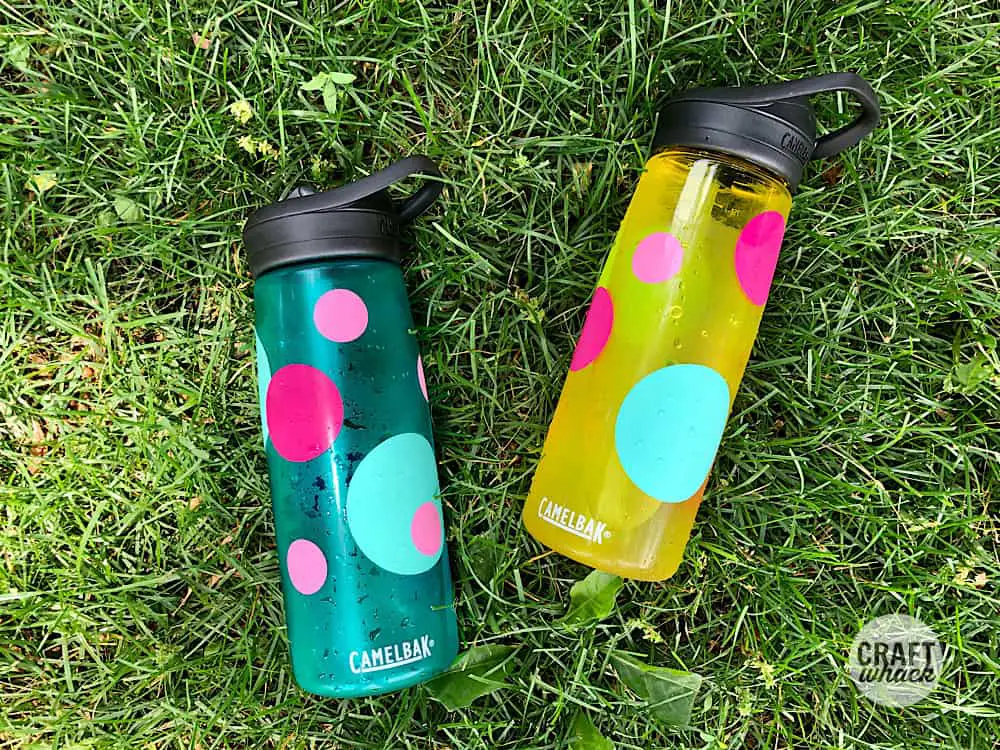
We went with these Camelback water bottles – they are actually leak-proof, plus they’re dishwasher safe, which is a must in our house.
These water bottles would be so cute to customize for a kid’s sports team or another group.
This is the vinyl I have been using with my Cricut Maker, and it’s been fantastic for all adhesive vinyl projects, like this DIY planner cover.
Don’t forget your transfer tape, scraper, and weeder tool, all essential Cricut tools.
How to Customize Your Water Bottle With Cricut
Before you start, make sure your bottles are thoroughly washed and dried.
Lay them out with your vinyl to see which colors you like with the colors of the bottles you buy. I chose 3 colors that worked well with both my bottle colors.
Next decide what you want to put on your bottles. I decided on a simple polka dot pattern, but you can use text or another shape. I’ll show you how to add polka dots onto your water bottle with 3 different colors of vinyl, in 3 different sizes.
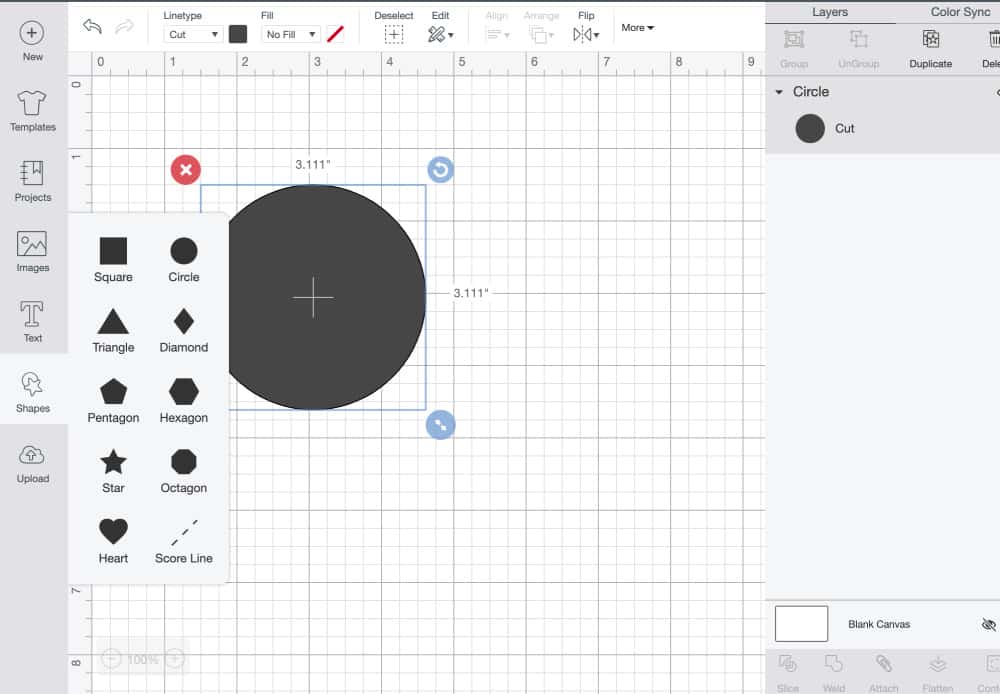
Designing Your Bottle in Design Space
Open Design Space and start a new project. Click to the left on shapes, circle, and the circle will be added to your your work space.
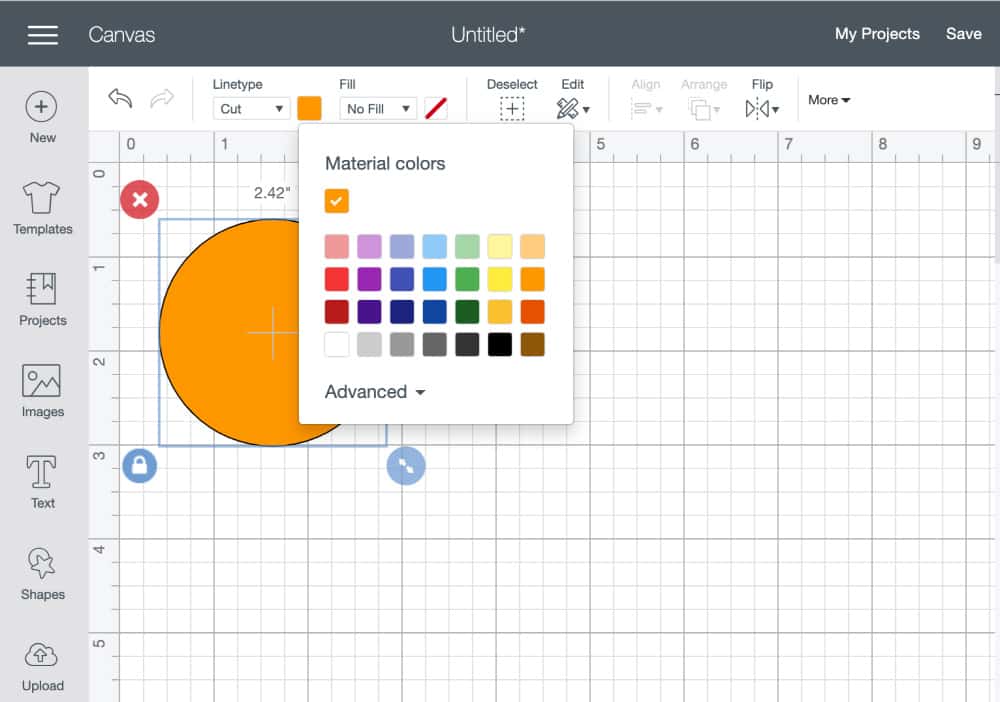
Drag the double arrows on your circle in or out to resize your circle. My large circle is 2.42″, my medium is 1.667″, and my small is 1.208″. (Those are just the sizes they came out when I eyeballed how I wanted them to look.)
While your circle is selected, click up at the top of your workspace and choose a color for that circle. It doesn’t matter what color you choose, you just want to make sure your different circle sizes have different colors. This will tell your Cricut cutter you are using different colors of vinyl.
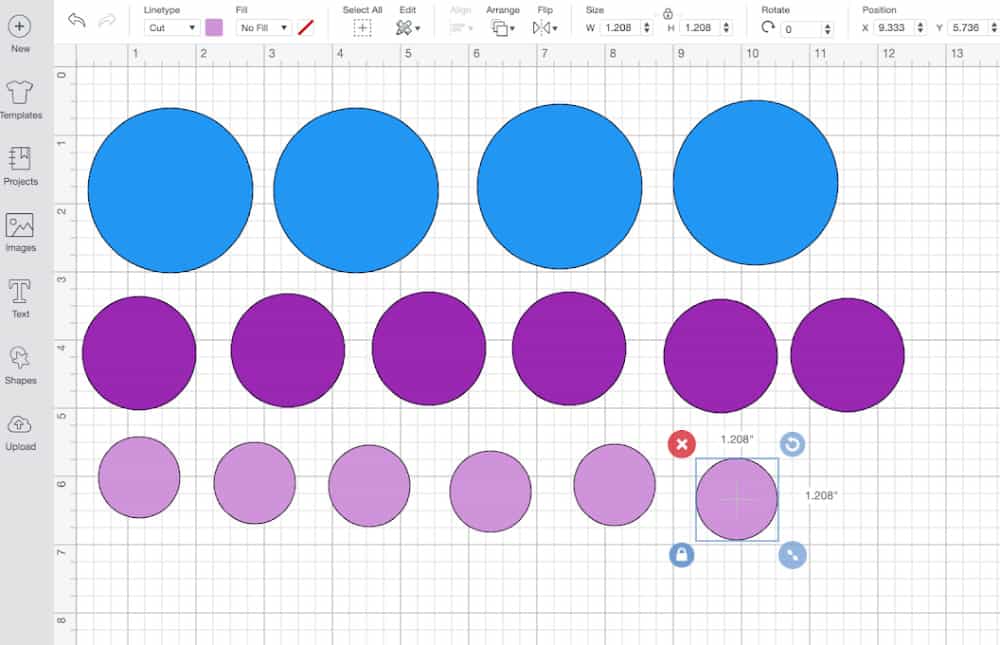
Duplicate this circle by clicking on ‘duplicate’ up at the top of your workspace. I suggest making more of the large dots than you think you’ll need, in case you run into any trouble adhering them onto the bottle. (The water bottles slightly taper in at the tops, so you need to work slowly and carefully when adding large dots to this area.)
Make your medium and small circles this same way. I made 6 of each of the small circles, and 4 of the large.
Now just click ‘Make it’ and Cricut will sort the dots and prompt you to change vinyl in between cuts.
When the dots have been cut, cut them away from the rest of the vinyl. Cut each dot apart from the rest, and weed away the background vinyl from around each dot.
Decide where you want to place your dots on the water bottles. I started by placing the large dots (2 on each water bottle), so then I could fill in the spaces leftover with the smaller dots.
For each dot, cut a piece of transfer tape just larger than the dot and use your scraper to scrape the tape onto the dot, and then to transfer it onto the bottle.
Like I said earlier, if you are putting a large dot on the top area of the bottle, it can be a little tricky. The top of the bottle tapers in some, so you want to transfer your vinyl slowly and carefully to keep it from folding on itself.
Pin it For Later:

See Related Article: A Deep Dive into the Cricut Explore Air 2
Comments
0 comments