
Tie-dye is a popular fashion style and has emerged as one of the most appealing fashion trends in recent years.
If you want to learn about the many tie-dye patterns out there and what you’ll need to make them, you’re in the right place. We’ve compiled a list of different tie-dye patterns that you may try at home.
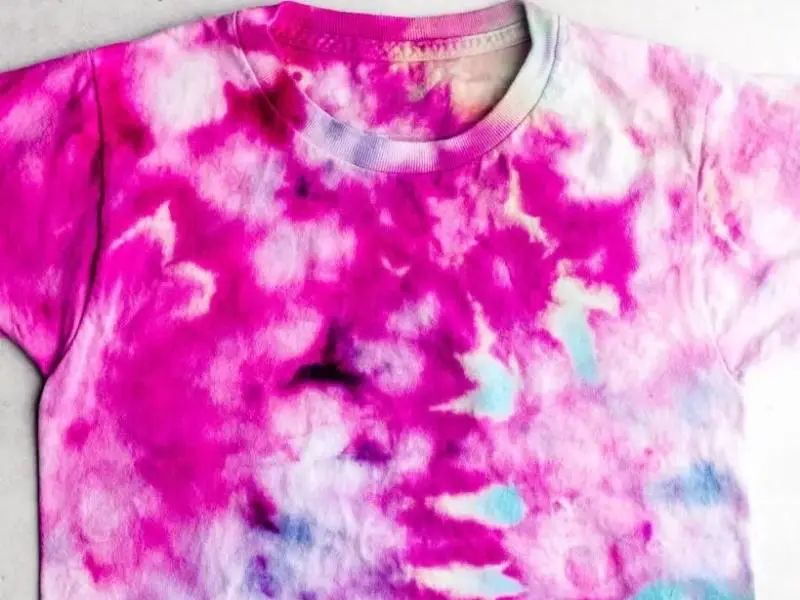
1. Ice Tie-Dye

Ice dyeing is an excellent option if you enjoy surprises and want to avoid the usual tie-dye designs. This method uses powdered dye instead of liquid dye and ice cubes to create a distinctive watercolor-like effect.
So, how does it function? The dye and ice cubes end up all over anything you’re tie-dyeing. The dye is carried into the cloth as the ice cubes melt and trickle down into the garment. Because the ice cubes melt at varying rates, you never know what the final product will look like, making the revelation more thrilling.
Check out Ice Tie-Dyeing at Sarah Maker.
2. Ombré Tie-Dye
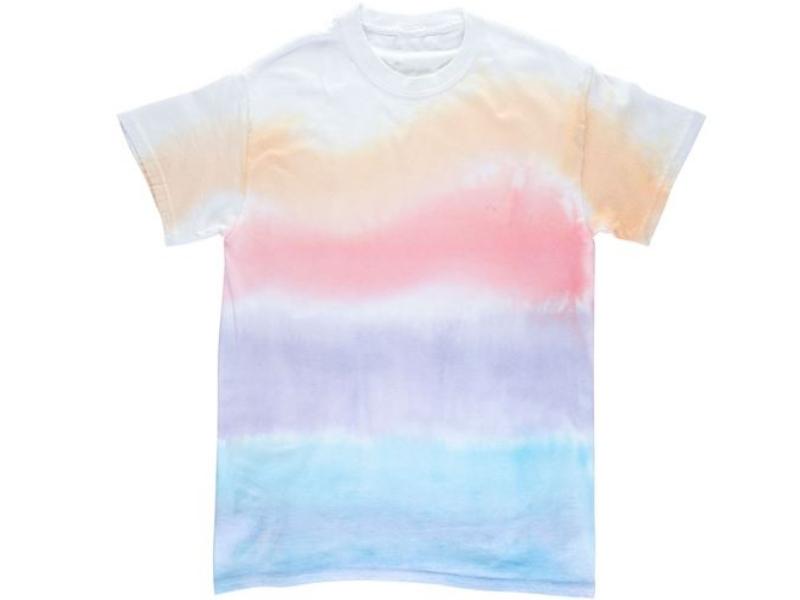
Ombre can also be called dip dyeing or color bleeding. It’s a pattern created by dipping fabric in dye by hand and allowing it to gradually change color from light to dark or from one hue to another.
Everyone will be curious about where you purchased your ombré tie-dye shirts. Don’t be surprised if they don’t believe it’s prepared from scratch! Choose one color to saturate the bottom of the shirt to make this stylish item.
Find out more about the Ombré Tie-Dye on Tie Dye Your Summer.
3. Heart Pattern
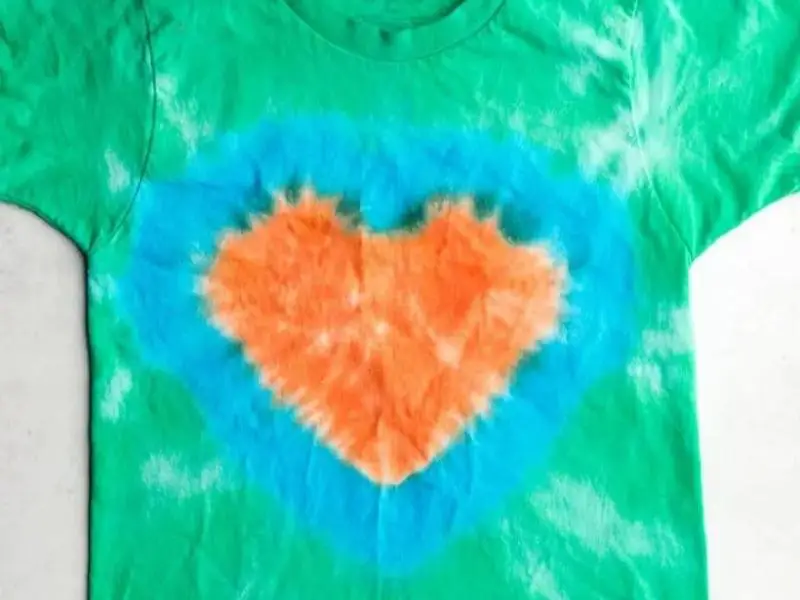
What better method to show your affection than to write it on your T-shirt? With this heart tie-dye pattern, you can share your love and show your passion for tie-dyeing. Use a washable marker to draw a heart shape on your T-shirt to make the heart stand out. Don’t worry if it isn’t perfect; the dye will fill any gaps.
Learn more about making a Heart Pattern on Sarah Maker.
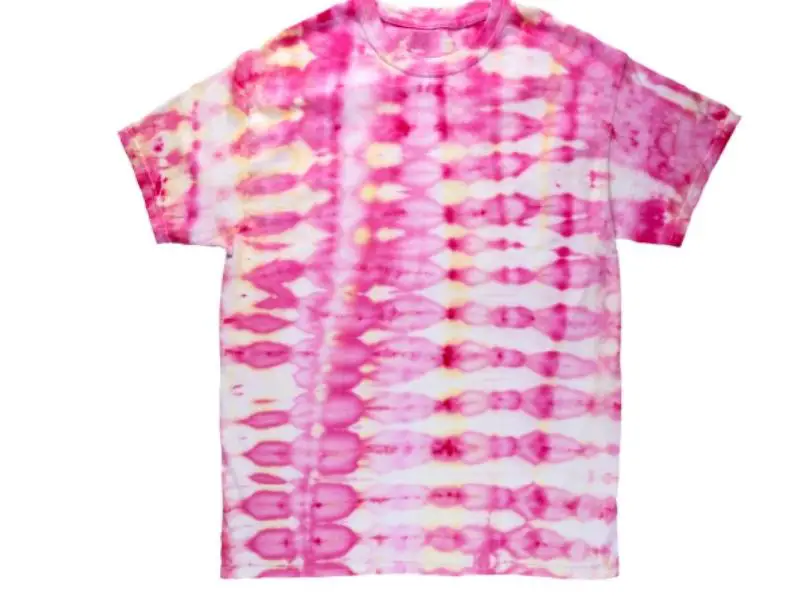
4. Mermaid Scales Tie-Dye
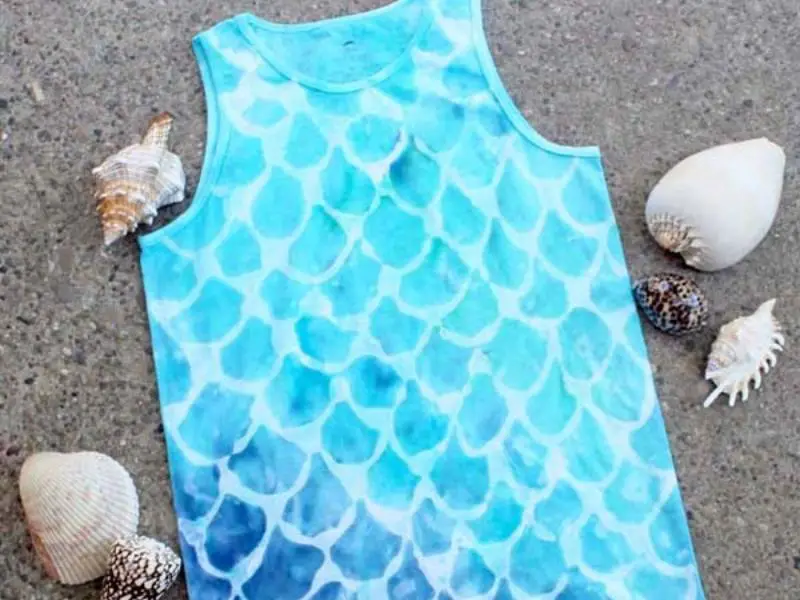
You’re probably wondering how to get some perfectly deigned mermaid scales on a shirt. It’s pretty easy to create this adorable work of art. It involves using simple materials you can easily get to create a fish scale pattern on your tie-dyeing cloth.
If you’re a mermaid lover, this scale pattern would be perfect for your shirt or any piece of cloth you intend to use. So gather your supplies and get started on this beautiful tie-dye project ASAP!
Learn more about the Mermaid Scales Tie-Dye at Doodle Craft Blog.
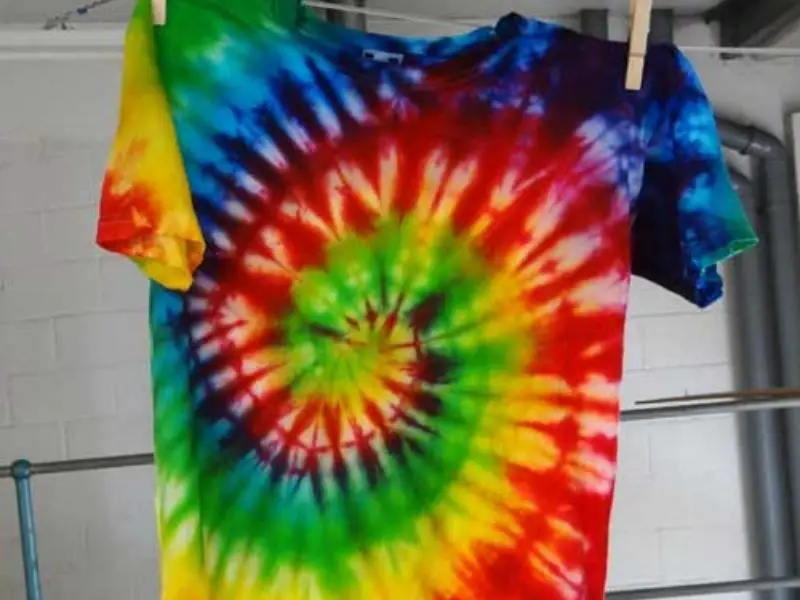
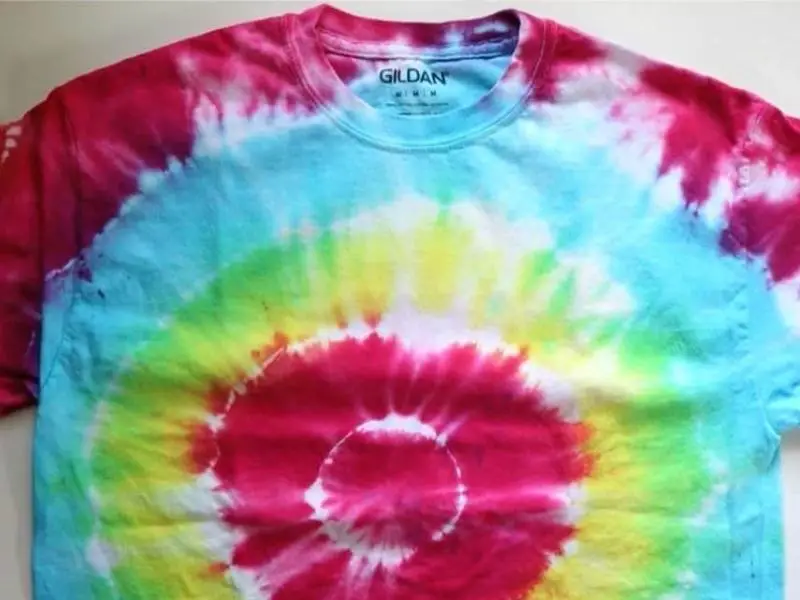
5. Spiral Tie-Dye Pattern
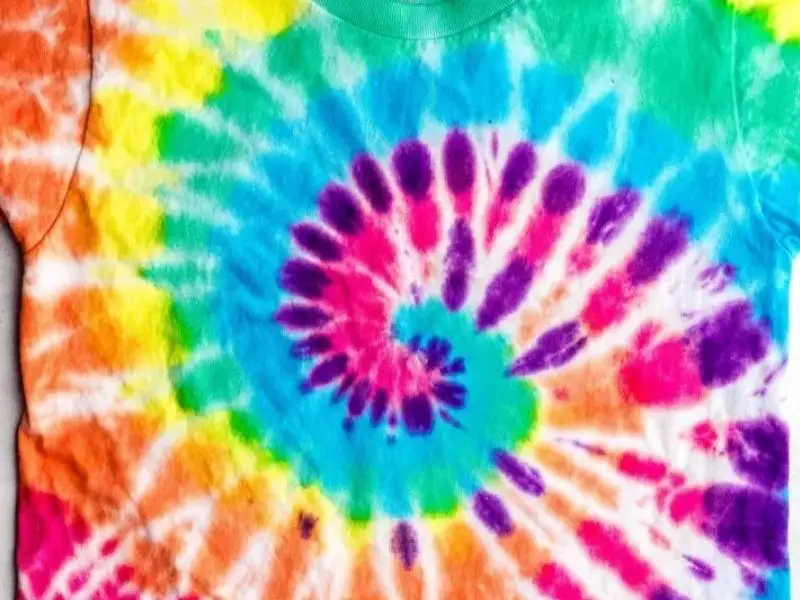
The spiral design is relatively simple and easy to learn. But keep the fabric and rubber bands tight to create a smooth transition between the hues.
Before you begin, you should make sure the colors you’ll be using are ready. To make the iconic spiral pattern, you’ll need to combine three bottles to have all three colors. Usually, the primary hues used are blue, red, and yellow.
Find out more about the Spiral Tie-Dye Pattern at Sarah Maker.
6. DIY Water Balloon Tie-Dye
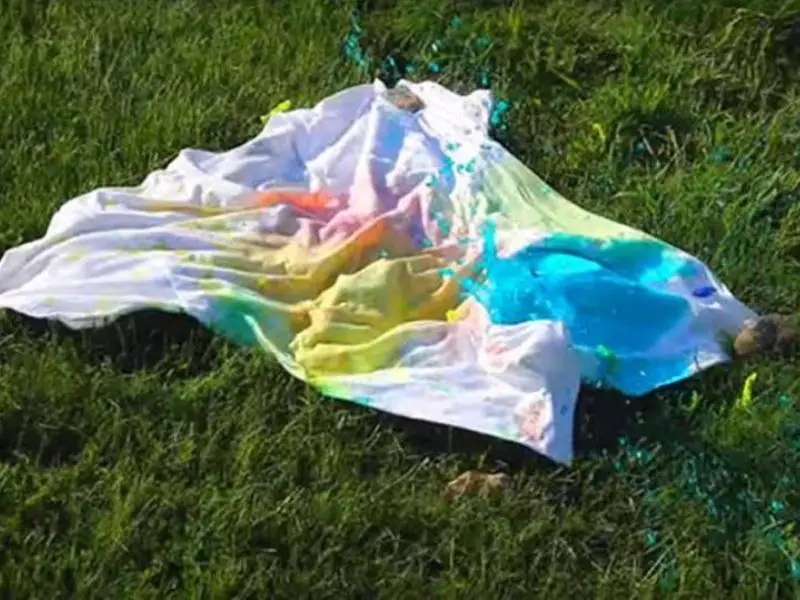
Do you intend to work on a tie-dye project anytime soon? Why not give this fantastic balloon tie-dye concept a shot? You’ll be throwing water balloons filled with tie-dye at the material you want to dye to get started.
The activity will appeal to both children and adults, and you’ll get a one-of-a-kind item. The best part is that you’ll only need some easy-to-get tie-dye supplies. It might be a bit of a mess, so keep that in mind when working with your kids.
Find out more about DIY Water Balloon Tie-Dye from Kimspired DIY.
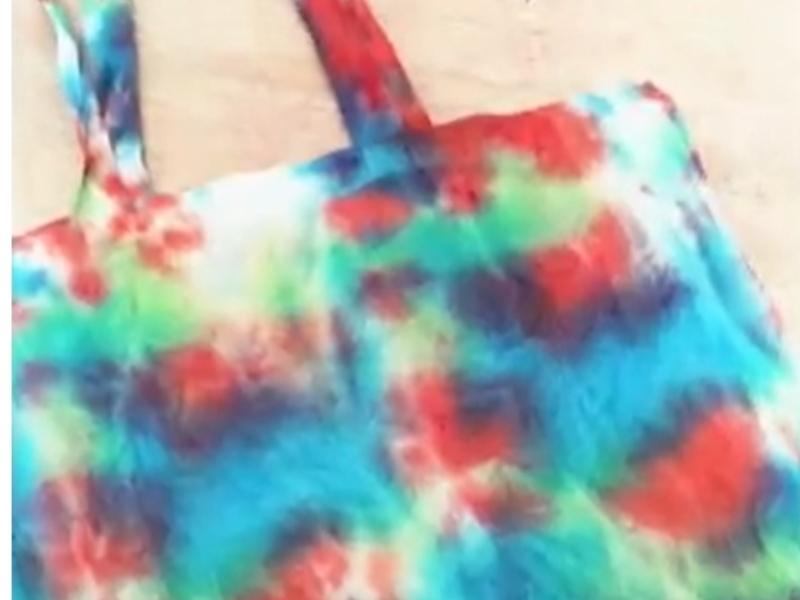
7. Captain America Avengers Tie-Dye
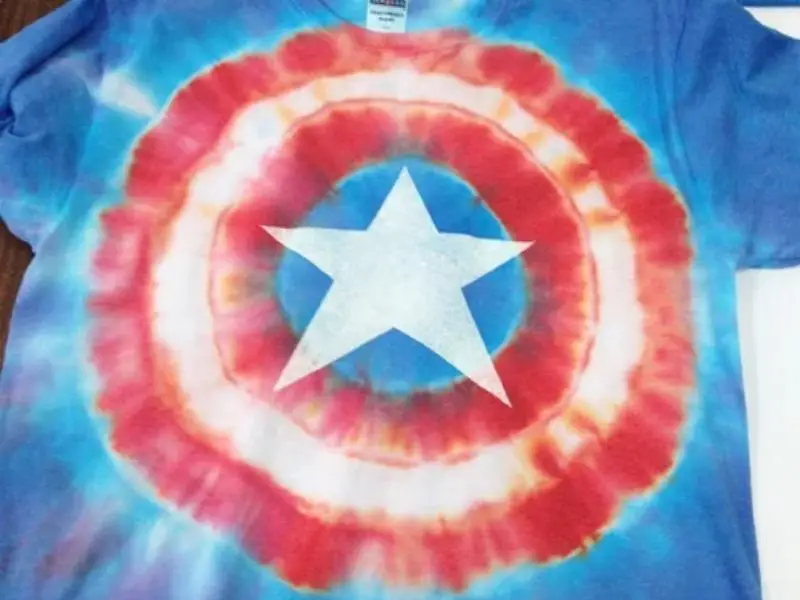
Who doesn’t want to fantasize about being a superhero at any time possible? That’s why this pattern appeals to us so much.
It’s bright and attractive, but it also has a badass vibe to it. Don’t be fooled by the intricate pattern. This is a very simple craft project that requires very little time and effort. Now, prepare your supplies and get ready to show off your Marvel masterpiece.
Check out Captain America Avengers Tie-Dye on Instructables.
8. DIY Sharpie Tie-Dye
Who said you need to purchase tie-dye kits to get a professionally-looking tie-dye output? You can accomplish a similar result using a variety of colored sharpies.
Sharpies are, unfortunately, underappreciated in this art realm. These small markers are capable of getting the job done. They’re easier to work with and suitable for people who need to make some DIY patterns on limited surfaces such as socks and shoes.
Check out the DIY Sharpie Tie-Dye technique on Instructables.
9. Watermelon Tie-Dye
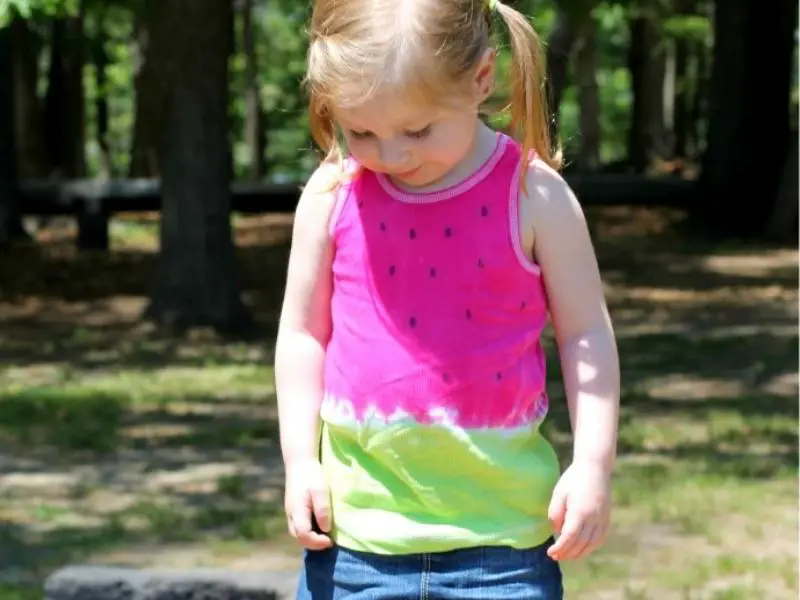
Are you looking for a fun summer tie-dye design? If so, you should probably give the watermelon technique a trial.
The bright colors of this pattern make it quite cheery and attractive. It’s also reasonably simple to produce, and you won’t want anything other than a piece of standard tie-dye equipment.
Find out more about the Watermelon Tie-Dye at Sweet Lil You.
10. Rainbow Tie-Dye Pattern
This is one of our favorite tie-dye patterns, and for good reasons. The pattern is pretty easy to create and doesn’t require a fancy tie-dye kit to replicate it. What’s more? This tie-dye design is quite suitable for white shirts.
We adore the various hues of this tie-dye design. Although this design may not be one of the most distinctive tie-dye folding techniques, we think its upbeat and welcoming vibes are a plus!
See the complete Rainbow Pattern Tie-Dye tutorials on Hand Printed.
11. Spider Tie-Dye Design
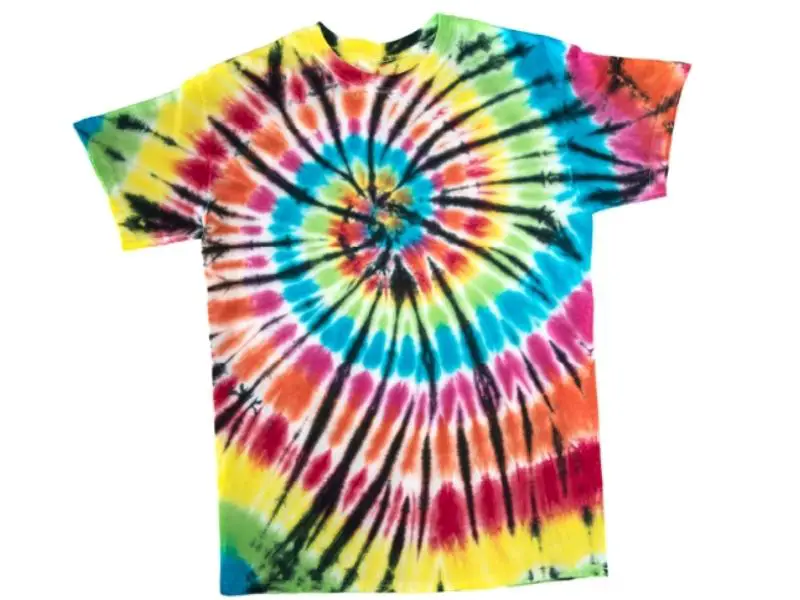
Sometimes, you need to combine bright and dark-colored dyes to create something beautiful. And this tie-dye pattern provides the perfect situation.
With this “spidery” technique, you may add some black dye to your T-shirts without making them look too closed-off. But what we appreciate about the pattern is how creepy and spooky it appears. That’s a huge plus in our book!
Learn more about this Spider Tie-Dye Design on FaveCrafts.
12. Alien Glow Tie-Dye
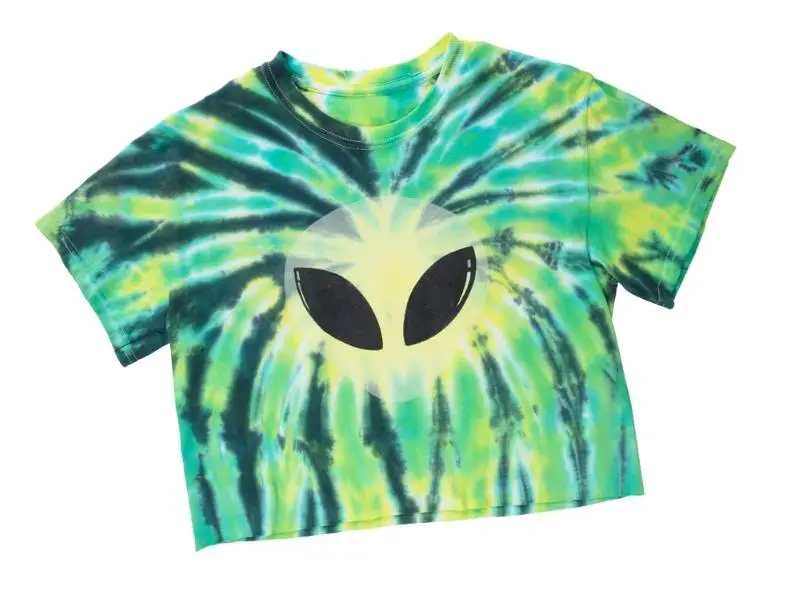
You don’t have to be from another planet to practice this tie-dye pattern on your T-shirt. This technique should be your favorite if the other complicated techniques are a pain in your neck.
This design ensures you don’t have to spend the whole day trying to fold your fabrics neatly. However, you’ll still get an awesome T-shirt that’ll make most sci-fi lovers jealous.
See the Alien Glow Tie-Dye tutorial at Tie Dye Your Summer.
13. DIY 5-Pointed Star Tie-Dye
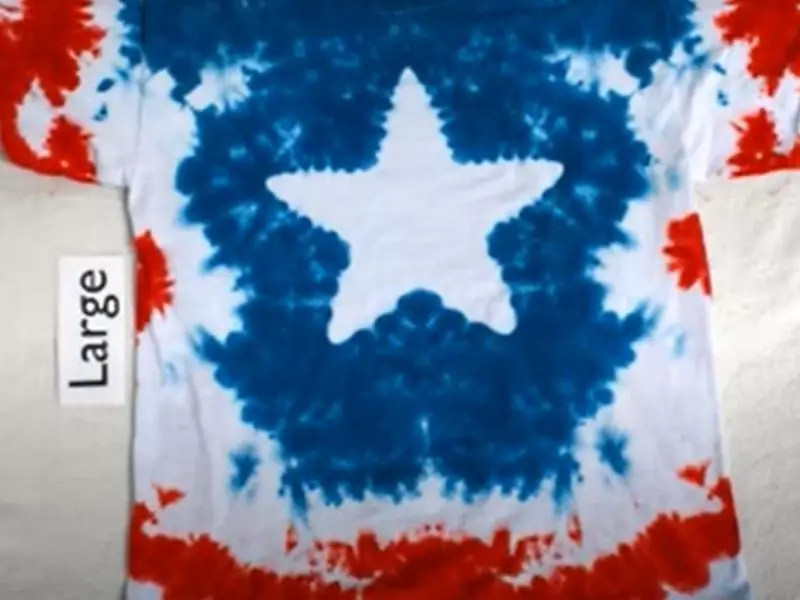
There’s no denying that stars are one of the most beautiful things to behold. However, we believe they’re even more beautiful when you feature them in your tie-dye design.
Although this design isn’t the simplest to create, you aren’t wasting your time giving it your best effort. You’ll be proud to showcase your beautiful work of art to your friends and family by the end of the project. Also, the craft requires simple home supplies, so you don’t have to worry about buying too much!
Check out the full step-by-step tutorial on the DIY 5-Pointed Star Tie-Dye at My Crafts.
14. Two-Toned Stripes Tie-Dye
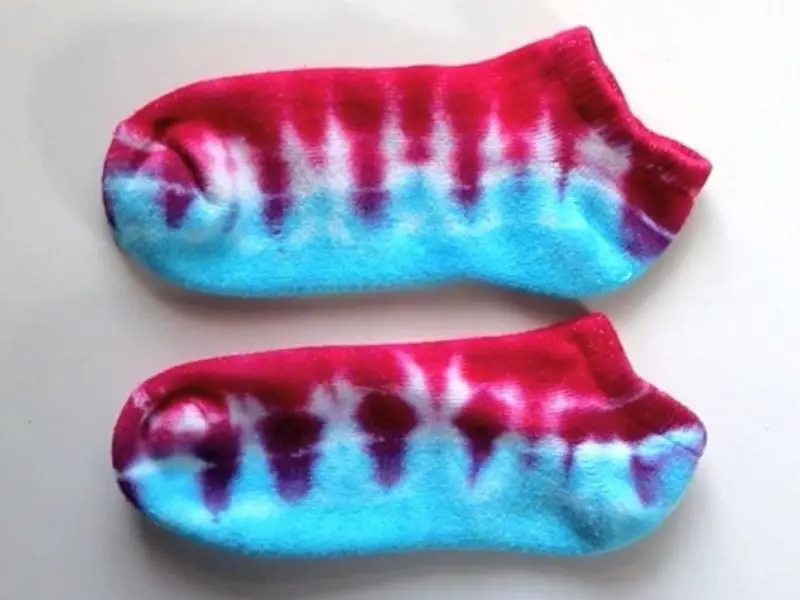
This cool and surprisingly easy tie-dye pattern is made using two colors, one for each side of the shirt folded in opposite directions. Also, you can choose to fold your shirt in one direction to get vertical stripes or another direction to get horizontal stripes.
For example, when trying to dye a pair of socks, you can start by folding them from the heel to the toe. Afterward, you can dye both sides with different colors. You only need two colors to achieve this pattern.
Get the full dye instructions for the Two-Toned Stripes Tie-Dye pattern at AB Crafty.
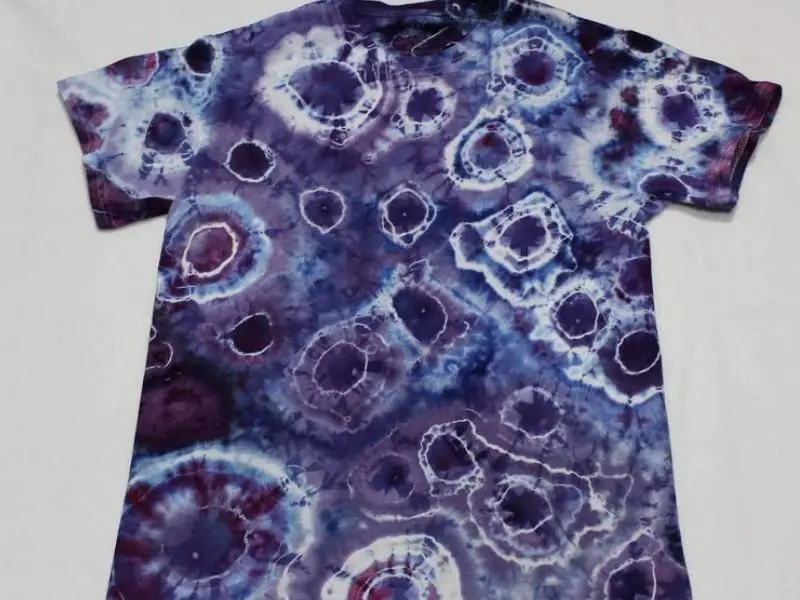
15. Geode Tie-Dye
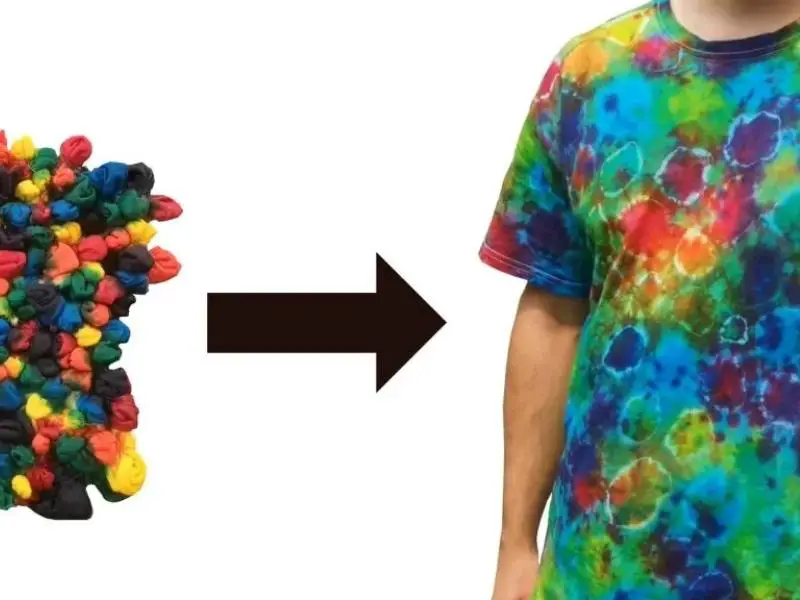
Do you want to express your passion for colors? If so, the geode pattern is ideal for you. In addition, you’ll get to make the most out of some of the tie-dye equipment available if you employ this method.
The process may be time-consuming, but the ultimate result is always fascinating. So, don’t be afraid to pick up the gauntlet and give this fantastic method a shot.
Get more details about the Geode Tie-Dye at Chandye.
16. V Tie-Dye
If you’re tired of the overdone spiral tie-dye design, try this V-shaped pattern on your T-shirt instead. It’s a cool tie-dye pattern that’s also reasonably simple to produce.
Gather several rubber bands and begin tie-dyeing your shirt. To avoid excess dye staining your skin, always use gloves during the tie-dye procedure.
Find out how to make a V Tie-Dye pattern on The Craft Patch Blog.
17. Pumpkin Tie-Dye Design
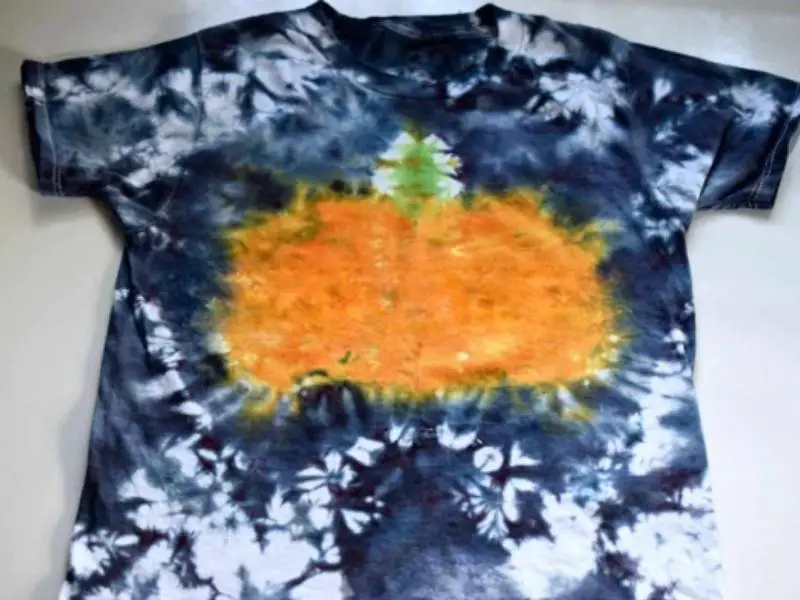
If you want something easy and beautiful, you can’t go wrong with this exciting tie-dye pattern for Halloween. You start this pattern by drawing a portion of the pumpkin on each half of the shirt after folding.
Next, get some needles and thread and sew through the pumpkin sketch. Then, squeeze the shirt and hold it in place with some zip ties. Afterward, apply your dye to the shirt with orange and a little green on the pumpkin’s side and black on the other parts.
Learn more about Pumpkin Tie-Dye Design at AB Crafty.
18. Accordion Tie-Dye
As the name suggests, this pattern requires you to make an accordion fold with the shirt to get the desired result. And that’s the most effort you’ll need to put into the DIY craft.
To keep things simple, you can decide to use only one color or as many colors as possible to draw attention. Either way, you’ll feel the stimulating effect of the pattern, and it may soon become one of your favorites!
See the items required for the Accordion Tie-Dye at Cromartie Hobby Craft.
19. Mandala Tie-Dye
The Mandala tie-dye pattern is an excellent way to flaunt your tie-dying skills to your friends and family.
This pattern requires a tie-dye kit and your creativity. First, you have to fold your plain white T-shirt in half vertically, then draw zigzag lines using a marker. Moreover, you sew along the zigzag lines before applying your dye colors. It appears beautiful and intricate, but it’s still acceptable for novices.
Get the full details about the Mandala Tie-Dye pattern at Tie Dye Your Summer.
20. Bat Tie-Dye
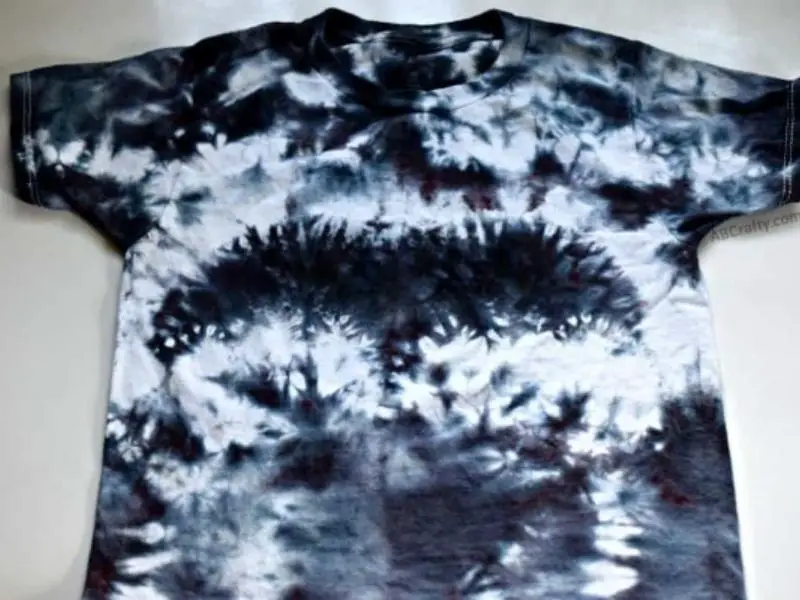
Do you want to turn on the Halloween spirit, or are you a big fan of Batman? If so, this tie-dye pattern will be perfect for you. It’s pretty cool and doesn’t require too many colors!
It appears to be quite eerie and mysterious, but it’s pretty simple to put together. Also, you can use this technique to create several creative designs, and the end product will always be entertaining.
Find out more about the Bat Tie-Dye on AB Crafty.
21. One-Eyed Monster Tie-Dye
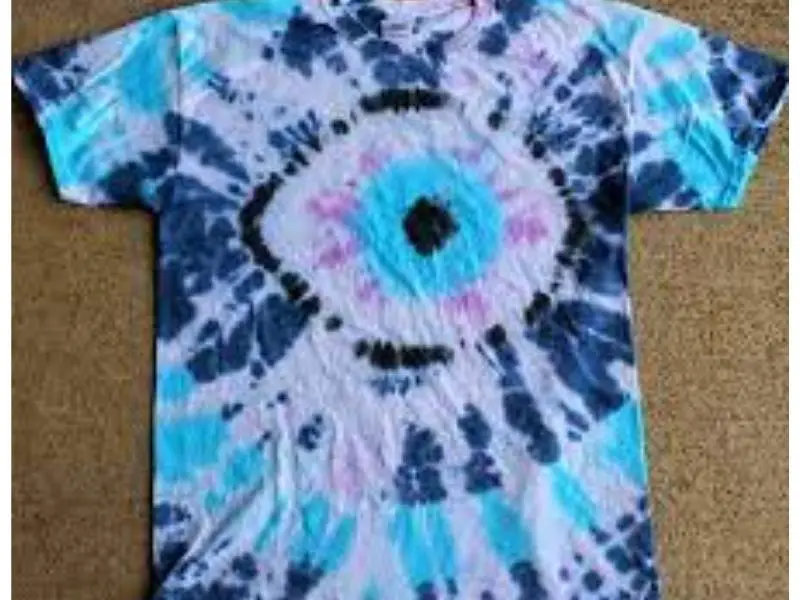
Is your child a fan of the Monsters, Incorporated movie? If so, this green monster pattern as a tribute to the one-eyed Mike Wazowski is for you.
This design is superb, and its resemblance to the figure from the movie is quite uncanny! To design this pattern, you start by washing your shirt in cold water to ensure that all colors stay as brilliant as possible.
See the full tutorial for the One-Eyed Monster Tie-Dye at Doodle Craft Blog.
22. Shibori Square & Triangle (Itajime) Tie-Dye
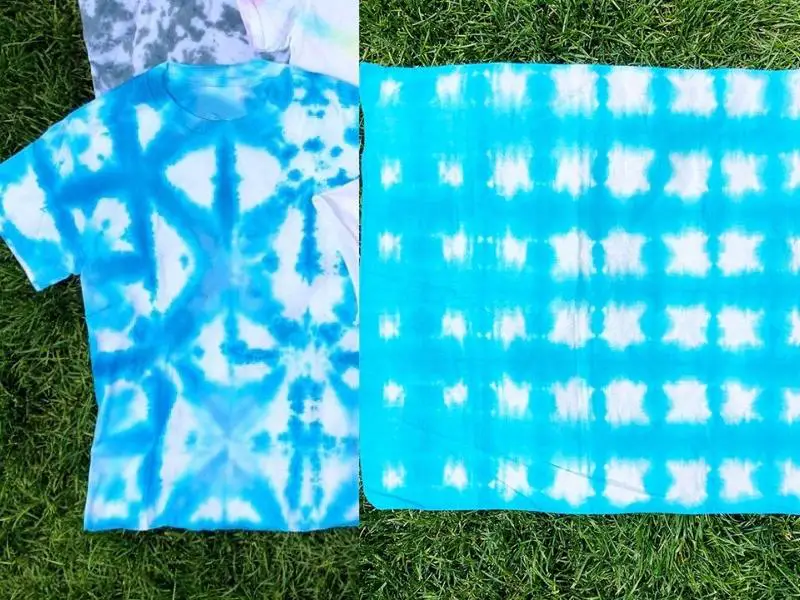
You’re probably becoming a pro in the art of tie-dying and looking for a more complex pattern. This geometric triangle and square shape pattern is the way to go. Here, you don’t just crumple up a shirt, tie it with some rubber bands, and call it a day. There’s more to it!
Firstly, you need to fold the shirt using the accordion fold style to achieve the desired effect. But don’t be concerned; the process isn’t that tough, and you’ll have a cool shirt in the end.
Learn more about the Shibori Square & Triangle (Itajime) Tie-Dye patterns at The Neon Tea Party.
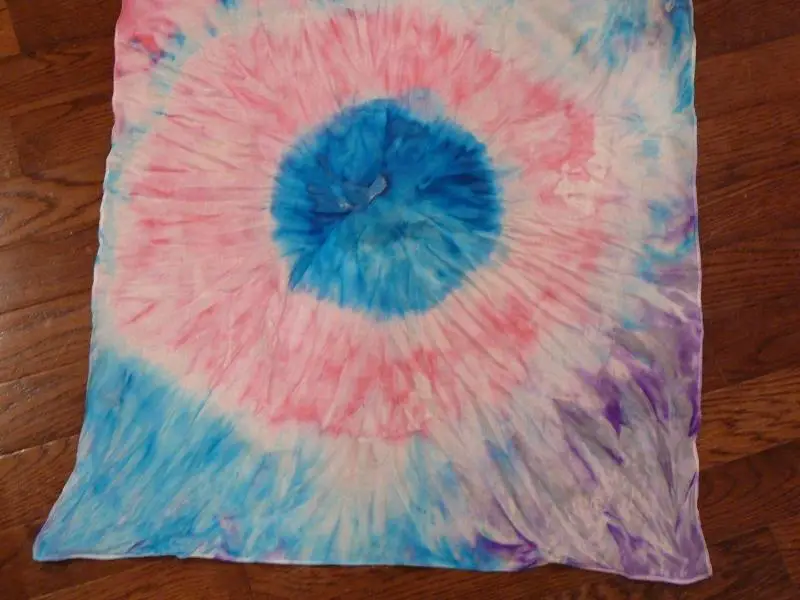
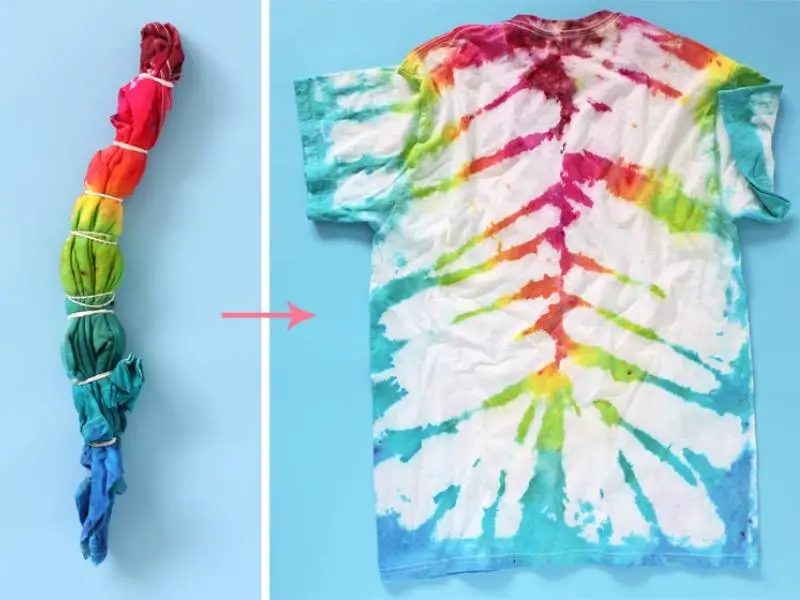
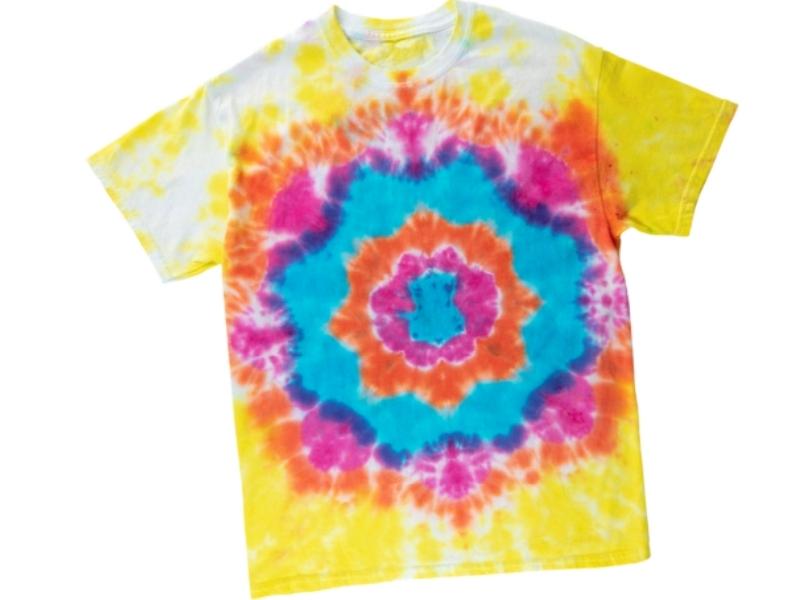
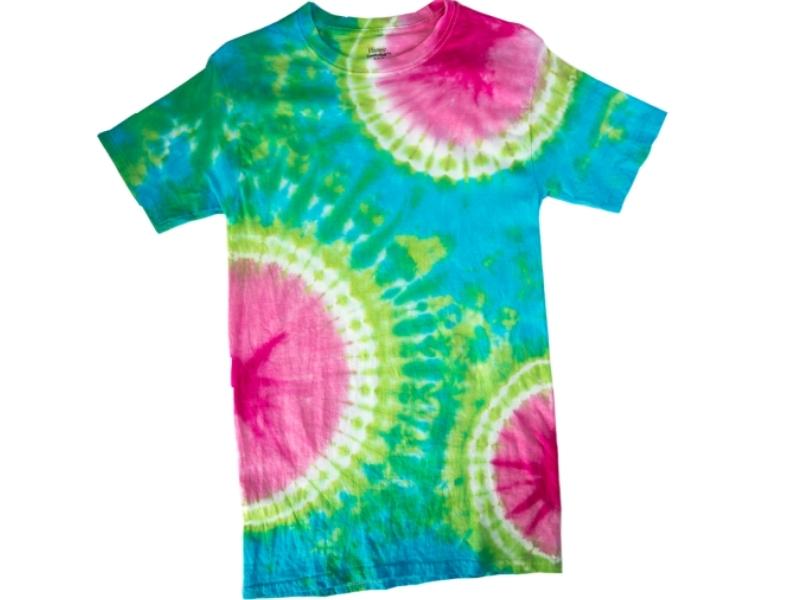
23. Rainbow Bullseye Tie-Dye Pattern
You really can’t get enough of rainbows, and this beautiful tie-dye pattern is proof of that. To begin, pinch the center of your fabric material with one hand and gather the other portion of the fabric with the other hand.
Next, tie the fabric into different sections with rubber bands and dye each section with a color in the order of the rainbow. Furthermore, always remember to press the colors into the rubber band area to enable them to blend well.
Find out more about the Rainbow Bullseye Tie-Dye Pattern at AB Crafty.
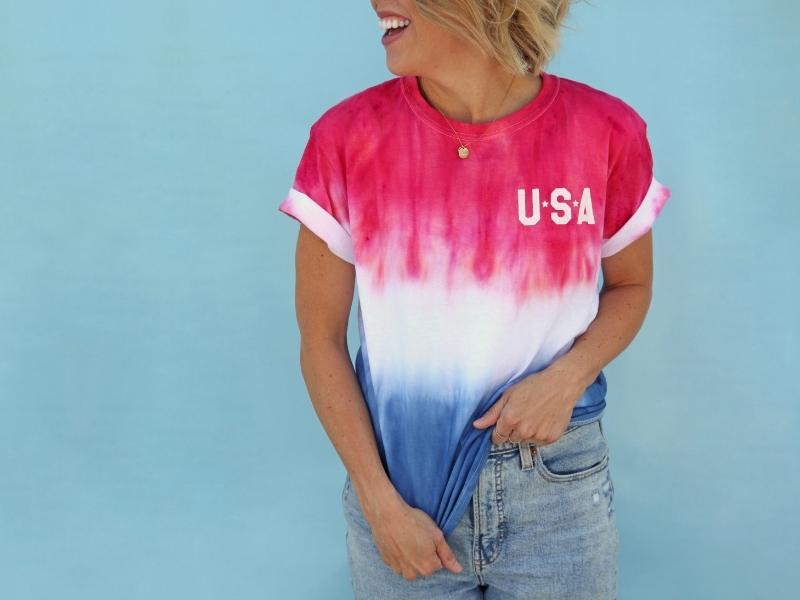
24. Sunburst Tie-Dye
Are you searching for a patriotic tie-dye pattern for the Fourth of July? This impressive sunburst design will do the trick.
Who’d have guessed that a T-shirt featuring pyrotechnics could be made simply by using a tie-dye hue and numerous rubber bands? And that’s not all; you can modify the colors you used in the pattern at any time and still get a fantastic outcome.
Check out the Sunburst Tie-Dye at Tie Dye Your Summer.
25. Candy Corn Tie-Dye
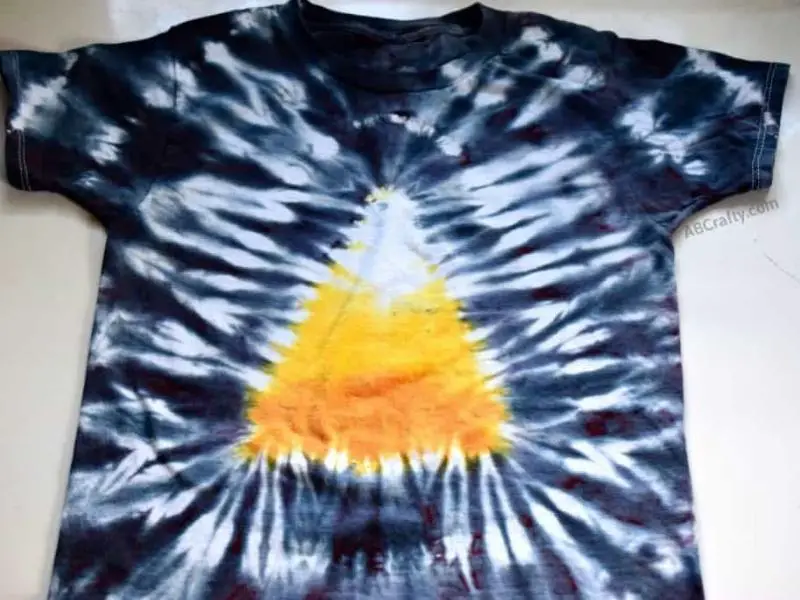
You and your kids are probably looking for a Halloween or fall-themed tie-dye design to master your tie-dying skills. This pattern is an excellent option to tinker with. First, you use your washable marker to sketch a three-section triangle on a folded shirt.
Next, you use a rubber band to hold the folded shirt and fold the exterior line. Then, using zip ties, wrap the shirt, leaving even space across the shirt. When applying the dye, use yellow, white, and orange for each triangle section, then apply black to the remaining parts.
See the full tutorial for the Candy Corn Tie-Dye at AB Crafty.
26. Chevron Tie-Dye Design
![]()
You’ll love the chevron pattern even more if you like the accordion pattern discussed earlier. Both designs are similar, but this pattern binds the shirt on a diagonal to give it the trademark chevron effect. You’ll have the perfect summer ensemble when you pair this tye-dye shirt with a chevron friendship bracelet!
Get tutorials for making the Chevron Tie-Dye Design on Tie Dye Your Summer.
27. Crumple Tie-Dye
The crumple is a relatively straightforward technique. It entails scrunching cloth together in a random pattern to create peaks and valleys. However, it has a lot of depth as well.
It’s a basic but effective technique that both beginners and masters enjoy. Another name for it is Random Folding. There are numerous methods for crumpling fabric and, more significantly, a shirt.
Check out Sarah Maker to find out more about the Crumple Tie-Dye technique.
28. Sailor Stripe Design
Straight-line stripes can be made using tie-dye and groovy spirals and circles. Begin gathering the T-shirt on one side to make accordion-like folds that run vertically from neck to hem. Wrap rubber bands around the shirt securely. Then, add rubber bands to the tie-dye pattern for more stripes.
Find out more about the Sailor Stripe Design on DIY 4 Tie-Dye.
29. Firecracker Tie-Dye
Though this tie-dye pattern is typically produced with blue, white, and red to give it a patriotic flavor, you can do it with any color pair you choose on a white shirt. First, make a crease or scrunch in the length of your shirt to bring the sleeves closer together.
Next, examine your shirt and decide where to divide it into thirds, using rubber bands to keep the thirds separated. If you want to stick to the traditional color scheme, dye the top third of your shirt red and the bottom third blue. Leave the center blank.
Check out Pretty Life Girls to learn more about the Firecracker Tie-Dye pattern.
30. Polka Dot Tie-Dye Design
Bring together dried beans or marbles to make polka dots. Put the one you choose inside the shirt, then cover it with a piece of plastic wrap (cut the wrap to be about four sizes larger than the bead you’re using).
Continue putting beads on the shirt and covering them in plastic wrap until the entire front is polka-dotted. Before you dye this shirt, make sure it’s wet.
Find out more about the Polka Dot Tie-Dye design on Find Any Answers.
31. The Galaxy Technique

Fortunately, with this galaxy tie-dye technique, you can have a piece of space on you. So, grab a shirt (preferably dark-colored), bleach, and some galaxy-colored dye powder, and create this beautiful work of art!.
We only want to emphasize the need to use gloves when using this approach because bleach may irritate the skin. As a result, it’s important to let the kids stay away from the project until it’s finished. Also, you can learn more about using bleach in tie-dyeing at Craftwhack.com.
See what The Galaxy Technique requires and follow the step-by-step tutorial at FaveCrafts.
32. DNA Tie-Dye
Out of the numerous tie-dye crafts available on our list, we believe this DNA approach deserves to be one of the best tie-dye projects.
It’s a unique tie-dye pattern that you probably didn’t know about before now, and it makes a big statement. Everyone who sees this design will be curious about how you came up with it.
Find out more about the DNA Tie-Dye at The House of Homemade.
So, out of all the different tie-dye designs we discussed, did any of the projects pique your interest? If so, let us know which one did! Finally, remember to practice patience when tie-dying because it can be difficult to perfect it at first.
Comments
0 comments