Creating tie-dye patterns with bleach is super fun, and the ideas are endless! If you’re bored of your old clothes, you can transform them into cool patterned shirts or sweatshirts with bleach and water.
Not only that, but you can also buy some new basic dark gray or black shirts and create your own style with bleach patterns.
With so many different folding techniques, your black t-shirts can be customized based on your style.
In this guide, we’ll explore some cool bleach tie-dye patterns, so let’s get started right away!
Tie Dye With Bleach: How Does It Differ From Normal Tie-dyeing?
you’re probably already familiar with tie-dyeing, so what exactly is bleach tie-dyeing? Bleach tie-dyeing, or reverse tie-dyeing, is essentially the opposite of tie-dyeing.
Instead of applying color to your clothes, you use household bleach to remove the color from specific parts of your garments.
The entire process lets you create some unique patterns by transforming your basic t-shirt into a graphic t-shirt. It’s an excellent technique for dark-colored clothes.
There’s more than one folding pattern to experiment with when you want to tie-dye with bleach. As long as you have a bleach mixture in a squeeze bottle within your hand’s reach, you can design your own shirt in a few different ways.
There are some considerations to keep in mind for this method to work. For example, the shirt must be wet before trying to shape it since damp clothes are easier to twist. It’s also crucial that the dyeing fabric is dark, not colored or white.
Required Supplies
Below are all the materials you need to bleach tie-dye shirts:
- Dark-colored or black shirt
- Water
- Straight bleach
- Protective gloves
- Plastic or glass bucket
- Squeeze or spray bottle
- Rubber bands
- Optional: facemask
You might also need a PVC pipe depending on which folding techniques you intend to use.
Abstract Reverse Tie-Dye Pattern
This bleach tie-dye pattern is perfect for artists and anyone who genuinely appreciate art in all its forms. First, you need to bind the shirt with rubber bands in some sections at the bottom of the shirt while keeping the top part flat.
Pour a straight bleach and water solution with a 1:1 ratio over the bound area at the bottom in a random way, and you’ll end up with eye-catching bleach patterns on your shirt. You may also use a bleach pen for more control so that you don’t end up bleaching the entire shirt.
Once you’re done bleaching and laundering your shirt, apply some colors to the shirt to complete the design. Since we’re trying to create an abstract look, there are no limitations on what or how many colors you may use. The choice is all yours!
Get the full instructions for the abstract reverse tie-dye pattern shirt from tiedyeyoursummer.com.
Reverse Tie Dye Heart T-shirt
Want to rock a heart-patterned garment without making it look like you’re trying too hard? This reverse tie-dye heart t-shirt would be a unique choice. Instead of cliche printed hearts, we’ll make it look as if the heart is exploding and staining the rest of the shirt.
Creating this pattern is all about folding the shirt the right way. It’s called the heart tie-dye technique, and surprisingly, it’s not that difficult to nail.
Once you’re done with the heart part, you need to bind the rest of the shirt using rubber bands with a minimum spacing of one inch.
After making sure that all the parts are securely folded, apply a 50-50 bleach-water solution, then use tie-dye colors to fill the heart.
Get the detailed step-by-step reverse tie-dye heart t-shirt guide from tiedyeyoursummer.com.
Reverse Crumple Tie-Dye T-shirt
Who said that you need to add color to your bleached shirt to make it look cool? This reverse crumple tie-dye t-shirt is real-world proof that it’s not a rule!
By utilizing the crumple tie-dye technique, you can get a super chic garment by applying a 50-50 bleach-water solution.
To crumple the shirt, scrunch up the fabric and make as many pleats, wrinkles, and folds as possible. You may adjust the tightness of the crumple depending on your preference. Tighter crumplings will increase the complexity of the pattern.
In all cases, it’s vital that you use lots of rubber bands and secure the fabric tightly. All the interior spaces will maintain their original color, whilst the exposed areas will be discolored by bleach.
After application, let the bleach sit on the shirt for a few minutes, then rinse it.
Follow the reverse crumple tie-dye t-shirt DIY tutorial at tiedyeyoursummer.com.
Rainbow Bleach Tie-Dye T-shirt
This rainbow bleach tie-dye t-shirt is a surefire way to stand out from the crowd. The corner is your starting point. From there, you need to bind the whole way using rubber bands. Then, add a solution of household bleach, and you’ll end up with arched patterns that’ll make your rainbow look wild.
After letting the fabric absorb the bleach and rinsing the shirt, you can now apply the rainbow colors using any DIY tie-dye party kit. You may keep the shirt low-profile by using only a couple of colors or going all-in with every single color of the rainbow; your call!
Get the in-depth, step-by-step tutorial for bleach dyeing a rainbow reverse tie-dye t-shirt from tiedyeyoursummer.com.
Shibori-Inspired Folding Technique
The shibori-inspired technique is actually quite simple. Start by folding the damp shirt in an accordion style until you get a geometric grid shape and a long rectangular strip is formed. Then, continue folding the strip accordion-style until you see a square or rectangle.
Now, you need to get 2 pieces of cardboard to put the shirt between them. Wrap up the whole setup with rubber bands so that the shirt is compressed. This way, you can prevent the bleach from finding its way into the internal spaces of the shirt.
After that, prepare a 1:2 bleach solution and submerge the whole shirt into it. Keep the shirt submerged for around 10 minutes, then take it out and rinse it.
Get a more detailed explanation of the shibori-inspired technique from sarahmaker.com.
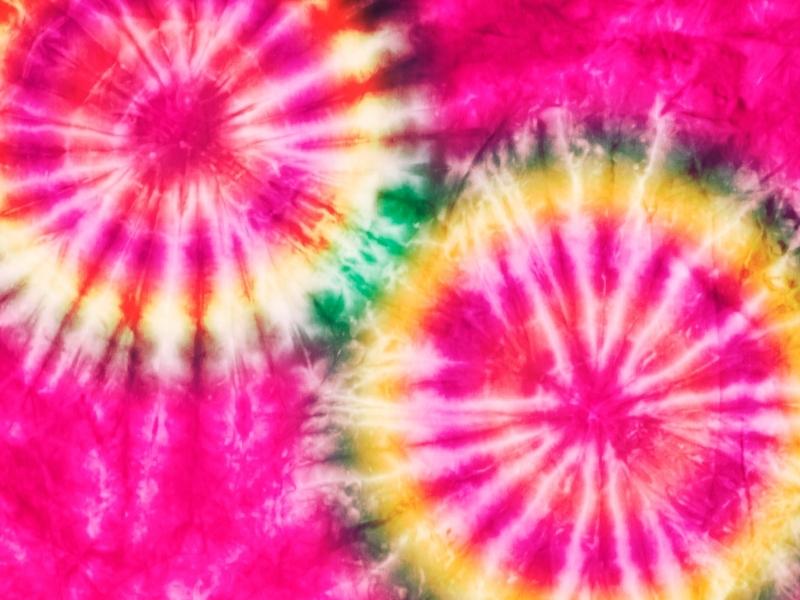
Bleach Tie Dye Sunburst Pattern
This technique isn’t well-known, but it’s definitely worth trying if you’re looking for something new.
The sunburst dying technique allows you to craft abstract ring pattern designs that’ll transform your shirt or sweatshirt into a totally different item.
First, you need to pinch the fabric. Then, pull the pinched parts up around 1-1.5 inches and use rubber bands to secure them. Continue doing this until you’ve created as many sunbursts as you want.
Then, apply the bleach solution to change the color of the exposed fabric. The covered parts will look like dark rings surrounded by bleached areas.
Learn how to do the sunburst dying technique correctly at sarahmaker.com.
Bleach Tie Dye Spiral Pattern
The spiral tie-dye folding technique is a classic that never gets old. To create your own spiral tie-dye pattern with bleach, pinch the center of the shirt and twist it until the shirt looks like a spiral.
Then, grab some rubber bands and wrap them around the fabric. For the best results, create a criss-cross pattern with the bands.
After that, submerge the bundle’s edges into a plastic container filled with bleach solution. Alternatively, you can use bleach spray.
Get the detailed spiral folding tie-dye shirt technique from sarahmaker.com.
Pole Wrapping Bleach Tie Dye Technique
This bleach tie-dye folding technique closely resembles the shibori-inspired method. In the pole wrapping method, you need to wrap the wet shirt around a pole and tie it with a string.
Put the shirt on a table, and from the bottom corner, wrap the fabric around a pole (preferably a PVC pipe) at a slight angle.
Then, use a piece of cotton string to tie the base of the shirt-covered pole. When trying it, make sure that you scrunch down the shirt for extra compression.
Once you’ve made sure that the fabric is fully scrunched and compressed, wear rubber gloves and spray the bundle with a small amount of diluted bleach mixture in a well-ventilated area. You can also soak it since the string will cover the fabric, anyway.
Find the in-depth pole wrapping bleach tie-dyeing instructions at sarahmaker.com.
Scrunch Bleach Tie Dye
The scrunch bleach tie-dye technique is tried and tested in lots of dye designs. The goal here is to create a random pattern, which is why it’s so fun and easy to craft.
Soak your shirt in water and rinse it while keeping it wet. Then, scrunch the shirt by starting at the bottom and going downwards. Use any type of rubber band to wrap it up. You can place the rubber bands in any direction you prefer, but placing them diagonally will give you the best results.
Grab your bleach solution and start pouring it over the shirt. You can also submerge the shirt, but pouring will give you the best control. You may also use a spray bottle if you wish.
Check out how to make a scrunch bleach tie-dye shirt from the tie-dye tutorials at abcrafty.com.
Target Bleach Tie Dye Design
This target reverse tie-dye is aggressive and, at the same time, fun.
The objective is to make spikes and use rubber bands to wrap them up. From the bottom of the shirt, pinch a small part and wrap one rubber band a little below where your hand is.
Keep the areas beneath secure with rubber bands while maintaining the same spacing. These rubber bands will end up being the rings that give the target pattern. Do this for the sides and top left corner of the shirt, too.
Dip the shirt in a bleach solution and give it a few minutes to absorb it. Then, put the shirt in the washing machine, and voilà ! The target pattern is here.
Read the complete target bleach tie-dye patterns guide at abcrafty.com.
Reverse Tie-Dye Striped Tank Top
Who said that reverse tie-dye patterns are limited to t-shirts? Tank tops can be added to the mix, too!
This reverse tie-dye striped tank top can be a fun addition to your wardrobe when the weather is too hot that you can’t even wear a shirt.
Fold the tank top in accordion style while ensuring that the width of each fold doesn’t exceed 2 inches. Then, fold one of the sides to the middle and lift the center. Then, tuck the other end into quarters.
Wrap the tank top with some rubber bands to prepare it for the bleaching process. Then, while wearing gloves, gently pour the bleach from the container. You may also use a spray bottle; the important thing to do here is to let the bleach solution go between the folds.
Get the in-depth instructions for these tank top bleach tie-dye patterns at abcrafty.com.
Bleach Tie Dye Pattern Ideas Round-Up
So these were some of the best bleach tie-dye design ideas that you can try right now. Of course, you don’t have to stick to a single idea and follow it religiously.
Don’t be afraid to experiment by yourself and maybe even combine multiple ideas into one to create something new. You can even try these ideas with sweatpants and other types of clothing.
And of course, only use bleach in a well-ventilated area to prevent chlorine fume intoxication. It’s also crucial that you wear rubber gloves.
Check out more bleach tie-dye design ideas at craftwhack.com, and don’t forget to tell us which tie-dye techniques you liked the most!
Comments
0 comments