Purim, also known as the Feast of Lots, is an upbeat Jewish festival that celebrates the survival of the Jews who were marked as dead by the Persian rulers. It involves exchanging gifts, eating delicious food, and donating money or goods to those less fortunate.So, why not bring some more joy into your Purim festivities? Take a look at how to do that with the top 7 Purim craft ideas.
#1 Purim Paper Gift Sacks
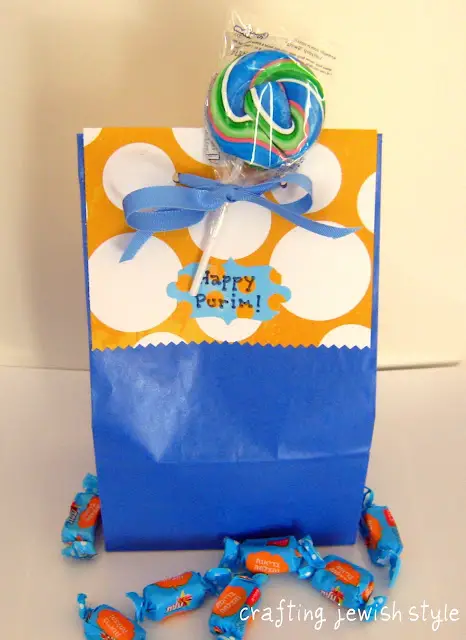 Source:http://craftingjewishstyle.blogspot.com/2012/02/purim-mishloach-manot-ideas-with.html Everyone loves pretty packaging so why not bring it into Purim? With these paper gift sacks, you’ll be known as the prettiest gift wrapper in the synagogue.If you are looking for something easier, why not just convert an old paint tin into a gift box? It’s as simple as washing and painting it. No hardcore crafting needed.
You Will Need:
- Scrapbook paper (whatever pattern you like)
- Paper lunch bags (whatever color you fancy)
- Decorative edge scissors
- Ribbon
- Hole punch
- Scissors
- Stickers, tags, etc. (to decorate)
How to Make It:
- Cut a wide strip of scrapbook paper with the standard scissors. It should fit over the top of the lunch bag and hang over both sides.
- Fold the strip in half.
- Cut the short edges with decorative scissors to make it ultra pretty.
- Fill the paper lunch bag up with snacks or gifts.
- Put the folded scrapbook paper over the filled bag. Make sure the top of the bag is folded down.
- Use the hole punch to make two holes near the top of the bag.
- Thread the ribbon through both holes and tie it into a bow.
- Use stickers, tags, and anything else you can find to decorate the bag.
You’re finished!
#2 Purim Groggers
 Source:http://www.designmegillah.com/2013/02/make-your-own-purim-groggers.html Groggers are a Jewish instrument typically used during Purim. Below, you will discover how you can make your own.
You Will Need:
- 1 14-inch wood dowel
- Beans
- Empty plastic bottle (without the lid)
- Washi tape or any type of patterned tape
- Ribbon
- Paint
- Paintbrush
- Duct tape
How to Make It:
- Cover the wood dowel with washi tape.
- Paint the plastic bottle. Acrylic paint works best but if you’re short on time, you might want to head outside and start spray painting.
- Fill the bottle with beans.
- Decorate the bottle with washi tape and ribbon.
- Duct tape the full bottle onto the wood dowel. Try to use duct tape that matches the base color of the bottle.
- Decorate with more ribbon and washi tape to cover the duct tape.
You’re finished!
#3 Felt Hamantaschen
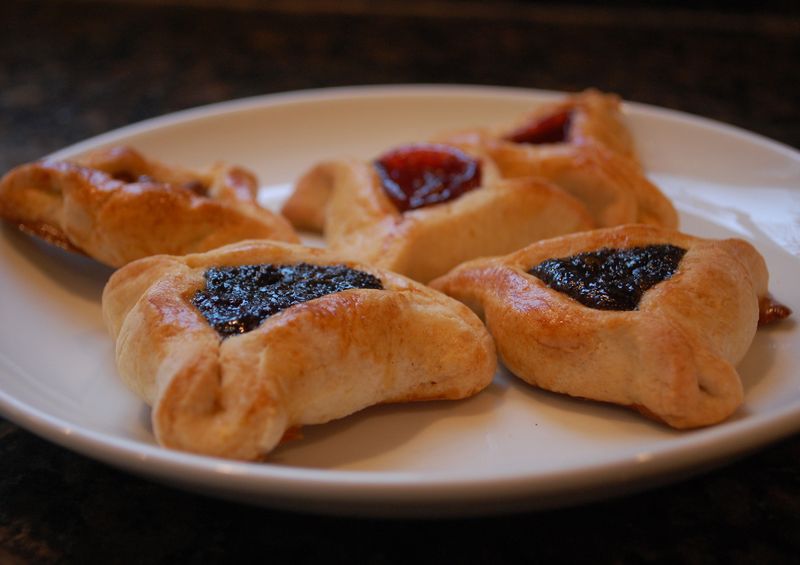 Source:https://whileshenaps.com/2013/02/easy-purim-craft-no-sew-felt-hamentaschen.html Hamantaschen is the cookie of Purim. The three corners represent the hat that was traditionally worn by Haman. Generally speaking, they are edible and taste amazing but we’re going to show you how to make felt versions. Don’t try to swallow!
You Will Need:
- Tan felt
- Pompoms (you can make your own by following the how-to below)
- Hot glue (if you don’t want to use hot glue, use craft glue instead)
- Paperclips
- Pencil
- Scissors
- Drinking glass
How to Make It:
- Place the drinking glass on top of the tan felt.
- Trace around the glass with a pencil.
- Use the scissors to cut the circle out.
- Place some glue onto the center of the felt circle.
- Press the pom pom onto the glue.
- With the glue, draw a triangle on any part of the circle.
- Pinch the felt together and squeeze. Make sure the glue is completely set before letting go. It might be easier to use the paper clips to hold it in place so you can continue with the project.
- Repeat the glued triangle and pinching action twice more on other areas of the circle. This creates a distinctive hamentaschen shape.
You’re finished!
Bonus: How to Make Your Own Pom Poms
Here, we’re assuming that you don’t have a pompom maker. If you do have one of those contraptions, however, just go straight to the yard wrapping part.
You Will Need:
- Cardboard
- Pencil
- Drinking glass
- Scissors
- Yarn
How to Make It:
- Put the drinking glass rim-down on the cardboard.
- Use the pencil to trace a circle.
- Cut out the cardboard circle.
- Draw a smaller circle inside the circle.
- Cut out the circle by making a slit from the outside circumference to the inside and following your pencil marks around.
- Cut a small v shape out of the top slit to ensure the yarn can slip easily through.
- Repeat the above steps to make a second cardboard circle.
- Hold both the circles together, one on top of the other.
- Wrap the yarn through the notch and around the sides of the circle. Make sure everything stays even.
- Repeat this motion until the circle in the middle is completely filled.
- Cut the yarn between both cardboard circles all the way around the circumference.
- Cut a separate piece of yarn and tie it around the middle of the pompom.
- Bring the yarn to the other side and tie it again. This should be really tight.
- Trim the pompom to ensure it’s even.
You’re finished!
#4 Purim Princess/Prince Crown
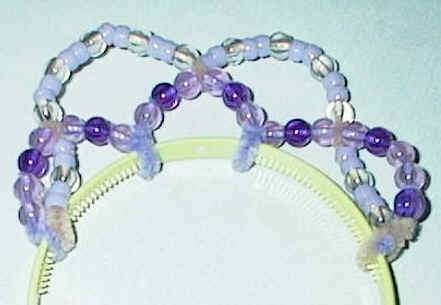 Source:https://www.dltk-holidays.com/halloween/crown.htm The little guy or girl in your life is undoubtedly going to adore wearing this crown. You never know, their friends might start begging you for one!
You Will Need:
- 2 pipe cleaners
- 40 beads
- Headband (a sturdy one, preferably without teeth)
- Hot glue (this is optional but might help give you peace of mind)
How to Make It:
- Thread the beads onto the pipe cleaners. Don’t worry about packing them on tightly. You’ll also need to leave enough empty space at both ends to secure the pipe cleaners onto the headband.
- Wrap one end of the pipe cleaner around the headband. Twist it to hold it in place. This is where you might want to add some hot glue.
- Push the first third of the beads together.
- Wrap the pipe cleaner around the headband again to create an arch.
- Do this twice more to create three arches.
- Wrap the first end of the second pipe cleaner around the top of the first arch.
- Repeat to create two arches.
- Snip off excess pipe cleaner.
You’re finished!
#5 DIY Needle and Thread Costume

If you have children, they’ll love wearing this needle and thread costume to the Purim celebrations! The best part? It’s pretty easy to make.
You Will Need:
- Big lampshade
- Duct tape
- Freezer paper
- Cardboard
- 5 plain white t-shirts
- Huge knitting needle
- Flexible cord
- Silver paint
- Paintbrush
How to Make It:
- If the lampshade has wire in the center, you need to cut it off.
- Cover the rest of the wire (if you can’t get it all out) in duct tape.
- Make a cone with freezer paper. It should stick out of the lampshade by several inches on both ends.
- Mark the shape and cut. This will be used as your template for the cardboard.
- Cut two rainbow shapes from the cardboard following the guide you made with the freezer paper.
- Fold them back into a complete circle.
- Stick them to the top and bottom of the lampshade. Duct tape is the best option for this.
- Cut the t-shirts into “yarn”. Just cut a never-ending strip, attaching to the next t-shirt as you go.
- Wind this around the lampshade.
- Use any leftover t-shirt to make straps to hold the spool up.
- You’ve finished the spool, now you just need to make the needle.
- Tape the flexible cord to the large knitting needle with duct tape.
- Paint it silver.
- Thread it through the yarn on the spool.
Try it on and you’re finished!
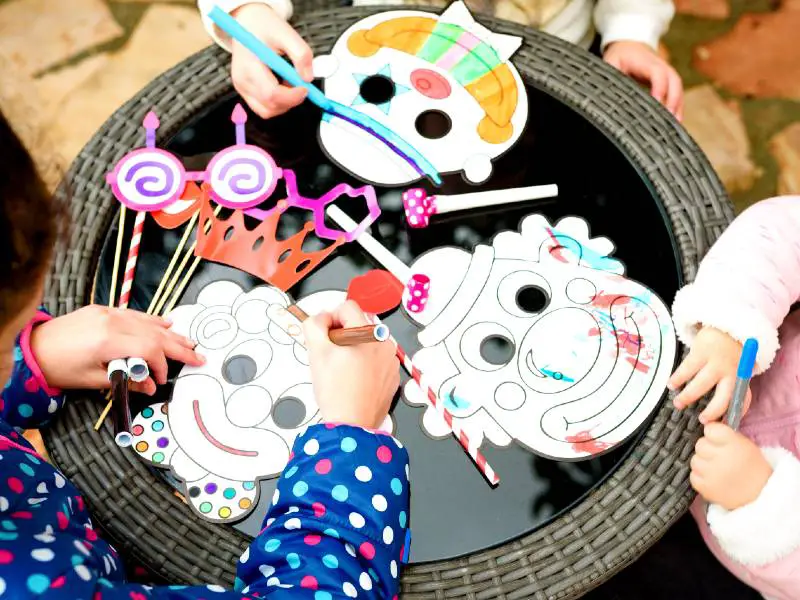
#6 Purim Party Masks
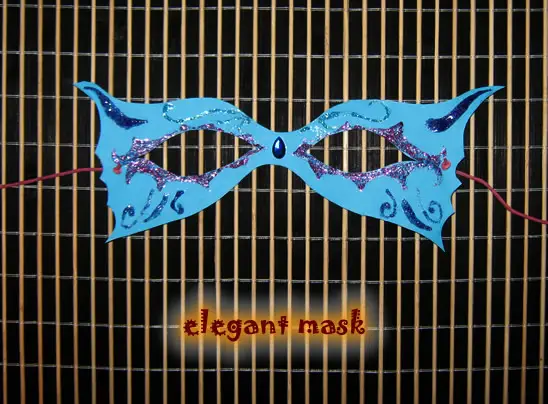 Source:https://www.artistshelpingchildren.org/kidscraftsactivitiesblog/2012/02/how-to-make-an-elegant-mask-for-purim/ There is no right or wrong way to make a mask so interpret the following however you’d like. Just have a bunch of fun while doing so!
You Will Need:
- Colored paper
- Pencil
- Cord
- Glitter glue, colored pens, paint markers, etc.
- Scissors
- Self-adhesive crystal
How to Make It:
- Using the cord, figure out how big to make your mask. It should cover the width of your face.
- Make marks on the colored paper according to your measurements. Aim for two dots for your nose and two dots marking the side of your face.
- Draw the lower half of the mask by connecting the nose dots with the sides of the face. Make this as fancy or as simple as you’d like.
- Draw an arch to connect the nose dots together. Make sure it roughly follows the curvature of your nose.
- Draw the upper half of the mask. Again, create whatever shape you fancy.
- Draw an inverted arch on the top half to mirror the nose arch.
- Cut out the mask.
- Use the cord again to measure the length and width of your eyes.
- Mark this out on the mask.
- Draw the shape of your eyes.
- Cut the eyes out.
- Use glitter pens, colored pencils, and anything else you can think of to decorate the mask.
- Leave space between the eyes for a large crystal.
- Make two small holes, one on either side of the eyes.
- Cut the cord in half.
- Tie a knot on one side of both halves.
- Put it through the tiny holes.
You’re finished!

Comments
0 comments