You can stay busy for hours making star crafts out of different materials. These are fun crafts to do with your family, with friends, or as classroom projects for preschool and elementary school students. Below you will find some easy ideas for creating your stars. For those who need a visual guide, links to tutorials are included with each craft.
Origami Star
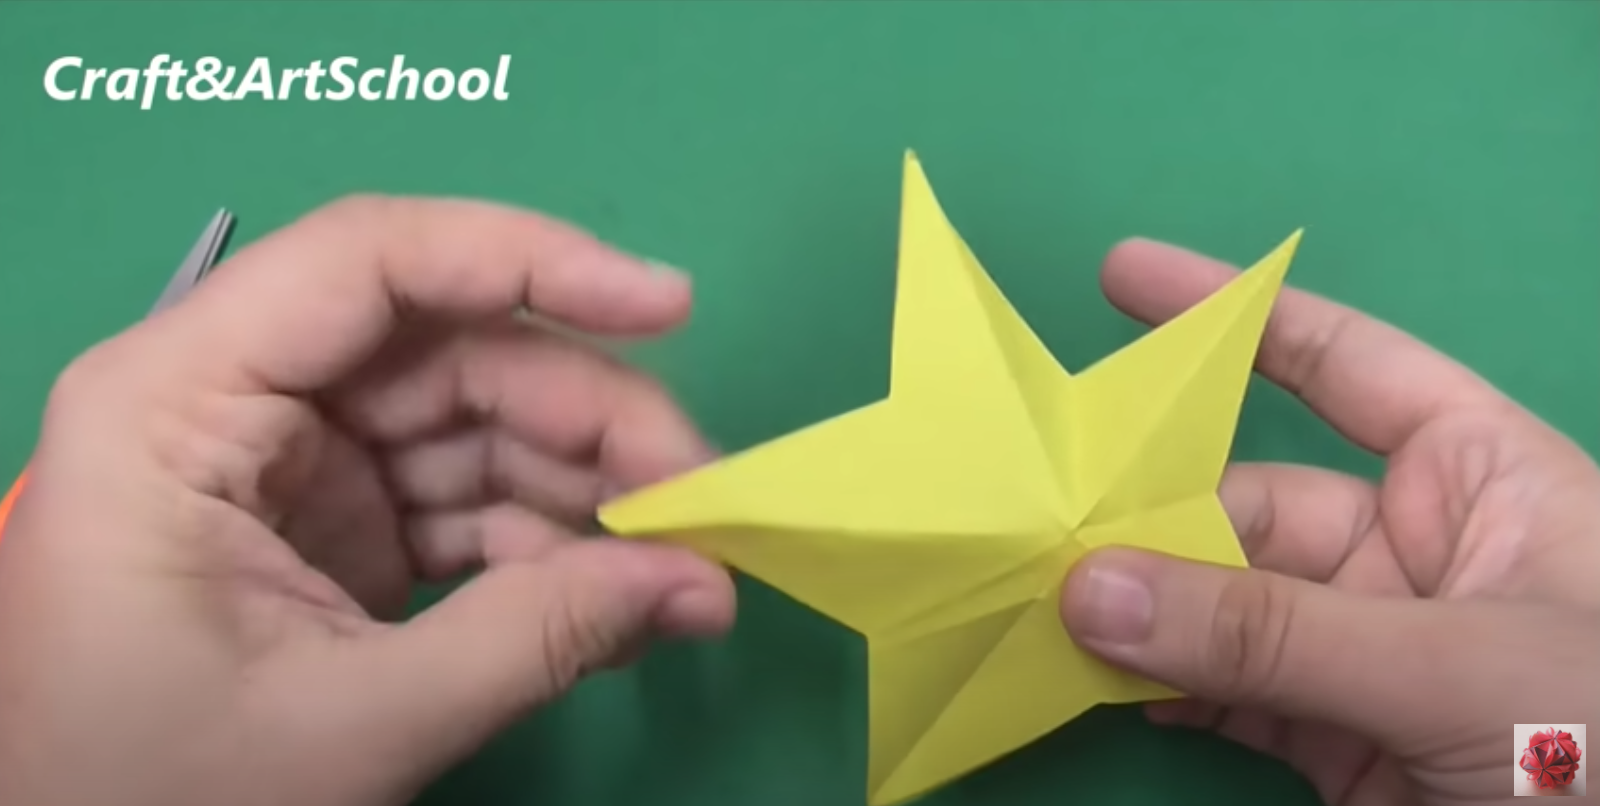
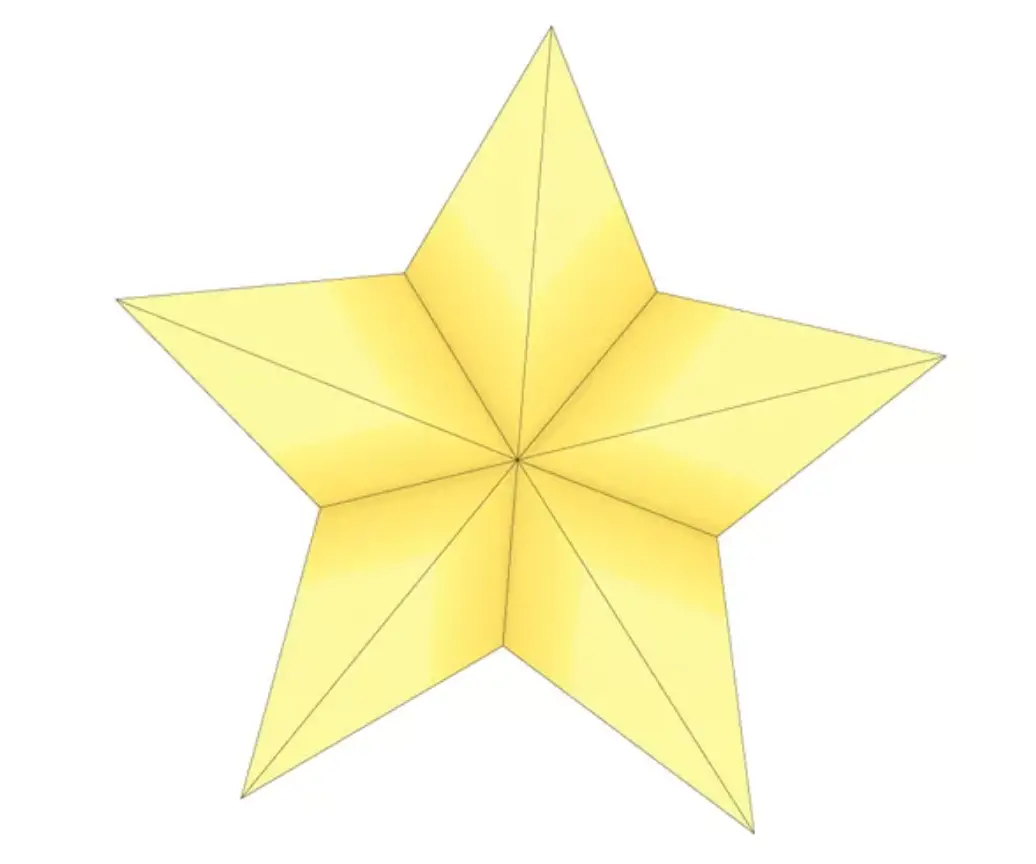 Source: By Chrissy PK @ The Spruce Crafts, “Easy Origami Star Tutorial” (https://www.thesprucecrafts.com/easy-origami-star-tutorial-4115083)If you have never done origami before, have no fear, this is an easy project for beginners. It has a lot of steps so watching the tutorial is helpful. This is a fun craft for people who like to keep their hands busy without making a mess. All you need is colored paper and a pair of scissors. You will need:
- Colored craft paper of your choosing (decorative paper will really make it pop!)
- Scissors
Instructions:
- Cut out a square from your paper (make sure all sides are equal in length).
- Fold the bottom of the edge of your paper to the top edge, and pinch along the fold to make a crease.
- Bring bottom left corner up to top center, then pinch down in the middle of the fold (do not make full crease).
- Unfold and repeat with the left corner, bringing it down to the bottom center and pinch in the middle of the fold.
- Unfold (you should see the outline of an X on the left side of your paper) and bring the bottom right corner to the center of the X then crease. Leave folded.
- Fold the left of the top flap (the fold you just made) to align with the right edge.
- Next fold bottom left up and over to the right.
- Now fold the left section behind the right section (mountain fold).
- You should have a long triangle pointing down. Cut the triangle diagonally in half, so that the bottom point is gone.
- Unfold your paper to see your 3-dimensional star.
Stained-Glass Star
Source: By Red Ted Art, “How to Make Craft Stick Star Sun Catchers” (https://www.youtube.com/watch?v=jdzapSo3mDs)These are easy, quick, and inexpensive to make. To achieve a more genuine stained-glass window look, you can paint the craft sticks black ahead of time. Hang your star on or near a window to enjoy the pretty effect of light shining through it. You will need:
- 5 craft sticks per star (popsicle sticks will work fine)
- Several sheets of colored tissue paper
- Scissors
- Craft glue
Instructions:
- Place sticks flat on a table in a star shape (place two sticks in an upside-down V-shape, then place one stick across the V about a third of the way down from the point. Place the last two sticks in an x-shape so that their ends are touching the ends of the other sticks)
- Once you have a star shape you like, use a hot glue gun to attach the sticks together. If you are making stars with children, you can do this step for them or use the craft glue instead.
- Cut pieces of colored tissue paper to fit over the middle of the star and the five points. You can use one large piece for a single color or mix colors.
- Put glue on the sticks and stick your paper to the star. Trim the edges. Some overlap of paper on the star is okay, it will bring out different colors!
Yarn-Wrapped Star
Source: By Søstrene Grene, “DIY: Yarn-wrapped star ornaments by Søstrene Grene” (https://www.youtube.com/watch?v=Ym2f20Zilw0)This is a simple craft to do with kids. It is also a great way for knitters and other needle crafters to use up any extra yarn you have lying around the house. You will need:
- White paper or star-shaped cookie cutter
- Cardstock or a thin piece of cardboard
- Scissors
- Yarn
- Hot glue gun
- Pony beads (optional)
Instructions:
- Print a star template or draw the outline of a star on your paper (you can use a star-shaped cookie cutter if you have one).
- Cut the star out of the paper.
- Place a paper star on cardboard and trace it.
- Cut out the cardboard star.
- For decorative accents, use a hot glue gun to glue pony beads to the points of the star (you can use the hole of one pony bead to thread string for hanging).
- Use a dot of hot glue to attach the end of your yarn to the star.
- Begin wrapping your star in different directions until it is fully covered.
- For extra hold, use a dot of hot glue on the points as you wrap.
- When finished, cut your yarn and weave it in the tail end.
Easy Craft Stick Star
Source: By Traposo US, “Ideas to decorate Christmas. Star craft for children” (https://www.youtube.com/watch?v=GpGvWFmmRrE)This is another super simple craft idea. These stars make great ornaments for the holidays. You can keep them basic and just paint your popsicle sticks in a color you like or add some flair with glitter and other decorative accents. You will need:
- Six craft sticks
- Paint
- Crafting glue
- Small decorative stars, glitter, sequins, other small decorative items (optional)
- Small paintbrush (optional)
Instructions:
- Paint the sticks in the color of your choosing and let dry.
- Glue three sticks together at the points in the shape of a triangle. Repeat with the remaining three sticks so that you have two triangles.
- Place one triangle upside down over the other so that it makes a star shape, then glue in place.
- Brush or squeeze glue along the sides of the star and sprinkle with decorative accents.
Salt Dough Star Ornament
 Source: By The Best Ideas for Kids, “Star Salt Dough Decorations” (https://www.thebestideasforkids.com/salt-dough-christmas-decorations/)This project is a little more involved than the other crafts, but it is still easy-peasy! The recipe is simple, and the process is a lot like baking cookies (just don’t eat the finished product). You can keep your salt dough ornaments plain or add color and decorative accents. You will need:
- 2 cups of flour
- 1 cup of salt
- ¾ cup of water
- Straw to make a hole for hanging
- Star-shaped cookie cutters (different sizes if you would like)
- Ribbon
- Small bell
- Paint, glitter, sequins, etc. (optional)
- Modge podge
Instructions:
- Mix flour and salt together in a mixing bowl.
- Slowly add water and stir (it will become a thick dough).
- Form the dough into a ball.
- Roll out dough until it is about ½ inch thick.
- Use cookie cutters to cut out stars.
- Use a straw to poke a hole in one point for hanging.
- Bake at 250 degrees for two hours (longer if needed).
- Let them cool and dry.
- Once dry, paint or decorate stars (optional).
- Spray with mod podge to seal and let dry.
- String ribbon through the bell and tie ribbon around the star for hanging.
You can use your finished products as holiday decorations, party decorations, or hang them from the ceiling of your child’s bedroom. Happy star crafting!
Comments
0 comments