What could be better than Jack O’ Lanterns when it comes to Halloween decor? Bright orange, iconic, and fun, they are the perfect way to make your house ready for this much-loved holiday and set off other black crafts with some vivid color.Here are some great Jack O Lanterns crafts to get you started!
Pet Pumpkin Painted Rocks
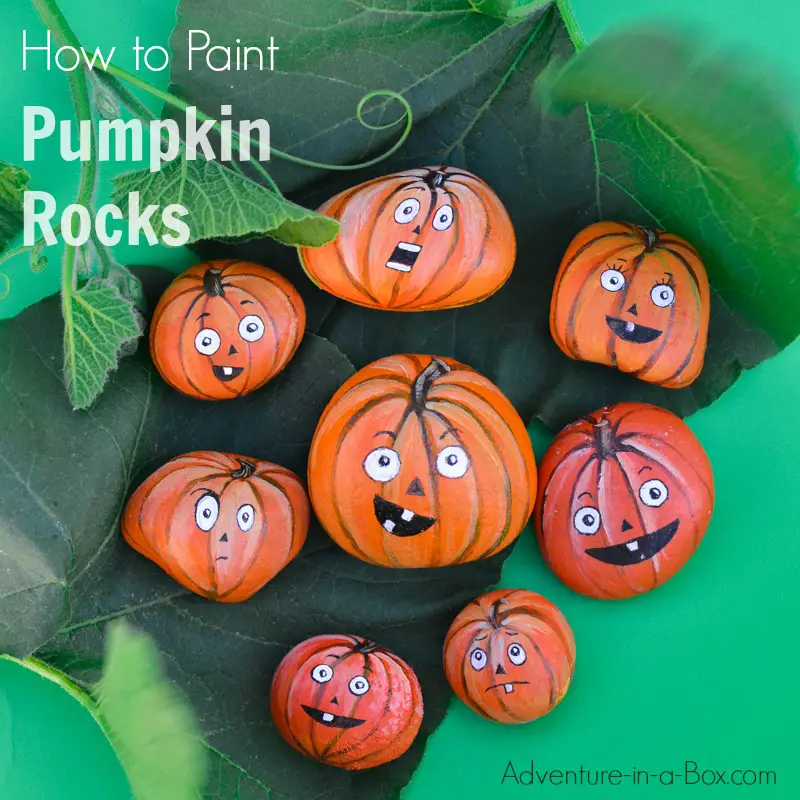 Source: https://www.adventure-in-a-box.com/painted-jack-o-lantern-pumpkin-rocks/Who doesn’t love pet rocks? These cute little buddies are perfect and popular year-round, but they are particularly wonderful at Halloween when you have an excuse to paint whole handfuls bright orange with scary faces.
Materials
For a pumpkin pet rock, you’ll need:
- Some smooth pebbles or rocks in various sizes and shapes
- Orange paint, preferably eco-friendly if you’re going to be using the stones to decorate outside
- White paint
- Black markers or black paint
- A paintbrush
Step 1: Paint Your Rocks
Grab your rocks and get painting! You might want a couple of coats to get them to come out really bright orange. Once you’re satisfied with the color, set them aside to dry for a while. They need to be totally dry before you move onto the next step.
Step 2: Design The Faces
While you’re waiting for the paint to dry, have a think about the faces you’re going to add. Look at the shapes of the rocks and decide what would look good on each. Think about their character and what sort of expression they might be pulling. It may help to sketch on some scrap paper before you paint on the rocks.
Step 3: Paint The Pumpkin Lines
Once your rocks are dry, paint pumpkin lines on them (or use a marker pen). You should try to use the contours of the rocks as your guide, bringing the lines to a central point at the top and bottom of the rock. You can draw the stems on some if you like.Depending on how artistic you’re feeling, you could add shading or highlights to the pumpkin’s contours to give them more depth.
Step 4: Paint The Faces
Once the pumpkin lines are dry, start to design the faces. You can mark them lightly with a pencil first if you like, and then use your marker pen or black paint to fill them in properly. Try and do a variety of different expressions.The eyes will look better if you fill them in white and then add black pupils as this will give them more definition. Alternatively, you can go for fully black eyes to create a darker and more menacing sort of look ““ it is Halloween, after all!
Jack O’ Lantern Treat Holder
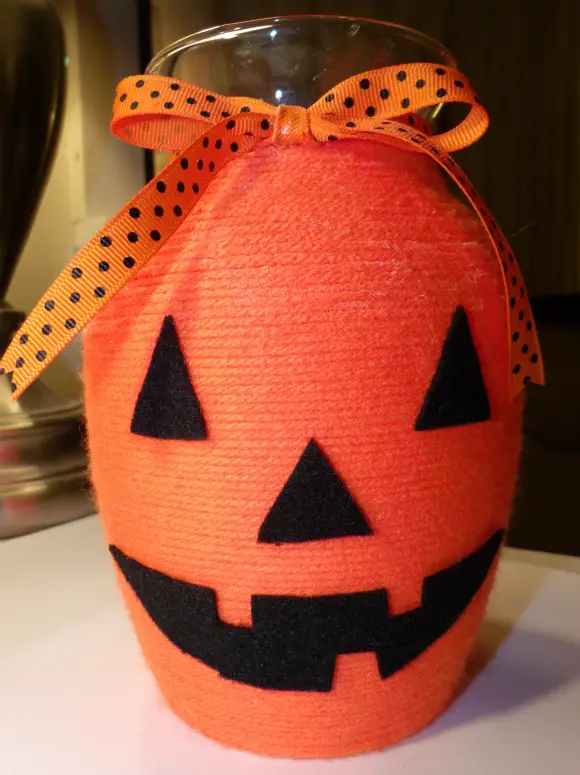 Source: https://dollarstorecrafts.com/2011/10/make-yarn-jack-o-lantern-vases/If you want some storage pots for your Halloween goodies, all you need to do is collect up a few jars in advance of Halloween, and get a little crafty!
Materials
For this craft, you’re going to need:
- Glass jars in varying sizes (as many as you want to make treat holders). Pickle jars are good as they tend to be very large.
- Thick orange yarn
- Scissors
- Black paper or black felt
- Glue gun
Step 1: Clean Jars And Remove Labels
Before you do anything else, you’re going to want to thoroughly clean and wash your jars and take off any labels. You don’t want to contaminate treats with leftover scrapings of honey, jam, pickles, or anything else.Once the jars are clean, leave them to dry, and then you can move on to the next step.
Step 2: Wrap The Jars
Grab your orange yarn and put a dab of glue from your glue gun at the bottom of the jar. Stick the end of the yarn in it, and then begin to wind the yarn around the jar. Don’t bother trying to cut the right length of yarn; just keep unwinding it from the skein as you go.Try not to pull the yarn too tight or leave it too loose, but aim for just fitting it flush with the glass surface.As you work your way around, add another dot of glue every so often to hold the yarn in place. This will make it easier to keep wrapping and will mean that you don’t lose all your hard work if you slip and some come undone.As you wrap, keep pushing the yarn down against itself so you don’t end up with any gaps. Finally, at the top, add another dot of glue and secure the yarn end. You can then cut the top of the yarn off.
Step 3: Cut Out A Face
Black felt is best for this, but black paper will do if you can’t access black felt. Grab whichever you are using, and draw (chalk may be easier than a pen for felt) some face components.You want some scary eyes and a mouth full of teeth, as well as a little black nose. You don’t need to spend ages making them beautiful, but have as much fun as you like with them. It might help to sketch your design on paper before you start (if you’re using felt).
Step 4: Glue The Face To The Jar
Arrange your pumpkin’s face on the jar and see what you think! You can always cut new pieces if you don’t like them. Once you’re pleased with the result, glue the face into position, and you have your very own Jack O’ Lantern treat jar!
Step 5: Create A Top (Optional)
If you want to use the lid of your jar, you can create a pumpkin stalk. If possible, a jar with a reasonably plain gold top is best. If your jar top will spoil the pumpkin effect, just cover it with orange paper.Grab a piece of paper and roll it to create a stalk. You can sketch some brown lines on it to add to the effect or keep it simple. Dot some glue into the center of your jar lid, and glue the stalk in place. Perfect, a finished pumpkin!
Conclusion
You’ve now got two great Jack O’ Lantern crafts to make your house bright and colorful on Halloween. We hope you have lots of pumpkin fun!

Comments
0 comments