This collection of fun and creative crafts for 11-year-olds will keep them entertained for hours. You’ll find ideas they can do alone or projects that are great to do with siblings or friends too. The best thing about doing crafts at home is they are usually cheap and will help keep your tween off the screen. We’ll give you a step-by-step tutorial for each craft activity but feel free to explore and add to any of these by letting you and your child’s imagination run wild.
Duct Tape Book Cover
Source:https://www.wikihow.com/Make-a-Duct-Tape-Book-CoverJazz up book covers and protect them at the same time using colorful or patterned duct tape. You can get so many cool and exciting colors or patterns these days so there is something for everyone, plus duct tape is notoriously tough so it acts as great protection for their school books.
Supplies you’ll need:
- Duct tape
- Scissors
- Craft blade
- Ruler
- Cutting mat
- Book (that you want to cover)
Step-by-step tutorial:
- Measure your book with the ruler from cover to cover including the spine. For softcover books with a small spine add 6 inches to the width and 1 inch to the height. For hardcovers with larger spines add 9 inches to the width and 1 inch to the height. Write your measurements down.
- Cut your duct tape to the width you wrote down (from cover to cover) and place the strip face down on your cutting mat. Cut a second strip the same length and lay it underneath the first, slightly overlapping by ½ inch so they stick together.
- Keep cutting strips of the same length and laying them below each other and sticking them together with ½ inch each time until you get to the height you need. You may not get exactly the same height as you wrote down because you are using the strips to work up to it. Make sure your duct tape sheet is more rather than less the original height.
- Now, slowly peel the sheet the duct tape has formed off the mat and place it on its back so the sticky side is facing up.
- Cut a strip of duct tape the same length and stick it face down onto the sticky sheet on your mat, leaving it to hang over the top by ½ inch (you will fold this over after to form the protective top). This layer you are working on now will be the front cover and you can use a different color/pattern to the first if you like.
- Keep cutting strips and sticking them down as you did the first sheet, overlapping the strips by ½ inch.
- When you get to the final strip you need to leave this hanging over the edge like you did the first strip. Make sure it is at least ½ inch.
- Flip it over so you see the ½ inch strips of sticky tape on the top and bottom. Fold these bits over so you create a seal and these will help form the top and bottom bind of the cover. Go over the sheets with a hard ruler to smooth over any bumps where you need to.
- Now you can neaten up the sides so they’re even using a craft blade or scissors. You just want to trim it so there is no sticky tape visible. You want to keep extra width to protect the inside of the book and act as a pouch.
- Wrap your duct tape cover around your book so that you have an even amount extra on both sides. Tuck it into the front and back cover and fold it and press down firmly. Now remove the book and with the impression marks you just made, press down again around the sides where you tucked it in and along the top.
- Measure the width of your cover and add 1 inch to this, then cut two strips of duct tape to this measurement. This time you will need to cut these strips vertically in half lengthways so that they are 1 ½ inch thick. You will use this to hold the cover together and keep your book in place.
- Place your folded cover on the mat so the front cover is facing up and the folded parts are facing down. Place the strip of tape you just cut so that it’s half on the top of the cover and half off and do the same at the bottom edge. Flip the cover over and seal the tape to the inside cover pressing firmly. Trim off the sides.
- Now you can take your scissors and cut the ½ inch or so of tape at the top and bottom that is covering part of the slit where the book will slot in. Make sure you are just cutting the strip you added in step 12 and don’t cut the whole way through.
- Now you’re going to reinforce and bind the shorter edges in the inside of the cover where the book will slip into (they form a pouch). Measure how long the opening is and cut ½ inch shorter than this (2 strips).
- Take 1 strip and fold half of it over 1 edge over a pouch opening and fold it under so it sticks together and seals. Repeat on the other side.
- Take your book and slide the back and front cover into the pouches and it’s ready to go.
You can reuse your book cover if you have another same or similar-sized book to cover in the future so don’t throw it away when your child is finished using the first book.
Decorate Canvas Shoes
Let them customize their own shoes by designing patterns or images and drawing these on. This can be a fun activity for them to do alone or dreaming up ideas with their friends.
Supplies you’ll need:
- White or light-colored canvas shoes
- Pencil
- Paper
- Colored pencils or crayons
- Fabric or acrylic markers in a selection of colors and tip widths
- Newspaper or an old sheet to protect the work area or floor
- Waterproof acrylic spray
Step-by-step tutorial:
- Choose the shoes you are going to decorate. Make sure they are canvas so the marker pen ink sticks to them. They could be old ones lying around the house or you could pick up a cheap pair from a discount store or shoe store if you like.
- Grab some plain paper so you can practice your designs first. If you’ll be drawing an image, try it a few times on paper before you are happy. You can also try different color combinations at this stage using colored pencils or crayons.
- When you’re happy with the design or drawings, find somewhere to work with the shoes. Find a flat area to work on, it could be a table or the floor. Make sure it is well ventilated or outside due to the fumes from the markers.
- Lay some newspaper over the area or an old sheet to protect the floor or the tabletop.
- Sketch your design or drawing/s onto the shoes with a pencil first. By doing this it will be lighter and any mistakes you can go over with a marker pen later.
- Color in or paint your design using the different colored marker pens you want to use and a selection of thin and thick tips.
- Spray a waterproof acrylic spray over the shoes to set the ink and protect your shoes from the weather. It will help to stop the ink from running. Check the instructions on your can to see how many coats are recommended and how long to leave the shoes before they dry.
Drying time and how long the ink will take to set will depend on how warm it is where you are, and if they are outside with a lot of wind or not, etc. A good rule of thumb is to wait at least one day before you wear them.
T-Shirt Tote Bag
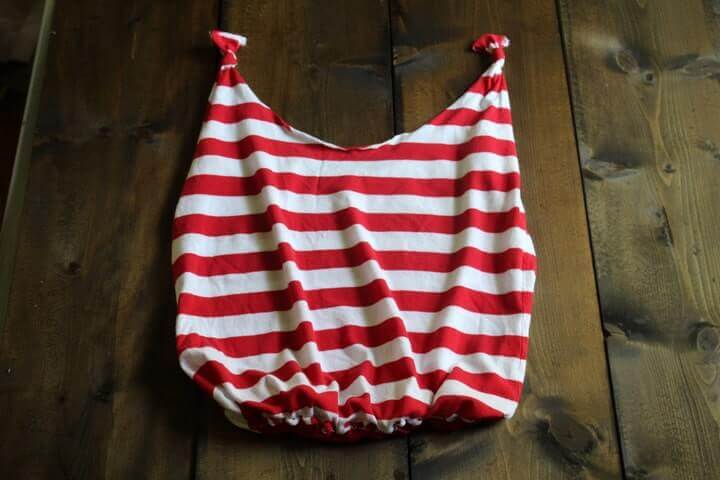 Source:https://mommypotamus.com/no-sew-t-shirt-tote-bag-tutorial/This one is always a favorite because it means your tween can use an old shirt that may not fit perfectly anymore but they don’t want to throw it away. Of course, you can use a new t-shirt if you prefer. Just remember, the stronger the fabric, the stronger the bag will be.
Supplies you’ll need:
- T-shirt
- Sharp scissors
- Washable marker
Step-by-step tutorial:
- Cut both of the sleeves off your t-shirt.
- Then cut the neckline off.
- Turn your t-shirt inside out. Now you need to decide how deep you want your bag to be. Use your marker to draw a line across on one side.
- Now cut slits from the bottom of the t-shirt to your line marker about 1 inch wide. Cut both sides of the t-shirt together. You need these to match up because you will tie these off in pairs, making the bottom of your bag. You also need to cut up the seam on both sides so these become a loose fringe.
- You can now tie your fringed ends together. Starting on the left, tie the two ends together that are facing each other.
- Then move to the next piece on the right and tie it together with the piece diagonally across to the right. Keep moving around the pieces like so until you have tied everything together and there are no gaps. You might want to just tie one knot to start then double knot them when you’re done.
If you used a fairly plain shirt, you can jazz your tote bag up using accessories if you like or glitter glue for fabric. Just a few diamantes stuck on or glittery stars can make all the difference.
Dreamcatcher
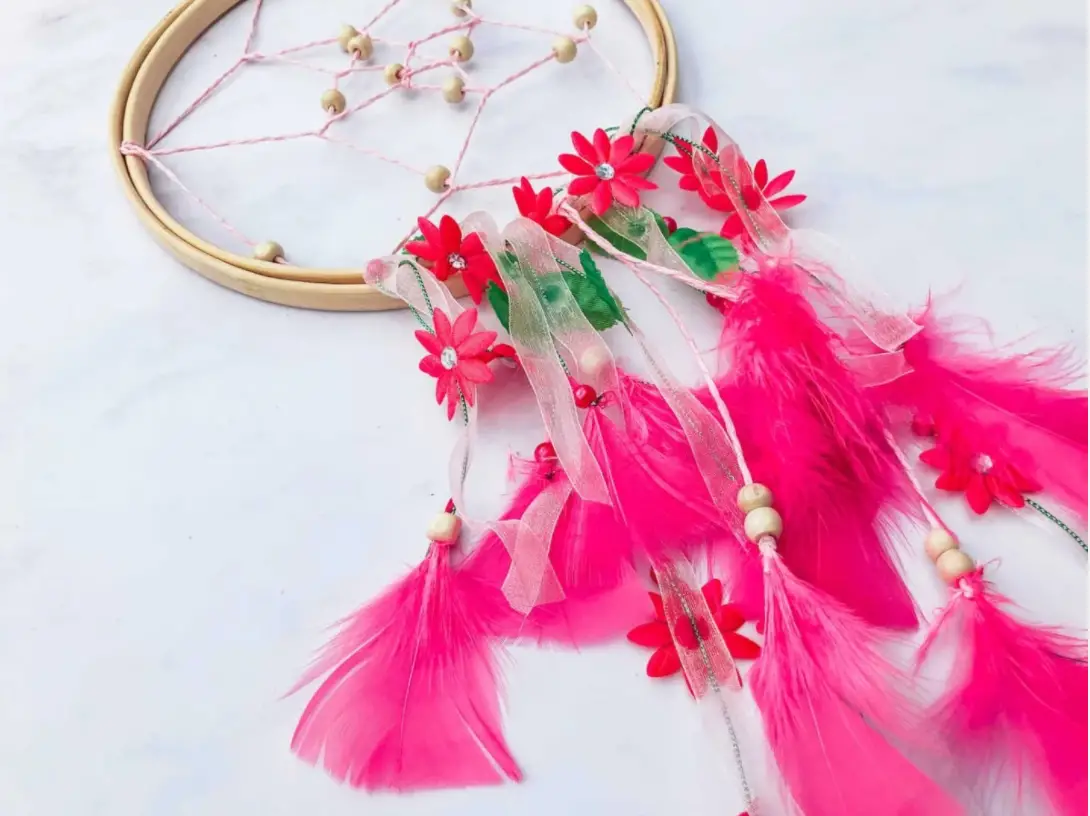 Source:https://extraordinarychaos.com/2020/02/how-to-make-a-dreamcatcher-with-embroidery-hoops.htmlMaking your own dreamcatcher is a fun activity that can produce a beautiful hanging piece of art that your tween can be proud of and enjoy for years to come. Best of all, you can use pretty much any accessory or color combinations that you like to suit the bedroom decor.
Supplies you’ll need:
- Metal or embroidery hoop (you can choose whatever size you like)
- Project twine or string (can be colored, patterned, or plain)
- Feathers (any color and size you like)
- Lace trim (a combination of patterns and sizes work really well)
- String
- Scissors
Step-by-step tutorial:
- Grab your hoop and your string. Start wrapping the string around the hoop and hold the end piece in place by going over it again with a couple of pieces of string. Continue wrapping the string around the hoop, you can wrap it tightly so it’s fully covered or you can move around in long sweeping twirls.
- When you have completed a full loop, tie it off in a knot around the hoop and leave it at the top (you will hang the dreamcatcher from this when it’s finished). Now you will make your webbing that makes the pattern inside the hoop. You can make your webbing as intricate as you like but these instructions will give you a nice 5-pointed star.
- To make the star, begin at the bottom left and tie off a piece of string then take it up to the top center and loop it around, then take it to the bottom right and loop it around, then to the mid-top left and do the same, then directly over to the same point on the right, then back to where you started and tie it off.
- Now you’re ready to make your dreamcatcher tail. It works well if you leave some room between each accessory so they can swing softly in the breeze. Cut pieces of lace trim you want to use and tuck them into the string already on the hoop. Then take your feather/s and tie each to a piece of string and attach them over the hoop.
- Now you can cut the top piece of string that you wrapped around the hoop in the first place. Decide how low you want it hanging down and this will depend on how long your feathers and lace strips fall. Cut the string at the desired length and attach it where you want to display it.
That is the essential kit you need to make a dreamcatcher. You can also attach further decorative items to the string, lace, or feathers like beads or jewels.
Slime – 2 ways
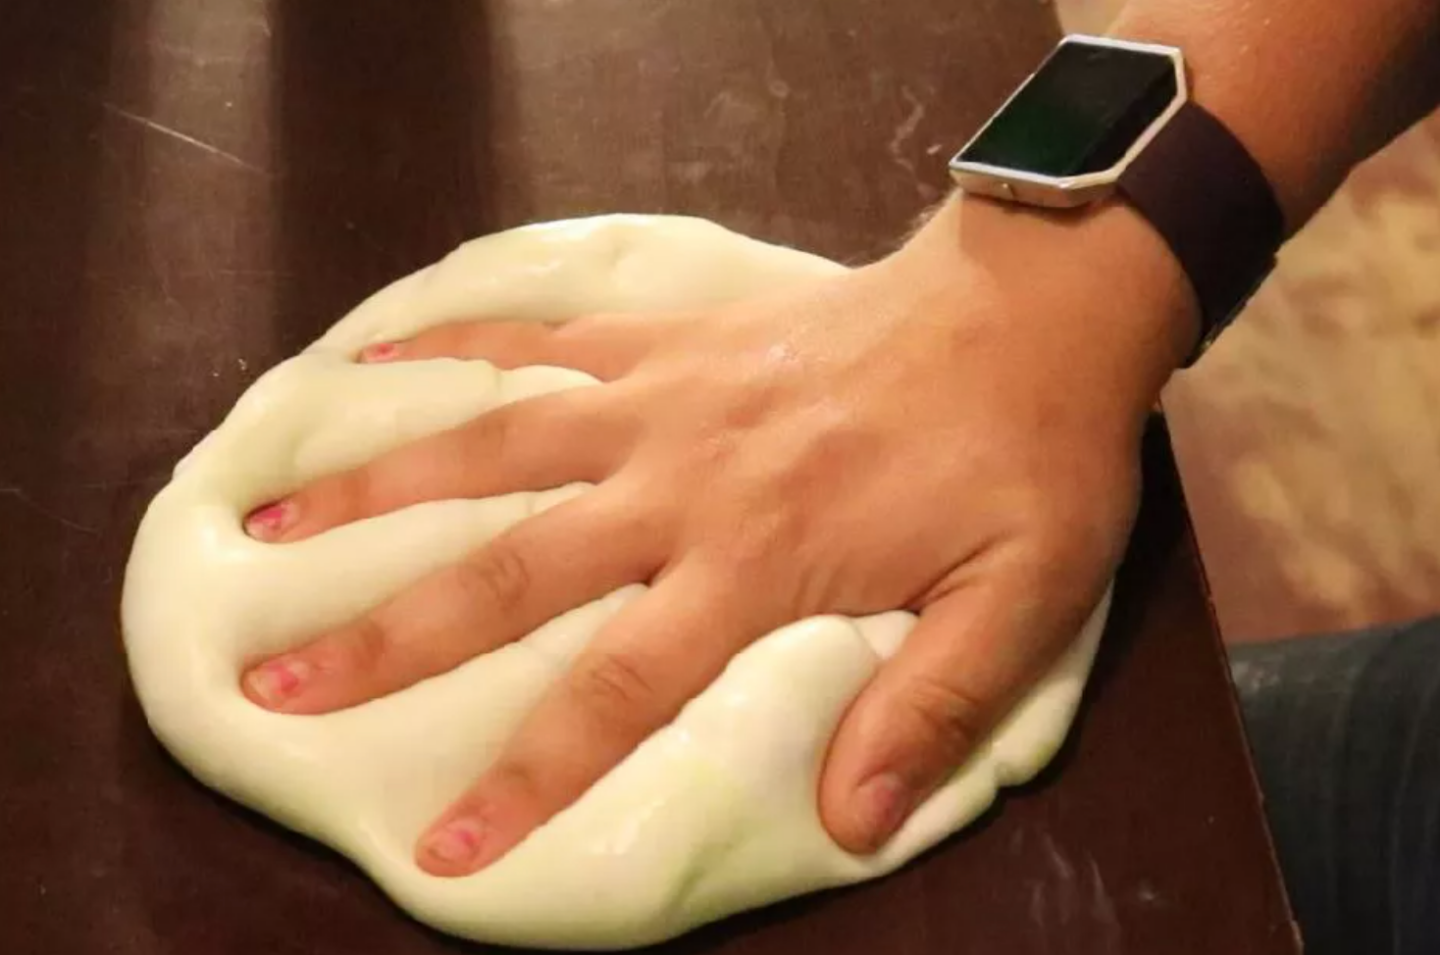 Source:https://www.cnet.com/home/smart-home/make-slime-without-borax/Slime is always popular to play with. Making it at home adds an extra element of excitement and is fun. These are borax-free recipes because there have been some safety concerns when using borax. These versions still work a treat and the first will give you fluffy slime and the second a more stretchy slime.
Supplies you’ll need (fluffy slime):
- Shampoo (the thicker the better)
- Cornstarch
- Food coloring
- Large mixing bowl
- Water
Step-by-step tutorial (fluffy slime):
- Add ½ cup of shampoo and ¼ cup of cornstarch to your bowl and stir well.
- Add a few drops of food coloring and mix again.
- Add 5 tablespoons of water and stir through.
- Now you should knead the slime for 5 minutes to start with.
- If it’s not fluffy enough and still a little sticky keep adding cornstarch ¼ cup at a time until you get the consistency you are going for.
Supplies you’ll need (stretchy slime):
- White school glue
- Baking soda
- Food coloring
- Contact lens solution
- Large mixing bowl
Step-by-step tutorial (stretchy slime):
- Pour 1 cup of the glue into your bowl.
- Add 1 tablespoon of baking soda and a few drops of food coloring.
- Mix it together well.
- Now add 1 tablespoon of contact lens solution and mix again.
- Knead it and play with it while continuing to add 1 tablespoon of contact lens solution at a time, until you have the consistency as gooey as you like it.
You can also go ahead and add glitter to these towards the end of the process to make unicorn slime.
Yarn-Covered Letters
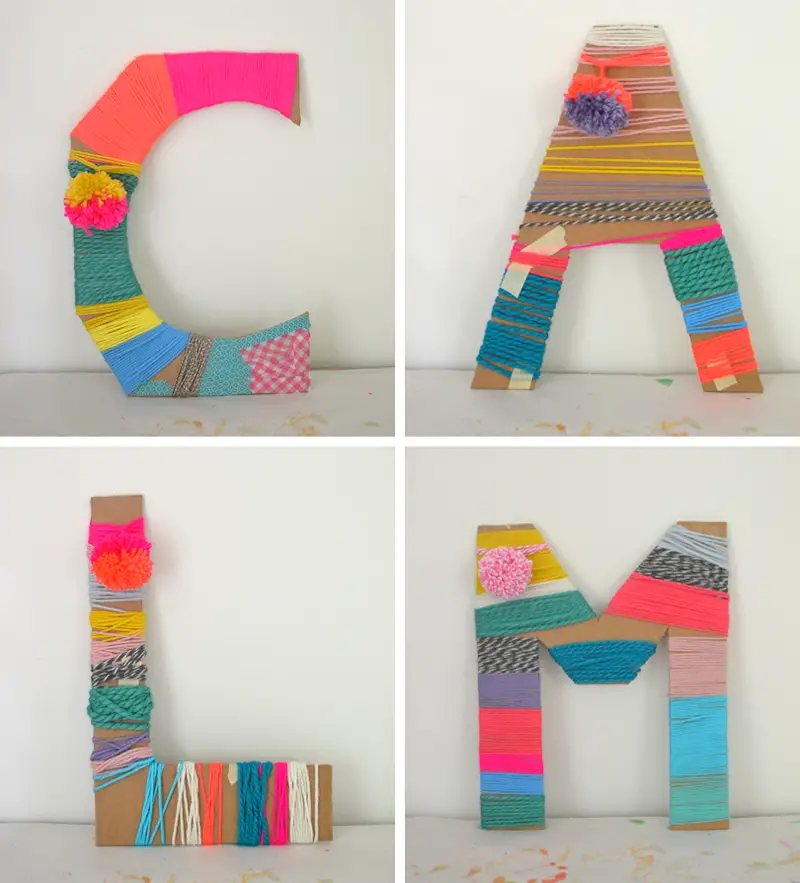 Source:https://www.artbarblog.com/yarn-wrapped-cardboard-letters/These yarn-covered letters make a great decoration for a bedroom door or bedroom. It’s an enjoyable and calming activity and you can make them as colorful as you like or keep them in one tone.
Supplies you’ll need:
- Cardboard
- Pen
- Scissors
- Yarn
- Masking tape
Step-by-step tutorial:
- Draw the outline of your letter on the cardboard.
- Cut around the shape of the letter.
- Cut various lengths of yarn in different colors you want to use and leave these on the table.
- Tape one end of a piece of yarn to the back of your letter and start wrapping the yarn around the cardboard. Once that piece of yarn is finished, tape the other end to the back of the cardboard.
- Continue taking pieces of yarn and taping them to the back and wrapping them around as per the first one. You can also weave them up and down the cardboard letter so that the colors are intertwined.
- When it’s completely covered, you can attach it to a door, wall, or rest it on a table or shelf.
You can also add beads as you work your way along. This is a bit trickier because you need to make sure the beads are at the front. Just add a bead or two when the yarn piece is getting shorter so that you can easily hold it at the front while you tape the yard to the back, keeping it in place.
Comments
0 comments