Kids love crafts. Creating is so much fun. And it can keep kids occupied for a long time. My favorite animal is penguins, so today, I want to show you my 5 favorite penguin crafts. I have included materials and step-by-step instructions on how to make these.
Handprint Penguins
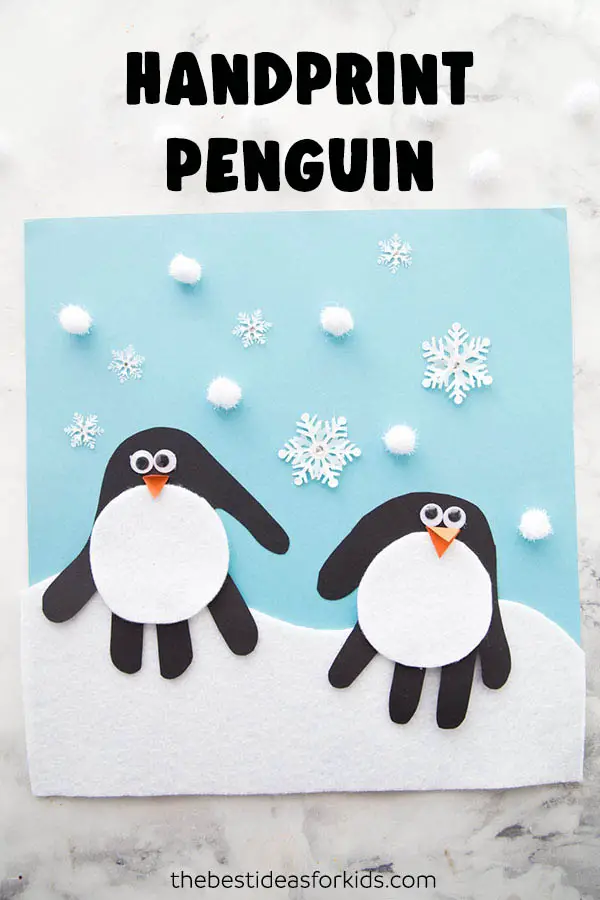 Source: Inspired by The Best Ideas for Kids, “Handprint Penguin” (https://www.thebestideasforkids.com/handprint-penguin/)
Materials you will need:
- Black cardstock
- Orange cardstock
- White felt
- White Pencil
- Googly eyes
- Glue
- Scissors
How to make it: Step-by-step instructions
- Get the black paper and the white pencil and trace the handprints onto the paper. Make sure you trace both hands and you round off the bottom of the print where your wrist is.
- Get the white felt, and cut out some round shapes, the same size as your palm. This will be the belly of the penguin. The easiest way to do this is to trace an object onto the felt. Something like a plastic cup.
- Make the beak: get your orange paper and cut out a diamond shape, then fold it in half.
- Assemble your penguin. Glue the felt circle onto the middle of handprints leaving enough space for the eyes and beak to go on the bottom. Glue the eyes on and the beak.
- And the penguin is finished!
Penguin Bookmarks
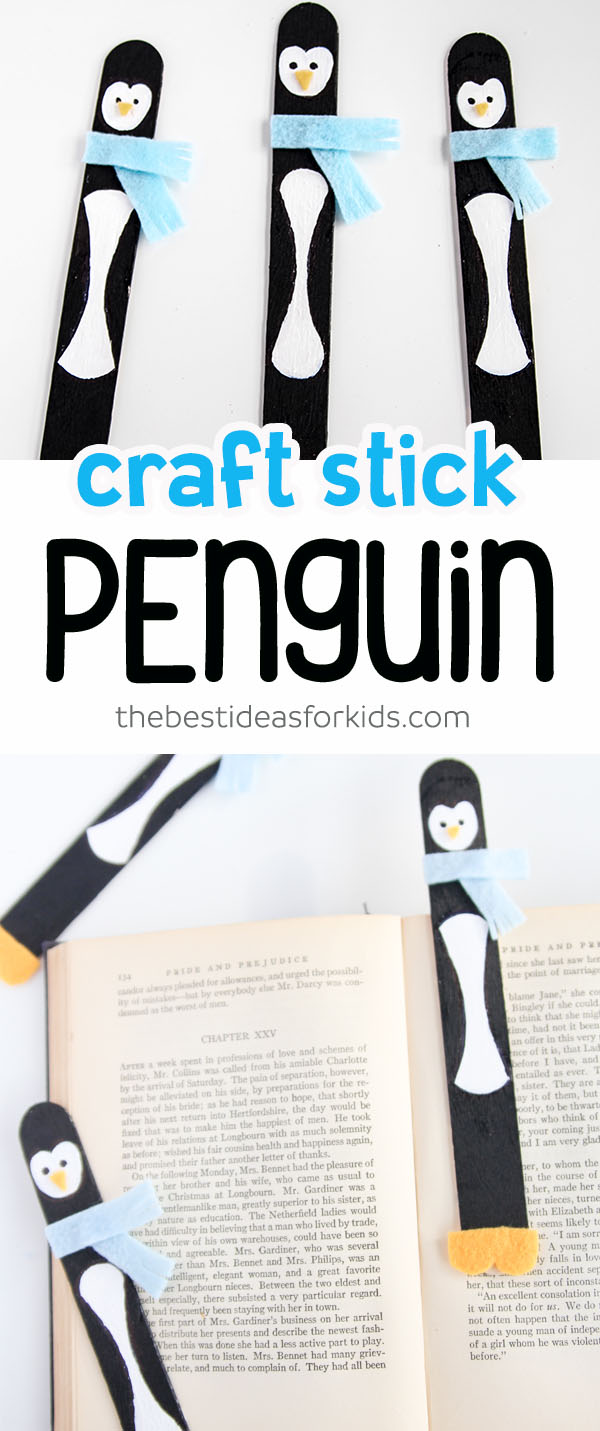 Source: Inspired by The Best Ideas for Kids, “Penguin Bookmark” (https://www.thebestideasforkids.com/penguin-bookmark/)
Materials you will need:
- Large popsicle stick
- Felt; both blue and orange
- Paint; black and white
- Glue
- Black Sharpie or Felt pen
- Scissors
How to make it: Step-by-step instructions
- Using the pen, outline the shape you want your penguin’s belly to be and draw a little heart shape as the head.
- Paint the popsicle black on the outside of your shapes. You will also need to leave the bottom of the popsicle unpainted, where you will put the feet.
- Paint the inside of your shapes white. If the edges are messy, wait for the paints to dry and correct the edges by using the sharpie pen.
- Using the sharpie pen, draw two dots on the face of the penguin for the eyes
- Cut out very small triangles from the orange felt ““ this will be the beak.
- Glue a triangle under the eyes.
- Cut out some feet from the orange felt. This can be in any shape you want
- Cut out a strip of the blue felt. And make tiny cuts on each end so it looks like a scarf.
- Assemble the penguin: Glue the feet to the bottom of the popsicle and wrap the scarf around the popsicle below the head.
- Glue the scarf in place and let the bookmarks dry before using them.
- These can be used in kids’ books, or it would be a lovely homemade gift to give to family members.
Cotton Ball Penguins
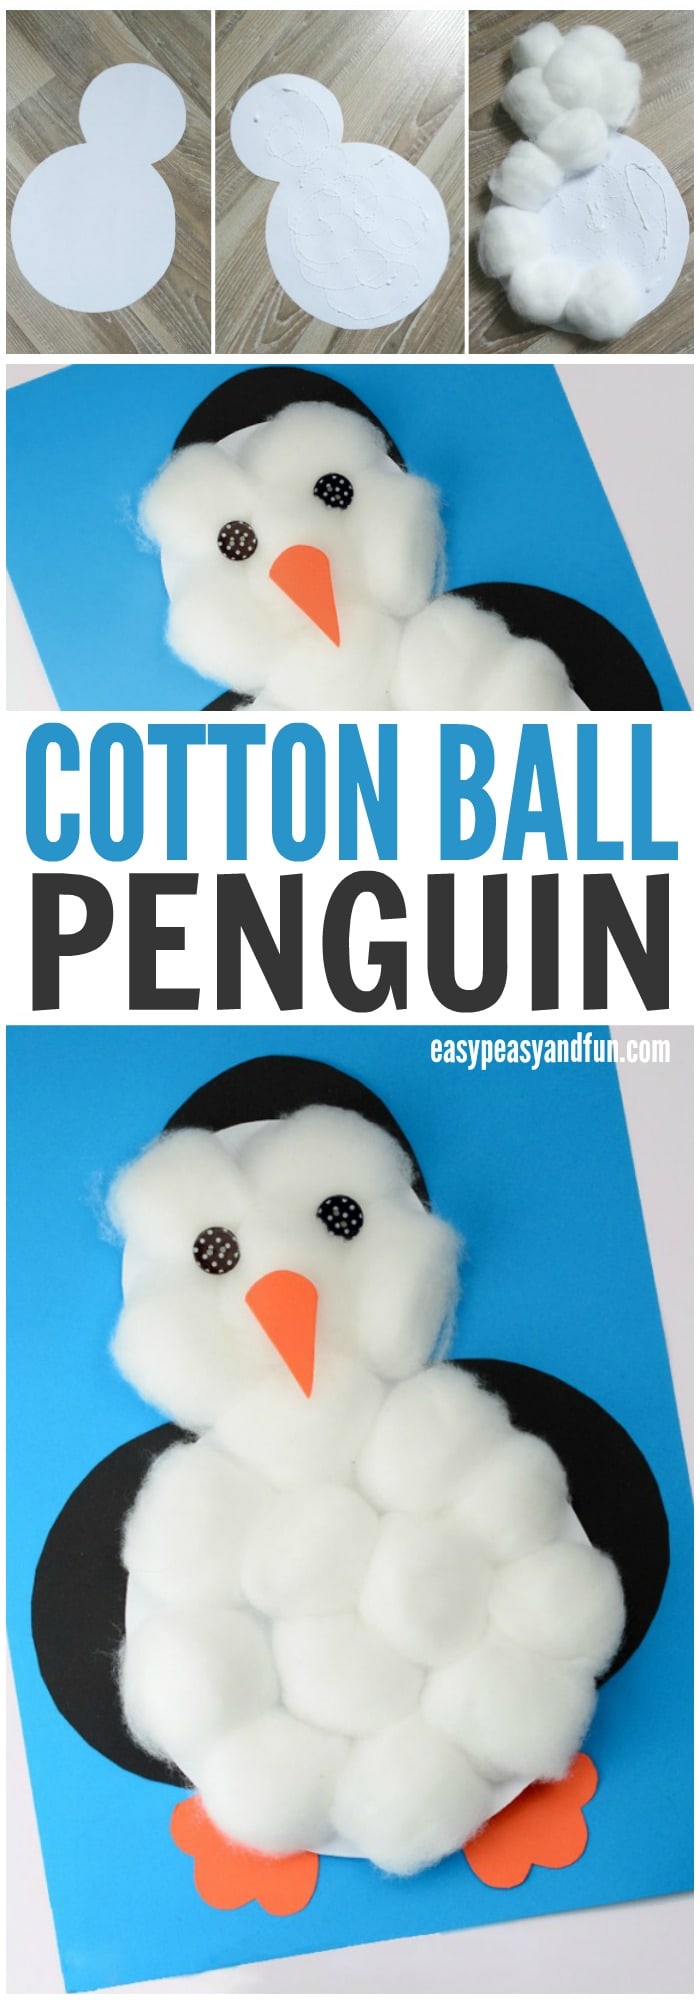 Source: By Easy Peasy and Fun, “Cotton Balls Penguin Craft” (https://www.easypeasyandfun.com/cotton-balls-penguin-craft/)
Materials you will need:
- Cotton balls
- White paper
- Black paper
- Orange paper
- Buttons or googly eyes
- Glue
- Scissors
How to make it: Step-by-step instructions
- Cut a penguin shape out of the white paper.
- Out of the black paper, cut out a small circle for the head, and two larger half circles. Those will be the wings.
- Cut a triangle out of the orange paper. This will be the beak
- Cut out two feet shapes out of the orange paper
- Put a good amount of glue on the white paper and start putting on the cotton balls. Do this until it is completely covered in cotton balls.
- Let it dry
- Add the small circle onto the back of the head of the penguin.
- Add the half circles. One on each side.
- Stick the beak onto the face of it and stick on some googly eyes or buttons if you don’t have googly eyes.
- Let it dry.
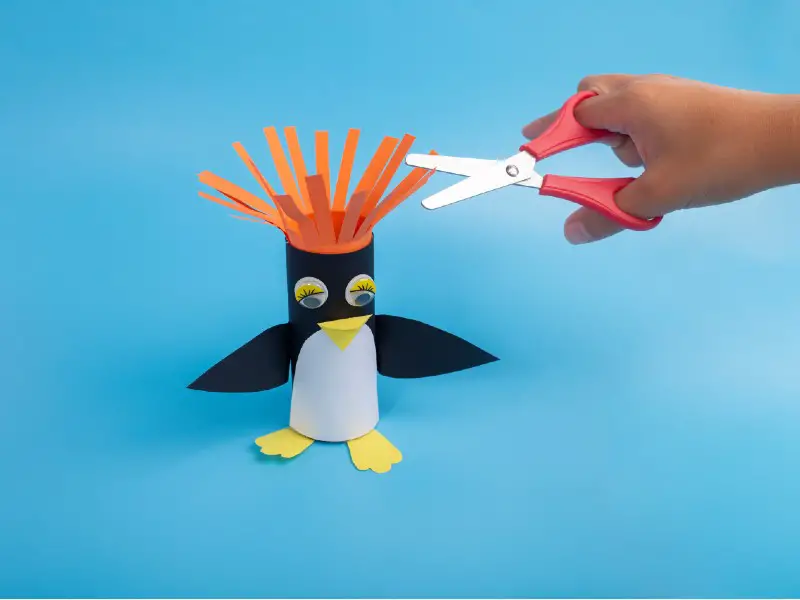
Paper Roll Penguins
 Source: Inspired by Amanda Formaro @ Crafts by Amanda, “Cardboard Tube Penguins” (https://craftsbyamanda.com/cardboard-tube-penguins/)Paper roll penguins are so cute, and cheap to make.
Materials you will need:
- Black paper
- Orange paper
- Googly eye stickers
- White paper (like regular printer paper)
- Paper roll
- Glue
- Scissors
How to make it: Step-by-step instructions
- First cut out strips of black paper, the same width as the paper roll and long enough to be able to wrap it around the roll.
- Cut half-oval shapes out of the white paper ““ they should look like little doors.
- Cut oval shapes out of the black paper, with one end being a bit pointier. These will be the wings.
- Cut out small triangles from the orange paper
- Draw some penguin feet on the orange paper, and cut those out too
- Glue the black strip around the paper roll.
- Glue the door-shaped white paper onto the roll and glue on two of the googly eyes at the curved side of the shape.
- Glue on the beak and glue the legs onto the inside of the roll.
- Lastly, glue on the wings and let them dry.
Paper Plate Penguin
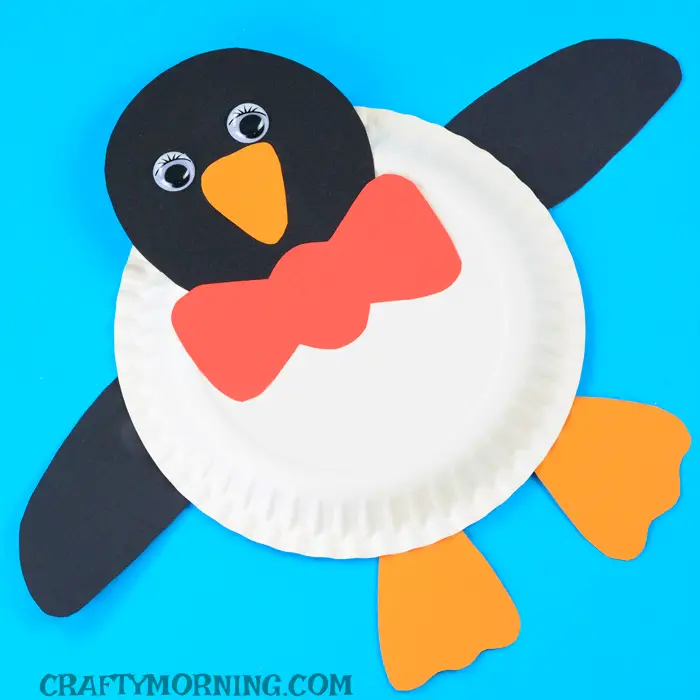 Source: By Michelle @ Crafty Morning, “Paper Plate Penguin Craft” (https://www.craftymorning.com/paper-plate-penguin-craft/)
Materials you will need:
- White paper plate
- Card stock paper: Orange, black and red
- Googly eyes
- Glue
- Scissors
How to make it: Step-by-step instructions
- Cut a round shape out of black paper. This will be the head of the penguin
- Cut two oval shapes out of black paper again. These will be the wings.
- Cut a bowtie shape out of the red paper.
- Cut a triangle shape out of the orange paper
- Draw two feet on the orange paper and cut those out too.
- Now assemble your penguin
- Make sure the plate is upside down. Glue the wings to the back on each side of the plate.
- Glue the black circle on the top of the plate, and the feet to the bottom.
- Stick on the googly eyes.
- Glue on the beak and the bow tie.
- Let it dry
Hope you liked all the above penguin crafts for preschool. These were my ultimate favorites, and I think the kids will love making these and they will have so much fun! Creating crafts can nurture kids’ imagination and can get their creativity flowing.Letting their imagination run wild while making these crafts is also great. They can put their own spin on the creations, so they can make them their own. This will help in developing their confidence and thinking skills too.

Comments
0 comments