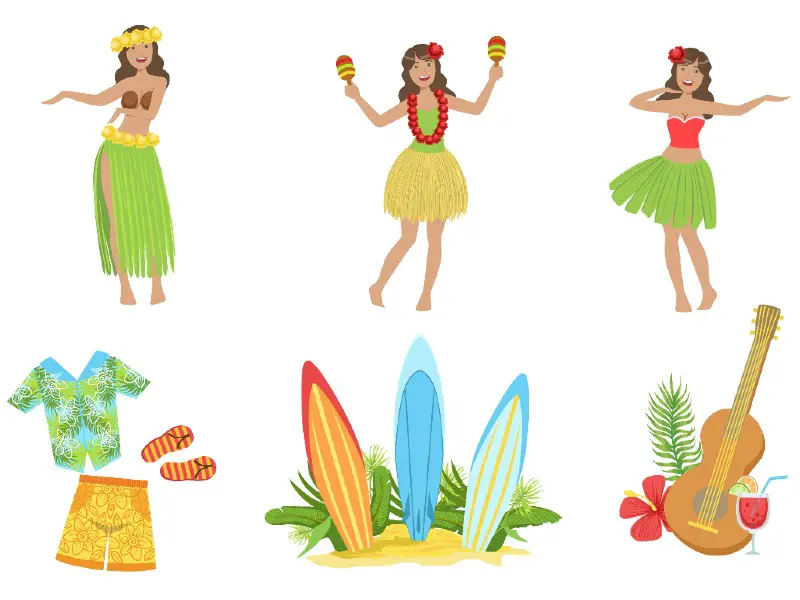
 By Liss @ Budget 101, “How to Make a DIY Grass Hula Skirt” (https://www.budget101.com/crafts-scrapbooking/3816-how-to-make-a-diy-grass-hula-skirt/)Hula, Hawaiian or grass skirt”“ no matter what you call it, you know it’s a must-have for a luau-themed party! Kids and adults will enjoy this interactive party favor that can double as fun décor.The only problem is that luau party decorations aren’t readily available except during summer. Even then, if you don’t catch them at the beginning of summer, you might not be able to find enough to satisfy your party needs.Ordering hula skirts and other luau party décor online is one solution, but you never really know what you’re getting if you don’t see it first. Customer reviews and product descriptions can only tell you so much. Therefore, knowing how to make a hula skirt can be a time- and money-saving talent!
Why Make Your Own?
Knowing you can purchase hula skirts inexpensively, it begs the question: Why make your own?
- Some people simply enjoy DIY projects and feel like a little homemade touch adds warmth and elegance to the event. Hand-made items that guests will see up close, and spend money on items that won’t be front and center. Rather than making every decoration from scratch, you can choose one or two pieces to add your personal signature.
- Another motivation for making hula skirts rather than purchasing them is that you’ll end up with a better quality item. Many store-bought hula skirts are plastic, and the ones that look more authentic are sold individually and will be a lot more expensive than the materials you’ll need to make them yourself.
If you plan on giving the skirts as takeaways or want a more authentic look, making them is the way to go. Because they will be well made, you can re-use your skirts or even sell them when you’re finished with them.
- Finally, by making hula skirts, you’ll be able to fully customize them. It may prove impossible to find the length, color, and amount of skirts you want online or in-store. By making them, you’ll be able to design the perfect number of skirts in any style you like, but you won’t be stuck with a bunch of unused, unwanted items.
Materials
You can make a gorgeous hula skirt with two basic supplies!
Raffia
Raffia is made from the leaves of a tree found abundantly in Africa and Madagascar. It is harvested and dried for countless crafts, but, more importantly, raffia is the basis for many useful household items like rugs and baskets. Using raffia ribbon for the skirt will make the finished product most resemble an authentic Hawaiian skirt.You can purchase raffia online or at any craft store in small packages or in spools of 100 yards, which may seem like a lot, but you’ll need a lot more than you think if you want your skirt to be full (so you can’t see straight through it). If you’re only making one skirt, an average 8-ounce package should be enough. Raffia is an oatmeal color in its natural state, but it is dyed a wide range of colors, so you’ll have the added benefit of customizing your hula skirts to match the color scheme of the event.
Jute
Jute is shiny and soft when harvested, which is hard to believe for many people because when it is spun, it becomes much coarser. Jute is stronger than cotton, better at holding knots and it does not absorb water like cotton, making it a better material overall for craft projects. Its natural color and texture are well-suited for a Hawaiian skirt replica.Jute rope and twine will both work well. It really just depends on how thick you want your hula skirts’ waistbands to be. Jute is inexpensive, so don’t make the mistake of buying hemp rope, a similar product, at twice the cost (or even more!).Jute will also be packaged on a spool and sold by the yard. Hardware and home improvement stores often carry jute, or you can find it online.For this project, you’ll need scissors, and you may also need some cold water for straightening the skirt if you choose to do so. (More about this in the last step!) You can also add the embellishments of your choice!
Directions
- Measure all materials.
The first thing to measure is the waist circumference of the people who are wearing the skirts. If you are making skirts for adults and children, you’ll need to make two different sizes. You could use a measuring tape, but it’s just as easy to wrap the jute around yourself or someone else and cut it to length.Cut this first waistband and use it as a guide for the rest of the skirts you intend to make. Remember to add a few inches of extra length on both ends to tie a bow, not a knot, so it’s easy to get off. Four inches on either side should be enough to tie a secure bow, but you can leave as much extra length as you desire. If you’re making something other than a skirt, measure the length of that area and decide how you’ll fasten it into place. How you’ll attach it determines how much extra length you’ll need for these projects. In a moment, we’ll go over some examples of other items that can be made using this same technique!You’ll also need to measure your strips of raffia ribbon. Decide how long you want the skirt ““ either knee-length or full-length. Then you’ll cut the strips double that length.Again, if you’re making both children’s and adult’s skirts, you will need two different lengths, unless you intend for the adult’s hula skirts to be knee-length and the children’s to be full length. This will save you a little time and trouble.
- Cut raffia strips.
The raffia strips need to be twice as long as you want the actual skirt to be since you’ll be folding them in half. Each strip, therefore, will become two strands of your skirt.The measurements don’t have to be exact. An uneven bottom hem will look natural if you decide to leave it as is. You can trim any excessively long pieces when the skirt is finished.Cut a lot of strips, so once you start trying them on, the process will go faster. If you have helpers, one person can be the designated cutter while others work on multiple skirts.Pile different colors of raffia together (if you are making a multi-colored skirt). That way, each skirt maker can keep up with their pattern as they go, rather than having a set amount of each color to start with.
- Tie the strips on the jute waistband.
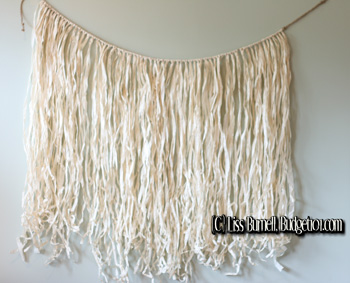
If you want, fasten each end of the waistband to something sturdy (so that the skirt is suspended on each side). This will make it easier to see your pattern and progress, but it’s not necessary.To begin the “grass” part of your hula skirt, fold a piece of raffia in half. Slide the loop you just made under the jute waistband. Then feed the loose ends through the loop from the front, creating a Lark’s head knot, a common Macramé technique. Then tighten the knot, but leave enough slack in the knot so that it can be moved. This is the only type of knot you’ll have to tie!Repeat this process over and over, periodically sliding the knots closer together, depending on how full you want the skirt to be. Once you achieve the desired fullness, you can gently tug the ends to tighten the knots. You can even tie two strands of raffia at once, beginning your knot with two pieces, then folding so you have two loops, and finally feeding all four loose ends through the two loops. This technique will use twice as much raffia, but it will result in an extra-full skirt. If you are using multiple colors of raffia, remember to alternate color strands as you work. You can also design a skirt of blocked colors, creating a striped effect.You should be able to complete one skirt in 30-45 minutes. The first one may take longer as you sort out your preferred methods, but you’ll get faster as you get into a rhythm.
- Straighten the skirt. (Optional)
Raffia is often crinkled, curled, or bent when packaged. If you like a full, messy skirt, you can leave it like it is.If you want the skirt to lie flatter, wet the raffia portion of the skirt and blot to remove excess water. Then straighten the strips with your hands. You can hang the skirt or lay it flat to dry. Your skirt should be completely dry within a few hours. Placing it outdoors or in a well-ventilated area can drastically reduce drying time.You can straighten the individual pieces before attaching the raffia to the jute, but doing it after the skirt is complete means you won’t have to work with wet raffia or wait for it to fully dry before you begin.
- Embellish. (Optional)
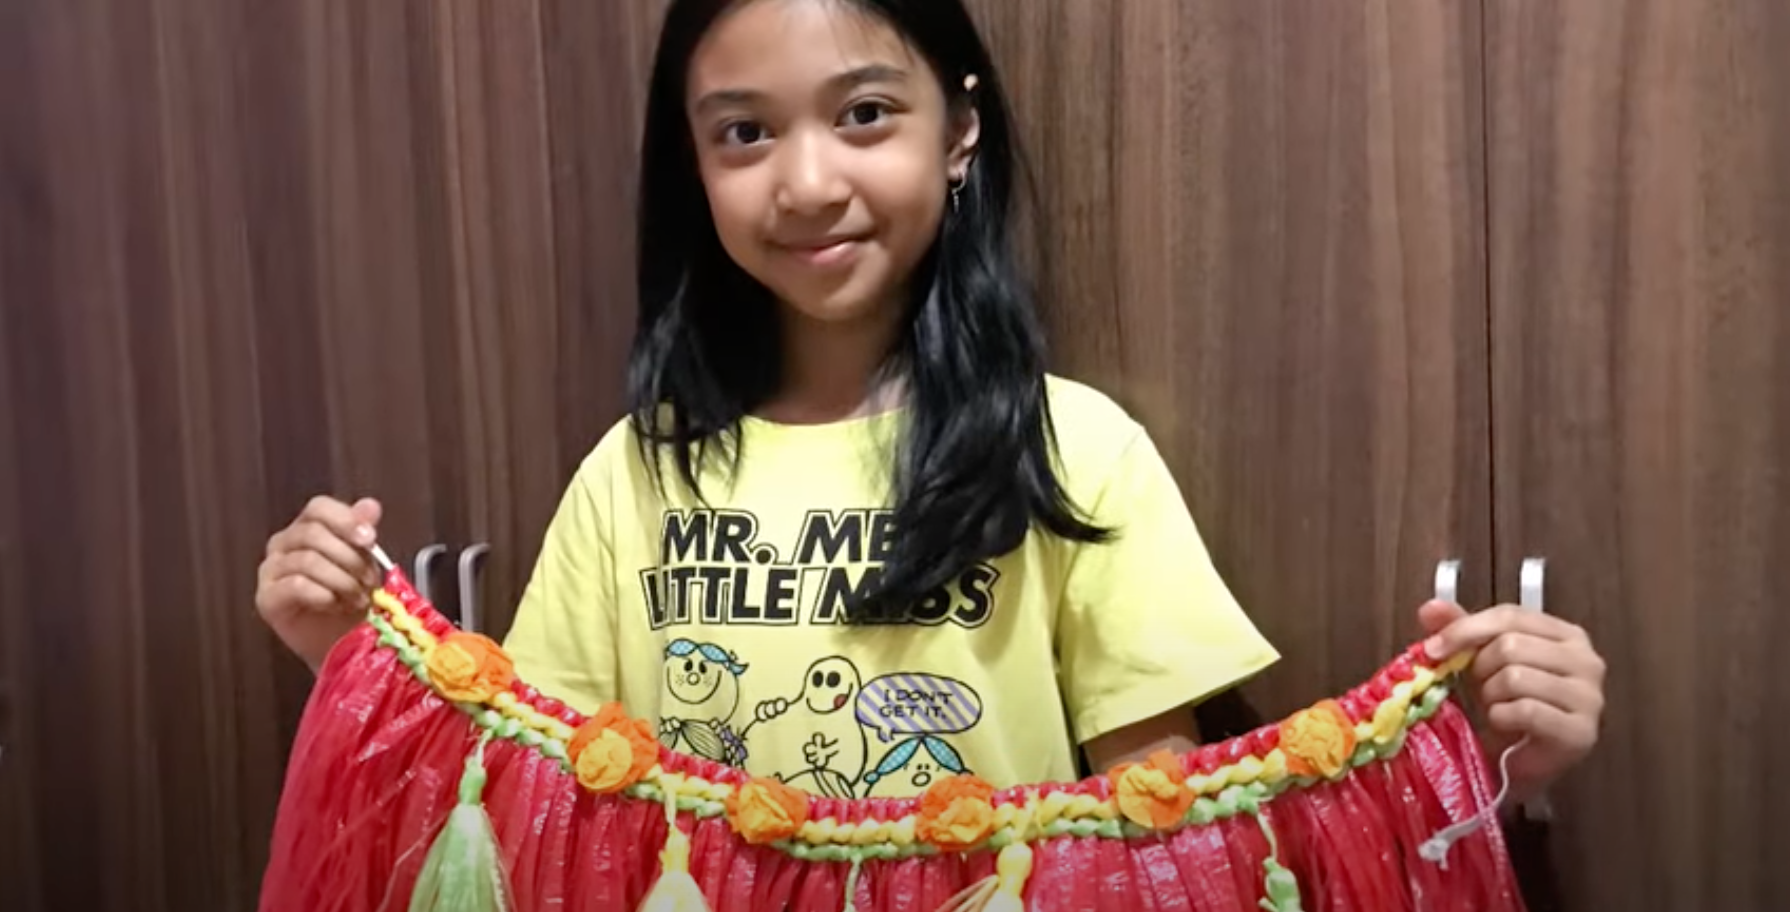
At this point, your skirt is ready to wear (once it’s dry, of course). But if you choose to add flowers around the waistband, it adds a little something extra, especially if you will be using leis and flower bracelets at the event. You can disassemble the leis and use those flower petals for the waistband so they will match, or you can purchase packages of loose petals for this purpose. The petals can be strung onto dental floss or thin jute that is woven around the waistband, or you can hot glue them into place.
Coordinating Items
Now that you know how to make realistic Hawaiian skirts, you can put this skill to use making a wide range of other party decorations! These decorations will enhance the overall theme of your event without breaking the bank.
- Table skirt ““ You can customize the length and height of your table skirt so you won’t have to hide a gap at the back of the table. This will look more put together than a pre-purchased one. Lining your table with a hula-inspired skirt is also a great way to disguise what’s underneath.
- Doorway curtain ““ Set the stage for a great party and create a little suspense as guests walk in. Hang these curtains over doors and windows to creating an enclosed space that’s totally immersive! Even outdoors, a raffia curtain blowing in the breeze will give your party automatic beach vibes!
- Wall décor or picture backdrop ““ Because this project is so inexpensive, a little can go a long way! Cover a large area with an extra-large hula skirt. It can also serve as a photo op when paired with a few fun picture props.
The best part is that you can use any of these items again! When you’re finished with your skirts and party decorations roll the jute base around and around until you have a tight spiral. Next, starting at the bottom where the loose ends are, roll the raffia up toward the jute. Place this ball into a plastic bag for later use!
Money-saving Alternatives
For a kid’s birthday, church activity, or any other time you want a fun, easy, and inexpensive craft idea, any of the following items can be used to make inexpensive, single-use hula skirts. You can pre-prepare as much or as little of the craft as you want.
- Plastic bag
Fold the bag into several layers, making sure that there are no wrinkles. Cut off the handles, which should be at one end, then cut the entire bag into long strips. Tie as many strips as necessary for the waistband. Using Lark’s head knot described above, begin tying your skirt strips around the waistband. Use different shopping bags for a multi-colored skirt!One plastic shopping bag should produce enough strips for one small child’s hula skirt.
- Paper bag
This option is even easier! Simply cut down one of the long seams of the bag, then cut around the bottom seams to remove the entire bottom of the bag. At this stage, the rest of the bag should open up to lay flat. Along one edge, draw a line about 1-2 inches from the edge with a ruler or other straight edge. The area between the edge and the line you draw will be the waistband of the skirt.Cut strips perpendicular to the line you drew, starting at the opposite end. This is the “grass” of your hula skirt.You can tape or staple multiple bags together to go around adults or to create volume. Make sure to turn any logos on the exterior of the bag inward so they don’t show on the outside of your skirt.
- Plastic tablecloth
A brightly colored or multicolored tablecloth will work great in a pinch for adults. Use the same method as the paper bag, cutting strips as thin or as wide as you want.Any excess length can be trimmed away before you begin. And if the tablecloth is wider than you need for a waistband, either cut it to make multiple skirts or double it over to decrease transparency. A tablecloth cut using this method can also be used for décor.
Comments
0 comments