If you have children and a garden, you’re bound to be trying to think of ways that you can combine gardening activities with crafting activities ““ and the great news is that there are absolutely loads of options.With that in mind, let’s look at the best garden crafts for kids to try.
Wooden Spoon Plant Markers
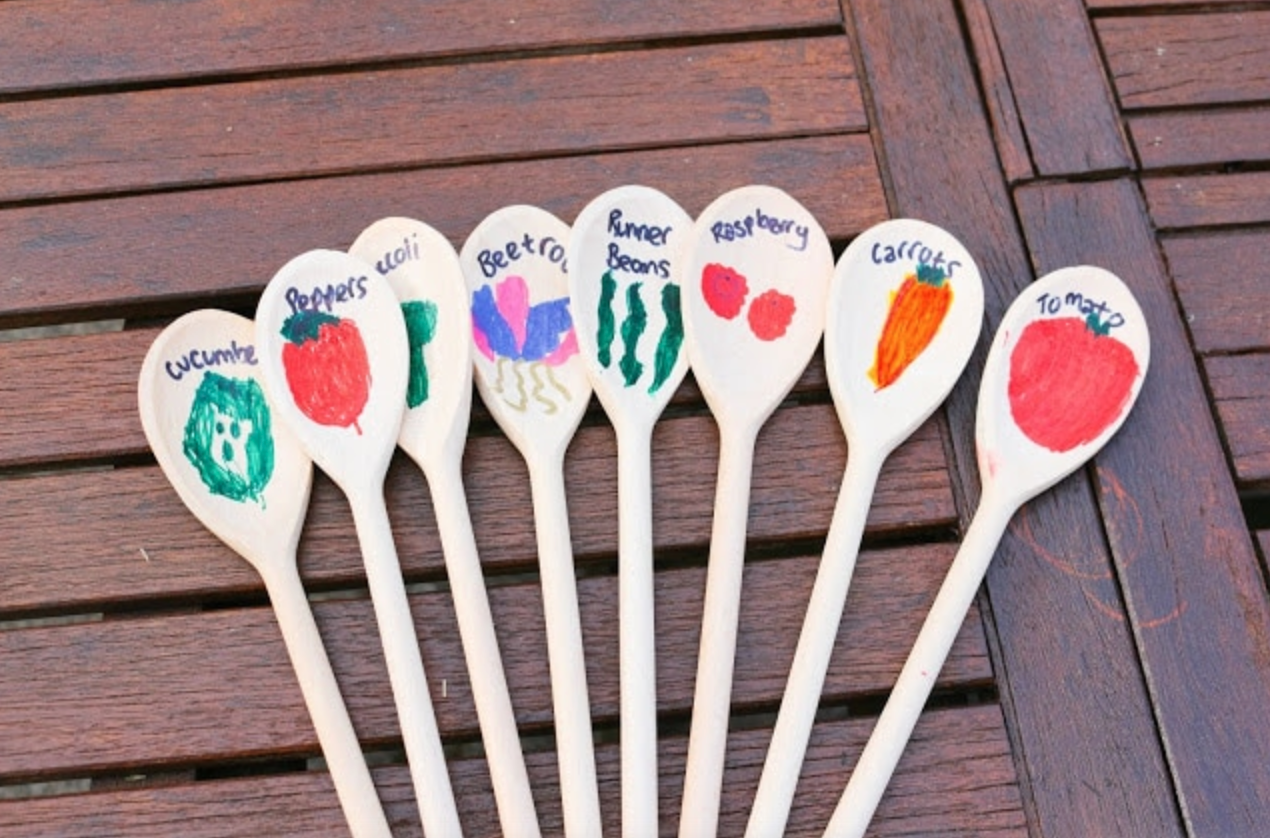 Source: https://thimbleandtwig.com/home/growing-our-first-vegetable-garden/Do you grow edible foods? If so, the chances are that you use plant markers of some description, because otherwise there’s a risk of mixing up the different plants. Even if they’re not edible, you might want to know what’s what!These markers are very simple and a great way to help your child make the connection between the plant and the food they’re familiar with. They shouldn’t take very long to make and you can use them year on year!
Materials
To make wooden spoon plant markers, you’re going to need:
- Wooden spoons (as many as you are going to use to mark plants)
- Colorful permanent markers
Step 1: Draw On Your Spoon
Help your child to draw something that represents the fruit or vegetable that you want a marker for. You can make this super simple, just adding an orange triangle for a carrot, or let them spend a bit more time on the drawing.
Step 2: Label The Spoon
Even if your child’s art is very recognizable, it’s a good idea to write the plant’s name underneath the drawing too. You can curve this around to fit on the spoon better or write it on the back if there isn’t much space left.Use a black marker to make this nice and clear.
Step 3: Plant Your Spoons
Head outside and stick the wooden spoons into the ground alongside the corresponding crops. The spoons make good plant markers because their long handles allow you to sink them deep into the ground, but still, have the label nice and clear above the soil level.Get your child to admire their work and feel proud of the contribution they have made to your gardening efforts.
Thumbprint Flower Pots
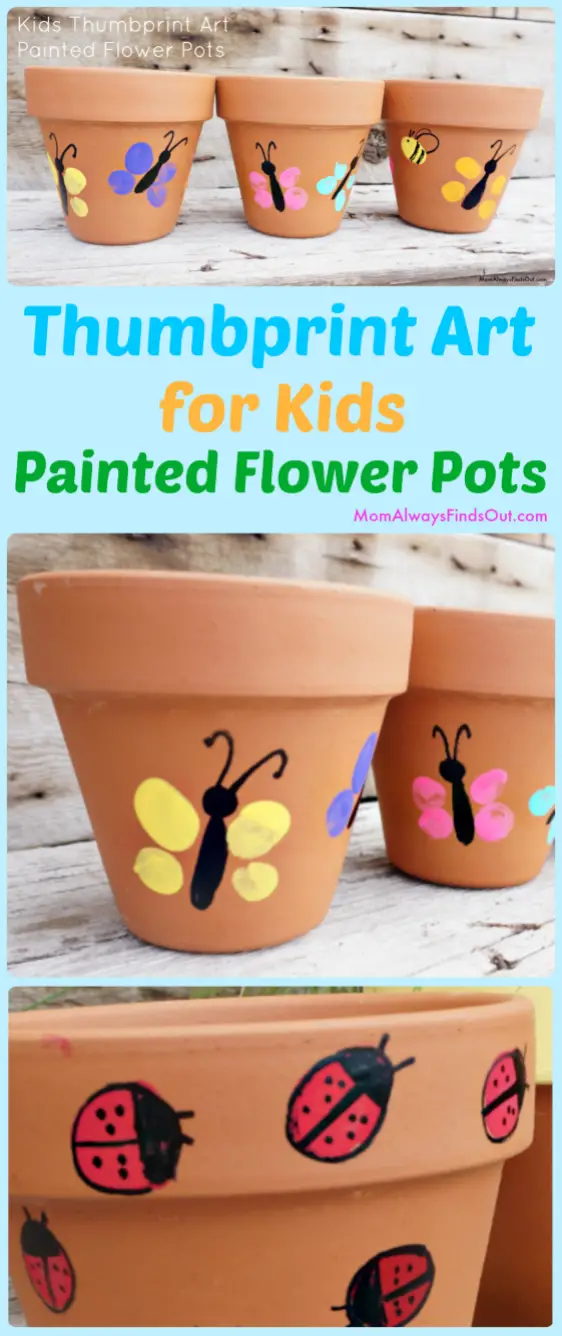 Source: http://www.momalwaysfindsout.com/thumbprint-art/#_a5y_p=5267104If your little one enjoys fingerpainting and you want to brighten up your flower pots a little bit”¦ you’ve got a craft activity! Your little one will love doing this, and you can make it as simple as you want, or spend a bit more time on the designs.These may fade a bit over the years, but they’ll be a lovely memory of your child’s tiny fingers, and will bring an extra splash of color to your garden.
Materials
To do thumbprint flower pots, you will need:
- Clean terracotta pots
- Acrylic paints in various colors
- A black marker pen
- A paintbrush
Step 1: Decide On Some Designs
You may want to use bugs and bees to decorate your flower pots, in keeping with the garden theme.Ask your child if they would like to make butterflies, bees, caterpillars, worms, or ladybugs ““ or a mix of them all! Get a rough idea in your head of what you’re going to add to each pot; this doesn’t need to be perfect.
Step 2: Get Printing
Pour out some paint and help your child to dip their thumb in and then make a print on the flowerpot.To make a butterfly, you should help them add four thumbprints close together, one for each wing. You are going to fill in the body later. Choose lots of different colors and let them have fun.To make a ladybug, you want just one large red thumbprint. You could add your own alongside your child’s to make a parent ladybug and its baby.A caterpillar should be made of multiple green thumbprints in a line. Again, you’re going to add some details in pen later.Bees can ““ like ladybugs ““ be done with a single thumbprint, and worms can be painted on using the paintbrush (they aren’t quite a thumbprint, but they’re still good fun).
Step 3: Add Details
Once the paint has dried, use your marker to draw in butterfly bodies, antennae, and flight paths. For the ladybugs, you can divide up the wings, and add antennae and spots.Caterpillars can be given legs and feelers, and bees need wings, stripes, and legs. Your worm might just want some eyes, or to be left plain.
Step 4: Paint The Scene (Optional)
You may want to help your child add a bit more to your flowerpot scenery; consider a layer of soft green grass at the bottom, or some leaves for your bugs to climb on, or a bit of soil for the worms to burrow through. You can keep this craft going for as long as you and your little one are enjoying it!
Recycled Bird-Shaped Bird Feeder
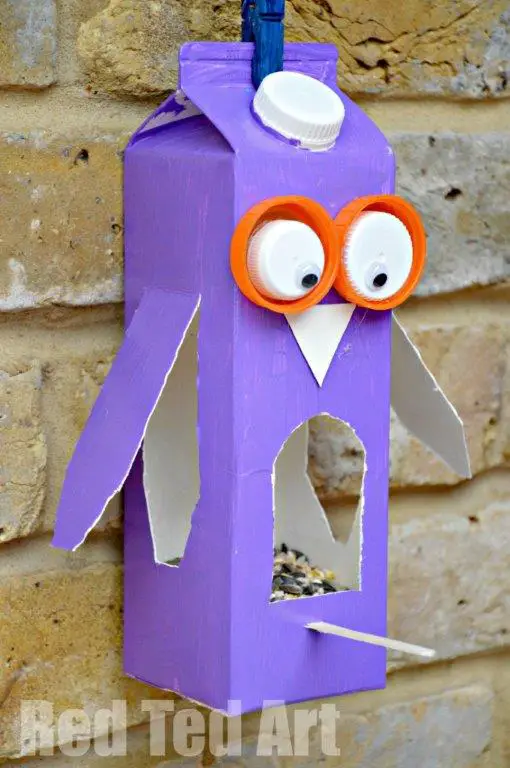 Source: https://www.redtedart.com/juice-carton-crafts-owl-bird-feeder/If your child enjoys watching the birds, how about creating a feeder just for them? Every gardener knows you can never have too many bird feeders, and this craft can be wonderfully simple and use materials from your recycling or landfill bin. Today, we are going to use tetra packs as they are difficult to recycle, but you could adapt this craft to use a plastic bottle fairly easily.
Materials
You’re going to need:
- An old tetra pack, thoroughly washed out
- Paint
- A craft knife
- A pencil
- Googly eyes
- Two bottle caps
- A black marker pen
- A tough cord for hanging the feeder with
- Birdseed
- A lolly stick
- A glue gun
- Scissors
Step 1: Design Your Feeder
Your child might have an idea of how they want the feeder to look, or you may need to help them. First of all, start by letting your child paint the feeder in whatever color they like.
Step 2: Cut A Feeder Slot And Wings
Next, cut the slot at the front of the feeder for the birds to access the seed from. Make sure this is big enough that the birds can get easy access. No matter how you design the bird, this will need to be there, so it’s a good starting point. Use a craft knife to cut the tetra pack neatly.Keep the piece you have cut off; we will use it later.Use the pencil to draw a wing on either side of the tetra pack, and then cut around these, leaving a flap on either side to keep them attached at the top. Bend these wings out a little way to help the rain run off the sides, rather than trickling in and making the seed damp.
Step 3: Add The Face
You are now going to cut a small triangle out of the feeder slot, and glue it to the front of the feeder as a beak. Next, above this, add your two bottle caps, with the top side facing outward.Help your child glue the googly eyes to this, completing your bird’s face. If they want to further decorate, let them, but remember that this needs to be weatherproof, and shouldn’t contain anything that could potentially harm the birds or other wildlife (e.g. glitter).
Step 4: Add A Perch
Use your lolly stick as a perch at the front. You can cut a slot for this beneath your feeder opening, and then add a layer of glue around the edge to make the joint firm.
Step 5: Hang It Up
Glue your cord very firmly to the top of the tetra pack. You want to make sure that the feeder definitely can’t fall; you could cut a slot and loop the cord through instead, but you will need to seal the holes with glue so that water cannot run into the feeder and spoil the seed.Fill the feeder, hang it up, and then you and your child can watch your little feathered friends come and enjoy the seed!
Conclusion
There are some wonderful crafts you can do with your child to help them engage with the garden and bring a bit of color to your outdoor space. Whatever they enjoy, you’ll find a garden craft that works for you both, and these can be very simple activities.

Comments
0 comments