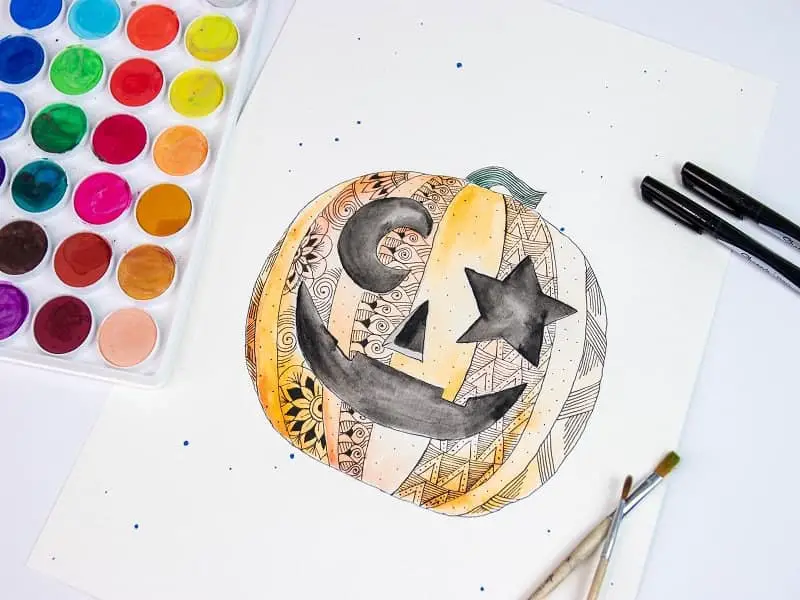
Isn’t alcohol the best?
I mean rubbing alcohol, you naughty kitty. Not only does it disinfect and clean everything in sight, it has an awesome smell and it’s great for use in art projects, like Sharpie faux tie-dye.
My kids have made these Sharpie tie dye t-shirts, and we’ve done some socks on the blog, but we have yet to try tiles. Until I stubbed my toe on a small cardboard box in my basement a few days ago, and discovered some tiles the previous homeowners had left. Bingo!
After my first venture into these faux tie dye tiles, I needed more. This tile-drawing stuff is as addictive as gelli plate printing.
Lowes scored approximately $1.70 of my my hard earned cash for 10 small white tiles, and all the way home I dreamed up different patterns I wanted to draw on the tiles.
Here’s what I discovered during my experimentations on the tiles:
-
- Don’t bother with intricate designs, as everything will all blur together when you add the alcohol
- Pick 2-3 colors or your colors will mix together and get all muddy-looking
- Small marks further apart from each other will give you a more subtle, marbleized effect, while blobs of color close to each other will mix and swirl for a more watercolor look
- Misting the alcohol on looks a bit spotty, and dripping it on with a small dropper spreads more alcohol out from one starting point and looks cooler (in my opinion)
- Start with just a few drips of alcohol, because you can always add a few more in areas where the alcohol doesn’t spread through the marker
- It’s damn fun to draw on those little shiny tiles with markers
- I was tempted to keep them as is after I drew on them and seal them that way, but I just couldn’t resist dripping the alcohol on
- I’ve heard to use the rubbing alcohol that’s around 90%, and avoid the 70% alcohol, for whatever reason
How to Make Faux Tie Dye Trivets
- Clean your tiles- wash them with dish soap and then clean off the surface with rubbing alcohol
- Lay out your tiles on foil or wax paper or the like
- Draw on the dry tiles with permanent markers in any design and color combo you wish
- Spritz the tiles lightly with rubbing alcohol and let them dry (tilt them while they’re wet if you want a runny look)
- Seal them with resin or polyurethane, or spray sealer if you just want to use them decoratively
The above tiles show what spread out dots look like as opposed to solid blocks of color. Also the bottom right tiles show what they look like right after the alcohol was dripped on, before it had spread fully. It’s fun to watch!
Supplies for Sharpie Tie Dye Tiles
Tiles
Sharpies
Rubbing alcohol
Dropper or spray bottle
Resin or spray sealer
Felt or rubber feet or hanger for backs
(Click below to purchase)
Sharpie Electro Pop Permanent Markers99% Isopropyl Rubbing AlcoholGlass DroppersEnvironmental Technology 4-Ounce Kit Lite Pour-OnKrylon Gallery Series Artist and Clear Coatings AerosolRound Cabinet Door BumpersSawtooth Picture HangersGorilla Super Glue Gel
Okay, your turn. Show me your tile creations!
Thank you for this fun project idea. Alcohol tile painting isn’t just for kids. This is a great project to do with seniors, too!
Absolutely! They’re so beautiful and easy, this would be a great senior activity.