Autumn is a great time of year, but it’s also one in which many people are starting to spend longer periods of time indoors ““ and that leads to the need for more indoor activities, such as crafts.With all the beautiful colors going on outside, you should have plenty of inspiration for autumn craft ideas, but we’ve compiled some of the best crafts out there.
Conker Spiders
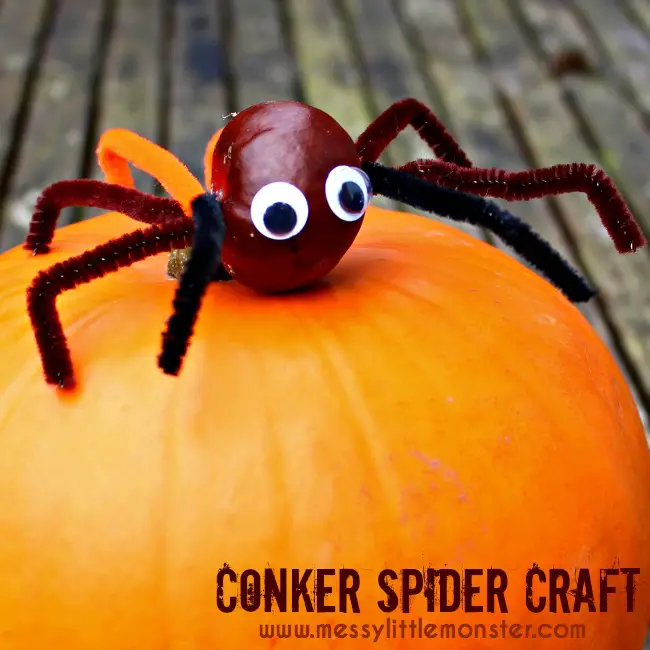 Source: https://www.messylittlemonster.com/2016/11/conker-spider-craft-horse-chestnut-ideas.htmlKids love conkers. Adults love conkers. Who doesn’t love conkers? They are such amazing things with their gorgeous shine in the white cushion of their shell and their spiky green armor.If your kid enjoys collecting conkers and you want something to do with them, here’s a way to turn them into spooky spiders for Halloween ““ or just for the fun of it! You can make a whole hoard of these.
Materials
To make a conker spider, you’re going to need:
- A conker
- Googly eyes
- Black and green pipe cleaners
- White paper
- Scissors
- A sharp knife
- A glue gun
- Gray cotton reel or clear fishing line
Step 1: Stab Your Conker
Do not let children get involved in this step! Use a sharp knife or a metal skewer to stab a small hole in either side of your conker, where you’re going to attach the spider’s legs. You don’t have to do this, but it will make it easier to securely attach the legs.
Step 2: Cut Your Pipe Cleaners In Half
Your child can now help you cut the pipe cleaners into two halves. Do this for each one, minding little fingers near scissors.
Step 3: Glue The Legs
Glue the legs to the spider’s body using the glue gun. You could put the green legs at the front to make the spider look more poisonous (you can use all different colors of pipe cleaners to create brighter spiders if you want to).Bend the legs around and arrange them so that the spider is running. You can twist the front legs to be waving in the air.
Step 4: Glue The Eyes
Get your child to choose some googly eyes and stick them to the spider’s face. If you have a large conker and small eyes, you could glue eight eyes to the front, but you may find there isn’t space for this, in which case you should just use two or four.
Step 5: Cut Out And Stick On A Mouth (Optional)
Take your white paper and help your child draw a little mouth on it. Cut this out and glue it below the spider’s eyes. You don’t have to do this, but it can be a great way to add an expression to your spider.
Step 6: Hang The Spider Up (Optional)
Take your cotton reel and cut a small length of thread, and then glue this to the spider’s back (near the top, rather than at the back). This will let you suspend your spider. You can also experiment with moving the thread to the back; this will make the spider hang with its face down.Let your child try out different positions; you can even suspend the spider so that it is climbing back up its web, and arrange its legs to grip onto the thread.
Step 7: Add A Fly (Optional)
Help your child draw a little fly on your white paper and cut it out, and then suspend this on another thread attached to one of your spider’s legs. Your spider now has some dinner to eat!
Pine Cone Hedgehog
 Source: https://www.muminthemadhouse.com/pinecone-hedgehogs/If spiders aren’t quite your thing, how about a hedgehog? These will look ultra cute decorating the mantelpiece or the dresser in your child’s room, and you could give them all names.
Materials
A pine cone hedgehog requires:
- An open pine cone (get several in different sizes so you can make a hedgehog family)
- Brown, white, and black felt
- Small googly eyes
- A glue gun
- Scissors
Step 1: Prepare Your Pine Cones
If you’ve collected your pine cones from a garden or local bit of woodland, give them a quick clean before you start turning them into hedgehogs. You can use a paintbrush or toothpick to just remove any bits of debris from all the nooks and crannies. Your child might particularly enjoy doing this.
Step 2: Cut Out Faces
Take your brown and white felt and cut little faces from both colors. You can simply cut triangles with curved edges to give a snout-like shape. If your pine cones are different sizes, make sure you make different-sized faces.Help your child make the edges smooth, and then cut some little noses out of the black felt (you can also use black paper for this).
Step 3: Glue The Eyes And Noses
Stick the googly eyes and the noses to the faces. Some of your hedgehogs can have brown faces, while some have white ““ or you can do them all in one color. You could even make bright hedgehogs if your child fancies purple or blue; there are no rules when it comes to this kind of craft.
Step 4: Stick The Faces To The Cones
Turn your pine cones so that the wide end of the cone faces toward you, and the “spines” are pointing slightly away. Glue the faces on here using the glue gun. You now have an adorable hedgehog family!Surround them with some little wigs or bits of straw to make a cozy nest, and they are the perfect ornament to add to any room in the house.
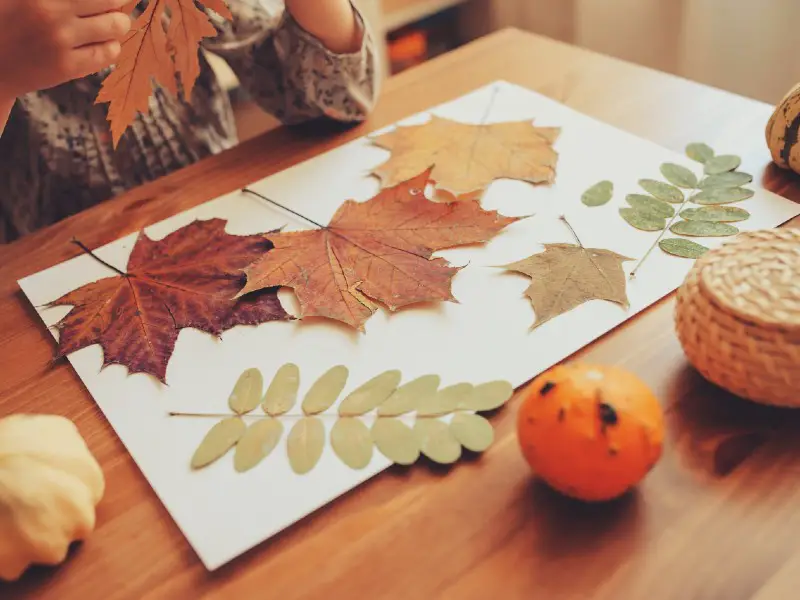
Autumn Leaf
This is a particularly great craft for little kids who enjoy tearing and sticking but haven’t quite mastered the more complicated crafts yet. However, you can enjoy it with older kids too!
Materials
You’re going to need:
- A sheet of stiff card
- Red, orange, and yellow tissue paper
- Scissors
- A pen
- Glue
- Black paper
Step 1: Draw A Leaf
If your child is very young, you may want to do this in advance so they can get straight to the part of the craft they can do.Draw a wide leaf onto your sheet of stiff card. You can do a variety of different shapes to create different leaves, or keep it simple and just do an oval with a pointed tip and a stem at the other end.
Step 2: Cut The Leaf Out
Cut the leaf out, and then cut a small strip of black paper to serve as the stem. This can be glued up to the center of the leaf. Most of it will get hidden by the tissue used in the next step, but it will help to give the leaf definition.
Step 3: Tear The Tissue
Now it’s time for your child to come and help out! Grab some sheets of orange and yellow and red tissue paper, and get them involved with ripping it into small pieces and scrunching it up. If you have different hues, add them in; the brighter the leaf, the better, so three different reds will just make it all the prettier.
Step 4: Glue The Tissue On
You can either put some glue in a little dish for your child to dip the scrunched tissue into or spread some directly onto your leaf so they don’t have to do the dipping. The second method can reduce the amount of mess this craft creates.Help your child cover the whole autumn leaf in scrunched tissue paper until it’s all bright colors. It doesn’t really matter if the stem shows through by the time you have finished. Set it aside to dry, and you’re done!This craft can be done in any size and involve all sorts of different leaf shapes, so it’s a good teaching exercise. You can punch a hole through the stem to suspend the leaves in a beautiful orange shower if you want to, or even turn them into a leaf mobile!
Autumn Headband
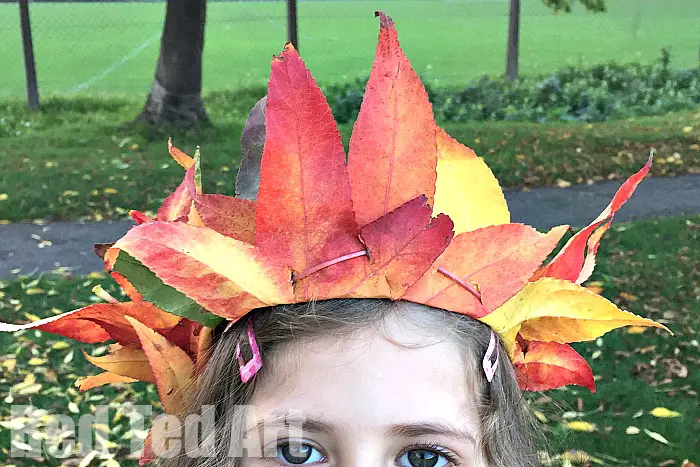 Source: https://www.redtedart.com/kids-crafts-leaf-crown//If your child is a big fan of collecting up leaves whenever you go out for a walk, you might be wondering if you can turn those into a craft ““ and the answer is yes, you certainly can, and a very simple one at that.
Materials
For this, you’ll need:
- A strip of brown or orange craft paper
- Autumn leaves in a selection of pretty colors
- A stapler
- A glue gun
- Scissors
- Paper clips
- Orange/gold glitter glue
Step 1: Make The Headband
Cut a long strip of brown or orange craft paper, and then measure this around your child’s head to get it the right length. Cut the end off and staple it so that it will sit snugly on their head.
Step 2: Glue The Leaves
Get your child to arrange the leaves around the headband, with slightly more gathered at the front. It may help to use paper clips to hold the leaves in place while you both get them in the right order and layout.Once you are happy with them, add some glue to glue them to the headband, and then slide the paper clips back into place to hold the leaves still while the glue dries.
Step 3: Decorate The Headband (Optional)
Remove the paper clips once the glue is dry.Use glitter glue or even sequins or feathers to decorate the headband and make it more autumnal. Your child now has a great autumn headband to wear! This won’t last for very long, but you can always make another using colored card leaves instead of real ones if your child wants to replace it.
Autumn Leaf Bookmark
 Source: https://www.happinessishomemade.net/easy-fall-kids-crafts-anyone-can-make/If your child is a keen reader, they’ll love this super simple bookmark. You can make lots of these, and they’d make wonderful autumn party favors. They can be made with either felt or cardboard, but felt may prove more durable.
Materials
An autumn leaf bookmark will need:
- Orange or red or yellow felt
- A black pen capable of drawing neatly on the felt (test this; you may find a fineliner most effective)
- Sharp scissors
- A lolly stick
- Orange or red or yellow paint
- Glue
Step 1: Draw And Cut Out A Leaf
Draw a leaf onto your felt. You may find it easier to make a template out of scrap paper first, or you might want to just go straight ahead and draw on the felt.It’s best to do a simple leaf design first. Beach leaves are very easy shapes, being mostly oval with a pointy end and a stem. Oak leaves will also look very effective if you’re feeling more confident.Get your child to help you with the drawing and ask them about the size and look, but you should cut the felt yourself as you’ll need to use sharp scissors to get a neat edge.
Step 2: Draw On A Stem
Help your child draw a stem and some leaf veins on both sides of your leaf. You may want to have a picture of the leaf handy so they can refer to it for ideas.
Step 3: Paint The Lolly Stick
Paint the lolly stick either the same color or a contrasting color to the leaf, and then cut it in half. Glue one half to the leaf; this can then sit inside the book, leaving the leaf sticking out of the top. You can also use stiff cardboard instead of a lolly stick if you prefer.
Felt Apple Pegs
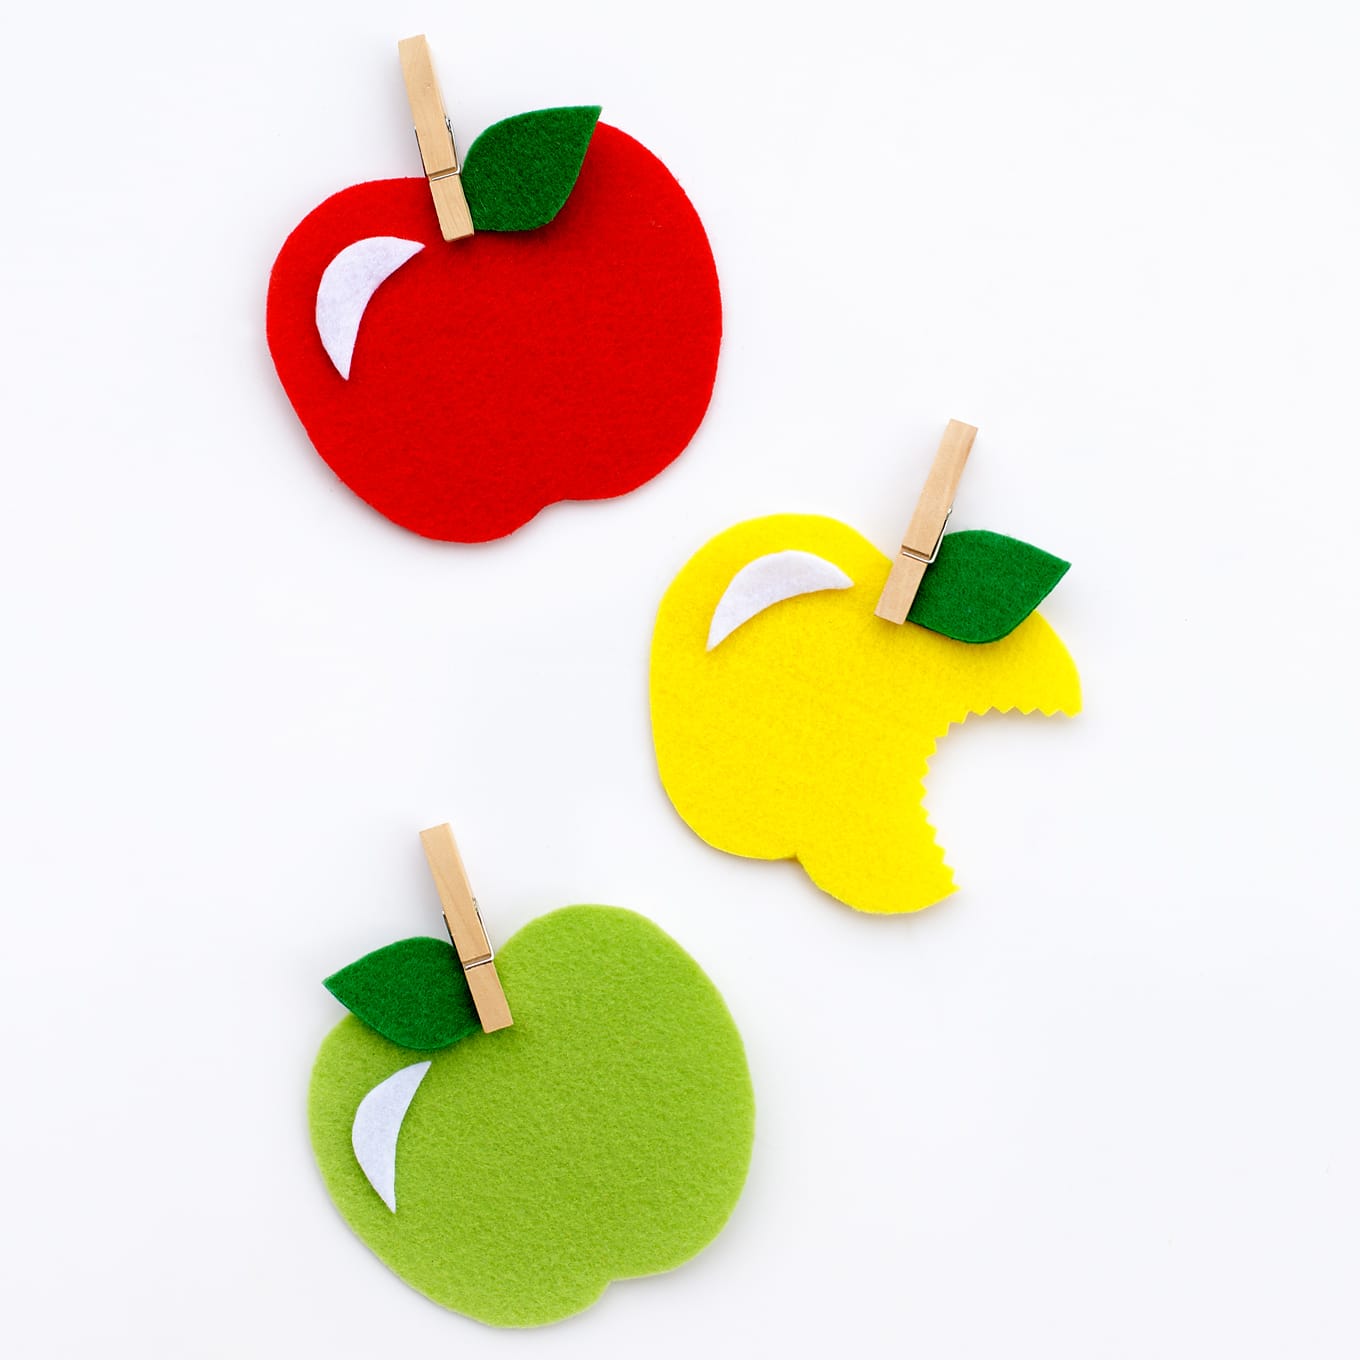 Source: https://www.firefliesandmudpies.com/felt-apple-craft/For an ultra simple and very adorable craft, you could make felt apples. Apples are a fruit that we all associate with fall, and apple pies, apple sauce, and apple cakes are very popular fall foods. With apples on the brain, an apple craft is the perfect thing for your children to try.It is also a great craft if you want to avoid having lots of mess or needing piles of complicated materials. Simple and straightforward, the apple craft is still good fun, and will let each child customize their very own apple to suit their preferences.You can make an array of red, green, and yellow apples, or go a little more adventurous and branch into other colors. The more felt you have, the more fun your child can have with experimenting!
Whatever colors you use, this is perfect for making your home feel cozy in preparation for winter, and getting your child’s mind on healthy fruits that they can enjoy.The best thing about these apples is that they won’t require much adult input, although you should supervise when your child is using the scissors.A dab or two of glue, some colorful felt, and a simple wooden peg, and you will soon have an array of adorable felt apples that you can hang in windows, on a noticeboard, or anywhere else you choose!
Conclusion
Autumn crafts bring a splash of color to the home and give your child and you plenty to do when the weather is turning chilly. Make the most of the ambers and golds of autumn to brighten up your crafts and talk to your child about the changing of the seasons.
Comments
0 comments