Notan is the coolest. Have you tried it? Have you seen it? Do you want to marry it? Cause I do.
The symmetry, the paper, the cleanness. Amazing.
Let’s get down to what Notan really is first, then I’ll show you some beautiful examples of Notan, and then my very beginner’s versions with bright, beautiful card stock.
Notan is a Japanese word that means “light-dark balance.” A notan uses an extremely limited range of values: in its most strict form, just black and white; in its more liberal form, black, white, and a mid-tone. source
Despite its graphic, simple appearance, you can obviously get wildly complicated with this art form. Here are some lovely examples I dug up for your gawking pleasure:
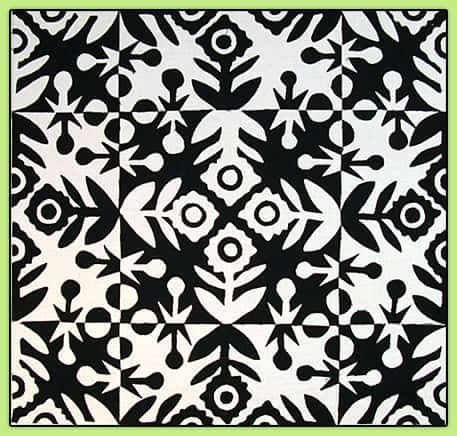
Notan lends itself beautifully to quilting as in this piece by Lynn Ticotsky.
This is impressive. (Original source doesn’t exist anymore.)
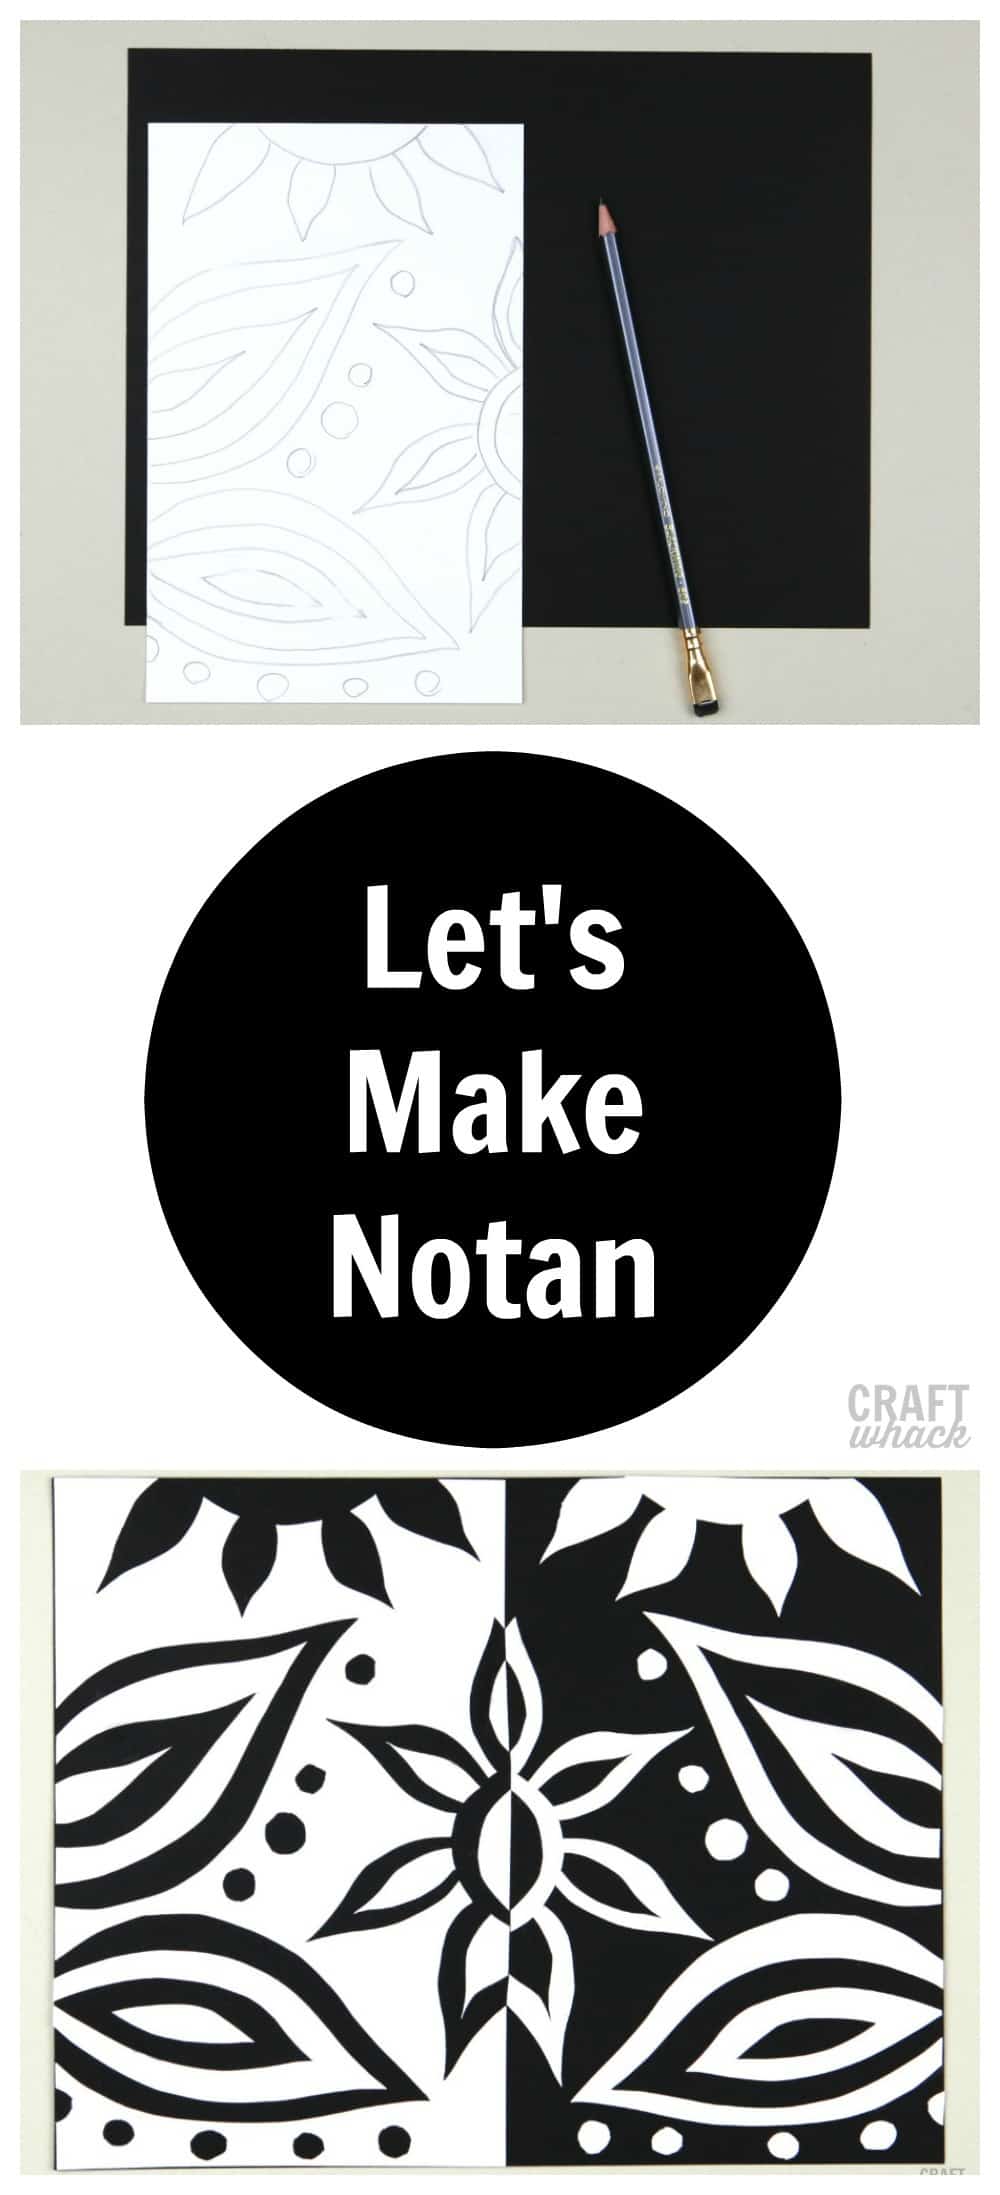
Now grab your paper, scissors (small pointy suckers if you’re getting complicated), or X-acto knife, and glue, and let’s paper craft.
What is Notan Art?
Notan art is an art form inspired and used by Japanese artists. Artists eliminate color elements and anything else that is considered to be a “˜distraction’. This art is all about shapes and balance, looking for light and dark elements that balance each other out. This is extremely important in most art as it shows the designer whether they have strong building blocks in their design. Once the notan is established, color and details can be added. The western world only discovered Notan after Japan opened its ports to trade in 1854. By the 1900s notan was incorporated in art education and taught to art students worldwide.
Two-Value Notans
Two-value notan paintings are extremely simplistic and harsh. They look at the dark and light elements of a picture or painting and color the dark in black and light in white. This leaves you with very striking shapes in black and white, and often the original painting is hard to recognize. Understanding a painting’s values is incredibly important in art. Looking at and seeing the values of light in a painting is vital because that is how we understand objects and their structure. Looking at two-value notans is how the Japanese originally started to pick apart art.
Three-Value Notans
Three-value notans are a little different from the original two-value notan shapes. Three-value notans use black, white, and a halftone of gray to display the dark and light elements in a painting. Using a three-value notan study on a painting shows the image in a more realistic way. The painting most likely still looks like its original colorful self even as a three-value notan impression.
How To Use Notan In Painting
You do not have to be a professional artist to use notan in your artwork. There are a few methods that you can use at home without the help of an art teacher, and the steps are very straightforward. The great news is that it can be applied to every painting because, after all, every painting has some sort of balance between light and dark. The fun thing about this is that sometimes you will find a very harsh clash between light and dark elements, and other times, the difference is more subtle and balanced. At first, you might find it very difficult to find the notan in a painting. Brushwork, colors, and details are all fighting for your attention. But with a little practice, you will be able to identify the notan by just inspecting the painting.
How to Make A Good Notan Design?
Grouping the light and dark notans together, rather than having them scattered, is the first step for creating a strong notan design. Your design should create bold, interesting patterns when stripped back to its black and white elements. If one element is overpowered by another, for example, if the notan is prominently light with very few scattered splashes of black, this is not considered a good notan. Here is a summary of what makes a good notan painting:
- Strong block white and black shapes
- Balance
- An unusual pattern created by the light and dark elements
Notan Art Project Methods
I mentioned earlier that there are plenty of methods that you can use at home to create notan art that won’t take up much time. Here is a breakdown of the methods with a step-by-step guide for each.
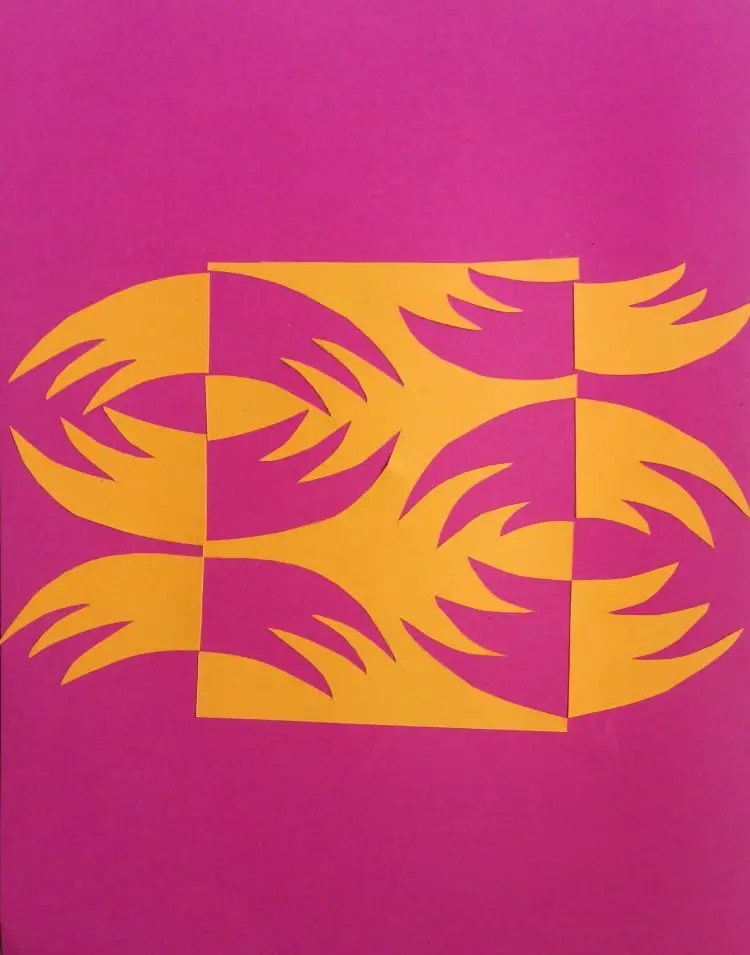
First Method
This is the easiest, and perfect for kiddos or if you’re just starting out and want a quick way to get a feel for Notan.
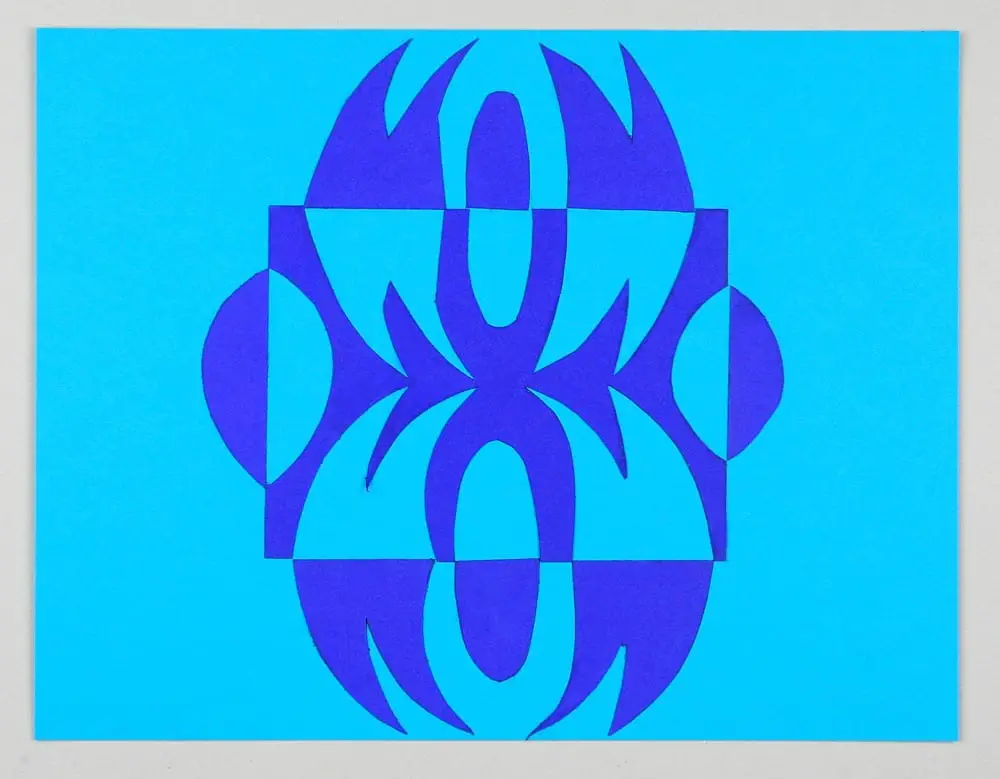
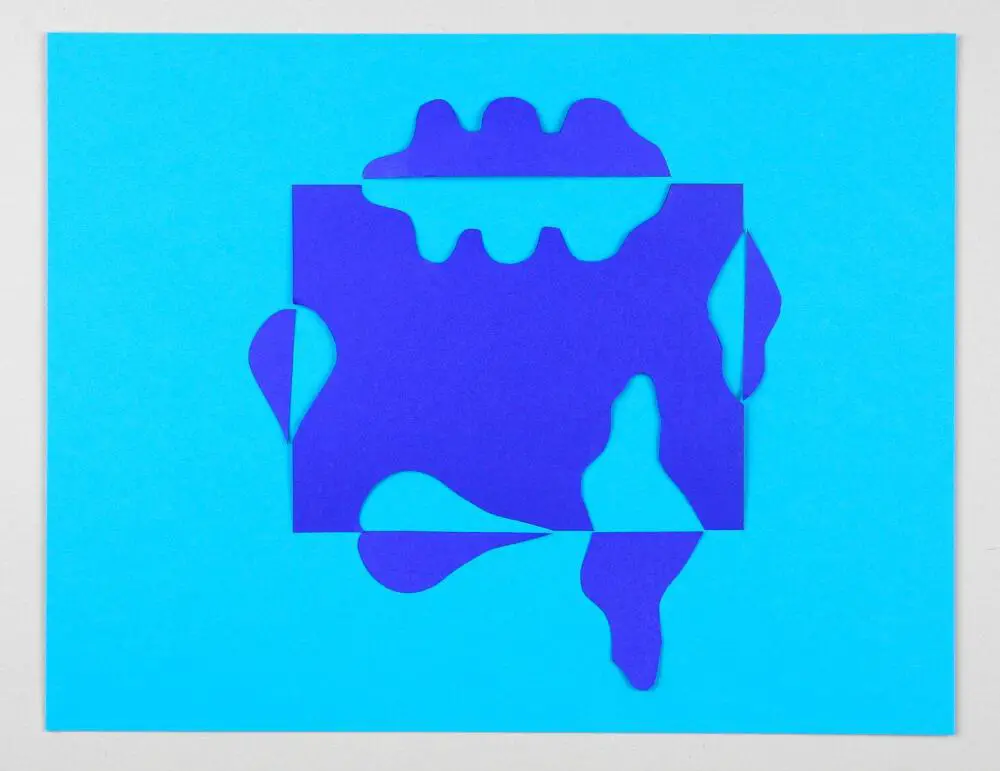
Technically I suppose this one isn’t Notan since Notan has to do with the interplay of dark and light, but it’s March and I need color, so we’ll focus on the positive/negative space aspect here.
(Here I go breaking rules again like in my Zentangle project that is more like Craftwhacktangle.)
- Using 2 pieces of paper that are the same size, cut one piece of paper down to half its length and width. This smaller piece of paper is what you will cut your shapes out of. You can either draw shapes on this paper with a pencil, or freehand cut shapes. Draw lightly so you can erase later.
- Remember to start and finish each shape on the same edge of the paper. Cut each shape out.
- Glue the leftover piece down in the middle of the whole piece of paper, and glue down your pieces in mirror formation to where they were cut out. (You will either be seeing the backs of the main piece or the cut out pieces here, which is why you need to use your pencil lightly if you have drawn your shapes.)
- If you aren’t sure about the placement of a certain piece, just make sure the edge is lined up straight with where it meets the other paper. Also, I struggled with placing the small paper right in the center of the larger background paper, so you may want to lightly mark the center with pencil marks.
Second Method
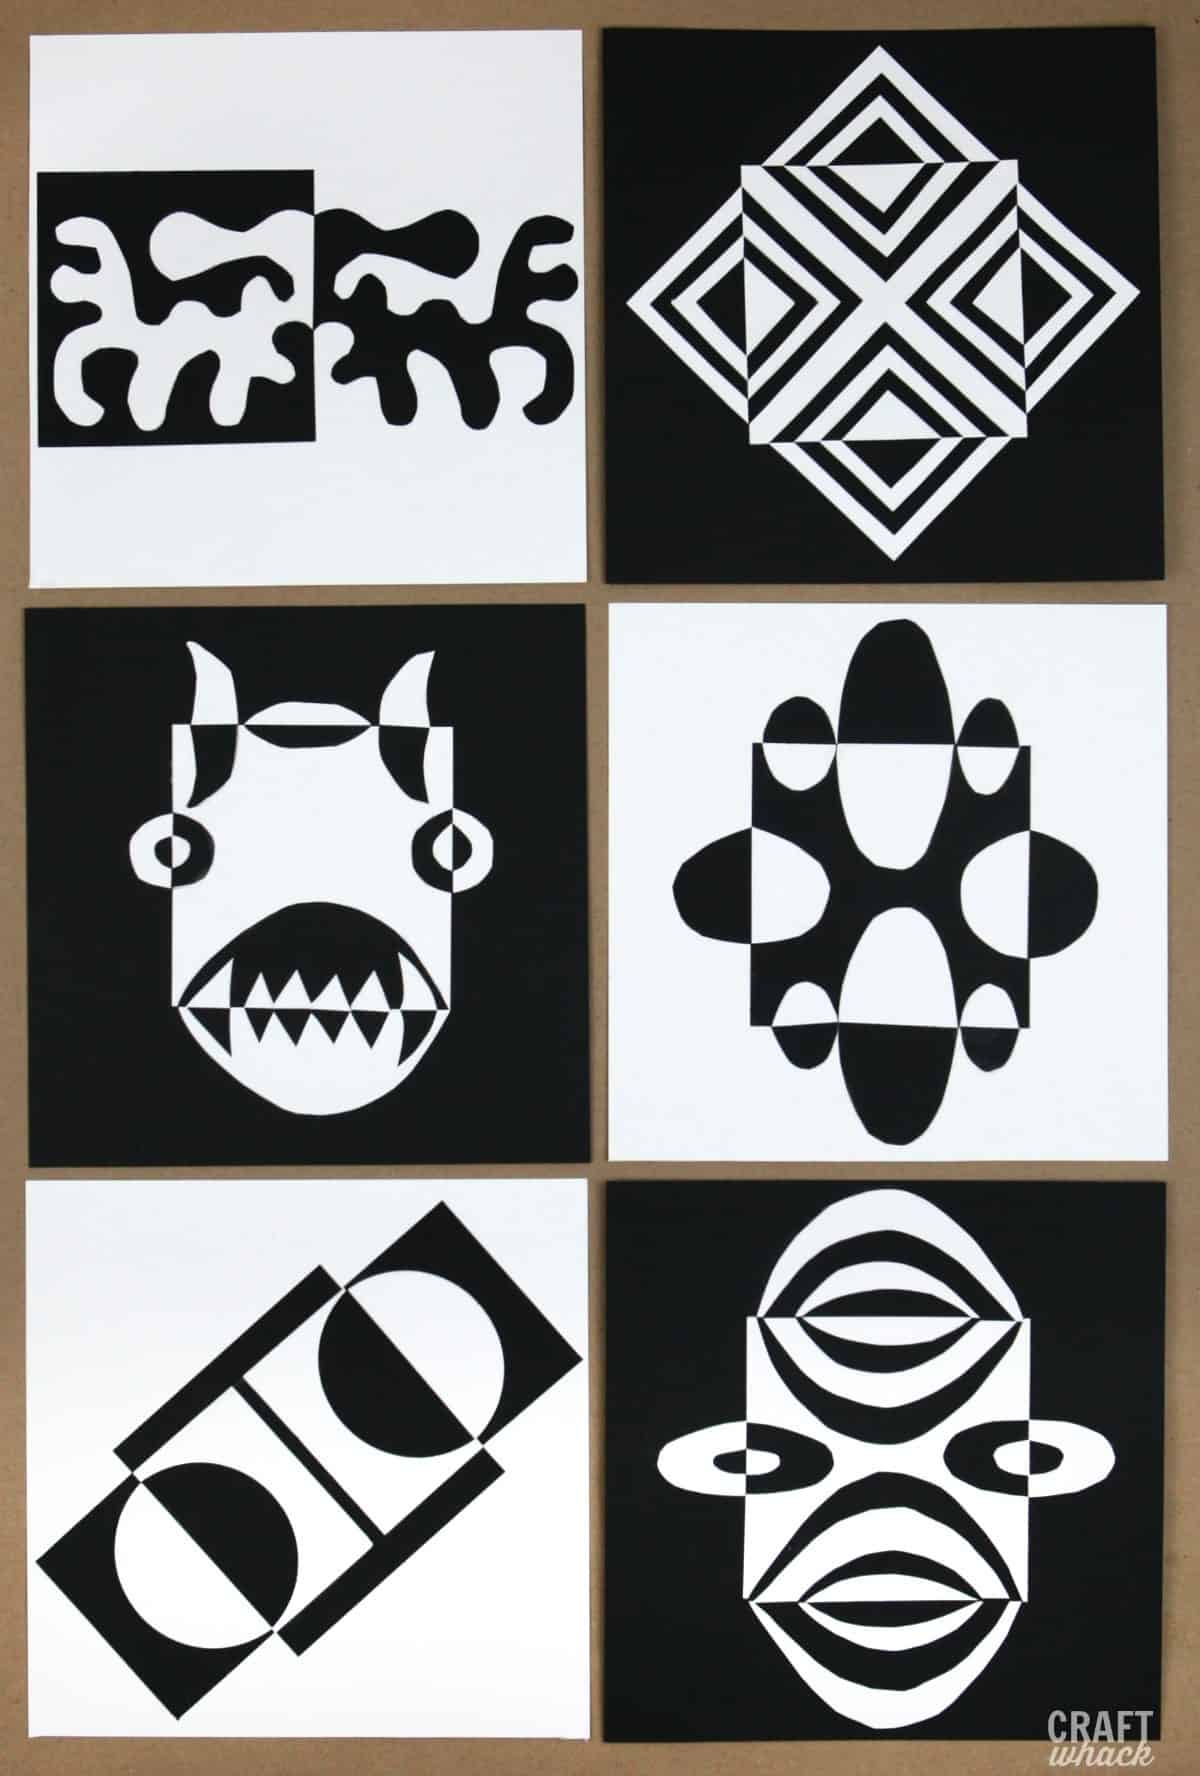
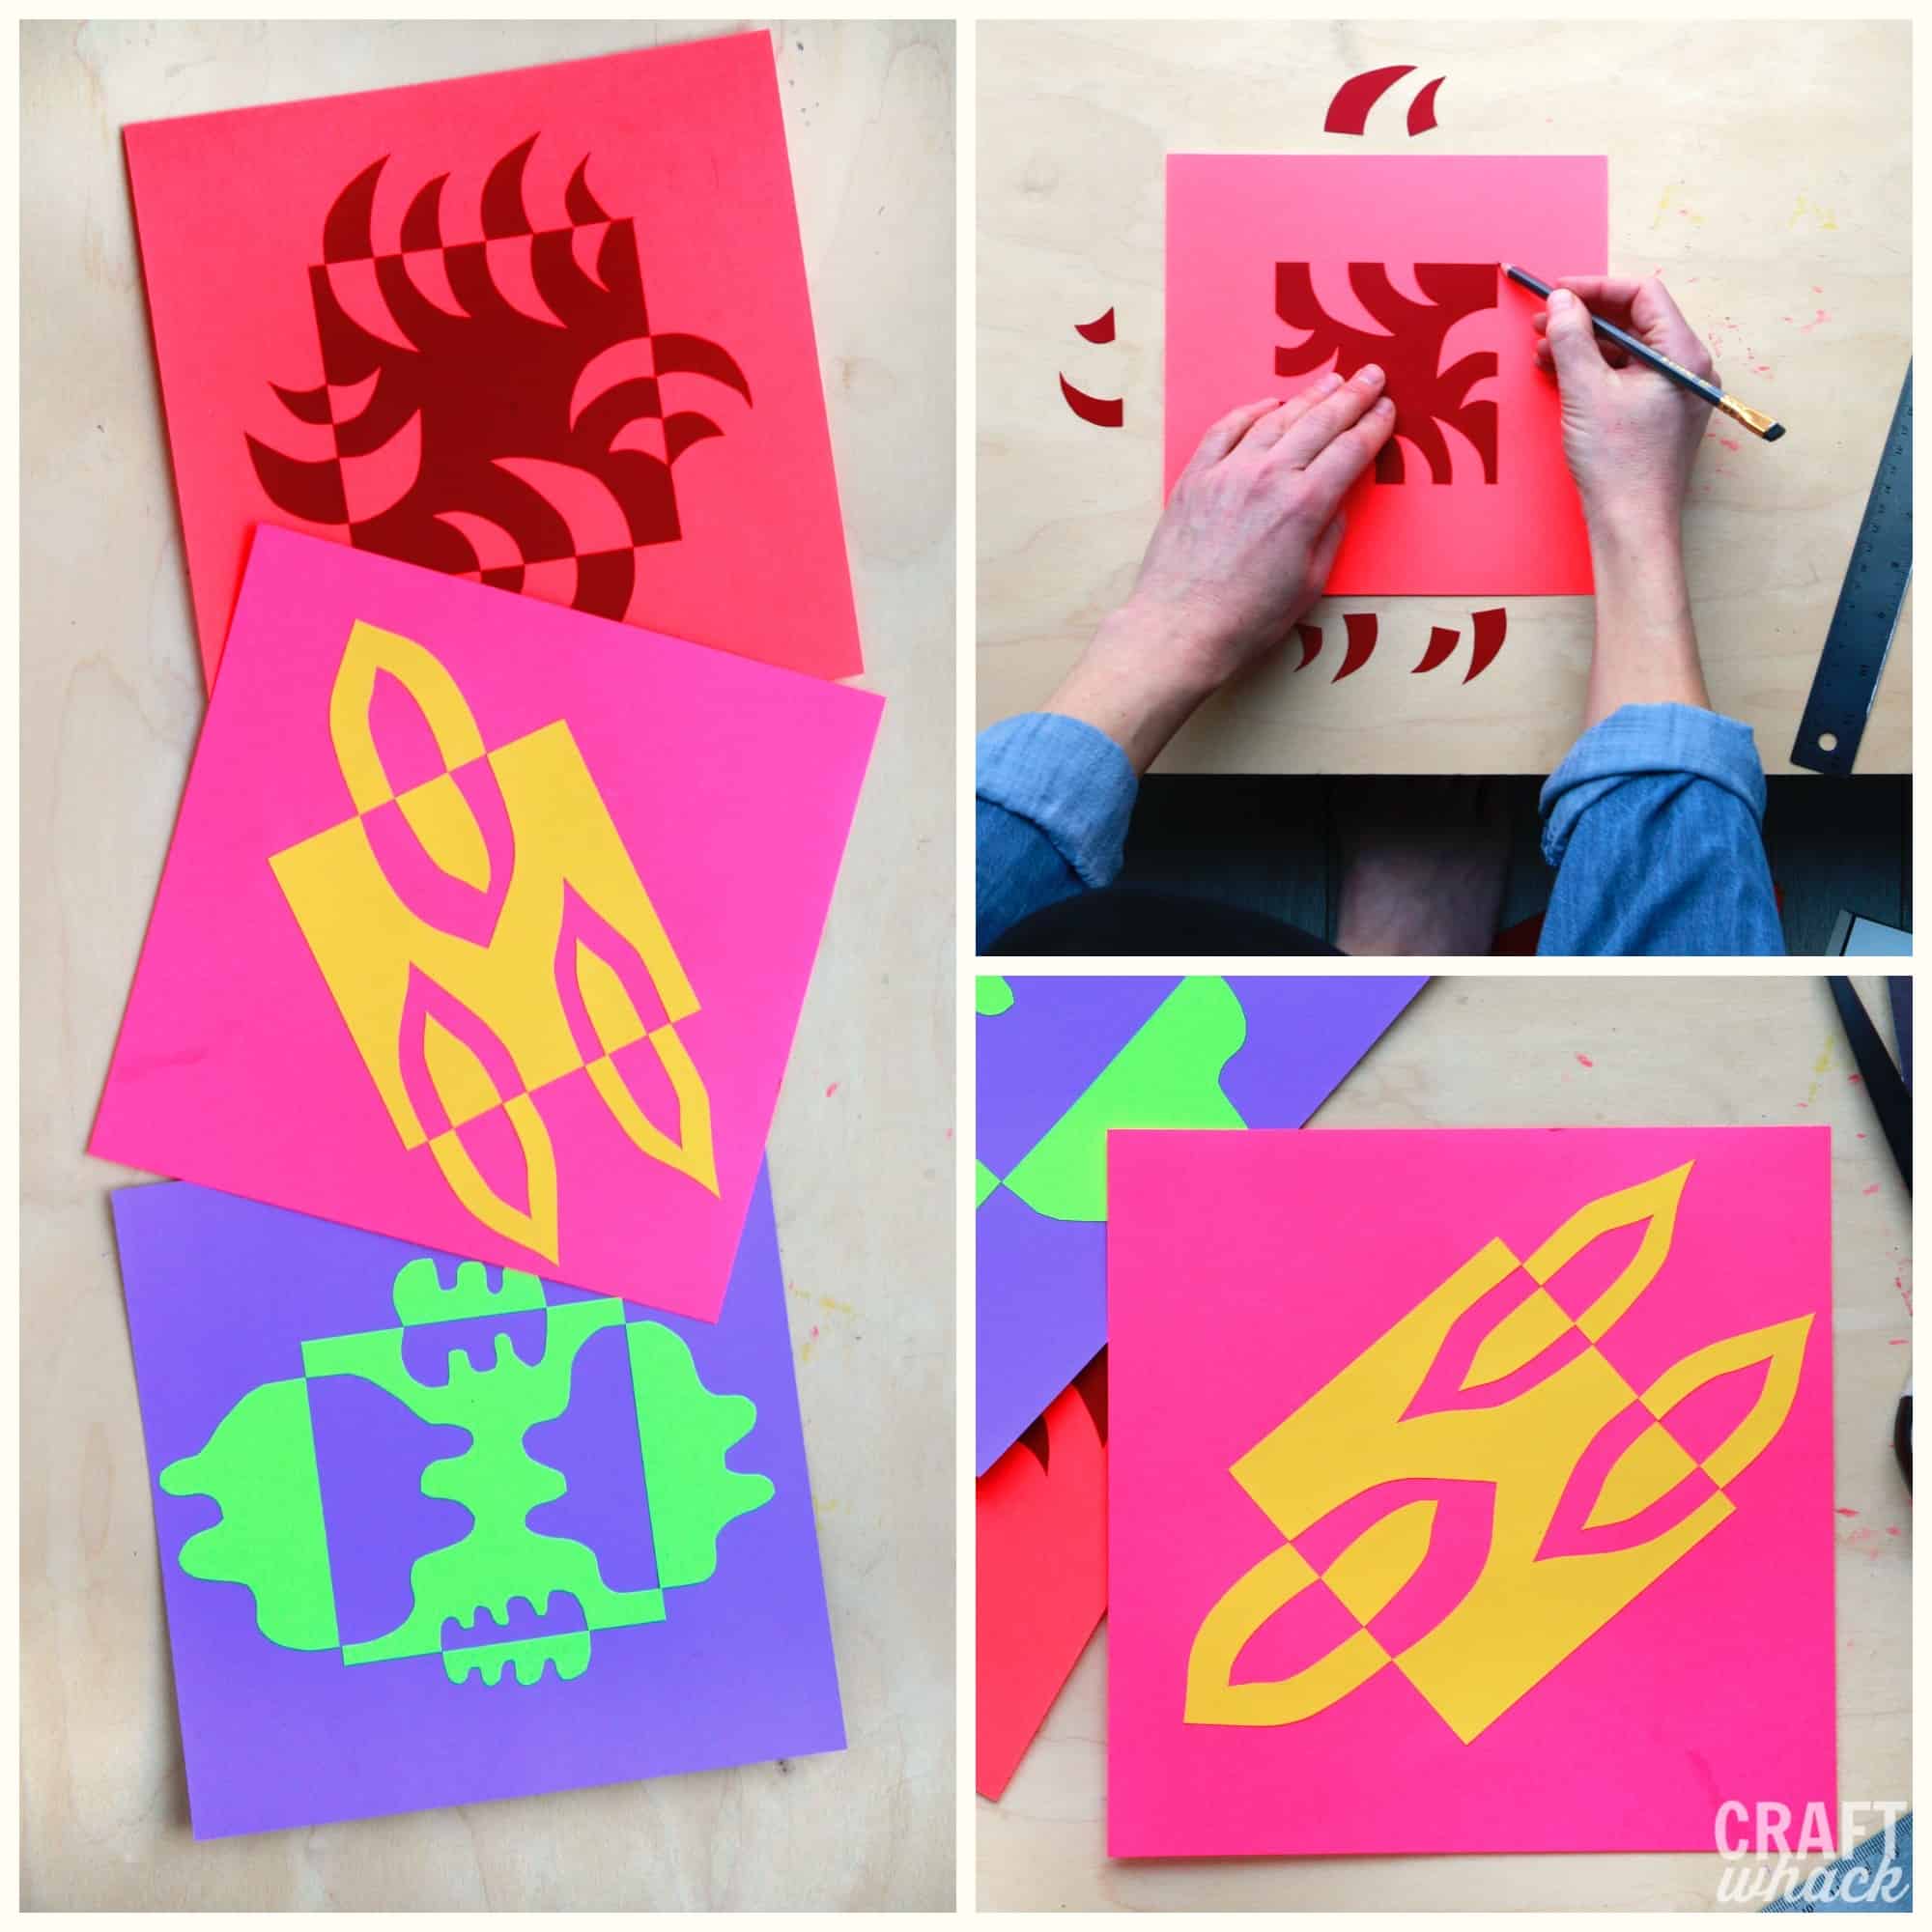
This time we cut our base paper into squares (8.5 x 8.5″), and then cut the smaller squares to 4.25 x 4.25″, which is still 1/4 the size of the main paper. Helloooo, fractions.
Start with the inner squares squared square-square or diagonally. (There was no good way to phrase that.)
We did both traditional black and white and color for this method. My 16 year old made the cool one on the top right.
Third Method
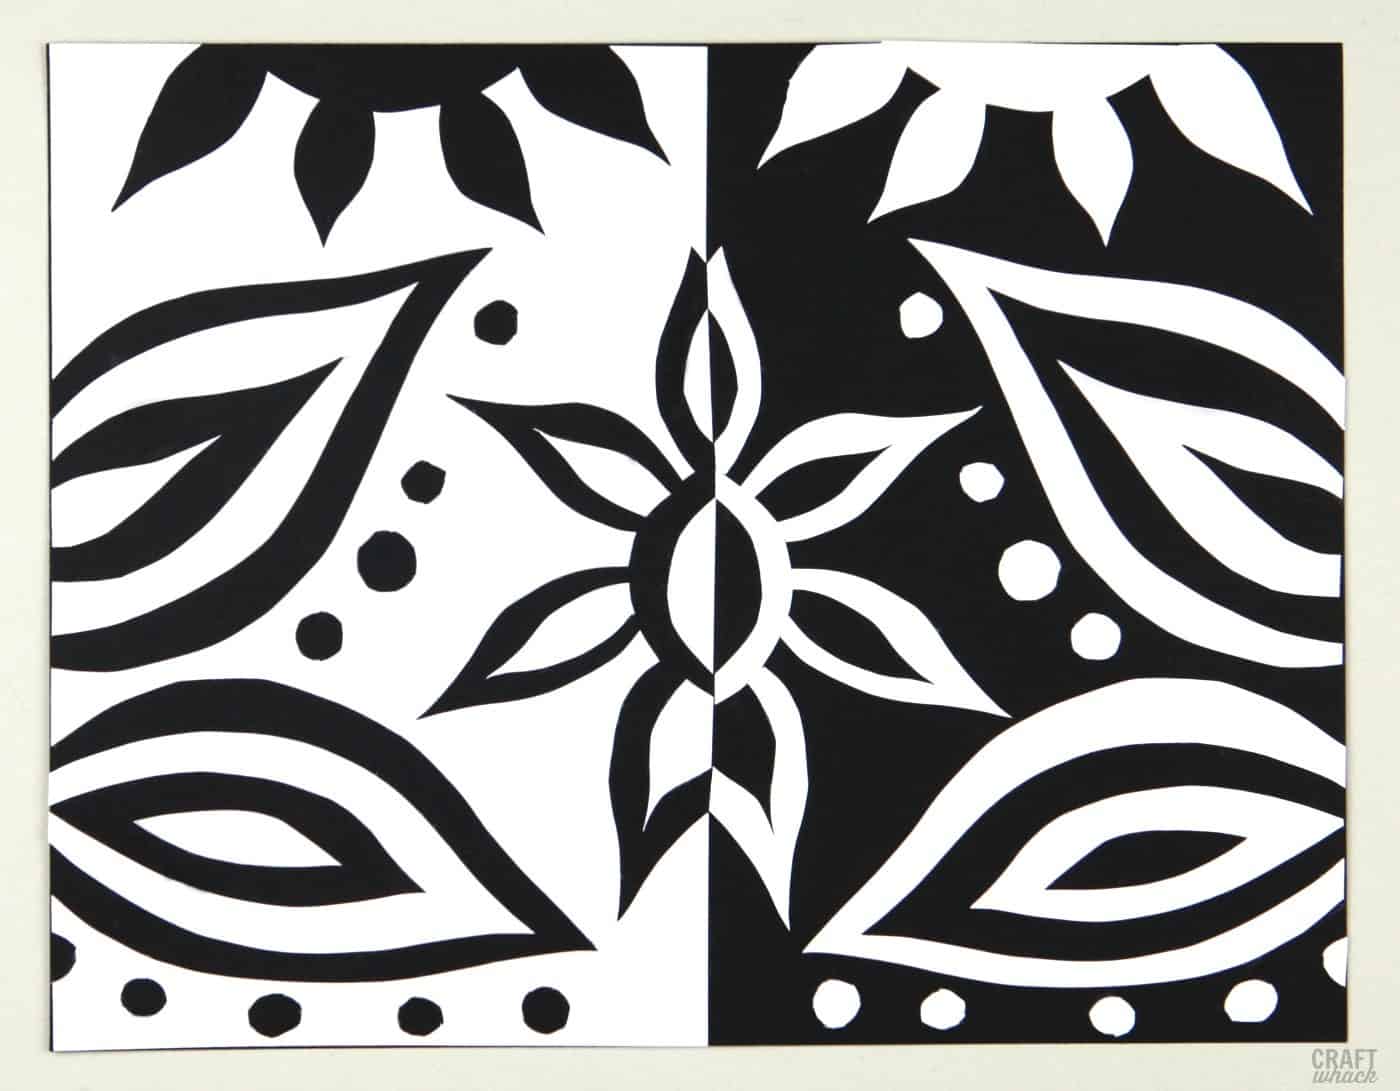
This time we’re Notanning the paper in half, so this may look like the easiest method, but it takes a different approach, and of course, uses more paper, so you end up cutting and placing more shapes.
You can actually make each method easy or hard depending on how intricate you get with your designs.
Use one piece of paper full size, and the other cut in half either way – depending on your preference.
You will be placing the smaller piece of paper all the way to one edge of the larger paper, so your design will be perfectly symmetrical on both halves of the main paper.
Notan Tips
Your finished product will look better if you cut into a good amount of the paper, i.e. don’t just cut a few little shapes from the edges of the paper, or you’ll have large blank awkward chunks of paper hanging out, looking all dumb. See:
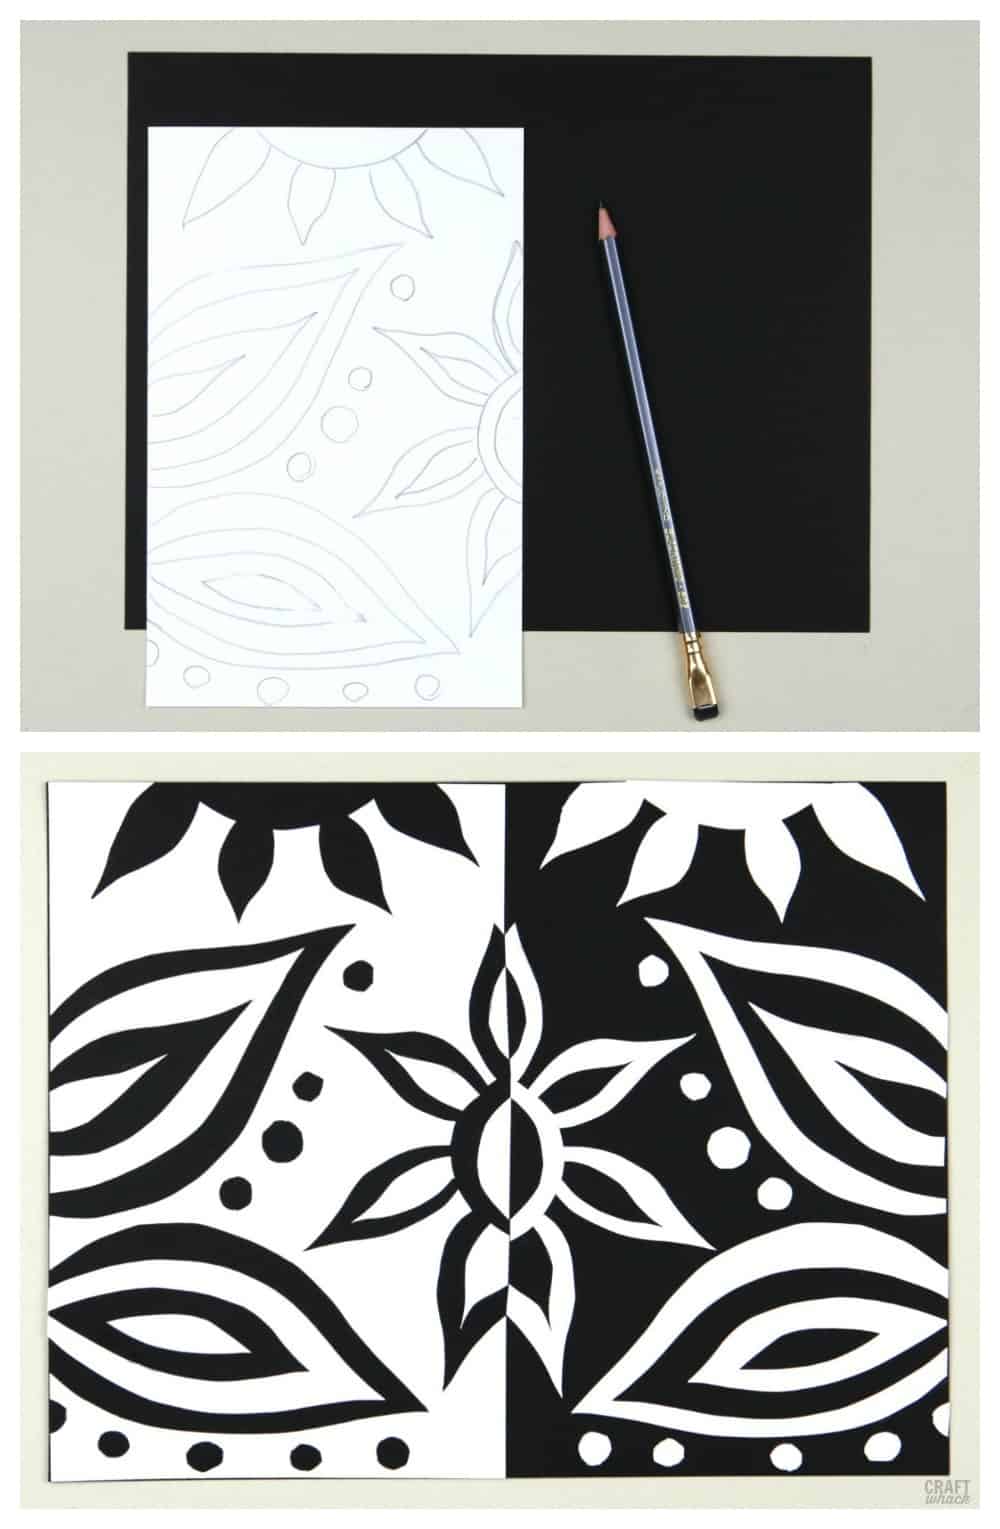
Draw out a few different ideas on paper first to get an idea of what you want your composition to be. A pencil or marker will help you quickly shade in the darker areas, and remember to draw the mirrored images on each side.
If you make drawings approximately the same size as the paper you’re using for Notan, you can pencil transfer your sketch over, otherwise, it’s god drawing practice to re-draw your design. I also find that if I have to re-draw, each subsequent drawing gets better.
Play around with cutting completely unrelated shapes out of each side of the paper, and shapes that might make sense all together once they are reassembled. Totally different approaches to each, so your brain will have to think differently in each case.
When you are cutting shapes out, keep them in place where you will be gluing them – it’s easy to forget which piece goes where when you are working on an intricate design, or if pieces look similar. In fact, sometimes I draw a pencil dot on the backs of the pieces so I don’t get confused. (I get so easily confused.)
When you are applying glue to your paper pieces, alternate using a few different pieces of paper as your surface. Glue inevitably gets onto the paper around the piece, and you don’t want it getting all over the fronts of your pieces.
[adthrive-in-post-video-player video-id=”JQGf0ASt” upload-date=”2019-01-13T17:00:23.000Z” name=”Notan-paper-Project” description=”A fun and easy Notan paper project for kids or adults”]
FAQ:
Q: What does notan mean in art?A: Notan means the combination of light and dark elements in a painting. Q: Why is notan important?A: Notan is very useful in paintings because it is the building block of art. Balance is vital in artwork, but sometimes color, texture, and other elements distract us from seeing the balance in a piece of art. Q: Who invented notan?A: The artist who invented notan is unknown, but the concept came from Japan. When the Western world was introduced to notan, an artist called Arthur Wesley Daw. Daw spoke about the importance of notan in a book he wrote in 1899.Q: Where did the word “notan” come from?A: Notan is said to be a Japanese word that translates to the interaction between light and dark elements. Q: How do you make notan?A: Notan is very easy to make. Take a look at the instructions in the article above to learn how to make notan for beginners. Materials Used in This project:Colored card stock
ooh- or this pack (I’m a colored card stock collector.)
If you adore colored card stock, you can also learn to draw with it over here. Yep, draw!
Pin This Puppy:
Comments
0 comments