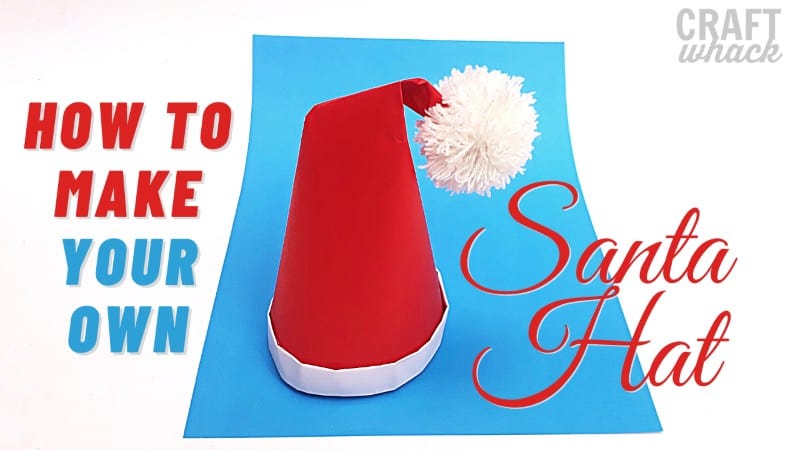
Arts and crafts are fun for people of all ages! You don’t need to worry if it doesn’t turn out exactly as you hoped it would, and it can be something that you do alone or with friends and family. Now, you might be thinking that Santa hats are just for Christmas, but they aren’t! Red Santa hats are predominantly Christmas accessories, but you can make the same hat in a different color as an accessory for a pajama party or make it decorative and use it like a party hat. I have put together a detailed step-by-step guide to help you make the best Santa hat in town! Have a look at the instructions below and give it a try now.
What You Will Need:

- Red paper
- Scissors
- Thick white wool
- White paper
- Glue
Step-By-Step Guide
[adthrive-in-post-video-player video-id=”fgCGdzVf” upload-date=”2021-05-10T02:14:52.000Z” name=”How to Make Your Own Santa Hat” description=”” player-type=”default” override-embed=”default”]
- Grab a piece of red-colored paper.
- Fold the paper in half.
- Outline where you want to cut the paper using a pencil. You should cut the paper diagonally to create a triangle shape once the paper is opened up.
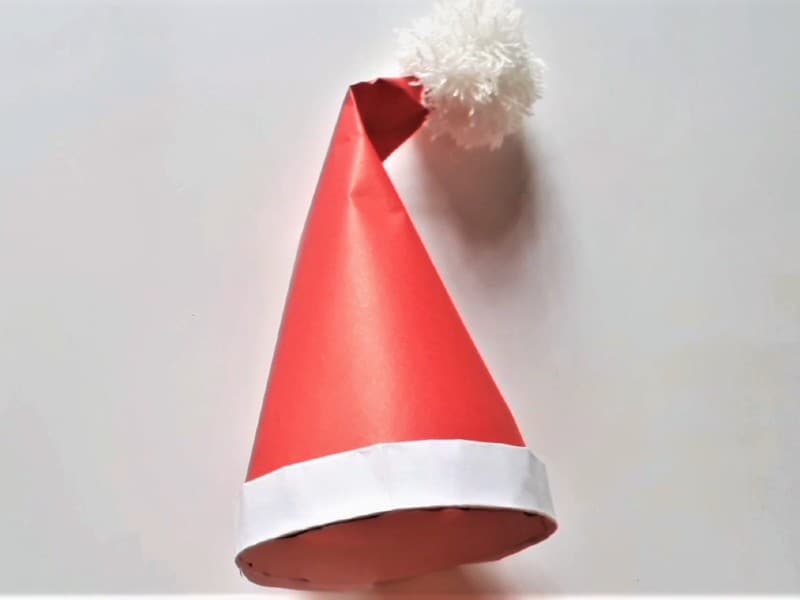
- Roll into a cone.
- Once you are confident with the shape of your cone, glue the edges and stick them together.
- Hold in place until dry.
- Grab your white wool and roll it around your finger several times before tying the ball in the middle with one string of wool. You should be left with wool shaped like a bow.
- Cut the two ends of the bow, pull and tug at the string to make it look like the bobble on a bobble hat.
- Trim the edges of the woolen ball to make it more circular.
- Glue the ball of wool onto the top of the hat.
- Measure around the base of the hat and cut a white piece of paper long enough to cover the base. The paper should have a width of three or four inches.
- Now you need to fold the paper in half and in half again, taking its width from three or four inches to about an inch. Glue the paper between the folds so that they don’t open.
- Glue the folded white paper around the base of the hat.
- Finally, pinch the top of the hat and fold it over to the side. You want the hat to look like it’s a little floppy from three-quarters of the way up the hat. This shouldn’t look like a sharp fold, so have a play with it!
 See, that was easy, right?! You can use this activity to occupy your children if you don’t want to give into television time, and think of a fun fancy dress look to go with it! You May Also Like: How to Make Maple Leaves Origami
Comments
0 comments