

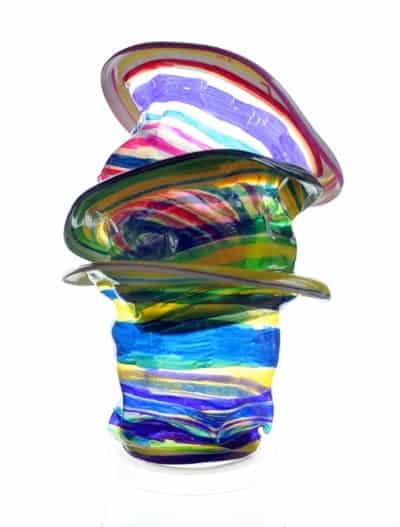
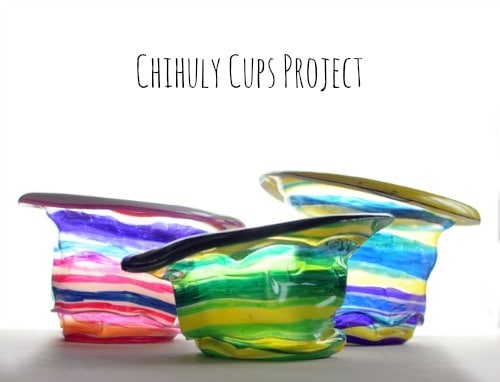
Chihuly-inspired cups are clear plastic cups colored with Sharpies, then briefly baked until they slump into wavy, glass-like bowls. This post covers the cups and markers you need, the oven steps, and the safety limits you should know before you try it. It’s an adult-run project, best for ages 8 and up for the coloring.
Safety first: read this before heating plastic
- This project is adult-only for the oven step. Kids can color the cups; an adult does the baking.
- The original cups were #6 (polystyrene) cups, and the maker of Solo cups told the author that its clear plastic cups are not designed for use at 350 degrees and that it has no test data at that temperature (see the email below).
- Work in a well-ventilated room with a window open and the kitchen fan on, and don’t hover over the oven.
- Don’t eat or drink from the finished cups, and don’t use the foil-lined pan for food afterward without washing it well. The cups are decorations only.
- Cups are hot and soft right out of the oven. Let them cool completely before anyone touches them. If you are worried about safety, skip the project and just enjoy the idea.
Who was Dale Chihuly?
Dale Chihuly is an American glass artist known for colorful, undulating vessels that look like sea creatures. He set up the glass program at the Rhode Island School of Design (RISD) in 1969 and taught there for more than a decade. Glassblowers shape a vessel by turning a gather of hot glass on a long pipe while gravity and breath stretch it. Melting plastic cups is a different process, but gravity and heat give a similar slumped, flowing shape.
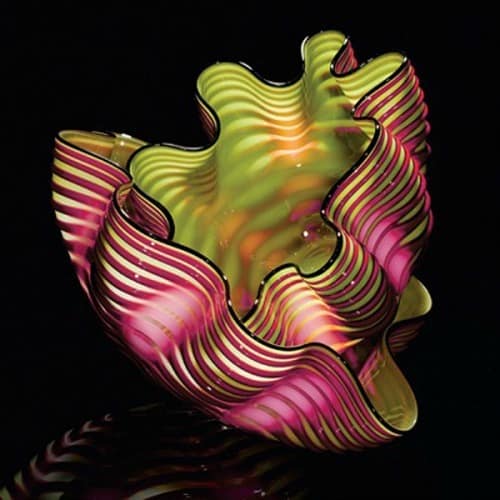
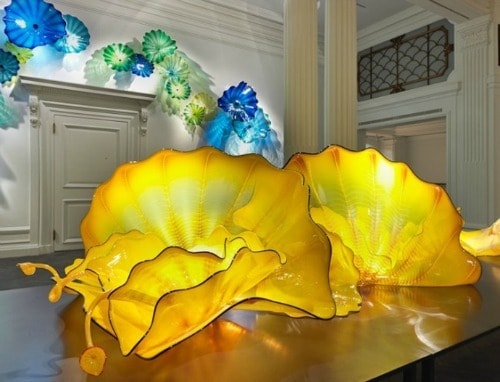
photos: Design Rulz
Projects based on famous artists give kids a look at an artist’s style, and this one gives surprisingly glass-like results.
Materials:
- Clear plastic cups, tall and/or short. The project was made with cups that have a #6 inside the recycle symbol on the bottom. Other cups were not tested, and the author later found these hard to buy in grocery stores, though dollar stores sometimes carry them.
- Sharpies – fine point (not the thin, ultra fine points!)
- Baking pan lined with foil, and an oven (an adult operates it)
Directions:
- Color stripes of varying thicknesses around the outside of each cup. For tall cups, color the inside bottom too, since it stays very visible after melting.
- Preheat the oven to 350 degrees F, with a window open for ventilation.
- Place the cups right side up on the foil-lined pan and put the pan in the oven. Stay nearby and watch them.
- The cups slump in about 1-2 minutes and then stop on their own. An adult removes the pan.
- Let the cups cool completely before handling.
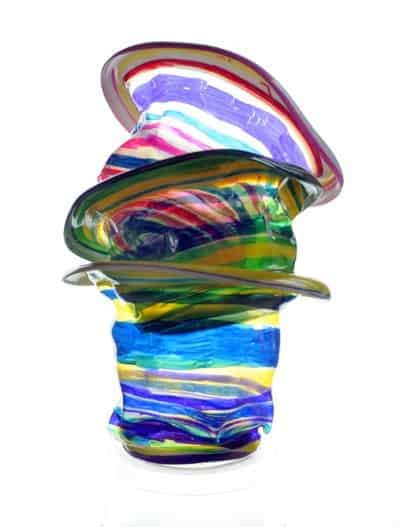
Shorter cups melt down nearly, but not quite, flat. They still look cool, but you can’t use them as mini bowls the way you can the larger cups.
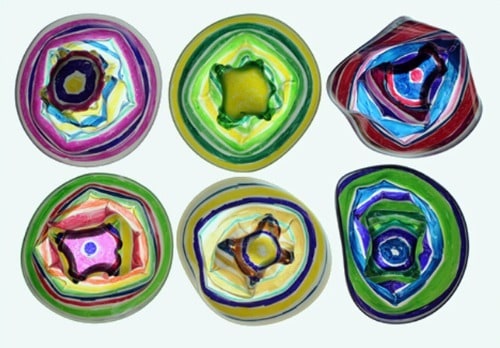
Because every cup slumps a little differently, it’s tempting to keep making more.
Here is the email the author got back from Solo about melting cups:
Thank you for your interest in SOLO Cup Company products. Our clear plastic cups are not designed and intended for use at a 350 degree temperature. Therefore, we have not tested the product at that temperature and would not have data available.
That means there is no manufacturer data on this, so use your best judgment and skip it if you have any doubts.
Like this project? Check out the Easy Zentangle drawing project, Crayon Transfer Technique, and bubble printing geometry project.
These are the Sharpies the author buys, in lots of colors:
Comments
0 comments
Wow. Those look really neat.
Hi Dyan- they’re just the best project. Each one is different and they come out so cool looking!
These are AMAZING, Jeanette!!!! Pinning!
Thanks for the pinning love!
These are SO neat! Love how they catch the light!
Yes- my darling husband took the photos after I failed miserably in getting the light to shine through and show off how cool they look.
This may be the coolest thing I’ve ever seen!
My girls loe Chihuly and we saw the exhibit three times when it was in Boston. Your project looks great!
I love that you saw the exhibit 3 times- that’s Chihuly love.
My girls loe Chihuly and we saw the exhibit three times when it was in Boston. Your project looks great!
I just love this idea! There’s a beautiful permanent installation of his in a nearby town. I’d love to take the kids there and then do this project. Thanks!
It’s kind of magical to see his work in real life. There’s nothing better than showing kids big, cool sculptures and witnessing their reactions!
Hi JeanetteLOVE these! I agree – I have seen (and taught) and bunch of Chihuly projects that didn’t related to his process. Definitely want to try. Thanks for posting!
Oh, I’m so happy! Thank you. I hope you can do this with your kids somehow… maybe drag an oven into school. 🙂
I did this once. I was trying to come up with interesting tree ornament ideas and if you let me go a bit too long they get really flat. What do you do with them?
We’re just using the taller cups as little bowls- the shorter cups, that almost flattened out, are just sitting around on a table. Every once in a while someone will play with them or stack them. I can’t bring myself to throw them out… 🙂
You could drill small holes in them and attach clear fishing line and make sun catcher mobile to hang from a window or deck.
I love this idea- I think they’d look beautiful hanging in a window!
We used to do this a lot while camping. We would put Solo cups on long sticks and hold them over the fire til they melted to unique shapes, then press the shapes together while they were still hot and soft to make big sculptures of all different colors.
That sounds TOTALLY fun! I didn’t even think about sticking them together.
just wondered if you cut the cups and slid them together, would they adhere as they melted and create shapes?
I don’t know, but I love that idea! I’m going to guess they wouldn’t become hot enough for the plastic to fuse together, but that’s really a wild guess. Now I must try this as well!
These are absolutely amazing Jeanette. The kids would love to do this.
Thanks so much for sharing!
Yay! Make some! Show me!
I can’t wait to try this this summer. I have budding artist and they love glass.
Great to hear! It would be fun to do a real glass project with kids somehow- I wonder if there is a modified sort of glassblowing project kids could do. Hmmmmm….
Not sure about a glassblowing project. My 11 year old has done 2 glassblowing workshops. He had so much fun. Check to see if there are any workshops around you that will work with kids. I am sure you already have.
These are so pretty! I’ll be featuring them on The Crafty Crow!
Oh, thanks Cassi! So excited!
Surprisingly stunning! Love the result, and it looks super simple. Thanks for the great idea!
Hi Michelle- Thanks for stopping by! They are simple, which makes the project that much more fun when you get cool results. I’d love to see your cups if you make some.
These are great! I would like to try them with my students but so far my practice attempts have not turned out. One kind of plastic cup barely melted at all and the other one melted into a completely flat disc. I can’t find clear Solo cups where I live – only colored ones. Could you tell me what kind of plastic (the # that is on the recycling sign on the bottom) and what size of cup you used? Thanks!
Hi Teagan- We used the 16 oz plastic #6 cups. The smaller cups were 9 oz (no. 1 plastic) and got fairly flat.
Awesome! Thanks so much for your help. Can’t wait to try again!
Sure thing- I’d love to see your results when you do this again!
These are absolutely stunning!!!! I love this project! Thanks for sharing at For the Kids Fridays! I am featuring this project at this week’s link party over at SunScholars!
Aw, thanks Rachel! I’m so glad I found your link party- I’ll be hanging out with you more often!
I’m worried about the toxicity of melting plastic. Any thoughts?
You know, Pat, that’s an excellent question, and one I don’t have an answer to. I tried a few Google searches, but only came up with lots of those sites where people give their opinions- no facts. I have an email into the Solo company, but not sure if I’ll hear back or not. If I do, I’ll be sure to reply to you again and update my post. My personal opinion is that they are in the oven for such a short amount of time that I am not too worried about any ill effects of plastic fumes. I would imagine that if you did this on a consistent basis, you may have problems. I’m really not sure though, so I hope Solo gets back to me. Thanks for bringing this up!
This is such a fun idea! Love it!
I love this! As a designer I love setting unusual and dramatic tables for parties and dinners. I’m going to have my grandsons make several of these and put battery operated tea lights inside. Then use them as the centerpiece for our next family get-together. They will be so proud!
AWESOME idea. Oh my- this will look so good. If you feel like sending me photos or posting them on my Facebook page, I’d love to see them!
I used the 9 oz size the kids drew all over the sides on the bottom they put to Aunt May from John put the date on them on the inside edge, melted them upside down in the toaster oven they turned white and very flat used a hole punch after they cooled and used them for XMas gift tags or tree decorations .what you drew on the inside was on the backs
Christmas decorations and tags! That is brilliant. I think we will be making more of these at Christmastime.
This looks like a lot of fun. Can’t wait to try it out with my girls. Thanks for sharing!
Oh, I’m so glad! Feel free to share their finished pieces on my Facebook page; I’d LOVE to see!
these are really cool. I’m thinking I might string them and hand them outside. or may be string lights through them. May be even a wind chime.
Dear Jeanette, wonderful craft !!
It’s so adorable…
thanks for the idea,Love your craft…
thanks for showing how to do …
What a great idea! They do look like Chihuly sculptures. I went to a Chihuly show here in Pittsburgh at Phipps Conservatory a few years ago and his work is absolutely amazing. He also made a huge hanging piece that now hangs in the 2 floor lobby suspended from the ceiling. Its gorgeous!! I will definitely be trying this to make some of my own creations. Thanks for sharing 🙂
Love them! My kids love colourful things to do and, with us as parents, are all too aware of Mr Chihuly (I’m sure most inhabitants of the deepest Amazon rainforest have hear of this glass artist too!)
Anna@BohaGlass
Woah! Your glass pieces are completely gorgeous- I’m amazed. I hope your kids will enjoy this project- but maybe they’ve already been able to play with blowing glass?
Thanks Jeanette for the compliment. I know they’ll adore this project, they are still quite young so no hot glass blowing yet!
Just happened to come across this when looking to make a chihuli inspired baby mobile.
after you bake it, does the plastic get harder than it was in its original form? or is it still flexible plastic? really hoping that it hardens up.
i have thought about using shrinky dink paper and pulling it out when it curls, because that becomes hard as rock plastic, but i like the more 3D look of these more.
thanks!!!
They do become rigid! The plastic shrinks in, so it becomes thicker and hard. You’re in luck… I’d love to see your finished mobile if you feel like posting it on my Facebook page- good luck!
Has anyone tried drilling holes in the bottom and slipping them over the small bulbs of a strand of Christmas lights? I think I will try this for our outdoor lighting (instead of Chinese lanterns)!
I completely, absolutely love this idea! Let me know if you try it. bet it would be really cute.
wonderful art..
so beautiful..
Here is something similar I saw earlier this week from plastic produce containers. http://blukatkraft.blogspot.ca/2012/09/diy-dollhouse-miniatures-modern-glass.html
Oh, cool! Thanks so much for sharing this.
Do you happen to know what # plastic the solo cups are? I have just been trying to melt my cups flat so the ones you used sound perfect! Thanks!
Georgina- they were #6, which I am finding increasingly hard to find these-a-days.
Thanks – I will start my hunt for them!
I am working with my daughter on a project for shool and we need them to melt totally flat and are really having a tough time. All that we have used are #6, but only some melt totally flat. The rest are curling up a LOT. We have had luck with the 2oz Brite Concepts ones, but no luck with the more expensive ones from Party City. The large red ones from Costco work well pretty much every time. So far only red ones are working. I am going to hit the dollar store today to see what I can find. I realize this is three years after you posted, but hope your project worked out!
Jeanette this is incredible! What a great idea! They look like the Chihuly real deal 🙂
Really cool art article. Some people are just so creative. Go Green
I don’t know, but I love that idea! I’m going to guess they wouldn’t become hot enough for the plastic to fuse together, but that’s really a wild guess. Now I must try this as well!
I don’t think it would get hot enough, but that would certainly be cool if it did! Give it a try; it’s such a satisfying project.
I too found this project on pintrest, looked super fun but gave no details, so I found you, thank you, I’m going to give this a try, just so you know I found this other site that gives a little different way as well,http://crafts.squidoo.com/shrinky-craft-made-with-plastic-cups, have fun!
Thanks Susan! That’s interesting- that project uses the white plastic cups. I hope you love this project as much as we did!
Can you use a gas stove as well? Or does it only need to be electric? We tried it in a toaster oven outside and there was a bit of a smell but it wasn’t too bad.
Hi Winnie- I used a gas oven. I had heard you can only do it in electric, but it worked beautifully in our gas oven. Toaster oven is such a good idea if you want to get outside to be extra safe! How did the cups turn out?
I have been wanting to try this in my son’s class. Yes, at our low budget public schools parent volunteers teach art… Anyway i am trying to find a safe way but I might just have to bring the cups home for melting. I was going to try a heat gun. Y question is did these smell when melting? I saw a pin on using overhead projector film and oh my those are toxic to melt. Don’t try it! lol.
Wow- I haven’t heard of using overhead projector film for this! It had a slight smell, but not terrible. My biggest concern would be finding the cups- I’ve tried to find them recently and couldn’t find them anywhere!! You are awesome for going in and volunteering for art. I feel like a lot of parents wouldn’t do that. Please let me know if you find the cups and experiment with a heat gun- now I’m really curious about that.
Thanks Jeanette. I tried with the the embossing heat gun and it worked! Yay. Didn’t notice a smell that would make this too noxious to just do in the class. I didn’t anticipate finding the cups to be a problem though. I had a stack left over from a party. They have a 1 not a 6. I usually grab these at the dollar store before big parties (with kids) so I don’t have a bunch of glasses to wash.. Now I hope they still have them. I’ve been trying for months to figure out a Chihuly lesson in the classroom. Appreciate your wonderful explanation.
How cool that the heat gun worked! I’m glad, because half the fun is watching the cups change. And now I’ll have to try the #1 cups, too. Have fun with the project!
I saw a similar blog on another site and was looking for directions to tie them together. But we ended up using the #1 cups. Ours didn’t melt down as much, but the tops looked kind of cool. My directions said to “cook” them for 30-45 min, but I don’t know that it made much difference after the first 15 min or so. Here are pics of mine: http://shopmakeadifference.com/chihuly-art-cups/
How strange that yours didn’t melt down all the way- I’ve since tried some plastic cups from a party store and did not have much luck, so I think I may need to test a bunch of cups out soon!
These look awesome!! What kind of material do they feel like when they are done? Could you paint them or use something besides sharpie to color them? Definitely on my list to try
I haven’t tried painting them, but I’m thinking the paint might melt off…. anyway, they get hard after they cool- harder than the original cups, which have some give.
I saw a recommendation on another site with a similar project to use the outside grill. Then you don’t have the issue of fumes inside.
You know, I have heard of that, and it’s a great idea. I still wonder where people are finding the right cups anymore. Have you bought some?
Regarding sourcing the cups, look for disposable plastic wine glasses. They are a heavier weight and tend to be #6s. My local Cash and Carry has them in four different sizes, hundreds of them (they’re not wine glass shaped, just sturdier disposable cups). I would think other places that specialize in event or restaurant/catering supplies would have them.
I used a $10 heat gun from Harbor Freight to melt hundreds of these for a school project. It worked beautifully and some of the kids had such great ideas about different tooling and melting techniques. Big fun!
I was thinking about the small cups. My thought was to use them on a wind chime. take a juice can for the center, use nuts on fishing line for inside to make the sound, then fishing line with the cups and beads for decoration. Each one would be personal to the makers taste.
That sounds like such a cool extension of the project! It’s the kind of thing that would be so fun to see how everyone approached how they colored the cups and then how they assembled everything- oooooooh I like it.