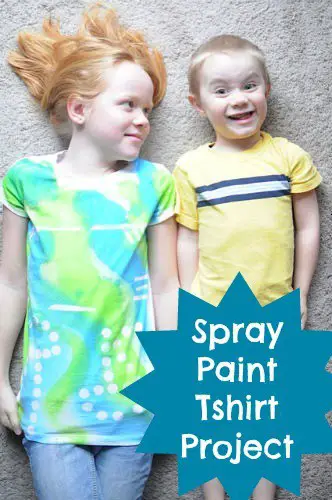
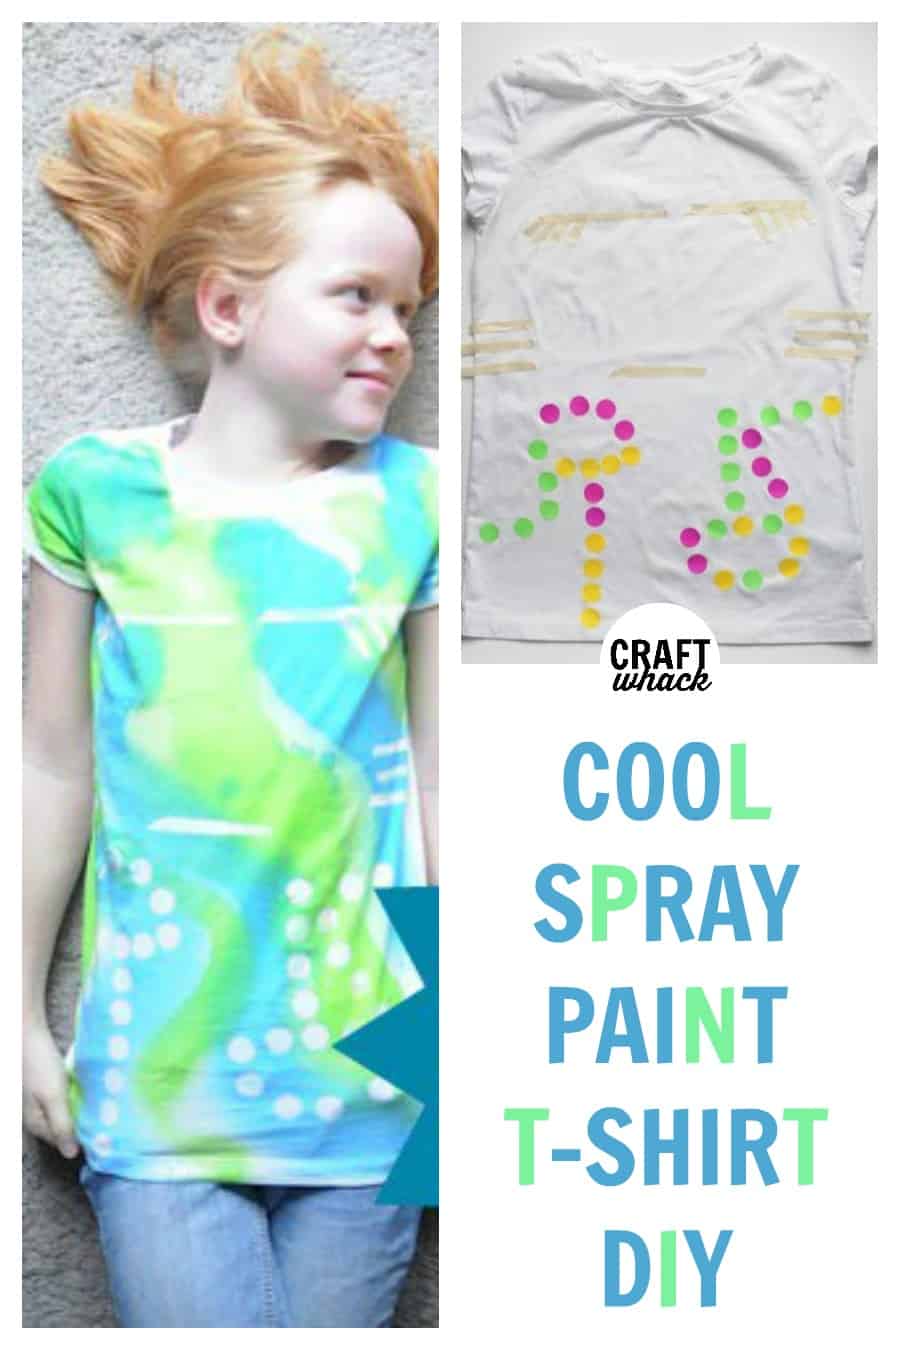
We’re big fans of making art on t-shirts, because, hey, wearable art!
This is a fun, non-toxic way for kids to get a spray-paint effect and outfit themselves with a new t-shirt in anticipation of Spring. I was originally going to make this project using spray paint, and was so excited to find a product that acts like spray paint without the fumes.

Materials:
- 100% cotton t-shirt in white (Hello, Target.)
- Fabric spray paint: I can’t even find the paint we used online anymore- lots of people said they clogged after one use, which seems to be the case with many fabric paints. For this reason, I suggest buying small bottles if you’re just doing a shirt or 2. These actually get great reviews, so we’ll try these next, and you can choose your colors or buy little sets.
- Cardboard for inside of shirt
- Paper to lay out under the shirt
- Circle stickers
- Masking tape
Technique:
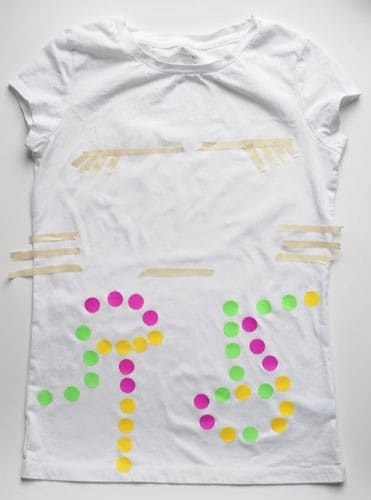
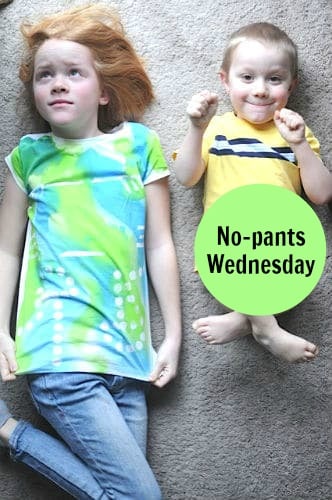
Place dots and masking tape anywhere you want on the shirt. Make a design, or randomly place them. Fen decided to make a character from Minecraft with the tape, and swirl the dots around at the bottom.
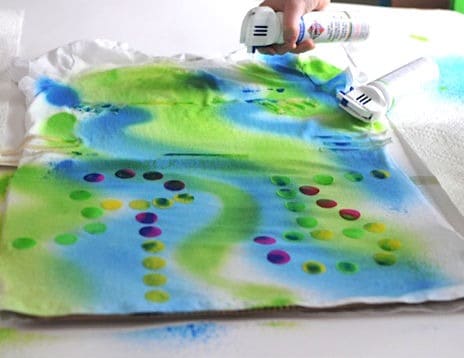
Shake the paint well, and spray from 6-8″ away, keeping the paint moving over the surface. You don’t want it to pool in one place. (Practice on a piece of scrap paper beforehand.)
Fen sprayed 2 paint colors in alternating swoopy-stripes.
Wait for the paint to dry, (about an hour), and remove your stickers and tape. Leave the shirt alone for 72 hours before washing. (Or if you’re like us, wear the shirt to school the next day.) You don’t need to heat-set this paint, unlike other fabric dyes.
Comments
0 comments
This spray paint has received bad reviews due to its dripping and spurting. Did you experience any problems?
Ya know, we didn’t have any trouble like that, but we only did the one shirt. I wonder if it’s similar to spray paint in that way. I always have trouble with spray paint after using it for a while. Maybe it’s just the nature of the can design.
This is a terrific idea Jeanette! Everytime I come here, I end up pinning tons of stuff.
La la la!
I just love your blog. So much great stuff!
La la la! Thanks for all the pins! I’m so glad you like it here- makes me happy to hear that!
Such a totally awesome project. I had no idea you could use special spray paint for t-shirts! You find all the best stuff!
Disclaimer: I went to the store to buy spray paint for this project, and happened upon this stuff. I was very excited- I sort of want to spray everything now.
I have some of that paint! Definitely trying this once it gets warm enough to paint the shirts in the back yard!
Interestingly, there were no fumes at all- we did it inside at a table and it was fine. I was so excited to find this stuff!
Very cool effect – it looks like something you’d see from Nike!
Very cute pic too!
Non-fumey spray paint – great find!
We are so Nike around here. The one pic featured som little boy nudity in the original, so I had to strategically cover it up with some help from Pic Monkey.
The pictures of your kids are soooooo funny! Too cute. I want to make some shirts, too.
I used to teach Children’s Church about 8-10 years ago & I did this project with my class of about 12 (ranging in age from 5-16). I helped the younger ones & the older ones did their own (unless they wanted me to draw a design or something). The kits did several shirts each & the kids LOVED them (I even made myself a couple lol). We did the front of the shirts one Sunday in class then the backs of the shirts the next Sunday (with their names across the shoulder football jersey style). We used cardboard between the shirts to keep from bleeding through but just freehanded the rest without stencils & they turned out GREAT. The kids wore them in a parade the following weekend & received may compliments on them. I don’t recall having any issues with the cans getting gummy or splattering until they were almost empty but it just added a tie-dye effect to the tees which was fine, just keep shaking the cans every little bit to keep the contents mixed well to avoid the spurting. I bought the glitter kind which can settle pretty fast. I still have my shirt from way back when (doesn’t hardly fit anymore I’m afraid lol). I’ve wore & washed it so much it’s lost it’s sparkle from the glitter after all these years but otherwise it’s held up very well, the paint blends with the fabric so well it’s just as soft as the t-shirt also (not hard or crunchy).
Actually – I just remembered…we used a flour mixture (oddly enough) as a ‘stencil’ to prevent the paint from getting to certain parts of the shirts for those who wanted to – for instance, I mixed up enough flour & water to make a thick paste & put it in a bottle if they wanted a cross or heart in the center of the shirt we drew out the design with the paste & whatever designs around the cross or heart -lines, dots, etc) then we sprayed the top with the paint in like a tye-die effect & set it in the sun to dry the paste & paint. Once it was dry we either flipped it over to do the back if they wanted or we sprayed the paste off with the water hose to reveal their designs (it was the middle of summer – good excuse to be outside & play in the water as well).