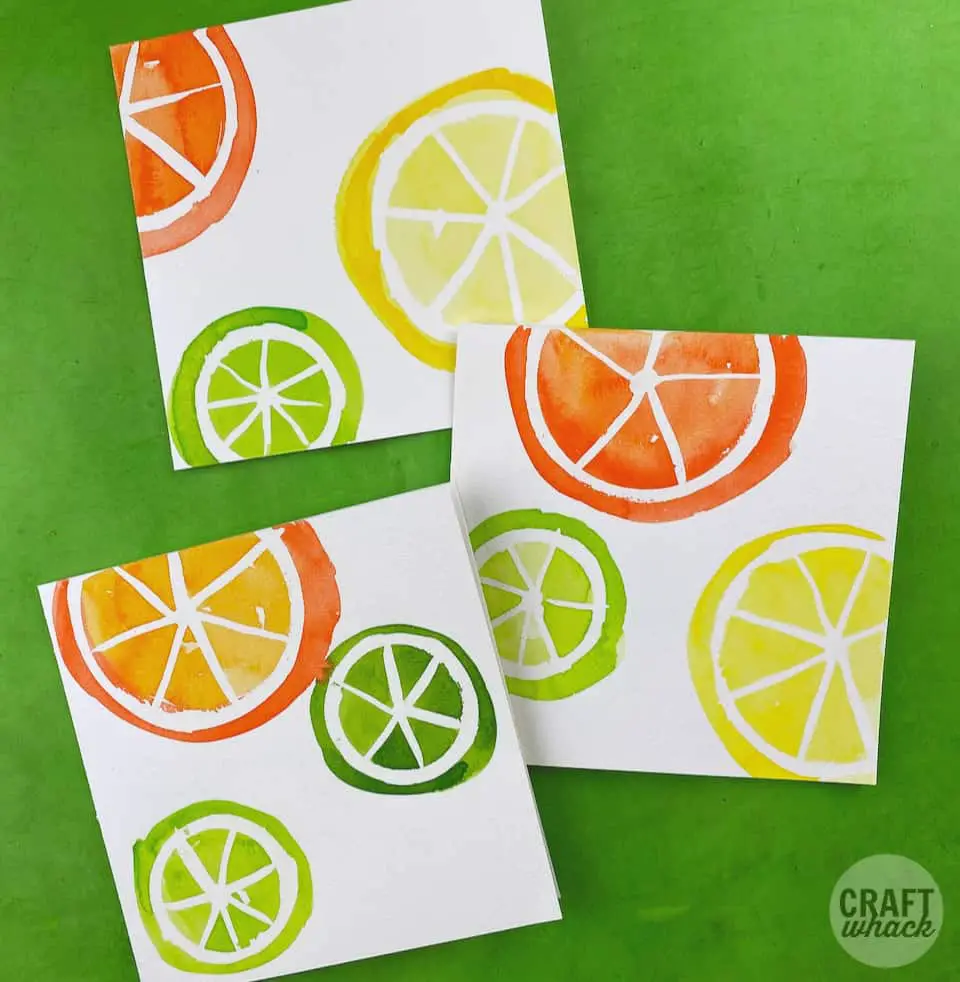
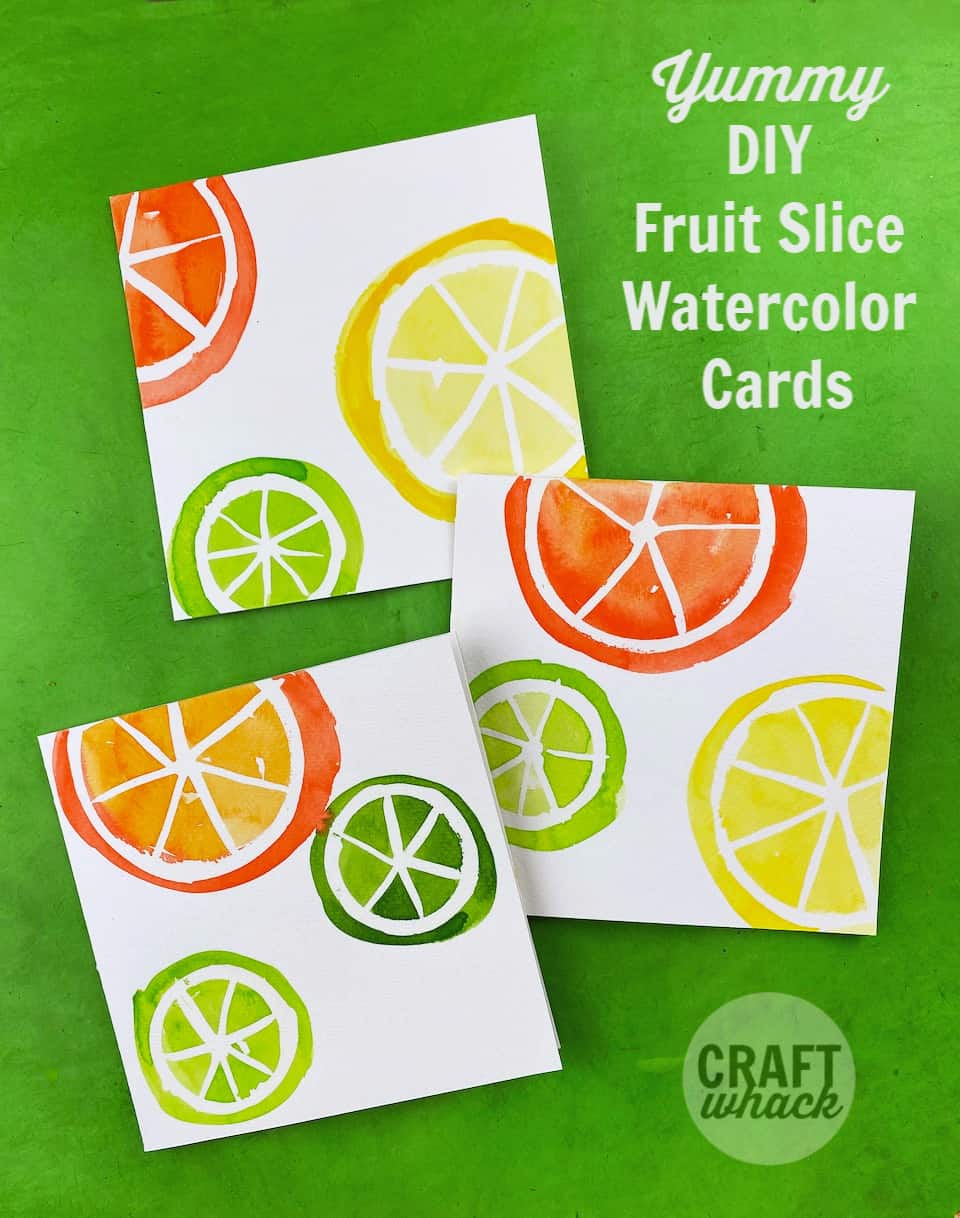
Maybe it’s a little early for Summer crafts, but I couldn’t wait to make these mouthwatering fruit slice watercolor cards!
They’re super easy to make, but you have to have a little patience to let the masking fluid dry, and then let the watercolor dry. This will be difficult, because pullet that masking fluid up off the paper is FUN.
So grab your watercolors and get ready to make some adorable fruit slice watercolor cards.
Supplies For Fruit Slice Watercolor Cards:
Watercolor brush and smaller, flat paint brush
Masking fluid (you can use white crayon or oil pastel for the resist part, but you won’t get as a clean a line, and it’s not nearly as fun to use as masking fluid)
Paper cutter or craft knife
Something round to paint the masking fluid around: I used cardstock circles punched out with circle punches, but you could use 2 sizes of glasses if you have them
[adthrive-in-post-video-player video-id=”bbUJeRfG” upload-date=”2020-05-08T07:00:35.000Z” name=”Yummy DIY Fruit Slice Watercolor Cards” description=”How to make Yummy DIY Fruit Slice Watercolor Cards” player-type=”default” override-embed=”default”]
How to Make Fruit Slice Watercolor Cards
Directions:
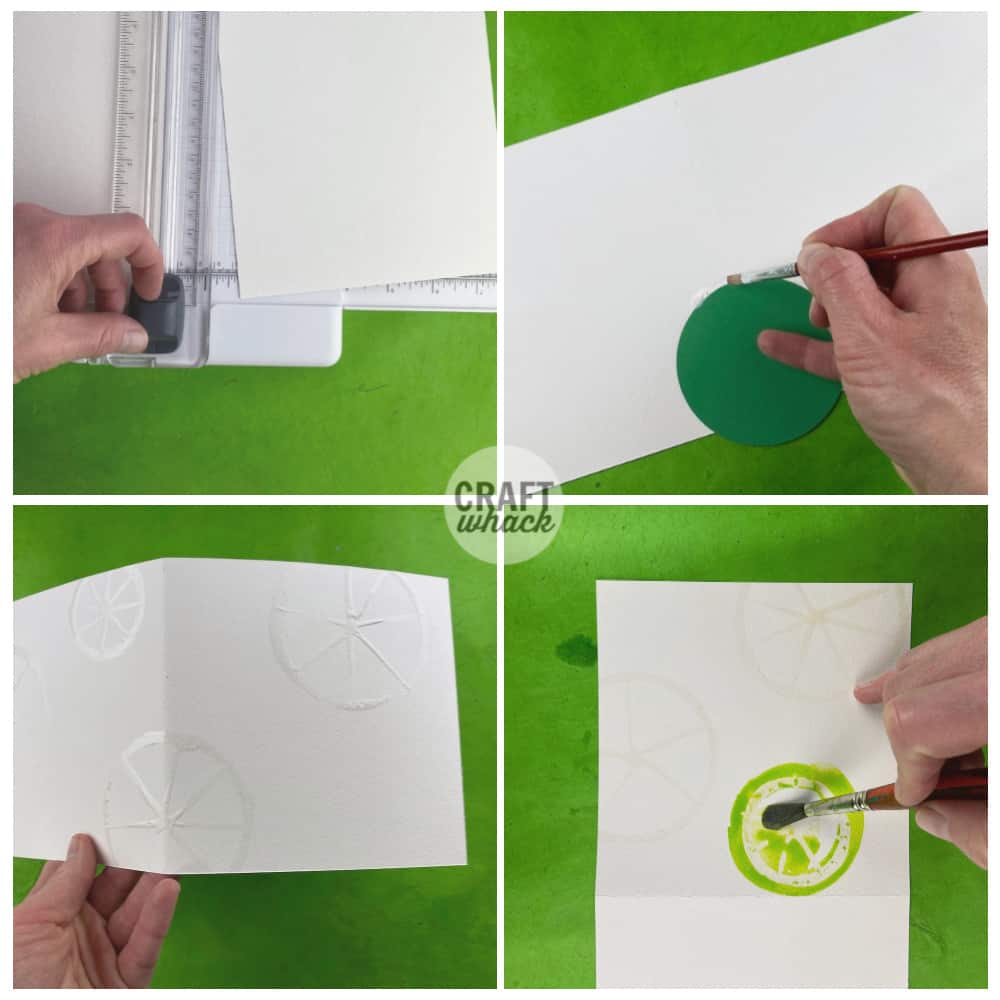
1 Cut your watercolor paper to 6×12″ using a paper cutter or craft knife and ruler.
2 Score the paper at the 6″ mark so it’s easier to fold it in half. (use the pointy end if you are using a bone folder, and run it down the side of a ruler placed over the paper.)
3 Decide where you want your fruit slices to be on your cards. I punched some large circles out of cardstock, and then a few small ones, so I could place them on the paper in different places to eyeball my design ahead of time.
4 If you have 2 glasses roughly the size of small and big citrus fruits, you can use those, too.
5 Dip your small flat brush into the masking fluid and paint it around the edges of the cardstock circles/glasses.
6 Paint a small dot of masking fluid in the center of the circles and then draw lines out to the edges of the circle to make your fruit segments.
Masking fluid tips:
- Don’t shake the bottle of masking fluid first, or you could pick up some of the congealed gummy stuff from the bottle with your brush.
- Allow the masking fluid to dry completely before you paint over it. Hairdryers can be your friend here, if you use them gently.
- I use masking fluid with a brush, but I know some people have had luck pouring masking fluid into a brush pen.
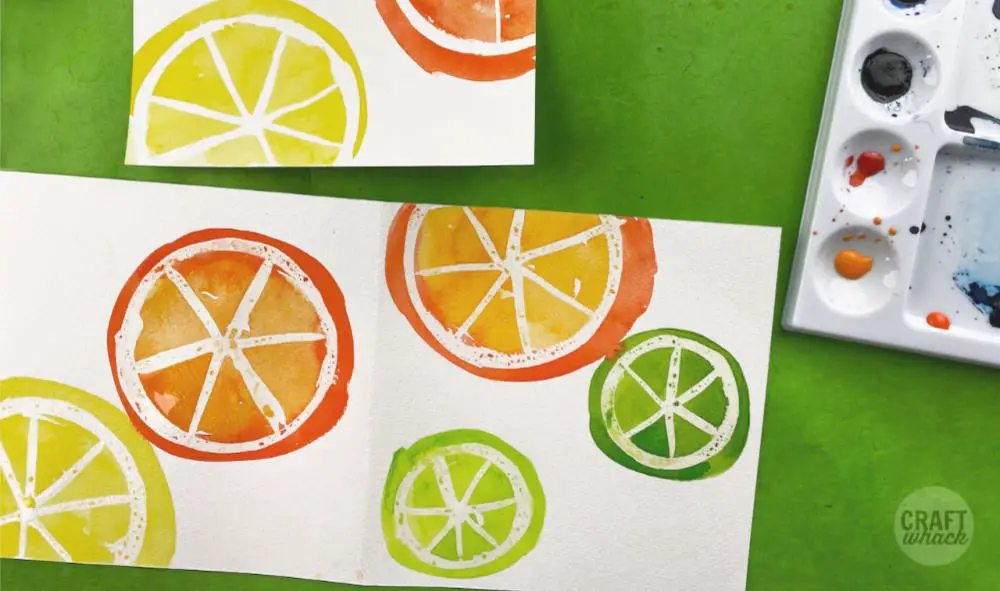
Once the fluid is totally dry, it’s time to paint!
You can use 1 yellow, 1 orange, and 1 green shade, or try a darker shade for the peel than the inside of the fruit.
Have fun playing with the watercolor and letting it pool in areas for variety.
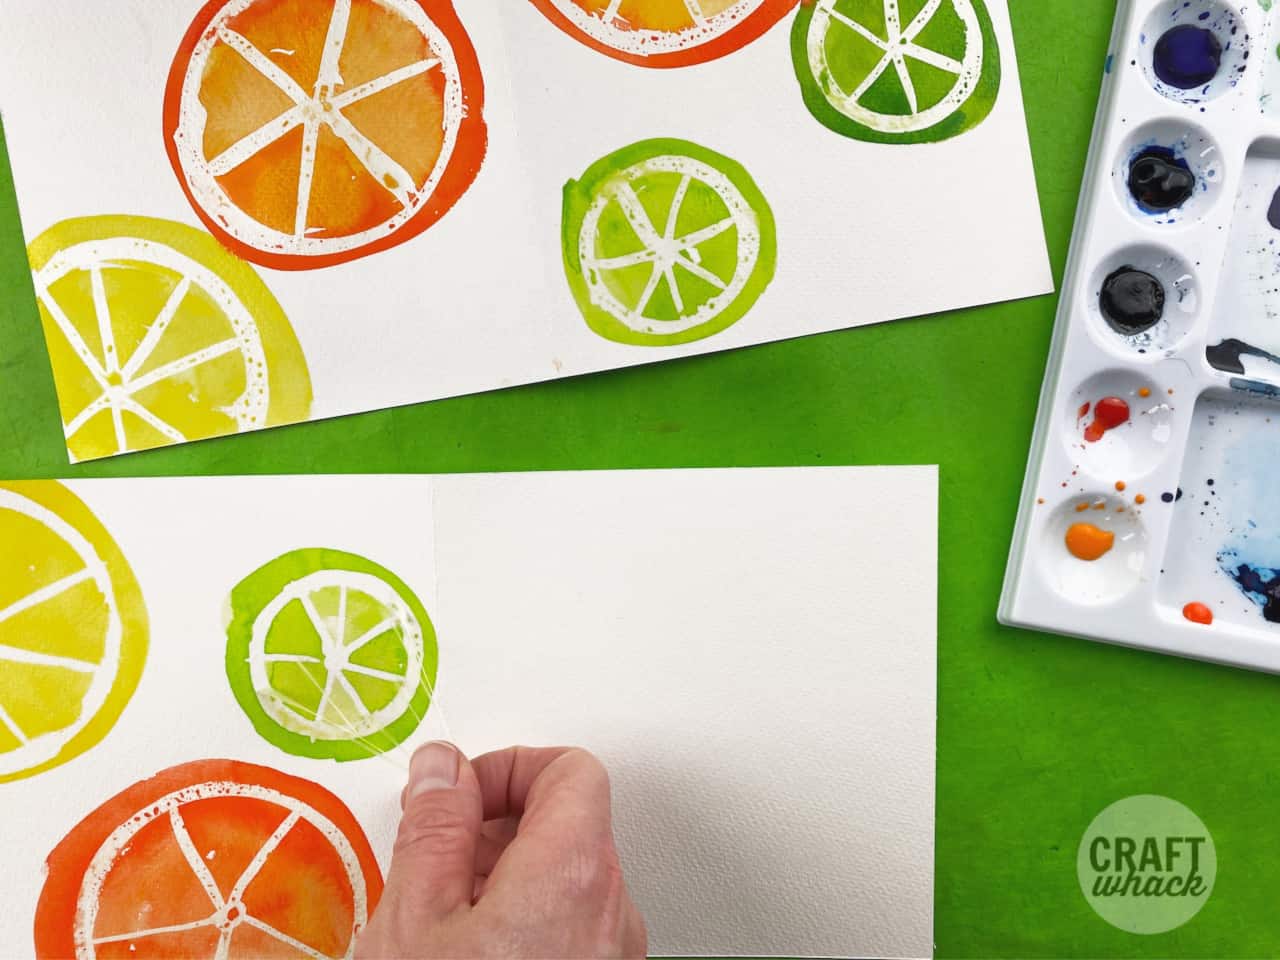
Once the watercolor is totally dry, you can use your finger or a small eraser to rub the masking fluid away from the paper.
I usually just grab it and pull, and a few strands will come off together. This part is SO FUN. If you’ve never used masking fluid before, you will be forever hooked!
Tips:
My cards were a little curly after all that watercolor and hairdrying, so I placed them under sheets of wax paper, and under a giant heavy book to flatten them out overnight.
You can go in with colored pencils to draw some texture on the fruit if you want.
These would also make cute little framed kitchen art!
Comments
0 comments