Summer is coming and that means parents are looking for productive, educational ways to fill up their teenagers’ time. After all, no one wants teens that do nothing all summer but play video games or watch television.Summer crafts for teenagers can be a fun way for your children to explore their creativity. It can also be a way for you to bond with your child over the projects. The best part about doing crafts is there is an item produced your teen can be proud of displaying or giving away. It’s a great way for the family to get a jump on Christmas gifts too.Keeping It FunYour teenager may be resistant at first to working on crafts. After all, it may seem like work to them. However, soon they will realize how fun these projects can be. A lot of that depends on you. If you enjoy making crafts with them, they will enjoy it too. It can even be family time where your summer crafts for teenagers include a larger project.Here are four ideas for summer crafts for teenagers to start.
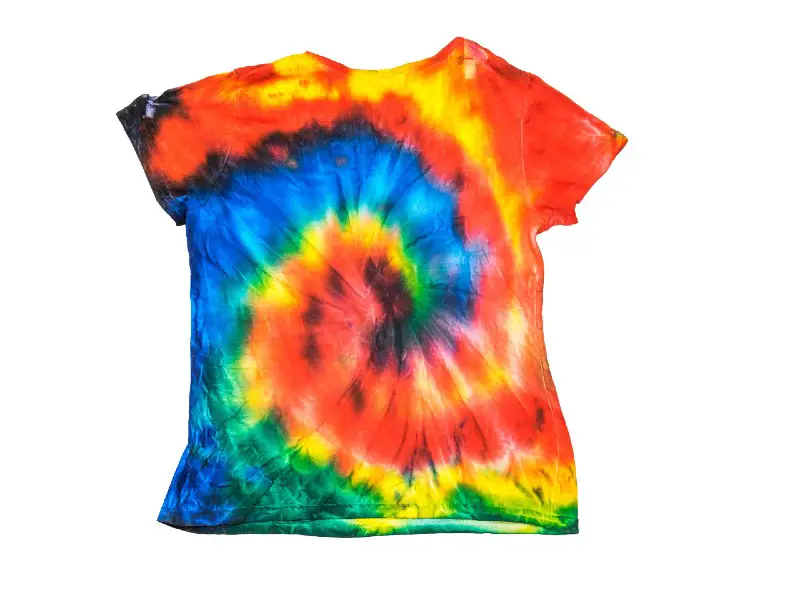
Tie-dye Shirts
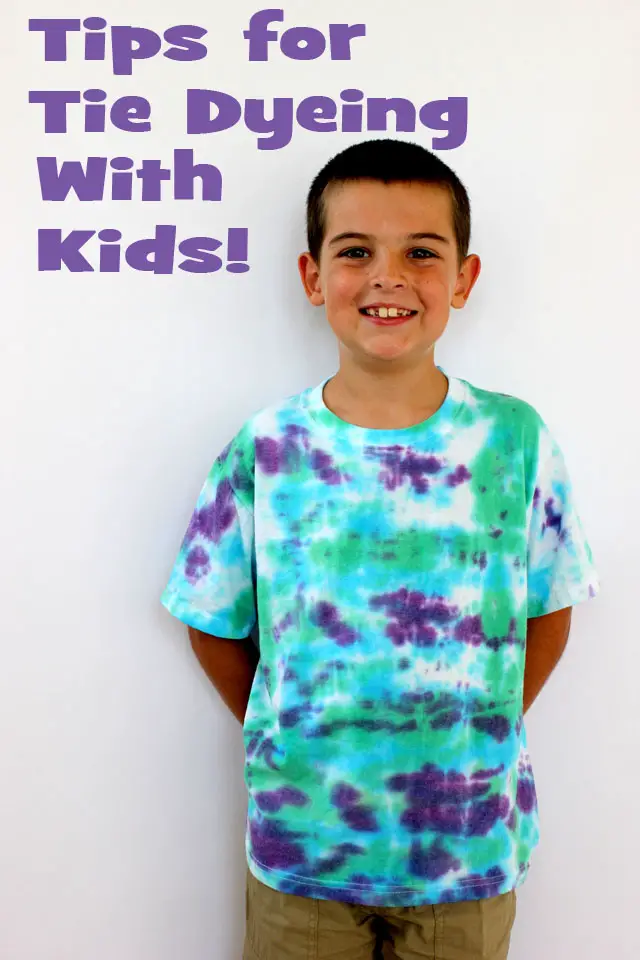 Source:https://www.happinessishomemade.net/tips-tricks-for-tie-dyeing-with-kids/Tie-dyed t-shirts and even dresses are great projects for both boys and girls. It’s inexpensive because all you need to get are white T-shirts or maybe a cheap white cotton dress. To do a basic tie-dye shirt, follow these directions:
- Take the shirt from the middle of the chest area and bunch it up.
- Tie it with rubber bands until it forms a rope-like cord. Remember, thin rubber bands will give it a thin white line between colors while wider bands will have wider white circles between colors.
- Teens can either dip the rubber-banded shirt sections in various colors or use turkey basters or cups to pour the colors over it. Make sure the colors go all the way through the shirt.
- Cut the rubber bands, unfold and let dry.
Mermaid Tie-Dye Shirts
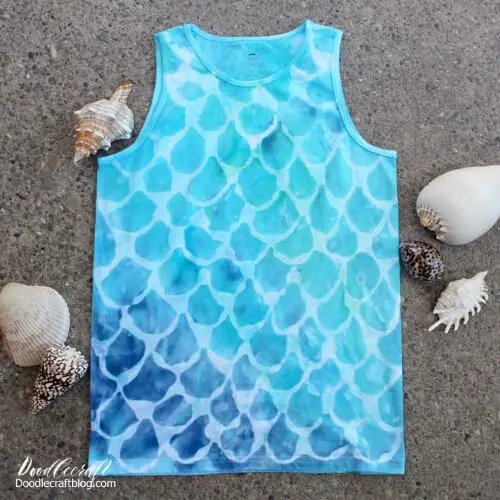 Source: https://joyfulbunny.com/12-fun-easy-summer-crafts-teens-will-love/Teenage girls that love mermaids can create a more upscale tie-dye shirt that boasts of mermaid scales! This is a little more advanced than standard tie-dye shirts, so it may require a little patience.For this project, you will need tacky water-based glue, tie-dye kids, buckets of water, a cotton shirt, garbage bags.Here are the steps:
- Stuff the shirt with the garbage bag to stop the glue from sticking both sides together.
- Start at the top and use the glue to draw a fish scale pattern of half circles.
- Proceed down the shirt, making each row beginning and ending in the middle of the circles of the previous row.
- Let the glue dry.
- While it is drying, set up the tie-dye kits.
- Remove the garbage bag once the glue is dry.
- Dip your shirt in water first. Now use the tie-dye colors to finish the project. You can dip it in complementary colors or use a baster to spot it. Work with it to get the right combination.
- Once done, put the shirt in another garbage bag and let it sit in the sun for up to eight hours.
- Rinse it in water until the water comes off clear. This is where your glue washes away.
Things to remember about tie-dyingThis is a messy project. It is best to do it outside with a cleanable plastic tablecloth over any tables being used. Also, wear gloves or you will have tie-dyed hands! Shirts will need to be washed and dried with detergent on the regular wash cycle before they can be worn.
Watermelon Soap
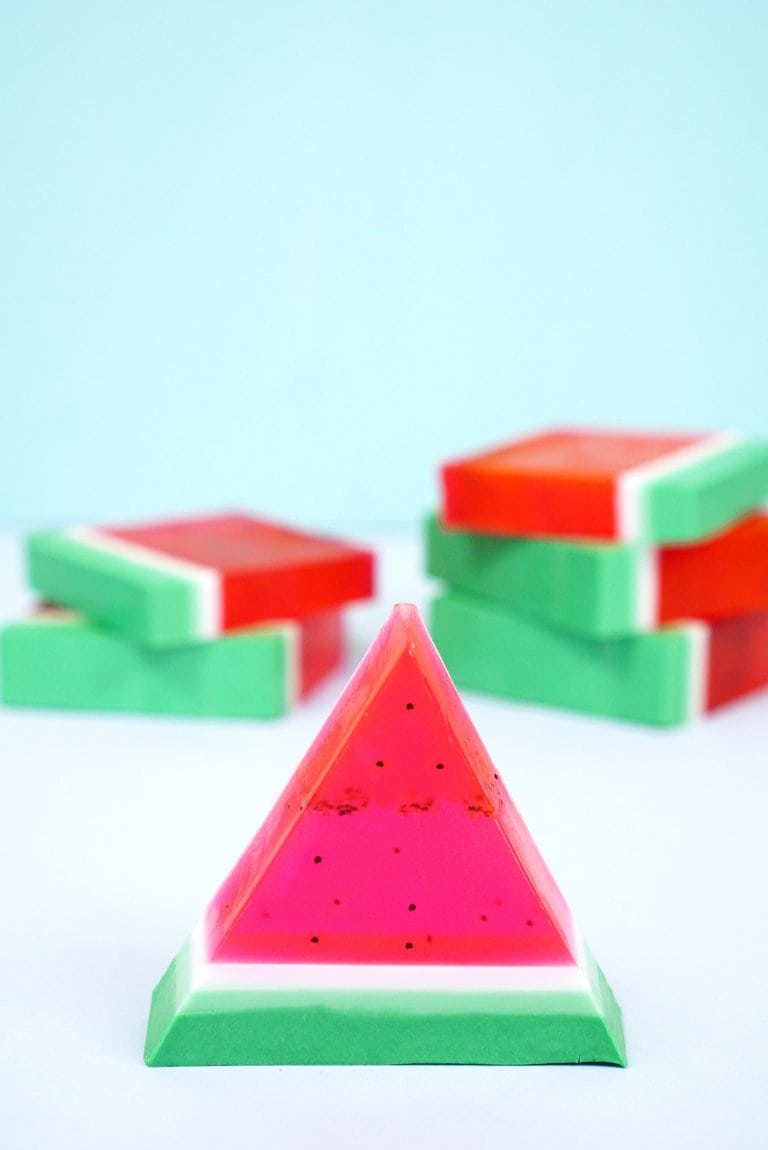 Source:https://www.happinessishomemade.net/15-minute-diy-watermelon-soap/This summer crafts for teenagers project takes only about 15 minutes of actual work, although you have to allow for time for each layer to dry. This craft is cute and makes great gifts for teachers, family, or friends either for special appreciation days, birthdays, or Christmas! It smells good too.Here is a list of what you need for this project:
- Clear soap base
- Soap base made of goat’s milk
- Pyrex measuring cup
- Silicone soap loaf mold
- Green coloring for soap
- Red coloring for soap
- Watermelon Fragrance Oil
- Poppy seeds
- 99 percent alcohol (isopropyl) in a spray bottle with a mister.
Make the green layer first. Cube 1/2 pound of goat milk soap. Melt them in the measuring cup placed in a microwave. It should take about 30 seconds. After it melts, mix in several drops of the fragrance along with the green colorant. The more you add, the darker it becomes.Pour about 75 percent of the mix into the mold. It should firm up in 20 minutes. Spray the top with the alcohol.Create another layer but of lighter green. Put in 1.4 pounds of the goat milk soap cubes to the remaining darker green soap. This will make it lighter. Melt the same as before and then stir. Spray the previous section again with the mist bottle before pouring the new mixture over it. Spray with alcohol again. It should be firm in 20 minutes.Create the white layer. This is the easiest layer. Melt a quarter pound of the goat milk cubes of soap the same as before. Add five to 10 drops of fragrance oil. Spray the previous layer again and pour the next mixture into the mold. Spray with alcohol again.Create the final pink or red layer. Cube two pounds of the remaining soap base, which is the clear base. Melt it in the microwave. Stir in the coloring, 15-25 fragrance drops, and one teaspoon of the seeds. Remember to use more coloring to get a deeper red and less to get it pinker. Spray the previous layer as before and pour the layer onto the soap mold.After it is set, take out the silicone liner. Then, take out the soap mold. Cut the mold into one-inch slices, then cut the squares into triangles.This should be done by cutting from the top middle of the red section down to the two corners of the green, creating three triangle pieces. Each batch should make 10 to 12 triangle soaps.
Keychains with Vintage Maps
 Source:https://www.thesprucecrafts.com/diy-keychains-4176042A keychain featuring a vintage map is the perfect craft for teenage boys. They can make it for themselves as they may be soon or already driving or can create it as gifts for brothers, fathers, grandfathers, or uncles.This is a highly personalized gift that can memorialize a favorite vacation, birthplace, or other important location.For this project, you will need:
- A pendant
- A key chain
- A piece of map
- Paste
- Resin
- Scissors
- Exacto knife
- Small screwdriver
- Pencil
This project can be done in about 30 minutes. Here are the steps:
- Use the screwdriver to disassemble the pendant.
- Put one of the pendant’s face on the map and trace the oval where the important section is in the middle.
- Trace it and then cut the oval.
- Put the paste on the back of the map and place it in the oval. Make sure there are no crinkles.
- Take the Exacto knife and trim the excess from the edge.
- Seal the whole face with resin to look professionally done. Remove any other item from the keychain and attach the pendant.
Conclusion
Finding fun, easy summer crafts for teenagers is a great way to keep your children occupied and spend time with them while they are out of school. It is also fun for parents too!
Comments
0 comments