Have you ever met a preschooler that didn’t love pirates? There is so much scope for having fun with pirate crafts, and whether you’re preparing for a themed birthday party or just having fun with your favorite things, there is so much you can create with your preschooler.We’re going to explore some of the top pirate crafts for preschool children, varying in complexity to give you lots of different options and ideas. Your kid(s) will love these!
Popsicle Pirate Flag
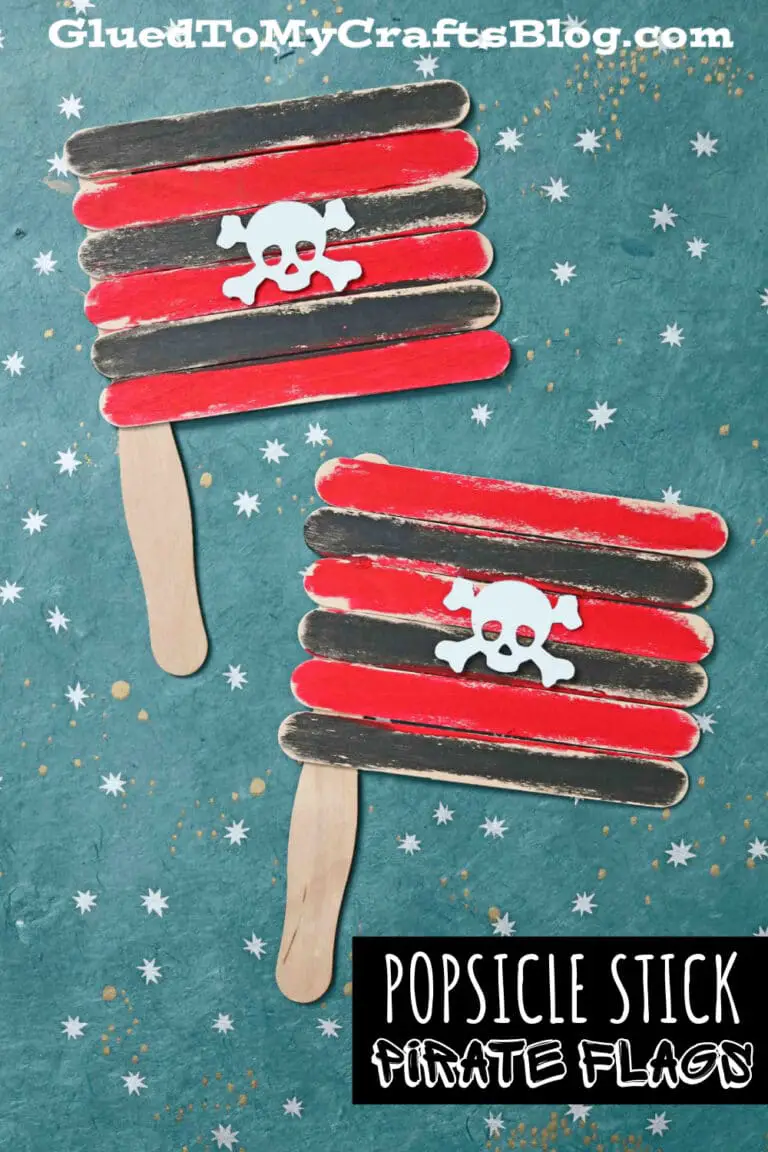 Source: https://www.gluedtomycraftsblog.com/2015/05/popsicle-stick-pirate-flags-kid-craft.htmlWhat’s a pirate without a pirate flag? This is a fantastically easy craft, with plenty of scope to adapt it to your child’s tastes, and it uses readily available materials.
Materials
You are going to need:
- Handful of Popsicle sticks.
- Red paint
- Black paint
- Glue
- Skull stickers
- Paintbrushes
Step 1: Glue Your Flag Together
You will probably need to assemble the flag for your child; this can be done in advance to make the crafting more fun. As the glue will need to dry, it’s best to do this and set it aside somewhere for a while before you get your little one engaged.Glue five or six Popsicle sticks in a flat rectangle, and then glue one Popsicle stick at a right angle to create the flag pole.
Step 2: Decorate The Flag
Once the glue has dried, call your preschooler and sit them down with some paints. Dress them in old clothes and use newspaper to protect the surface, remember!Give them a little bit of red paint and tell them to paint every other stick. You can put a little dot of glue on the sticks if that will help to guide them. Don’t worry if they get a stick wrong; the black should hide it, and it doesn’t really matter anyway.When they have finished painting the red sticks, give them some black paint and get them to paint the other sticks.If your child is quite patient, they may want to paint the other side of the flag too, but they don’t need to do this if they aren’t interested.
Step 3: Add The Pirate Skull Sticker
Give your child a skull sticker to put in the middle of the flag to complete their Jolly Roger. You can also cut out a skull and crossbones from scrap paper if you don’t have any stickers, and they can glue this on instead, but a sticker is faster if you can source one.You’ve now got a cool pirate flag your child can tack to their door or carry around with them, proclaiming their pirate status to all the world!
Paper Cup Telescope
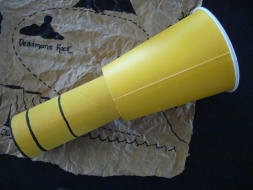 Source: http://www.busybeekidscrafts.com/Spyglass-Telescope.htmlIf you’re looking for a slightly more complicated craft that might also serve as a costume prop, this telescope is a great idea. Your child will definitely need some help to pull it off, but it’s a fun project to do together and can really complete an outfit!You can make this telescope actually fold shut, which your kid will absolutely love. It’s not the simplest craft, but with you there to help, they will have a telescope in no time!
Materials
For this telescope, you’re going to need:
- Paper cup
- Empty toilet paper tube
- Gray paint and paintbrush
- Scissors
- Glue
- Black marker pen
- Thin card
- Sheet of clear acetate (optional)
- Pencil
Step 1: Paint The Tube And Cup
Your cup and the toilet tube both need to be the same color. You don’t have to make them gray if you would rather use another color ““ just pick a different paint. Give them a couple of coats to help get a nice, even finish.Your child might like to help with this part of the craft, as some of the cutting may be a bit tricky for them, but they will love painting.
Step 2: Draw Around The Toilet Tube
Place your paper cup so that it is upside down on a flat surface. Put the toilet tube on top of it, and then carefully draw around the end of the tube. This will eventually allow the tube to be pushed into the cup, making the telescope fold away.Once you have finished the line, punch through the bottom of your cup with the scissors and carefully cut around the circle you have made.
Step 3: Make A Card Ring
Get your construction card. You are going to make a ring in it. First, place the bottom of your cup on the card and draw around it. Next, place your toilet tube in the center of this circle, and draw around that, so that you have a small ring inside a larger ring.Cut the outer ring out, and then punch through the center and carefully trim the inner ring as well. This is going to help with the movement of the telescope, so it wants to be reasonably sturdy; try not to crease the card as you cut.Make yourself a second identical card ring, either using your cup and tube as a guide or using your first ring.
Step 4: Glue The Rings To The Toilet Tube
Ask your child which way around they want the toilet tube to slot into the cup. Insert it the way around they want it, and show them how it slides but will fall out.Next, get some glue and spread a layer around one of the card rings. Press one end of the toilet tube into it and let it dry. This is going to go inside the cup.Once the glue is dry, drop your toilet tube into the cup, with the ring on the inside. Now the tube cannot fall out in one direction, but it can still fall the other way.Get your other card ring and spread glue on it. Glue the other end of the toilet tube to it and let the glue dry.You now have a tube that can be pushed in and out of the cup, but can’t fall out in either direction.
Step 5: Decorate
Now your child can have some fun with the telescope! Ask them how they would like to decorate it. Most telescopes have black lines around them. If your child wants to do this but finds it too difficult, try putting some elastic bands over the toilet tube to help them draw straight lines.They could also write their name on the underside of the telescope, though you may have to help hold the tube still for them.
Step 6: Add A Plastic End (Optional)
Finally, if you have some clear acetate, use a marker to draw around the wide end of your cup telescope. Cut this out, and glue it to the end to create a “glass” finish that will make the telescope look extra convincing. You definitely don’t have to add this step, but it’s a nice touch if you can. However, your child will love having a telescope they can pull in and out and look through no matter what!
Pirate Cutlass
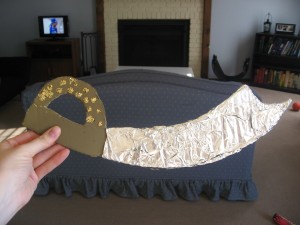 Source: http://easypreschoolcraft.blogspot.com/2012/05/pirate-sword-cardboard-craft.htmlNo pirate worth his or her salt is to be found without a shiny cutlass, so this is a great craft to do with your kid. It’s pretty straightforward and again will make a great prop for a costume, so it’s perfect if you’re hosting or attending a pirate-themed party!
Materials
To make a pirate cutlass, you’ll need:
- Pencil
- Strong, stiff cardboard
- Craft knife
- Glue
- Aluminum foil
- Decorative gems
- Gold paint
- Paintbrush
Step 1: Cut Out The Cutlass
You will want to do this part by yourself; the stiff card will require very sharp scissors or (preferably) a craft knife, and you don’t want little fingers around while you’re cutting.Draw a cutlass on your card. You can either draw a cross shape for the handle or create a curved grip to one side. Check out some pictures online if you want ideas.Once you have drawn the full sword, cut it out.
Step 2: Paint The Handle
Now you can involve your child.Tip a little gold paint into the dish and draw a black line around the end of the handle so your child has a guide to work with. It won’t matter if they go over it, but this should help them get an idea of the area to paint.Help them paint the handle on both sides so it’s gold and looks just like a metal handle.
Step 3: Wrap The Blade In Aluminum Foil
Get a large piece of aluminum foil and then add some glue to the blade of the sword and wrap the foil around it. You might find this a bit tricky if it’s a curved blade, but it won’t matter if it isn’t very neat. You can scrunch the foil up a bit without ruining the look.Add a bit more glue to the edges of the foil to make sure it sticks down properly. The foil will probably hold pretty well without the glue, but this will make the sword last better and ensure your child won’t find it unraveling when they’re playing with it.Get your child to “quality check” the sword as a way of engaging them with this step. They may also be able to help you smooth down the foil.
Step 4: Decorate The Pommel
What pirate sword doesn’t have decorations on the handle? You could use some glitter to make it sparkle, but many parents are avoiding glitter to try and be a little more environmentally friendly, and glitter is more likely to wear off while the sword is being played with.Instead, get some little plastic gems and help your child glue one or two to the sword’s pommel to give it a bit of sparkle and glamour.You’ve now got a very convincing pirate sword for your child to brandish at other pirates in the dastardly gang.
Toilet Tube Parrot
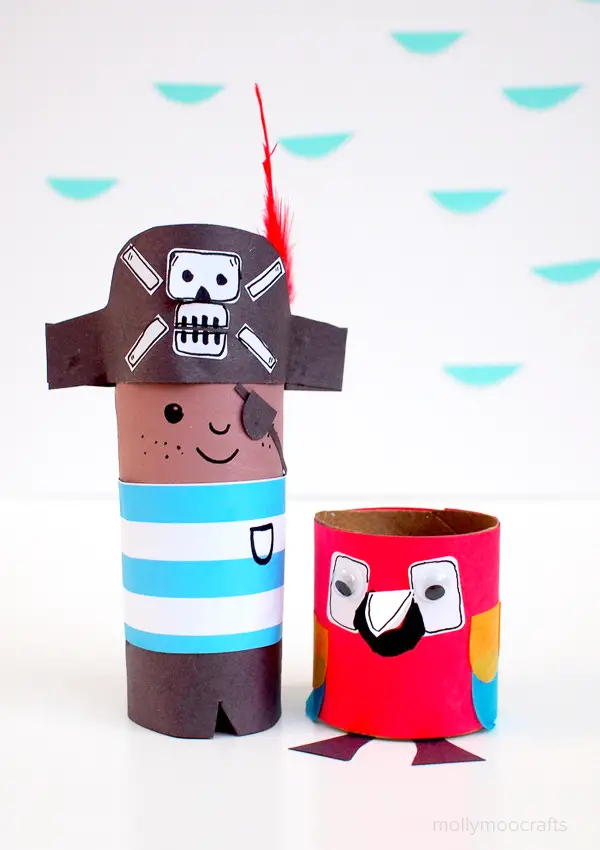 Source: http://mollymoocrafts.com/toilet-roll-crafts-pirate/You might be looking for a super easy craft that your child can join in with ““ a toilet tube parrot is a great one. It gives your child a pirate companion and can either be part of a costume or just a fun plaything.
Materials
A pirate parrot requires:
- Toilet tube
- Googly eyes
- Blue and yellow/orange tissue paper
- Brown card
- Black pen
- White paper
- Scissors
- Glue
- Red paint
- Paintbrush
- Gold paper/card
Step 1: Paint The Parrot
Help your child paint the whole toilet tube red. It doesn’t matter about the inside but they can do the inside too if they want to.
Step 2: Make The Wings
Help your child tear (or cut out) six little tufts of yellow tissue paper and six little tufts of blue tissue paper. On either side of the toilet tube, glue first one blue tuft, and then a yellow tuft overlapping on top.Glue the other tufts on, overlapping in whatever position your child likes. This will give your parrot nice colorful wings. You can do more or fewer tufts depending on the look you want to achieve.
Step 3: Add Googly Eyes
Help your child position the googly eyes about two-thirds of the way up the tube. This will form your parrot’s face.
Step 4: Cut Out And Add The Beak
Fold a little piece of white paper in half and draw a small triangle on it, and then help your child cut it out with the paper still folded, so you get a hinged triangle. You now have a little open beak. The fold will stick out and make the beak 3D.Put a small dot of glue under the googly eyes and get your child to glue the beak into place.You can add some more little tufts of orange and blue tissue paper around the beak to make the parrot more colorful, or leave it plain if you prefer.
Step 5: Cut Out And Stick On The Feet
Take the brown card and draw two feet. You can join them up or cut them out separately. They don’t need to look amazing; just some triangles will do, or you can shape them a bit more if you want to.Leave a little bit of card sticking out and crease this over. You can then help your child glue the feet to the inside of the toilet tube using this card tab, and bend the feet around so that they come out in front of the parrot’s body.
Step 6: Finish Off
Add any further details, such as tummy feathers drawn in with a pen, or eyebrows. Next, tear up a little bit more tissue paper, and help your child glue some more blue and orange feathers to the back of the toilet tube to make the parrot’s tail.
Step 7: Give The Parrot A Gold Coin (Optional)
Cut out a little gold coin from your gold card and let your child stick this in the parrot’s beak as a “piece of eight.” You can also use aluminum foil for a silver coin if you don’t have gold paper.
Conclusion
Pirate crafts are plentiful, and you can find all sorts of things to do with your child, no matter what materials you have to hand or how complicated you want the crafts to be. Parrots, swords, telescopes, and flags, you can fully equip your child to play at pirates or dress like a pirate with only a handful of crafty bits and a little time. Most kids will love these pirate crafts and help you create them.
Comments
0 comments