There’s no doubt about it, these fluffy animals are adorable and that’s why kids go crazy for making squirrel craft. These fun ideas will keep them entertained all afternoon.
Paper Cup Squirrel
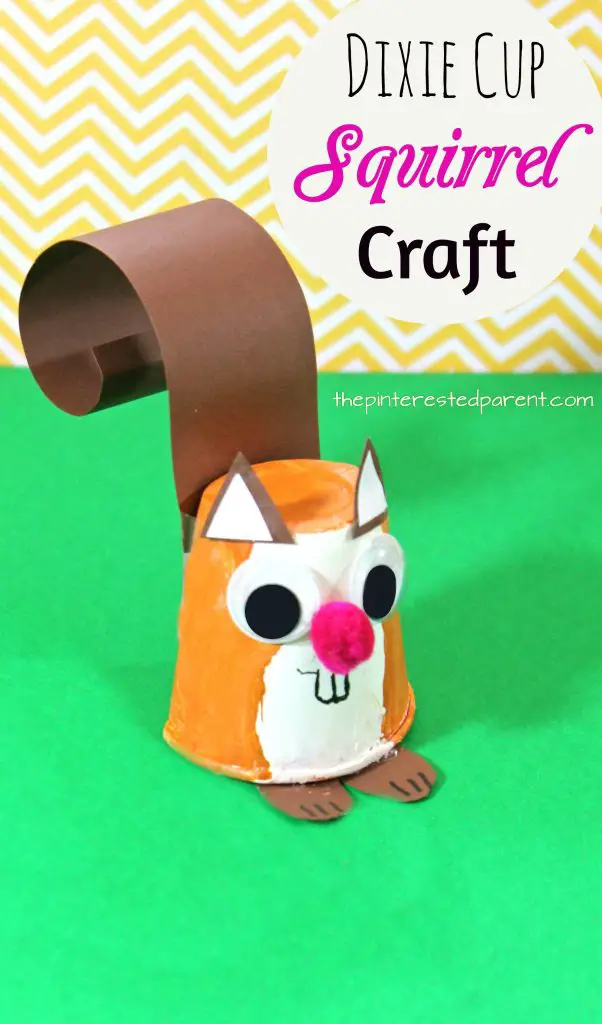 Source: https://thepinterestedparent.com/2017/08/dixie-cup-squirrel-craft/When you’ve finished this craft activity, you’ll have a cute squirrel to play with all of your own.
Supplies you’ll need
- 1 white paper cup
- Brown or gray paint
- Paintbrush
- Black marker pen
- Clear tape
- Brown or gray paper (sugar or construction paper)
- Scissors
- Small brown or grey pom-pom
- School glue
- Pencil
- Pair of googly/wiggle eyes
- Newspaper or an old sheet
Step-by-step tutorial
- Set up your workspace by laying some newspaper or an old sheet on the surface to protect it from paint.
- Draw an outline on the front of the cup for the squirrel’s belly and face. You will keep this section white but paint around it.
- Paint around your belly and face outline with brown or gray paint (depending on what color squirrel you want) so that most of the cup is colored. Let the paint dry.
- In the meantime, cut a strip of A4 paper the entire length and it should be about 3 inches wide or nearly as wide as the cup itself. This will form the tail of the squirrel so you need to roll it up and around itself a few times so it is curled.
- Cut 2 small triangles from the paper to make the squirrel’s ears.
- Cut 2 small ovals from the paper which will form the squirrel’s feet. Take your marker pen and draw 3 straight lines on one of the long ends of the oval to make its toes.
- When the paint has dried on the cup, you can assemble your squirrel and finish its face. First, take your cup and place it upside down, so the open part is facing down.
- Take your 2 triangles and glue them to the top of the cup so that they’re on the white section.
- Glue 2 googly eyes below the ears.
- Glue the pom-pom below the eyes to form its nose.
- Draw 2 large teeth with your marker pen just below the pom-pom. Now you have finished its face.
- Take the feet you made already and place the side you drew on at the front (these will peek out from under the cup. Curl the back of the oval shapes up and fix these to the inside of the cup with tape.
- Finally, take the tail you made from the paper and fix it to the cup toward the top using tape.
Now your squirrel is ready for action. You could make some nuts to feed your squirrel using the brown paper and marker pen too.
3D Squirrel and Tree Art
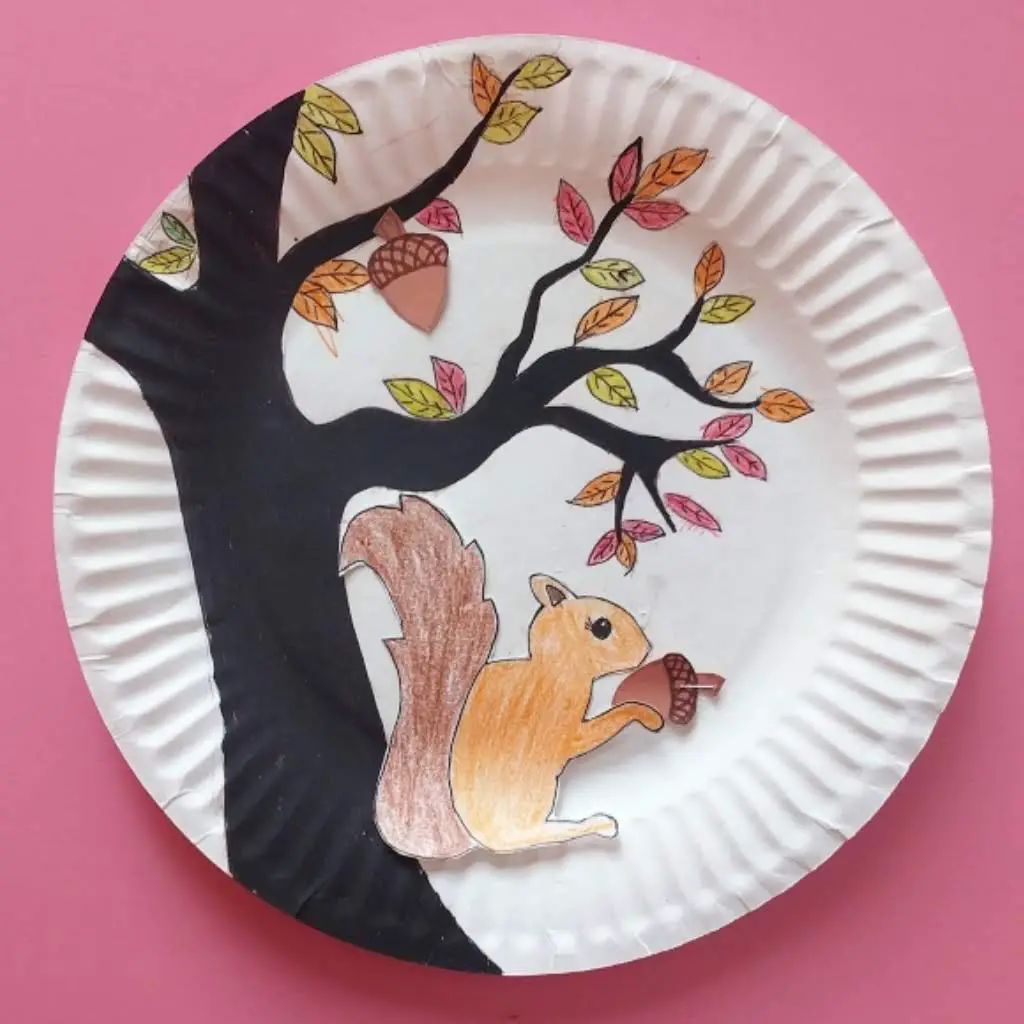 Source: https://www.thejoysharing.com/2018/09/magnetic-squirrel-and-acorn-fall-craft.htmlThis craft activity involves cutting out pieces of paper in the shape of acorns and squirrels. You will draw a tree and leaves and arrange it all artistically on a paper plate to have a cute squirrel scene.
Supplies you’ll need
- 1 white paper plate
- Thin black marker pen
- Thick dark brown marker pen
- Clear tape
- Colored pencils – yellow, green, orange, brown, gray, and red
- Plain paper
- Scissors
Step-by-step tutorial
- Draw a thick tree trunk on the right-hand side of the plate using your brown marker pen. Draw some thinner branches coming off it at the top of the plate and from the center of the tree reaching up and over to the opposite side.
- With your colored pencils, draw small leaves coming off the branches you just drew. Then using your thin black marker draw a line down the center of each leaf lengthways and little lines out from that line to resemble the veins of the leaves.
- Draw some acorns onto your paper and color them using your brown pencil and add detail to them with the thin black pen. Cut these out and set them aside for later. Make at least 3.
- Draw 2 squirrels on paper using the thin black marker and color these in with the brown or gray pencil, depending on what color squirrel you want for your artwork. Draw the squirrels so they are facing opposite directions. Later when you stick them onto the plate you will make them face each other while they feast on acorns.
- Cut thin strips of paper 1-inch long and ½-inch wide (cut as many as you have acorns). These will hold up the acorns and give them a 3D effect as they will be raised from the drawing of the trees and leaves.
- Cut 6 strips of paper 1-inch long and 1-inch wide, which you will use to hold up your squirrels.
- Now you are ready to stick on your squirrels and acorns. Take the strips of paper you just cut and fold them 3 times so they make an accordion shape.
- You’re going to stick your squirrels onto the plate first. Work out where you want them positioned on the ground, somewhere below the tree branches and facing each other. Leave enough room between them so they can each have an acorn in their hand or near their mouth.
- Cut 12 pieces of tape. Stick 3 of your larger accordion-shaped paper pieces onto the plate by placing a piece of tape over one end of the paper strip and plate. Position them where your first squirrel will go (1 piece of paper to hold its tail, another where the head will go, and the other at its feet).
- Attach the first squirrel by taping the top of the accordion strips to the back of the squirrel with tape.
- Repeat this process for your other squirrel.
- Cut double the number of pieces of tape as you have acorns. You will want to position 2 of the acorns near the squirrels’ mouths or hands so attach those first. Fix the strips of paper with tape first and then stick the top of the paper to the back of the acorns with tape. You can position your other acorns hanging from different branches of the tree.
Your squirrel art is ready and you can display it where you like. Since it’s so light it’s easy to attach anywhere, or you can rest it against a wall or on a shelf.
Comments
0 comments