If you’re looking to find some of the best fish crafts for toddlers, you’ll find there are lots of options to create fun and beautiful art projects. Some of these take very little time and will result in amazing fish that your toddler can admire and enjoy for hours.
Paper Plate Tissue Fish
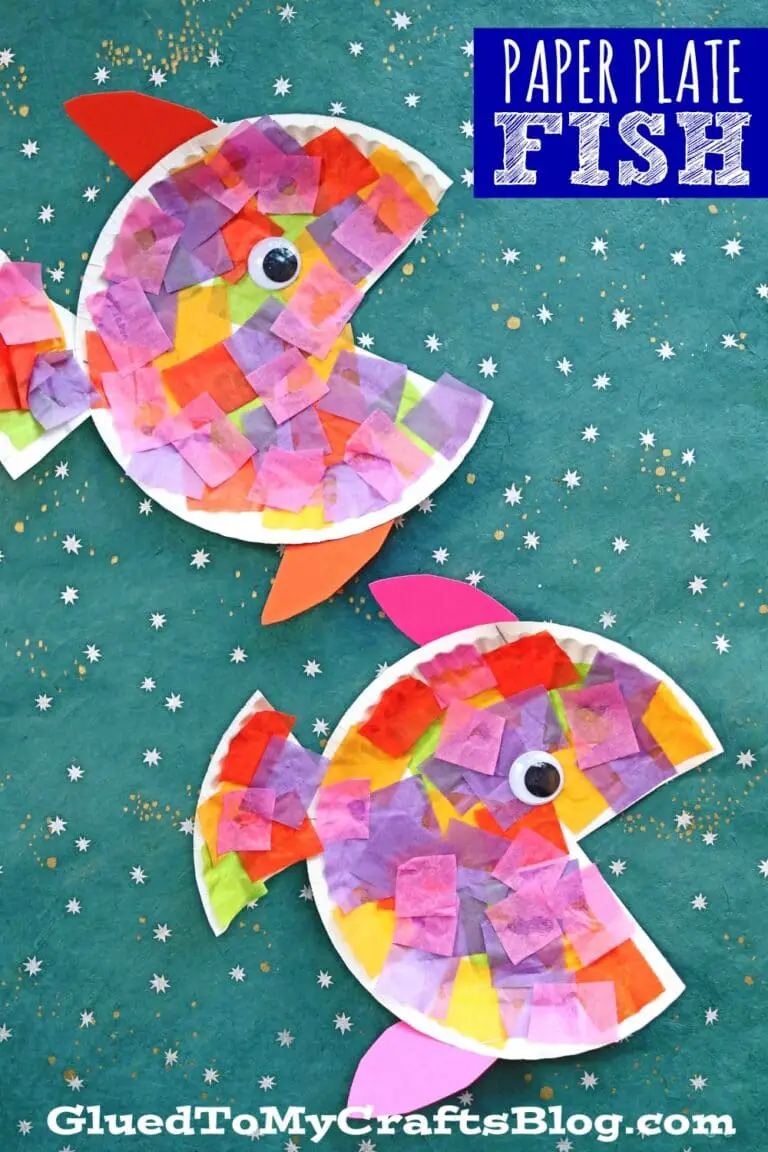 Source: https://www.gluedtomycraftsblog.com/2013/07/tropical-paper-plate-fish-craft.html
Materials
To make a paper plate tissue fish, you’re going to need:
- A paper plate
- Colored tissue paper
- Glue
- Googly eyes
- A pipe cleaner
- Scrap card
- Scissors
Step 1: Tear Up Some Tissue
One of the good things about this craft is that it involves very little cutting, so you don’t need to risk sharp scissors near your toddler. Help them tear up some tissue into little pieces; these are going to be the fish’s scales. You can also tear (or cut) some little bits of shiny paper or foil to make the fish glint in the light.
Step 2: Glue The Tissue
Spread a layer of glue on the paper plate, and help your toddler stick the tissue paper on. It doesn’t matter if it gets a bit crinkled up or if they overlap it; just add a bit more glue and let them have fun experimenting.
Step 3: Glue The Eye And Mouth
Glue the googly eyes to the front of the fish (get your toddler to decide which side is the front) and then cut a short length of pipe cleaner and bend it into a curve beneath the fish’s eyes to create a happy smile. You can also use a marker to draw on the mouth if you don’t have a pipe cleaner.
Step 4: Cut Out A Tail And A Fin
Take your scrap card and cut out a quick triangle for a tail, and a slightly rounded triangle for a fin. Make sure you put the scissors out of reach once you’ve finished so your toddler can’t grab them.Next, glue the tail to the back of the paper plate, under the rim, and glue the fin to the front on top of the tissue paper.Set the paper plate aside to dry, and then you’ve got a beautiful fish craft that your toddler will love!
Fingerpaint Fish Shoal
Little kids generally love fingerpainting, and if that’s true of your little one, this is a great craft that doesn’t need huge amounts of time or materials. Use water-based paints or make sure they are wearing old clothes and an apron.
Materials
To make finger paint fish, you will need:
- A sheet of blue paper
- Paints in various colors
- A thin black marker pen
- A green marker pen
- A pencil
- Yellow paper
- Scissors
- Glue
Step 1: Make A Quick Seascape
Before you get your toddler to join in, you may want to make the background for them to work on. You should cut a long strip of yellow paper and glue it to the bottom of your blue paper to form a sandy bottom.Use the green marker pen to add some strands of seaweed, and the pencil to draw some quick rocks. You can add more details to this scene if you like, or get your toddler and start on the fish.
Step 2: Fingerpaint Fish
Dish out some small quantities of paint and help your toddler dip their fingers in, and then print little shoals of fish all over the paper. Red and orange are nice, bright colors to use, but your toddler can print the fish in any color at all. It won’t matter if they end up a bit blobby or smudged, either.
Step 3: Finish The Fish
When the paint has dried, you can add some details to the fish using your black marker pen. Little eyes, fins, scales, and outlines will make them clearer. This craft will also serve as a particularly good memento of your toddler’s tiny fingers.
Egg Carton Goldfish
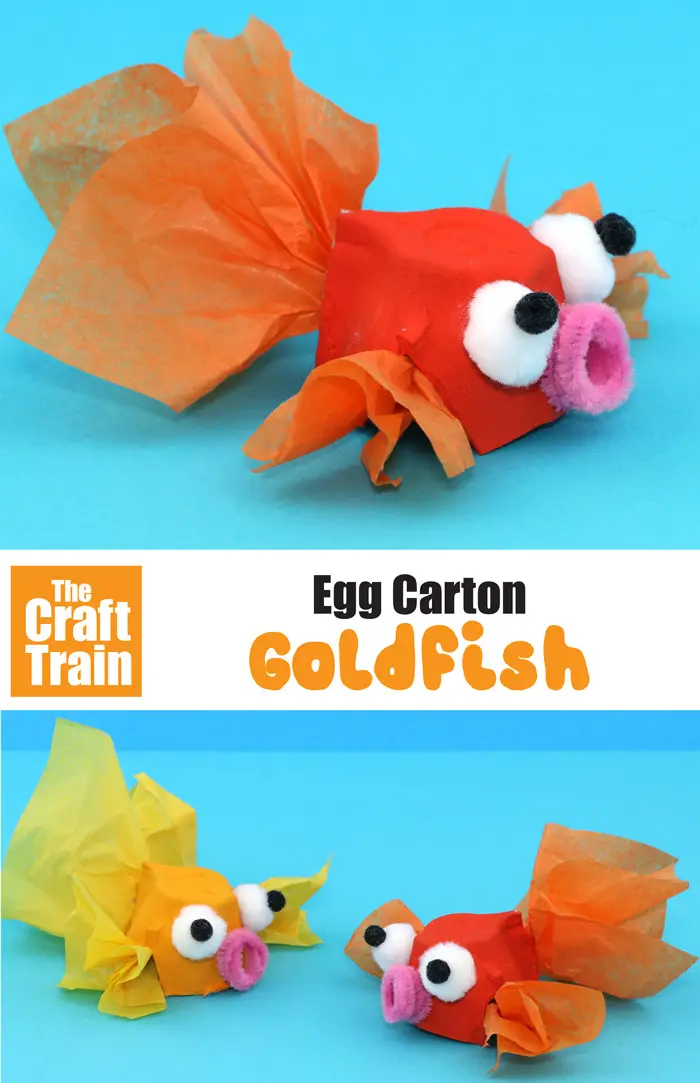 Source: https://www.thecrafttrain.com/egg-carton-goldfish-craft/If you want a craft that’s a bit more 3D for your toddler to get involved with, an egg carton goldfish can be very simple and fun to do.
Materials
You’re going to need:
- An egg carton
- Paint
- A paintbrush
- Colored tissue
- Googly eyes
- Glue
- Scissors
- A pipe cleaner
- Clear fishing wire
Step 1: Cut Out Your Egg Box
For each little goldfish you want to make, you only need one of the “cups” that hold the eggs. You can make a whole shoal of fish with just one egg box, or discard the rest and stick to one fish.Once you’ve cut out the cup, cut it down to a little over half the size, and then help your toddler paint it a bright color.
Step 2: Add The Face
When the paint has dried, it’s time to give the fish a face. Help your toddler glue two little googly eyes to the front of the egg cup. Next, cut a small piece of pipe cleaner and bend it into a circle. Glue this under the fish’s eyes like a little open mouth. You can also use a colored card if you don’t have a pipe cleaner, but the effect won’t be quite as good.
Step 3: Add The Tail And Fins
Get your toddler to helping you tear up some tufts of tissue paper and gently scrunch the ends, fanning the other sides out. You want a big piece for the tail and two smaller pieces for the fins at the side.Glue the ends to the insides of the egg cup and fluff the tissue out to create lovely, wavy fins. You can also add a dorsal fin if you like.
Step 4: Hang It Up
Your toddler’s fish will look a lot better swimming through the air, so add a dot of glue to its back, and then press your fishing wire into it. Cut a length of the wire, and then tie a loop in the end, and the fish can be hung in a window with a whole shoal of other egg carton fish!
Conclusion
Fish make for wonderful crafts because of their beautiful, fan-like tails and lovely round mouths. You can go for simple painting on paper, or tackle a more involved 3D project ““ but whatever you do, your toddler is bound to enjoy themselves!
Comments
0 comments