Turkeys become a big part of life at a particular time of year, and they are a great crafting opportunity for kids to have fun with. It’s important to make time and slow down enough to complete an activity with your children at this time of year, so we’ve collected up some easy paper bag turkey crafts for you to do.Some of these can even be used to decorate the Thanksgiving table or show off to guests. As it can be such a hectic time of year, we’ve aimed for simple crafts that won’t make too much mess or take many hours to complete.
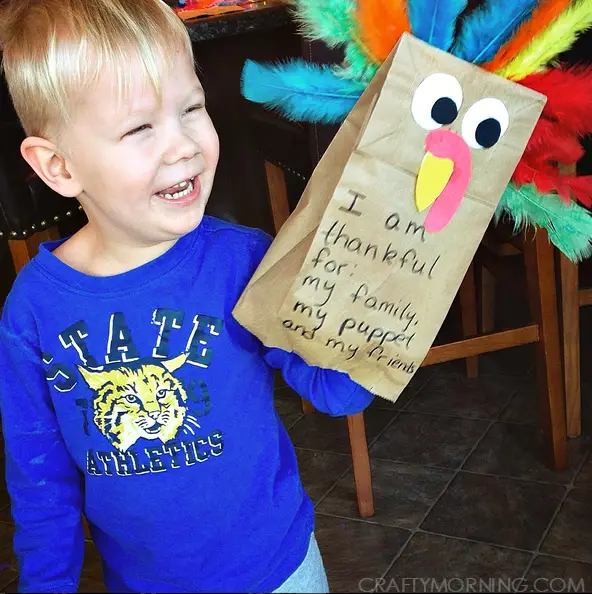
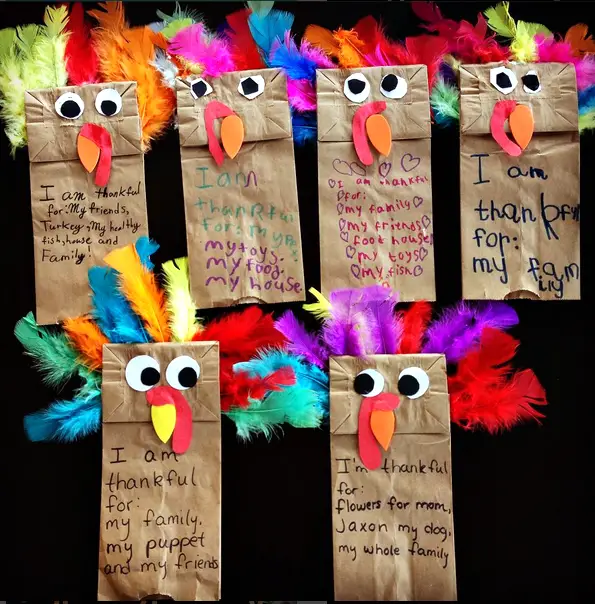
Paper Bag Thank-You Turkey
 Source: https://www.craftymorning.com/paper-bag-turkey-puppets-thanskgiving-craft/
Thanksgiving is the time to be thankful, so why not help your child to think about the things they are grateful for and incorporate these things into their artsy activities? These thankful turkeys are wonderful.
Materials
You are going to need:
- 1 brown paper bag
- Googly eyes
- Red paper
- Yellow paper
- Red tissue
- Yellow tissue
- Scissors
- Pen
- Glue stick
Step 1: Fold The Paper Bag
First, you are going to fold the end of the paper bag over so that the bottom of it is flat against the side of the bag. Glue it there, making a flat surface to work with.
Step 2: Cut Out The Beak
Next, help your child to cut out the beak and wattles. An older child may be able to do this without much help, but a little one will probably want some assistance. The wattle can be a simple red curve that will hang down below the beak.Help your child to glue the beak to the front of the paper bag, and then glue the wattle on top of the beak, dangling off to the side so that it looks like it hangs below.
Step 3: Add The Eyes And Feathers
Glue the googly eyes above the beak. If you don’t have googly eyes, you can cut these out of white paper with black pupils, or even just draw them with a pen to keep things extra simple.Next, turn the turkey craft over and get your child to tear some strips of tissue paper; these will make the feathers. You can also cut the plumes if you want to make the craft tidier, but tearing will be quick and easy.Help your child glue the tissue feathers in an overlapping array on the back of the paper bag, and then leave the glue to dry.
Step 4: Write Thankful-Fors
When the feathers are dry, turn the turkey bag back over and ask your child to think of a few things that they are thankful for. What would they miss if it went away? What do they love most about their life?You might want to pick just one thing for a young child; older kids might want to do two or three. Help your child organize it so that they have enough space to write on the bag below the turkey’s beak (or write some of it for them if they are too young).Once you’ve written everything they want to include, the gratitude turkey is complete!
Handprint Paper Bag Turkey
 Source: https://www.craftymorning.com/paper-bag-turkey-puppets-thanskgiving-craft/If you have slightly older children, they might want to make a more complicated craft, and this handprint paper bag turkey is ideal if so. It would make a great centerpiece for your Thanksgiving table, too.
Materials
You’re going to need:
- 1 paper bag
- Brown paper
- Orange paint
- Paintbrush
- Yellow paper
- Red paper
- Googly eyes
- Newspaper
- Brown pen
- Glue
- Glue gun
- Stapler
- Scissors
Step 1: Stuff The Bag
First, you’re going to make your turkey 3D. To do this, help your child to scrunch up some newspaper, and then put the balls inside the paper bag to make it rounder and puffier. This will be the turkey’s body. Fill it as full as you like, and then staple the end over so that the newspaper can’t escape.
Step 2: Make Some Handprints
Next, dole out some orange paint, and help your child to paint their palm with it. They should make a series of handprints on the brown paper; these are going to be used to make the turkey’s wings and tail feathers. They can use lots of colors, or just orange if they prefer.Set the paper aside to dry.
Step 3: Make The Head
You can make the head by cutting a circle of your brown paper, and then helping your child to glue the googly eyes to it. Cut a small triangular beak from your yellow paper, and glue this between the eyes. Cut a wattle from red paper, and stick this under the beak.Stick the head to the paper bag when your child has finished decorating it.
Step 4: Add Legs
Help your child to cut two legs and feet out of the yellow paper. You can just cut triangles, invert them, and cut two small triangles out of each to leave three toes on each foot. Glue these to the bottom of the paper bag, and your turkey is starting to take shape.
Step 5: Cut Out The Wings And Tail
Your child’s painted handprints should be dry by now, so it’s time to cut them out. Cut carefully around each print, leaving some of the brown paper background visible as you do so. Choose the two clearest prints first; these are going to make the turkey’s wings.Help your child to glue these in place, with one on either side of the paper bag.Next, choose some handprints to make the tail with. These are going to overlap each other, and if you’ve used different colors, it’s a good idea to alternate here. Help your child to glue the handprints to the back of the bag, using the glue gun to make this quick.Stick some further up, especially near the center of the bag, to give the turkey’s tail shape. You want the highest point to be at the center of the bag, and the rest of the feathers to fan out from there.
Step 6: Decorate Turkey
Once you’re happy with the turkey and the glue is all dry, let your child spend some time drawing on brown feathers onto the paper bag using a pen. They may wish to fluff up the turkey’s tummy and sides or add a bit of detail to their tail feathers to make the plumes more distinctive.When they have finished, step back and admire the turkey!
Super Simple Paper Bag Turkey
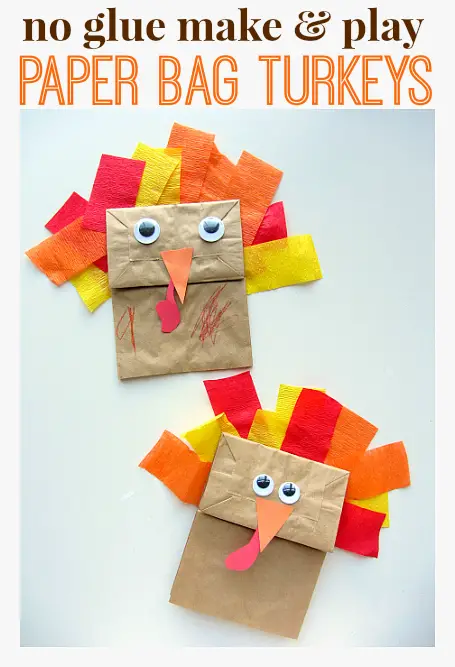 Source: https://www.notimeforflashcards.com/2013/11/paper-bag-turkey-craft-for-thanksgiving.htmlIf you want a really easy craft, perhaps because you’re doing it for a kiddy party or something similar, this paper bag turkey requires very little input from adults and can be created by young children as well as older ones.
Materials
For this craft, you’ll need:
- 1 paper bag
- Googly eyes
- Yellow card
- Red card
- Rainbow feathers
- Scissors
- Glue gun
- White glue
Step 1: Fold The Bag
As with the first craft we looked at, you’re going to fold the bottom of the bag over and stick it to the main body of the bag to create a flat surface that’s easy to craft on. If you’re doing this for a party, you may want to do this step in advance.
Step 2: Add The Face
Help your child add the turkey’s face. You need to cut a triangle from the yellow card for the beak, and a comma-shaped red curve for the wattles. You can also use red tissue paper glued beneath the beak to shape wattles if you prefer.Again, if you’re doing this craft at a party, you can cut these pieces in advance and just let the little fingers do the sticking (use white glue, not a glue gun, if a child is sticking the components on).Glue the turkey’s googly eyes above the beak, and you’re well on the way to being done.
Step 3: Add The Tail
Help your child arrange the feathers. You can use fluffy feathers or neat quills for this craft, depending on the effect you want to achieve. If you are using a whole rainbow of colors, you may want to help your child choose the order.Glue the tail feathers in place with the glue gun (as white glue may not bind very well to the feather quills). Check your child is happy with it, and see if they want to add more feathers.
Step 4: Add Feet And Wings (Optional)
If you want another step to the craft, you can either cut some little feet out of the yellow card or get your child to draw them on using a yellow marker pen. Use a brown or black marker to add a “C” and a reversed “C” shape to either side of the body to indicate the curves of the wings, and your paper bag turkey is complete!
Conclusion
Paper bags make crafting a very simple process, giving you a base to work from, and you can have great fun with paper bag turkeys crafts, using just some googly eyes, some colored cards, and some homemade feathers to create a beautiful turkey to decorate with this Thanksgiving.
Comments
0 comments