Many children love nursery rhymes and little sing-songs, and if your child enjoys these traditional verses (or the modern ones), there are lots of crafts you can make with your child ““ some complicated, some simple!We’ve collected a few of the best nursery rhyme crafts for you and your child to explore.
Interactive Itsy Bitsy Spider
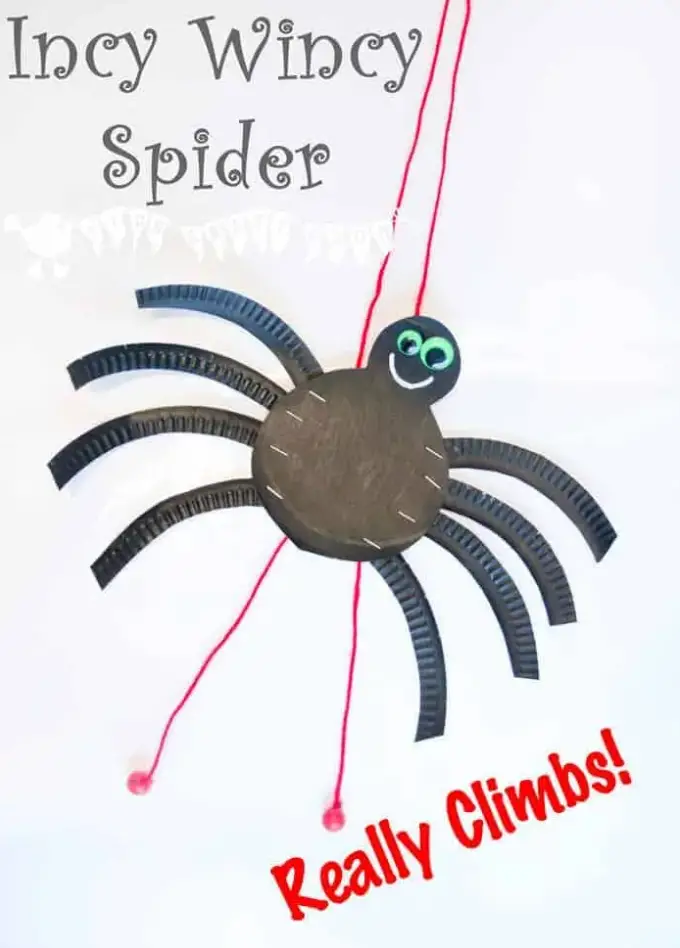 Source: https://kidscraftroom.com/climbing-incy-wincy-spider-itsy-bitsy-spider/ An interactive craft is often the best craft to do with a child, and if you want a really engaged afternoon teaching your little one all about how to make things, this is one of the best. It is a challenge, but sometimes, you want to create something unusual and magical.This is one of the top crafts for showing kids just how amazing something that you make by yourself can be. If they love the classic nursery rhyme, it’s also a great way to help them engage with it and play along. They can act it out with their hands, or use the craft to “see” the events of the nursery rhyme taking place.The spider will climb up the yarn, but you don’t have to do anything immensely complicated to make this work. There is also plenty for your little one to get involved with in terms of cutting and sticking. You could make a few different sizes and show your child how they climb.It’s always nice to have a craft that is fun beyond the making period, and this Incy Wincy spider definitely fits the bill. You might want to make a few different colors to make them more fun, and your child can learn a bit about physics at the same time as being creative. Win win on both sides!
The Cow Jumped Over The Moon
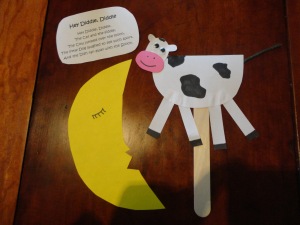 Source: https://www.allkidsnetwork.com/crafts/nursery-rhymes/hey-diddle-diddle This is another fun, interactive craft to do with a little one.
Materials
You’re going to need:
- 1 paper plate
- White card
- Black pen
- Black card (Optional)
- Paper fastener
- Pencil
- White glue
- Scissors
Step 1: Turn The Paper Plate Into A Moon
You’re going to start by helping your child draw some craters and marks to turn the paper plate into a moon. You can add a few dabs of yellow paint if they would like to, or leave it plain white. Use the “right” side of the plate, so your moon is on the side you would eat from. You can trim the plate down if you want to.
Step 2: Cut Out A Cow
Now, draw a cartoon cow on your white card, and cut it out. Your cow doesn’t need to look amazing. Let your child decorate it with a black pen, and then cut a long strip of cardboard, a little longer than half of the paper plate.
Step 3: Attach The Cow To The Moon
Glue the cow to the strip of card, and then use a paper fastener to fasten this behind the “moon” (so the strip is mostly hidden by the paper plate). Your cow should now be able to jump over the moon ““ and indeed, spin right around it.
Step 4: Add Figures (Optional)
You may want to add some other characters from the nursery rhyme, or you can leave the craft here.Decide which is the bottom of the moon, and ask your child which other characters they would like to include. There’s a laughing dog, a dish and a spoon, and a cat and a fiddle. Draw any or all silhouetted on the black card, and then cut them out and get your child to glue them on the bottom half of the plate.Your cow jumping over the moon is now complete! Let your child have fun turning the cow around and around the moon.
Baa Baa Black Sheep
If your child loves this nursery rhyme, this is a very easy craft to do with a youngster and offers an opportunity to practice their fine motor skills. It also doesn’t involve much cleanup!
Materials
You’re going to need:
- White card
- Black yarn
- Scissors
- Pencil
- Small cloth bag (optional)
- Black pom poms (optional)
Step 1: Make A Sheep Template
You can either draw a sheep template on the white card, or print one from the internet; it doesn’t need to be perfect, but you may find it easier and quicker to use a printout.Cut this out, and you’re ready to start the craft.
Step 2: Add The Wool
Take the end of your skein of yarn, and help your child to start winding it around the sheep’s body. Show them how to wind the wool over itself so that it stays on the body. You may find you need to hold the end while they get the hang of this.Help them wind the wool right around the body, and over the legs and head if they like. You can then glue a black pom pom on for a tail if you like.
Step 3: Add A Bag Of Wool (Optional)
You could add three bags if you want to be accurate to the nursery rhyme, but one is fine. You can use pretty much anything for a bag, even two pieces of fabric glued into a square. If you want to make the full three bags, that’s great.Cut some scraps of yarn and black pom poms, and fill the bag. Your child will have great fun singing the rhyme whenever they look at their sheep craft.
Humpty Dumpty Craft
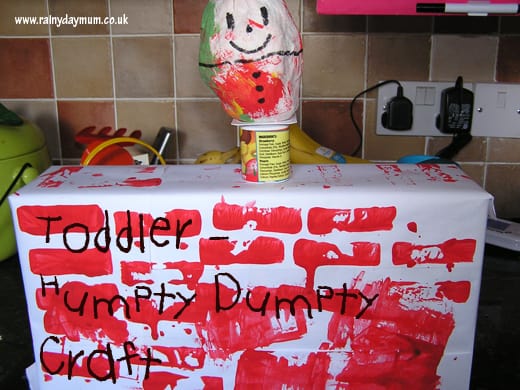 Source: https://rainydaymum.co.uk/humpty-dumpty-2/ If you want another simple but reasonably interactive craft, Humpty Dumpty can be good fun. You can use real eggshells for this if you like, or make a cardboard version. We will use eggshells in this version. It may seem a little morbid, so only choose this craft if your child likes the rhyme!
Materials
You’re going to need:
- 1 reasonably intact eggshell
- 1 broken eggshell
- White paper
- White card
- Scissors
- Glue
- 1 small cereal box
- Colored pens
- Ruler
Step 1: Make The Wall
Humpty Dumpty needs a wall to fall off, so you’re going to start by making one with your child. If you have a mini cereal box, this will be perfect; just cover it with white paper and help your child draw some bricks on it, using the ruler to get reasonably straight lines.When you’ve finished, glue the wall to a large semi-circle of cards, so this sticks out behind the wall.
Step 2: Make Humpty Dumpty
You’re going to need two eggs for Humpty Dumpty’s two shapes. To get an intact egg, boil two eggs, and then cut the top off one neatly with a knife, scoop out the insides, and glue the top back. For the other, you can just pull the shell off however it breaks.Decorate Humpty Dumpty’s face on the egg using the pens, and your child can also cut him some paper legs if they like. Drawing hair on the egg can help to hide the cracks at the top.When they’ve finished, sit the intact Humpty Dumpty on the wall, but don’t glue him down.
Step 3: Arrange The Broken Humpty Dumpty
Humpty Dumpty meets an unfortunate accident when he falls, so on the backside of the wall, where you made a semi-circle base, you are going to glue the broken eggshell. Get your child to help arrange it. You may want to draw some features on the eggshell, using the same colors as they decorated the intact Humpty with.If you have any toy soldiers or horses, you can add them to the craft, failing to put him back together. Your child can also decorate the semi-circle so that it has grass or plants around to make it look complete.Now, your child has two sides to the craft. They can show the intact Humpty Dumpty sitting on a wall, and then remove him and swivel the craft around to show the disaster!
Conclusion
Nursery rhyme crafts are a great opportunity for your child to learn more about crafts and think about the characters in the nursery rhymes. They help bring the little poems and songs to life, and you can have endless fun reinventing the familiar characters. Interactive crafts are great if you want an involved and detailed project, or you can choose a simpler one like Baa Baa Black Sheep for a wet afternoon when you just want something quick and fun to do.
Comments
0 comments