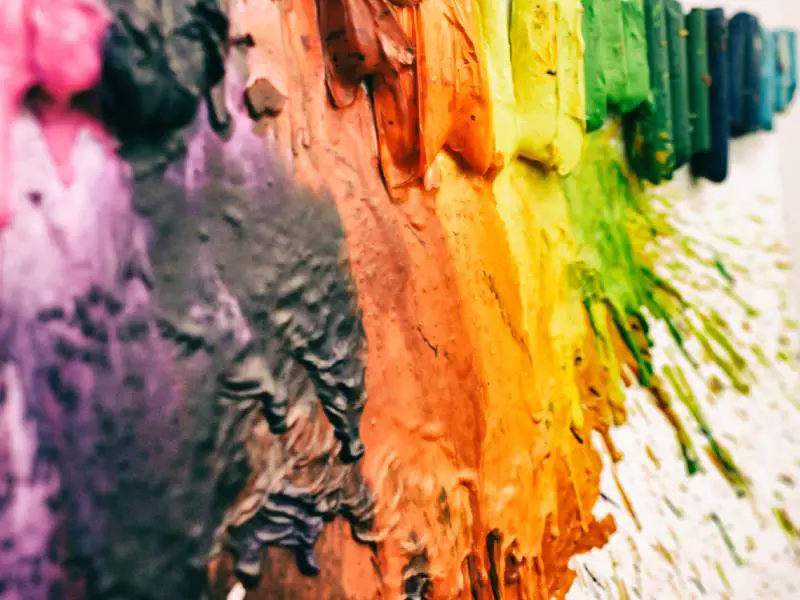
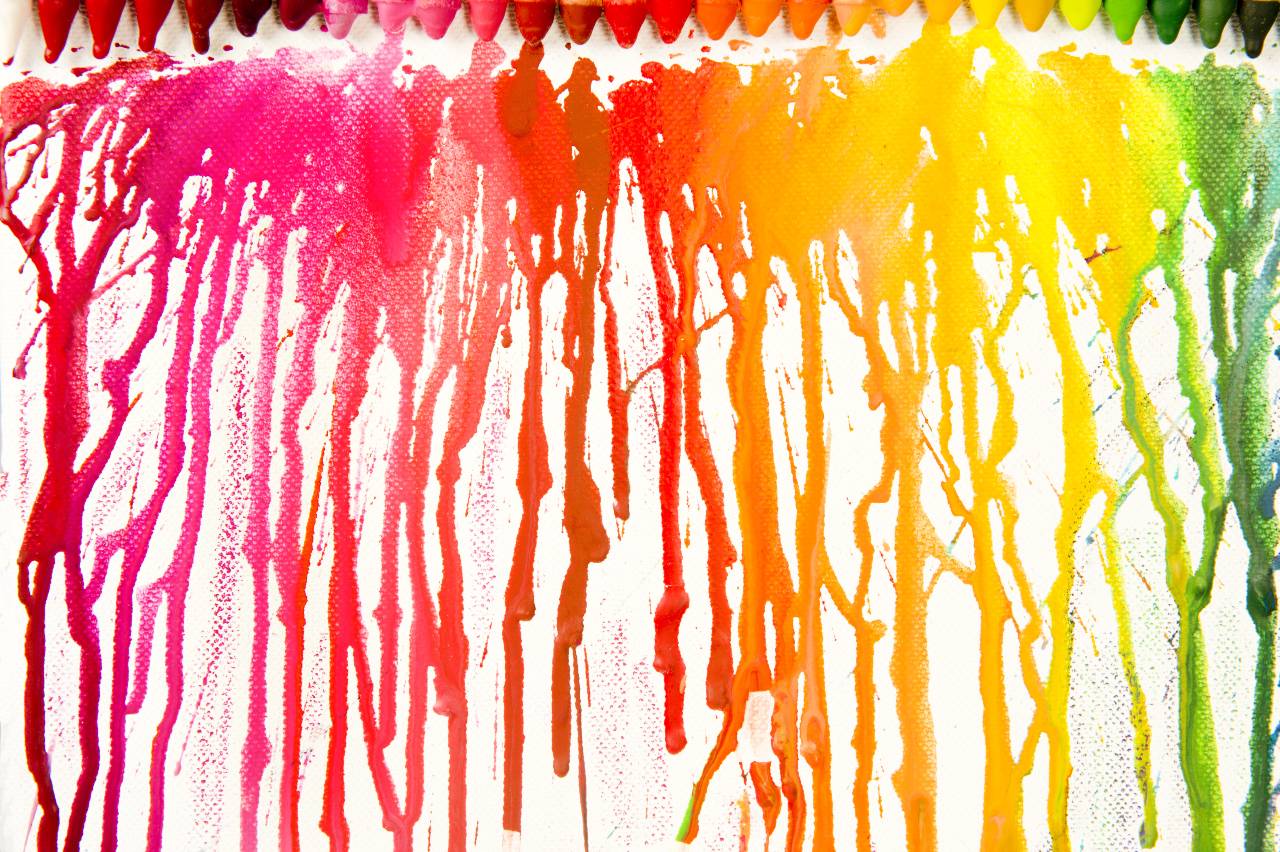
Crayons make a wonderful craft material, and melted crayons can form some incredibly beautiful rainbow art. They’re a fun way to adapt a familiar medium and give your kids an opportunity to learn about how liquids respond and how temperature can affect things.We’ve put together some melted crayon crafts that are perfect for getting kids busy. If you’ve got some broken crayons or crayon stubs lying around, these are fantastic ways to use them all up.
Melted Crayon Letters
 Source: https://www.minted.com/julep/2015/04/27/diy-alphabet-crayon-favors/These turn old crayons into art and new crayons at the same time, and your child will love having the letters of their name to color in with.
Materials
For crayon letters, you’re going to need:
- Some broken crayon ends
- 1 silicone letter tray that is oven safe
- 1 flat knife to help you get the crayons out of the molds
- Chopping board
- Sharp knife
Step 1: Chop Up Your Crayon Ends
Start by removing any labels left on the crayons, and then get a chopping board and a sharp knife.These crayons are going to come out rainbow (unless you happen to have a huge amount of one color), so it’s best to go for fairly small pieces so you can mix the colors uniformly. Of course, you can go for big lumps and experiment with different sizes if you like. Be warned that very small pieces may blur together into a muddy brown, so you don’t want them to be too small. 1-3 centimeters is a good rough guide.Preheat your oven to around 400 F.
Step 2: Fill The Mold
Get your child to help you put the crayon pieces into the molds. Fill them nice and full, and then put them in the oven for 10 minutes.
Step 3: Top Up The Mold
Using oven gloves, lift the molds out and top up the molds with some more pieces of wax crayon, as you will find that the wax has melted down a bit. Put them back into the oven for the next 15 minutes.
Step 4: Allow To Harden
Take your crayons out and check that they are fully melted. If not, put them back for a little longer. If they are, transfer your silicone mold to a cooling rack and leave them to cool for about 20 minutes before you try to remove them from the mold.When it is time to take them out, be gentle. You don’t want the letters to snap. Use a knife to help if necessary, gently easing the tip under the edge of the letters (make sure that the knife is blunt so you don’t risk cutting the mold).Your wax crayon letters are now done and ready for your child to enjoy. These can be used as a decoration or as multicolored crayons!Tip: use a dedicated silicone mold for any craft projects. Your letter silicone mold should not be used for food after it has had wax crayons in ““ even if you clean it thoroughly. It is much better to keep a mold that is dedicated to crafts.
Melted Crayon Lantern
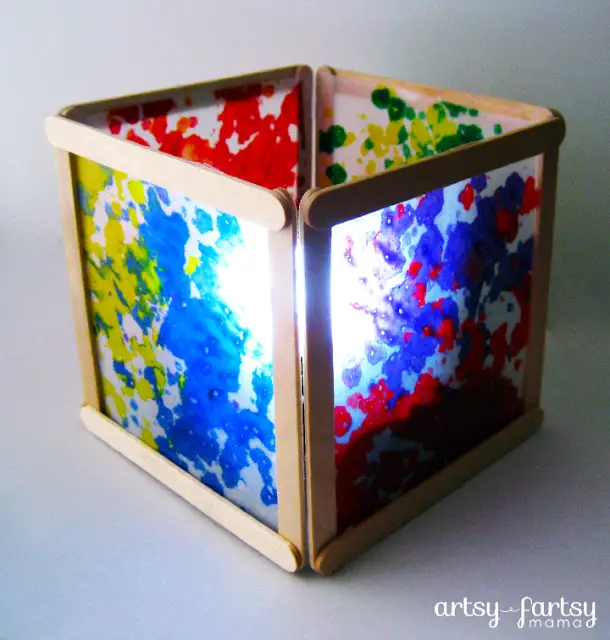 Source: https://www.artsyfartsymama.com/2013/02/diy-wax-paper-lantern.htmlIf your child wants a colorful new light shade for their bedroom, a melted crayon lantern could be just the way to go. Your child can have lots of fun creating this craft, sprinkling the crayon on in all sorts of interesting colors and patterns.
Materials
For this project, you’re going to need:
- Clear waxed paper
- Broken crayons in various colors
- Wooden Skewers
- Newspaper
- An iron
- Glue or a glue gun
- Scissors
- A grater or knife and board
- An electric tealight
Step 1: Prepare The Lantern Sides
Tear off a large sheet of your waxed paper, and then fold it in half and crease a fold in it. This is going to be one side of the lantern. You then need to tear off a similar sheet and again crease it to make the other side.All in all, you will need four pieces of waxed paper with a crease in the middle of each one.
Step 2: Grate Your Wax Crayons
You want little crayon shavings for this project, so if you have a grater that you don’t use for food, it will be the best way to get the right size. Alternatively, you can try a pencil sharpener, but you may find that the shavings come out a bit too small.You can also use a chopping board and sharp knife to break your crayon into pieces, but this can be a little time-consuming and tedious.
Step 3: Sprinkle The Crayon Shavings On The Paper
Next, you are going to help your child sprinkle the shavings onto the waxed paper. They should only do one side of the fold (the other side is going to be folded on top later).This is a good opportunity for your child to think about what colors go well together (e.g. red and yellow crayons will mix into orange in the middle, while green and purple will make a muddy color).Try to keep the sprinklings fairly thin, or you will get a lumpy effect and the colors may merge too much and just blur into brown.You may want to experiment and make several “lantern sides” before you decide which are the best ones for your lantern. Let your child learn how the patterns and colors work with each other.
Step 4: Iron The Paper
Spread out a generous layer of newspaper to catch any drips of wax, and then fold the clean side of your waxed sheets over the crayon shavings and carefully iron them. Mind your child doesn’t try to touch the iron’s surface.You want medium heat and just a little bit of pressure. Run back and forth over the paper smoothly, gently squashing the crayon out. It doesn’t matter if some spills over the edge of the paper; the newspaper will catch this.All in all, you need to finish with four ironed pieces that you are happy with, to make up the four sides of the lantern.
Step 5: Make The Lantern Frame
Using a glue gun, you are now going to stick together the frame. You may want to cut your skewers shorter so that the lantern is not too big.Stick four skewers into a square, and then use small dots of glue to fit one of your paper sides to the inside of this square. You can trim the paper down to fit, but make sure you don’t cut it too small.Stick the next four skewers into a square and glue another paper side to it. Repeat this until you have all four sides of the lantern, and then carefully join these together by gluing along their edges.
Step 6: Add An Electric Tealight
Now that the lantern is finished, let your child put an electric tealight inside to brighten up the wax sides and make it glow. Look at all those pretty colors! Do not use real candles in this project; it could pose a serious fire hazard.If you don’t have an electric tea light, you can cut a bit off the back edge of the lantern to let you insert a cable, and use this as the shade for an electric light instead.
Crayon T-Shirt Art
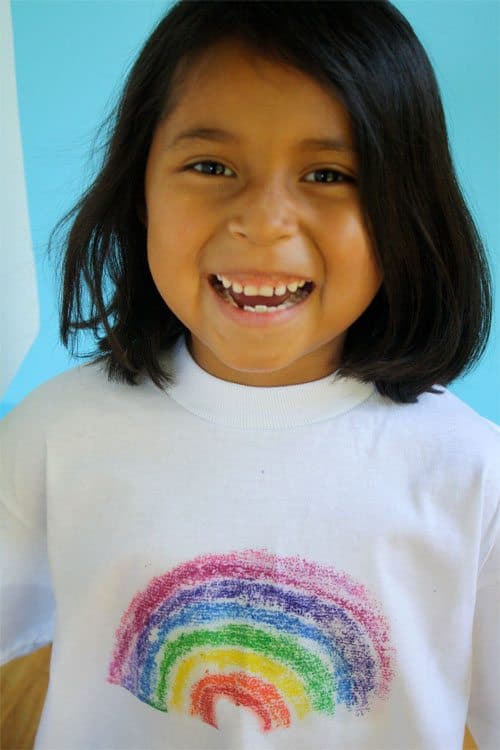 Source: https://alphamom.com/family-fun/crafts/sandpaper-printed-t-shirt/Wouldn’t your kid love to be able to wear their art on their very own handmade t-shirt? This is a wonderful way to make their art last and not have to find room for another piece on your cluttered fridge; turn it into a shirt instead!
Materials
A crayon t-shirt will require:
- A plain white t-shirt that will fit your child
- Crayons (not broken)
- An iron
- Fine sandpaper
- Scrap cardboard a bit bigger than your image
- Parchment paper
- Paper towels
Step 1: Decorate The Sandpaper
Help your child to draw a fun picture on the sandpaper. This image is going to end up reversed, so it may be best to draw something symmetrical or help your child work out how to make their image appear correct on the finished thing.Lettering might prove quite hard to do for this method; we’d recommend doing sunshine or a rainbow or a flower so that it won’t matter when the image is flipped.Tip: to stop your child from hurting their hand on the sandpaper, slip a little scrap of plain white paper between their hand and the sandpaper.
Step 2: Transfer The Image
Put your scrap card inside the shirt so that any wax that bleeds through won’t stain the other side of the shirt.Place the sandpaper upside-down on the shirt and make sure it’s level. Tear off a strip of parchment paper and place this over the top so you won’t get wax on your iron. Heat the iron to medium, and then gently press the iron back and forth on the sandpaper, applying just a little bit of pressure. Do this for about 45 seconds, and then lift a corner to peek at the image and make sure it has transferred properly.If necessary, iron over the image a little more, and then carefully lift off the parchment paper and sandpaper.
Step 3: Fix The Wax
Your design should now be looking great, but you need to make sure it will stay on the shirt and not rub off too easily. To do this, put some clean paper towels on top of the design, and iron over it again. This will help to lift excess wax out of the fabric. Discard the towels.Next, put the shirt in the dryer for a burst of 20-30 minutes. This should help the wax to seal itself into the fabric and make sure the shirt is safe to wash. However, we recommend gentle washing and that you do a test wash before you allow other colors to be washed with the t-shirt.When it’s done, let your child wear their new shirt and proudly proclaim that they made it. It will probably become a firm favorite, and you can branch out into other designs very easy-to-make t-shirts for any occasion.
Easter Egg Crayon Art
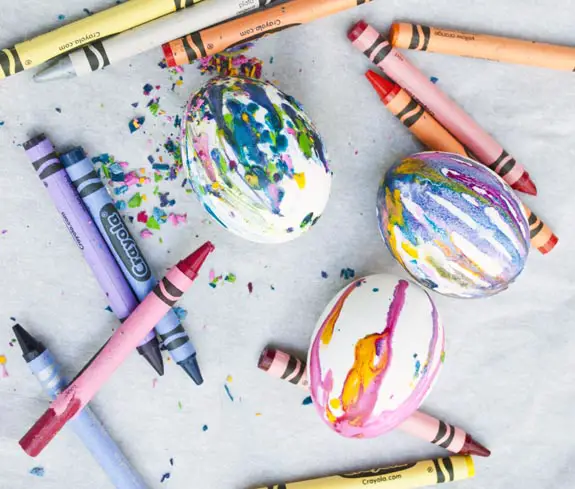 Source: https://www.clumsycrafter.com/melted-crayon-easter-eggs/If you’re getting ready for spring, decorating eggs is probably high on the agenda, and you can do this with crayons just as well as with food coloring ““ perhaps better! Your child will love getting the opportunity to try a new trick.
Materials
For Easter Egg crayon art, you need to gather up:
- Grater or sharp knife
- Broken crayons
- Freshly boiled eggs that are still hot
- Little bottle caps
- Toothpicks
Step 1: Make Crayon Shavings
Remove the labels from your crayons, and then begin creating crayon shavings. You may want to use an old grater, or chop them with a sharp knife. You really want little tiny pieces for this project, not big ones. You could also experiment with hitting a crayon with a hammer.Make sure all the pieces are very small. You can either mix them all together, or put them in little dishes of their own color; either is fine, but separating them may make the next step easier as you are going to have to work quite quickly.
Step 2: Put Your Eggs On To Boil
Put the eggs on to boil and line up your bottle caps on the table. You are going to stand the eggs in these so your children don’t have to handle boiling hot eggs. Make sure you have enough bottle caps for every egg you plan to decorate, and a space to slide the eggs to one side while they cool down once they’re decorated.
Step 3: Decorate The Hot Eggs
When the eggs have boiled, lift them one at a time out of the pan and straight onto the bottle cap. Dry the water off them, and then your child can immediately start sprinkling the crayon shavings onto the eggs in whatever pattern they like. They can mix and match colors, or just go for one hue.They may also like to roll the eggs in the crayon shavings, but this is probably not a good idea for young kids, who might burn their fingers.The toothpicks can be used to draw the crayon around once it starts melting, blending colors and creating patterns on the eggshells.When an egg is decorated, let it sit for a while so that the crayon can finish melting and the egg can cool. You can then flick off any excess bits of crayon that haven’t melted and you will have beautifully abstract eggs, just perfect for an egg hunt!Tip: you can use a hairdryer to boost along any little bits of unmelted crayon, but do so carefully as you may spoil the pattern. It’s better to let the cooked egg’s heat do as much of the melting work as possible.
Crayon Coaster
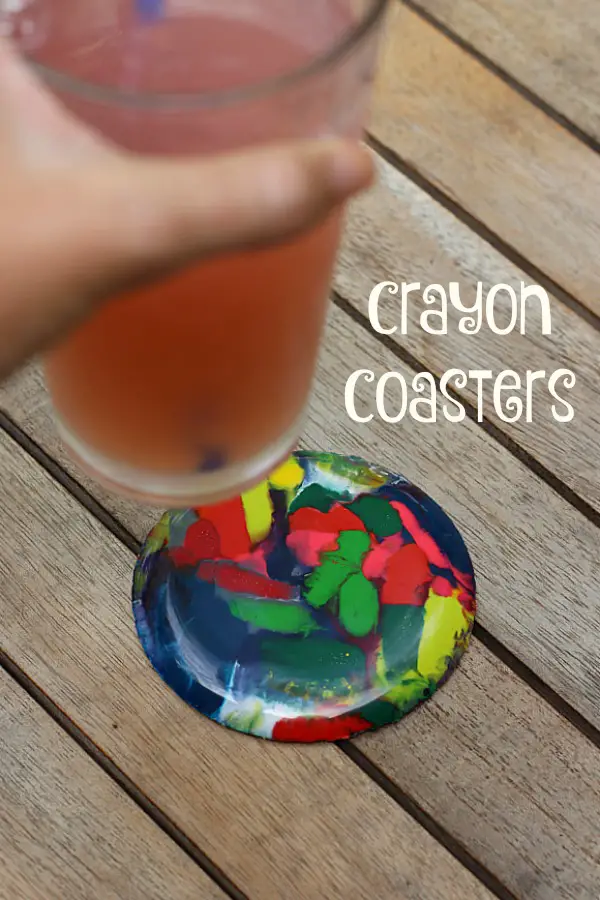 Source: https://momunleashed.com/2016/08/crayon-coasters.htmlIf you have trouble getting your child to put their glass on a coaster properly, this can be a great way to help them remember. Crayon coasters are practical and fun, and you can make them for the whole family if you want to!
Materials
To make a crayon coaster, you’re going to need:
- An old soup bowl
- Broken crayons
- A ramekin with a flat base
- Mod Podge
- A paintbrush
Step 1: Add The Crayons And Microwave
Put the crayons in the bottom of the soup bowl, after you have removed all of the labels. You don’t need a huge amount and they don’t need to be broken down too small. Cover the bottom of the bowl with chunks of broken crayon, and that should be sufficient.Microwave them for thirty seconds, and then check on them. It’s easy to burn crayons in the microwave, so you want to be careful. Microwave for another thirty seconds, and check again.Keep doing this until the crayons have turned to liquid at the bottom of the bowl. You can give them a little swirl using a toothpick to mix the colors up a bit, but if your child does this, don’t let them get carried away.
Step 2: Press In The Ramekin
Gently press your ramekin onto the top of the liquid crayons. You don’t want to press down hard, but just give it a little push that will set it on the surface. This will create a lip on the coaster.
Step 3: Leave It To Cool
Your coaster must be totally cool before you move it. Put it on a high shelf away from the temptation of little fingers, and leave it for a couple of hours so the crayons can set.When it’s cold, remove it from the bowl and check out the cool creation!
Step 4: Coat with Mod Podge
Coasters need to be durable, especially if kids are going to be using them, so add a few coats of Mod Podge to help the coaster withstand drops and bumps. You’re all done!
Conclusion
Crayon art is a great way to use up those old bits and pieces, rather than letting them gather fluff and take up space. You and your kids can have great fun turning the crayons into beautiful art instead!
Comments
0 comments