If you’re in the middle of working on your best artistic piece yet and looking for the fairy magic to kick in to show off how creative you can be, you might need to learn a thing or two about how to draw fairy wings.
While fairy wings can look amazing in pictures, tutorials make them seem incredibly difficult to execute in practice. However, this won’t be the case if you know the best (and most fun) way of drawing fairy wings.
Look no further because we’ll tell you in detail the easiest and most creative way to do just that! So read on.
1. Start With the Materials
First, you should start by compiling the materials you’ll work with. Here’s what you’ll need to draw fairy wings:
- Sketchbook or white paper of your preference
- A pencil
- A drawing pen or fine liner
- A black marker
- Color markers or coloring pencils
- A white paint pen
- An eraser
Note:
Coloring with color markers or pencils depends on your preferences; the tricky thing would be drawing a fairy’s wings.
This tutorial should be easy, but you might have to try drawing and fail several times to get all the details right, which is a natural part of the process.
2. Sketch an Outline
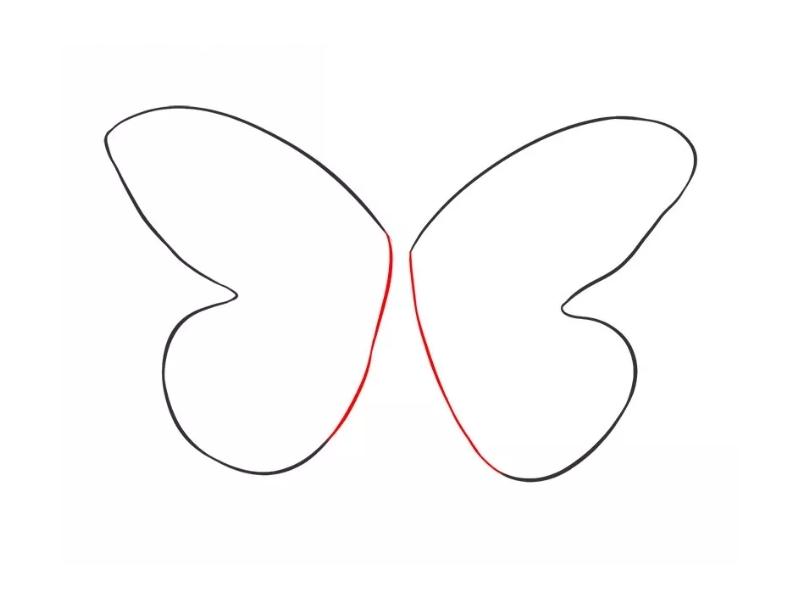
You might find yourself inclined to draw a horizontal line to base the proportions of the wings on at first, but you actually don’t need to.
From the middle part of the page, use your pencil to add a medium-sized dot, then from the left and right sides of the dot, start drawing petals. The curves should be elongated and go upward, similar to what you’d draw with flowers but slightly thinner.
To the bottom left and right of your dot, draw symmetrical petals. Note that the curves of the bottom petals must be shaped in a way that makes them smaller compared to the top ones. Their curves should also be thinner.
To have that unique wing shape, you’ll need to add an outer pattern to the petals. Starting from the dot, follow the inner line of one petal to the tip, then create cloud patterns to the outer line until you reach the dot once more.
Remember to pay attention to details. As you draw every curve, make sure that it matches the shape of the one on the other side. This step can be a bit of a trial-and-error practice for beginners, but once you learn to match the wings, you’ll love the process!
3. Ink in Your Outline
Now that you’re done with the tough part of fairy wings drawing, you’ll get to exercise your inking powers! To get the perfect fairy wings, you’ll need to use your eraser and carefully remove the petals you’ve drawn in the previous step.
This will leave you only with the patterned fairy wings at the edges. Make sure not to touch these lines with your eraser. If you happen to remove any of the outer patterns by mistake, simply try to use the pair wing on the other side as a reference to redraw it.
Once the wings are done and ready to go flying, follow the lines with your drawing pen. If drawing pens or fine liners aren’t your favorite inking tools, you can use a gel pen.
4. Line the Background of the Sketch in Black
When you’re drawing fairy wings, you’ll need the glowy element to show up and a prime example to show that off is contrast. There are a couple of simple and creative ways to set a contrast.
For example, if you’re using white paper, coloring the outside completely with black will attract attention to the myriad of colors in your designs.
To create this contrast, start by coloring the outside of the background with a black marker, but make sure not to get any lines into the wing design.
Although this is a very simple step, it can still take some time to practice to get accurate and error-free results.
5. Add Veins to the Wings
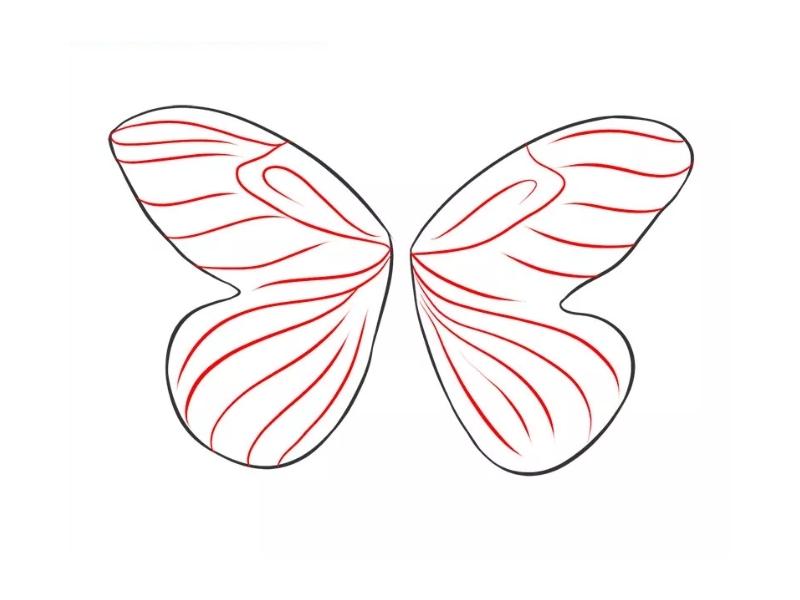
Adding veins to the fairy wings is a very simple process. All you have to do is use your drawing pen and add the top wings with horizontal, nearly wavy lines.
For the bottom parts of the wings, draw lines extending from the dot and to the farther end at the bottom. If these shapes aren’t to your taste, you can create any style that fits your vision and imagination.
You can also use reference material if you can’t find inspiration. For example, Tinker Bell has elaborate shapes on her fairy wings, so this is your way to go if you’re looking for a cool design to appeal to your kids as they look at the fairy’s face.
Note: This step is optional, as it’ll depend on a couple of creative decisions on your part. For example, if you prefer your fairy wings to have a translucent, rainbow-like quality to them, you’ll need to add some veins, patterns, lines, or any shape at the very least to the wings and work on the color palette of each section.
On the other hand, if you’re blending colors, particularly with coloring markers, you won’t need to add further details and just focus on blending. After that, you can decide whether or not to add wing veins. Either way, both ideas are truly amazing, and the results will show off your creativity every single time!
With that said, you’ll now be able to draw fairy wings successfully! Of course, you can simply leave it at that and call it a day. So, coloring your design is also an optional step.
6. Start Coloring!
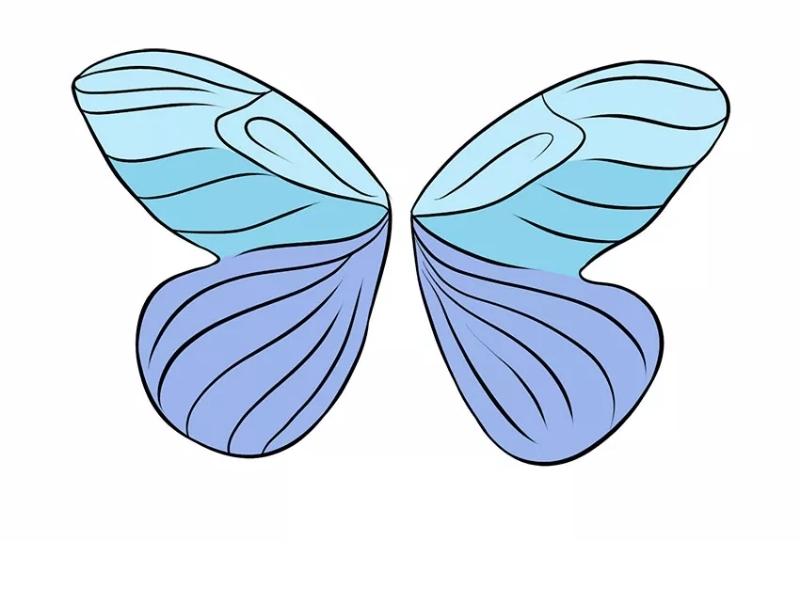
As mentioned earlier, you have two options for this step: color markers and coloring pencils.
Color Markers
Color markers work almost with every fairy wings drawing, and they’re perfect for kids, beginners, and seasoned artists alike! Make sure to choose a set of three colors for blending.
For instance, you can use green, blue, and purple together. You can also use blue, pink, and violet, or red, blue, and orange.
Blend the Colors
Fairies are well known for their shimmery, translucent wings, and blending various shades with your markers will give that effect. One way to go about this is to use darker shades at the edges of the wings, then blend the lighter colors as you move inside the wing.
Highlight With a White Paint Pen
Highlighting with a white paint pen works similar to adding veins. So, you’ll follow the same method mentioned earlier with the simple step of lining the inner sides of the colored wings.
White highlights will continue to add contrast to your designs, so make sure to form these highlights to the best of your ability and remember not to overdo them. Too many highlights might draw attention away from the blended shades on the wings.
Use Colored Pencils
It can take a while to learn how to blend colored pencils but using them can be immensely fun to work around with! Here’s what you’ll need to keep in mind:
Find Reference Material
There’s an abundance of reference material if you want to know how to draw fairy wings. Then, starting from infamous characters like Tinker Bell to insects with a gorgeous pair of shimmering wings, pick one as your reference material.
Choose Your Colors
Choosing colors is essential to complete your palette. If you’re going for a rainbow design, you can choose all colors on the spectrum or stick to a group of colors, like green, blue, and violet. It all depends on your imagination.
Start Coloring
Assuming that you’ve already added veins to your fairy wings, you can finish your piece of art by adding the colors. Use light pressure as you apply color to each section. If possible, blend the colors in a similar style to your reference material to get the best results. Make sure not to start with the same color on each section.
Coloring can cover up the background and not make the fairy wings translucent. A simple fix for that is adding lines when needed. This only works if you’re already sketching the wings in a template or a painting. Be sure to use a grey pen to fully form the transparent effect.
Highlight With White Paint Pen
One thing that makes fairy wings special is their glimmer, which a very simple step can achieve!
All you need to do is use a white paint pen to add a limited number of highlights to the curves and lines of the wings. You can also add dots to get the full glistening effect in your artwork!
Final Thoughts
With these simple tips, you’ve just learned how to draw fairy wings in no time! Remember that practice makes perfect, so make sure to always design fairy wings of different sizes and colors before incorporating them into your artwork.
Lastly, be mindful that you choose which coloring tools you’ll work with first, as this will affect the order of steps in this tutorial.
Sources:
- https://www.youtube.com/watch?v=XkztmcEr2DU
- https://www.colouringheaven.com/how-to-colour/how-to-colour-fairy-wings-with-a-rainbow-shimmer/
- https://howtodrawforkids.com/how-to-draw-fairy-wings/
- https://iheartcraftythings.com/fairy-drawing.html
Comments
0 comments