Wall art belongs to everyone, not just professional artists. Creative souls at any skill level can create beautiful pieces that won’t drain their bank accounts.
Amazing transformations happen with simple materials like thrifted canvases and old CD cases. A basic 50″ square canvas from Goodwill can become your room’s stunning centerpiece. The possibilities stretch beyond traditional approaches – you could frame your children’s artwork in gallery-style displays or craft eye-catching geometric designs with hexagon boxes.
Your blank walls can become vibrant showcases with materials already sitting in your home. The perfect time to add personality to your space is now. Let’s head over to our step-by-step guide and bring your creative vision to life!
Plan Your Wall Art Vision
Before you jump into painting or hanging anything, it helps to take a step back and think about the bigger picture. A little planning goes a long way when it comes to making your wall art feel intentional rather than random.
Whether you’re starting from scratch or adding to a space that already has a vibe, laying out a vision first helps everything come together more smoothly. This early phase is where creativity meets strategy—and the results tend to look a lot more polished because of it.
Decide the purpose of your wall art
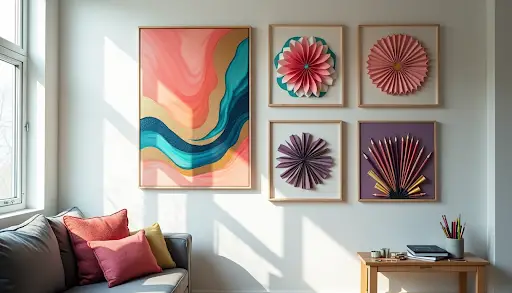
Your wall art selection should begin with a clear purpose. What do you want this piece to do? Should it be a focal point, work with your current décor, or set a particular mood? To name just one example, gallery walls add visual interest to unexpected areas like entryways or powder rooms. Each room’s purpose should guide your art choices. Calming pieces work best in bedrooms, while living spaces can showcase more vibrant, conversation-starting art.
Note that a gallery wall is a chance to share your story through paintings, sketches, family photos, or a mix of these elements. This personal touch makes your space uniquely yours instead of looking like it came straight from a catalog.
Choose a color palette that fits your space
Colors can make or break how your wall art blends with your room. Bold, colorful art creates eye-catching focal points in neutral spaces. Rooms with bright elements need art with complementary or softer tones to stay balanced.
Your gallery wall needs these unifying elements to work well:
- Similar color palettes across different pieces
- Matching frame styles or colors
- Consistent art themes or subjects
A common thread should run through mixed artwork collections. This could be matching frames, similar colors, or related styles that make everything work together. Gallery walls look best when colors repeat 2-3 times across different pieces.
Measure your wall and sketch layout ideas
Good measurements are the foundations of well-placed wall art. Measure both width and height of your target wall space. The two-thirds rule applies to art above furniture – your pieces should cover about two-thirds to three-quarters of the wall space above it.
Your artwork’s center should sit at eye level, usually 57-60 inches from the floor. This height works well regardless of ceiling height and creates comfortable viewing angles.
Test your layout before you pick up any tools. Map out pieces on the floor in a space that matches your wall size. You might also trace frames on kraft paper, cut out these shapes, and tape them to the wall. This method lets you adjust everything until the spacing and balance look just right.
Gather Materials and Tools
Once your vision is set, it’s time to prep for the fun part—bringing it to life. A successful art project doesn’t require a studio full of gear, but having the right materials on hand can make a big difference. From basic supplies to more creative shortcuts, a bit of planning here will help you avoid mid-project runs to the store and keep the creative momentum going.
Simple tools you’ll need
You’ll want these essential supplies to create most colorful art:
- Paint brushes (short-handled and various sizes for detail work)
- 4″ or 6″ foam rollers for larger areas
- Paint trays or liners
- Drop cloth (canvas works better than plastic since it’s less slippery)
- Measuring tape and pencil
- Ladder or stepstool to reach higher spots
- Sealant or finish (based on your project)
You might also want project-specific tools like putty knives for textured art or painter’s tape for clean edges. Ziploc bags make great storage solutions to keep your brushes fresh between painting sessions. A good starter set of acrylic paints runs about $50 for seven quarts, though prices change based on quality and quantity.
Where to find affordable art supplies
Quality supplies don’t have to break the bank. Thrift stores often sell canvases and frames at amazing prices – some artists grab framed canvases for just $18. Major art retailers like Dick Blick and Jerry’s Artarama keep discount sections with up to 80% off regular prices.
Local hardware stores stock many essential supplies. Online retailers sell starter kits that bundle multiple tools together at better prices than buying everything separately. The clearance sections at craft stores like Hobby Lobby or Michaels often hide quality products at great discounts.
Paint-by-number kits as a beginner-friendly option
Paint-by-number kits are a great way to start if you’re nervous about beginning from scratch. These detailed packages come with everything you need: pre-printed canvas, numbered paint pots, brushes, and clear instructions.
These kits might look simple but they teach valuable skills like color theory, composition, and brushwork techniques. They come in different sizes to match your wall space. Many companies will send extra paint at no cost if you run out within 60 days.
The results can look quite sophisticated and the process itself helps reduce stress and anxiety through focused creative activity. You can explore a wide range of designs at this paint by number shop to find a piece that suits your space and style.
Create Your Colorful Wall Art
Now comes the exciting part—actually making the art. This is where your ideas and prep work start to take shape. Whether you’re aiming for something bold or subtle, hands-on or guided, this stage is all about experimenting and enjoying the process. Don’t stress about perfection—the goal here is expression, not rules.
Paint-based ideas: abstract, ombre, and stencils
Ombre effects create beautiful gradients by blending colors naturally. Start with the darkest shade at the bottom, covering about 1/4 of the wall. Then blend it into lighter shades as you move up. A 3″ angled brush works best to apply paint in “V” or “X” patterns. Make sure your brush strokes end at different heights to avoid creating stripes. A bit of water or Floetrol helps the colors blend better between sections.
Stencils give you precise designs without needing artistic skills. Just secure your stencil to the wall with tape or adhesive and apply a thin layer of paint. This prevents the paint from seeping under the edges. Wall stencils cost less than wallpaper and let you pick any colors you want.
Paper and fabric crafts for texture and color
Shadow boxes made from layered paper create eye-catching wall art with depth. You’ll need 9-10 sheets of quality cardstock (65 lb. or 80 lb. works best). Cut detailed designs by hand or use a cutting machine. Double-sided foam adhesive squares add depth between layers. Work from bottom to top to create a 3D look.
Old fabric scraps can become beautiful no-sew décor through découpage collages. This method brings new life to unused fabrics and adds rich texture to your walls.
Mixed media: combining photos, text, and objects
Make your art personal by mixing photos with meaningful text. Your wedding photos with vows, travel pictures with location names, or pet portraits with their favorite commands create unique pieces that tell your story.
Add texture by using embossing techniques or combine materials like modeling paste, tissue paper, and fabric. These create rich backgrounds that look great with sharp text elements.
Tips for layering colors without making a mess
Keep your colors bright by mixing no more than three paint colors together. Clean your brushes with dry paper towels between colors instead of using paint thinners that can fade the pigments. Let each layer dry completely before adding the next one, especially with contrasting colors.
Display and Style Your Art
Once your art is ready, it’s time to bring it into your space in a way that feels intentional and stylish. How and where you display your pieces can completely change the mood of a room. Whether you’re working with a collection or just one special artwork, thoughtful placement helps your creativity shine and ensures your space feels complete.
How to hang art to make it stand out
The right height plays a crucial role in displaying wall art. Gallery standards suggest placing your artwork’s center 57 inches from the floor. This height matches the average person’s eye level and gives your space a professional appearance. When you hang pieces above furniture, leave 6-10 inches of space. This creates a balanced look between your art and the furniture below.
These placement techniques help you avoid unwanted wall holes:
- Map your layouts on the wall with painter’s tape
- Test different arrangements using paper templates of your frames
- Take photos of test arrangements to get a better view
With multiple pieces, treat the group as one unit. Keep the grouping’s center at the 57-inch mark. This helps your artwork blend with other room elements and creates a harmonious look throughout your home.
Creating a gallery wall vs. a single statement piece
Gallery walls tell stories through multiple pieces. Statement pieces create bold focal points with just one work. Each style serves a unique purpose in your design plan.
Gallery walls let you show off collections that mirror your personality through varied art pieces. Place your biggest piece slightly off-center. Add smaller works around it with 2-3 inches between frames. This setup works great for family photos, travel memories, and creative wall art combinations.
A statement piece brings simplicity and grabs attention. One large, vibrant artwork draws eyes while keeping other décor subtle. These pieces work best in minimalist rooms or spaces where you want a clean look. If you’re looking for oversized, eye-catching pieces to anchor your wall, visit this page for some inspiring options.
Both approaches can give your space new life. Your room size, current décor, and style preferences should guide your choice. Art that seems slightly too big often works better than pieces that look too small on your wall.
Conclusion
Creating wall art that truly pops doesn’t require formal training or expensive tools—just a bit of creativity, planning, and the courage to try something new. With a few thoughtful choices and some hands-on fun, you can turn a plain wall into a bold expression of your personality.
Whether you’re layering textures, playing with color, or mixing personal mementos with store-bought pieces, the process should feel as rewarding as the final result. So gather your supplies, trust your instincts, and let your walls tell your story.
Comments
0 comments