Hedgehogs have to be among the most popular animals when it comes to kids, and they are a wonderfully distinctive and fun thing to try and recreate in all sorts of different ways. We’ve pulled together some top hedgehog crafts for you to try out with your little ones.If you’re lucky enough to have hedgehogs in your garden, spend some time talking to your kid about hedgehog-appropriate foods ““ and never put any milk down for them.
Fringed Hedgehog
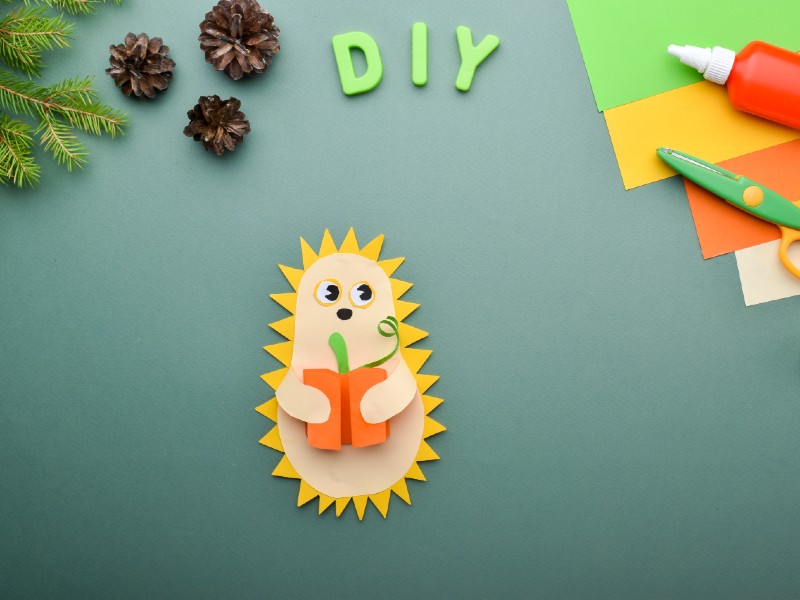
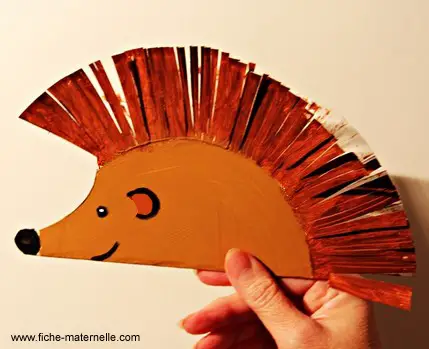 Source: https://cutediyprojects.com/diy/easy-paper-craft-projects-can-make-kids/attachment/paper-plate-hedgehog/Hedgehog spines are great fun to represent in art, but if you’re working with a little kid, you are quite likely to want to tone the spikes down a bit, without losing the look of them. This craft manages to do that. It’s also great for practicing motor skills and is easy, cute, and quick.
Materials
To make a fringed hedgehog, you should get:
- Light brown card
- White glue
- Black pen
- Scissors
- Black card
Step 1: Cut Out A Circle
Start by cutting a circle out of your piece of card. You should then fold this in half.Next, you are going to put a ring of glue between the two pieces of card, but about two inches from the curved edge of the circle. This will result in the middle part of the semi-circle being stuck but will leave the upper part (which we are going to turn into hedgehog spines) free.Finally, cut a “C” shape out of one edge of the semi-circle. The bottom edge of this “C” will form the hedgehog’s long, curvy nose, while the upper part will be the first spike on its forehead. Add a bit of glue to the head so that the two sides of the head stick together.
Step 2: Draw The Face
Now your child can get involved. They can draw a hedgehog’s smiling face on the hedgehog, using the “C” you just cut as a guide. While they do that, cut them another two small circles from the black card. They should glue one of these to each side of the hedgehog’s snout to make a cute black nose.They may also want to add some feet to the hedgehog using their black pen, or with some lighter colored brown card cut into toes.
Step 3: Fringe The Hedgehog
Next comes the fun part; adding the spines! You will need to help your child to begin with, but an older child should get the hang of this quite quickly.Use the scissors to cut lots and lots of thin slits down the part of the semi-circle which is not stuck together. These are the hedgehog’s spines. The card should start to spring and curve in different directions, giving the hedgehog a spiky look.They may want to cut a few little pieces out entirely to leave more space for the rest of the spines (or this may happen accidentally as they cut). That’s not a problem at all; it will make the hedgehog look better.Help them fringe the edge of the card from the top of the hedgehog’s head all the way around its back and down to the bottom of the semi-circle. You should now have an adorable hedgehog! You can help them neaten up any spikes that still look a bit square, and it’s all done.
Leaf Hedgehog
 Source: https://www.firefliesandmudpies.com/fall-hedgehog-craft/
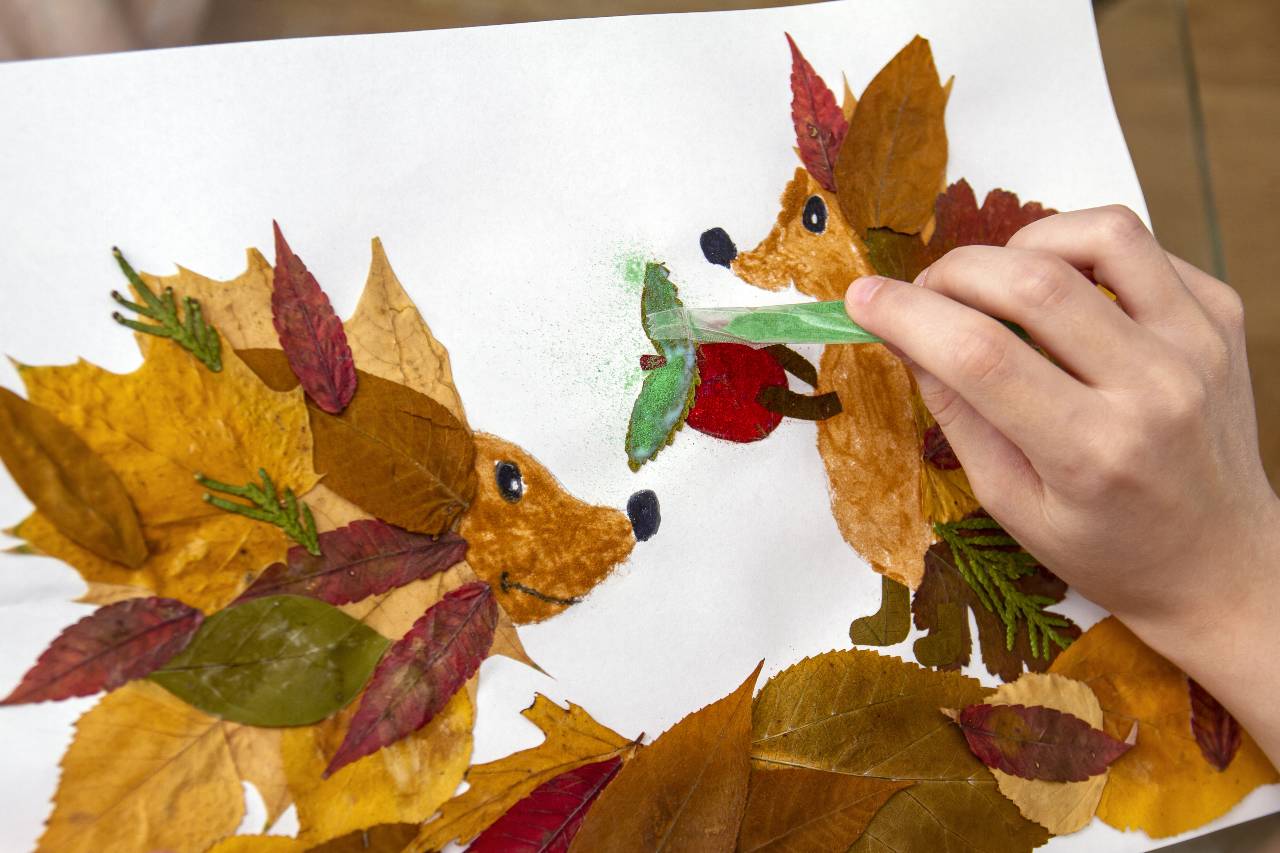
What could be better suited to fall than a hedgehog and some gorgeous fall leaves, both combined into an adorable and simple craft? Most parents love doing paper crafts with their kids because these are low-cost, low-mess, and lots of fun.
You also get a wonderful project at the end that you can hang on the fridge or gift to relatives or friends for a particularly special Thanksgiving or Christmas.
Hedgehogs are very popular animals with children, who love all their prickly spines and their incredible ability to roll into a ball. That means that this hedgehog craft is bound to be a hit with the little ones.
You can encourage them to give their hedgehogs inventive names and let them choose different colored pom poms for the noses so that every hedgehog is unique. The hedgehogs can also be made in different sizes, allowing you to create an entire family in bright fall colors.
This craft will need a bit of adult input if you are cutting out the leaves by hand, but it is generally a pretty simple one, and once you have some leaves ready, you can let your child get busy with the sticking ““ the bit they will find the most fun.
One of the great things about the hedgehog craft is you don’t have to be neat or tidy to get good results; it will look wonderful whatever the child does!
Popsicle Felt Hedgehog
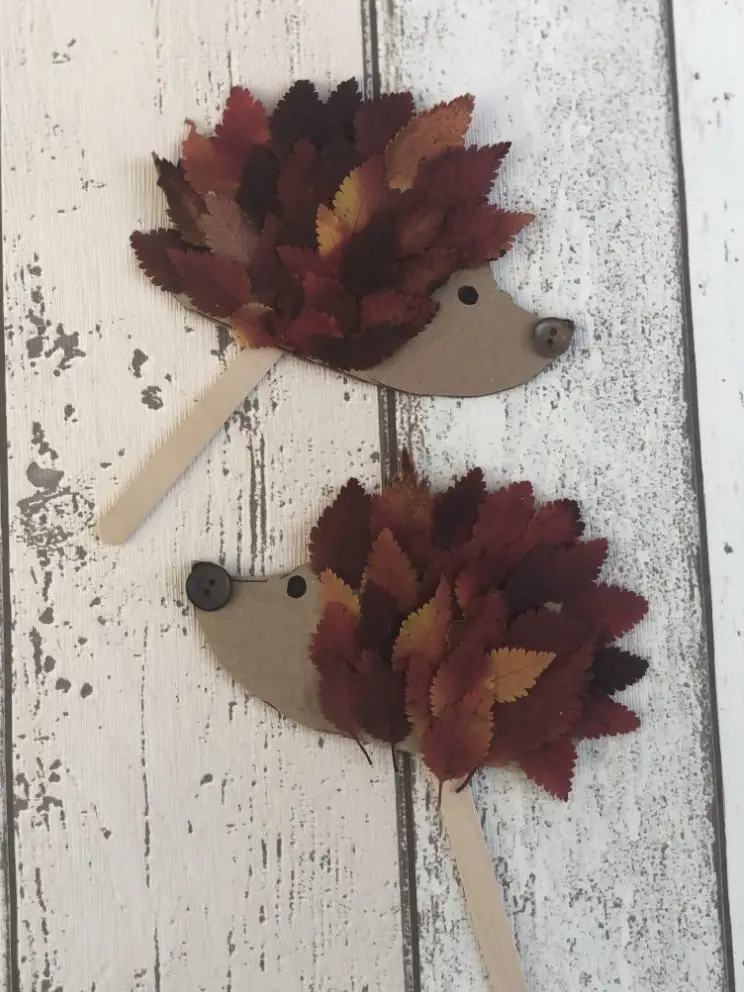 Source: https://daisiesandpie.co.uk/hedgehog-craft-for-kids/If your child likes crafting with Popsicle sticks, you can make a beautiful little hedgehog on a stick ““ and this is ideal for inclusion in a puppet theater or similar project.
Materials
You will need:
- Dark brown felt
- Light brown felt
- Green felt (optional)
- Light brown cardboard
- 1 Popsicle stick
- Glue gun
- White glue
- Black pen
- Scissors
Step 1: Cut Out The Spines
If your child isn’t old enough to help with cutting out the felt, it may be best to do this in advance, so you have it ready for the craft before they join you. If you don’t, you may find they’re bored before they’ve even begun, as this will take a little while.You are going to cut multiple spines out of both kinds of brown felt. You should make these pointed at the tips, with rounded ends that will be easy to glue to the card when you’re ready.
Step 2: Draw A Hedgehog
Next, get your child to help you draw a hedgehog outline onto the brown cardboard. Again, this can be a very simple shape; you don’t have to make it complicated. Be generous with the sizing so you have enough space for gluing on spines, but remember that it’s going to fit on a Popsicle stick, so it shouldn’t be too big.Once you’re happy with the template, cut it out.
Step 3: Glue The Spines
You’re going to start at the back of the hedgehog, and help your child to start gluing the felt spines you have cut to the cardboard. You can layer these up as you work your way along, letting the new spines overlap with ones you have already placed.Don’t glue the ends of the spines down; you want to leave these loose so they stick up and look spiky. As you work, you should see the spikes of the hedgehog forming as the felt overlaps itself.You can do both sides of the hedgehog if you want so that it’s a reversible stick puppet, or just one side if you don’t want to spend too long on the craft. You can speed things up a bit by using the glue gun, but you need to make sure your child is old enough to safely handle it (or do this part yourself if not).
Step 4: Add The Popsicle Stick
Once the hedgehog has dried, glue the Popsicle stick to the back of the hedgehog (if you’ve made a double-sided hedgehog, don’t worry ““ just choose one side to make the back. Use the glue gun to get a good, firm bond.
Step 5: Draw The Hedgehog’s Face
Add the last details of the hedgehog by helping your child draw on a round nose at the top of the hedgehog’s snout, and a little black eye near the first layer of spines. You can also use a googly eye if your child wants to, but a drawn one will look just as good.
Step 6: Include Leaves (Optional)
If you want to, you can cut some little green leaves out of felt and help your child glue these around the Popsicle stick, or around the hedgehog so it looks like he is rooting through the leaf litter.If you are planning to use hedgehogs in a puppet theater, you might like to make some baby hedgehogs too. You can use the same method, but scale it down a bit, and use toothpicks instead of Popsicle sticks for the baby hedgehogs.
Conclusion
Hedgehog crafts are very fun and varied, and you can do almost anything to create these iconic little creatures. No matter what kind of craft your child likes, you’ll find a way to create hedgehogs using that material. These are cute at any time of year and can be a great way to get your child interested in nature.
Comments
0 comments