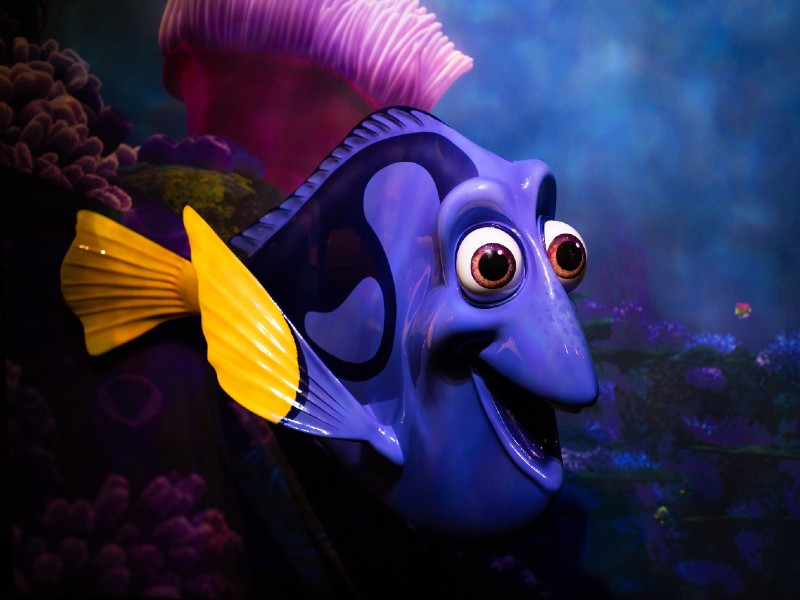
There is no doubt “Finding Dory” is one of the most notable animated films from the last decade. Kids and kids at heart alike appreciate the lovable characters and their pretty designs. If you’re fond of crafting cute artworks, Finding Dory crafts would be a fun activity for you. Most Finding Dory arts and craft activities are child-friendly and don’t need fancy materials. You can use the available art supplies in your house and still get a good result. Here are five easy and fun crafts that you can do during your free time.
1. Finding Dory Envelope Puppets
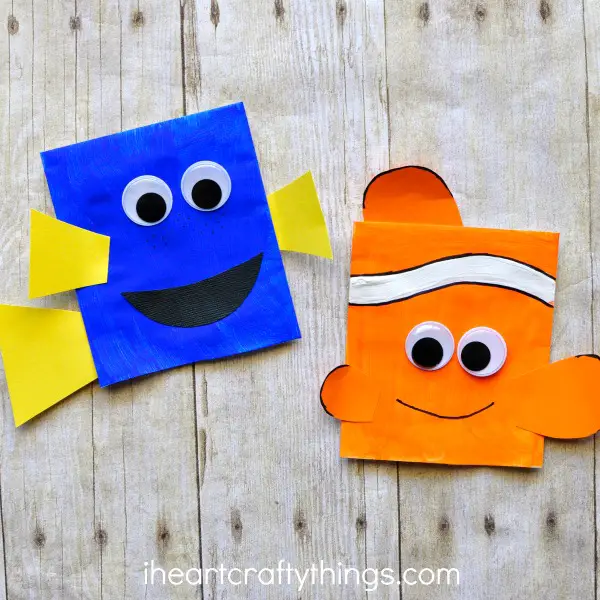 Source: By Caroline @ iHeartCraftyThings, “Finding Dory Crafty Envelope Puppets” (https://iheartcraftythings.com/finding-dory-craft-envelope-puppets.html)The Finding Dory envelope puppets can also serve as a makeshift container for cards and other thin materials. Another good thing about this artwork is that you can do both Dory and Nemo with it. Here are the materials you would need for this artwork:
- 1 standard #10 envelope
- Paint and paintbrush
- Construction paper
- Scissors and glue
- Google eyes
- Marker
Make The BodyCut the standard envelope crosswise and paint the body with your desired color. Use blue for Dory or orange if you’re doing a model for Nemo. Add DetailsCut out squares from the construction paper and attach them to both sides of the body. Dory’s yellowfins and tails should be cut a bit more “square-y” than Nemo’s round orange fins. Use the black marker to add more details. Glue Facial ExpressionsLastly, it’s time to add facial expressions to your artwork. Glue the googly eyes in the center of the body. Add or draw a mouth below it (you can use any facial expression that you like.)
2. Finding Dory Hank The Octopus
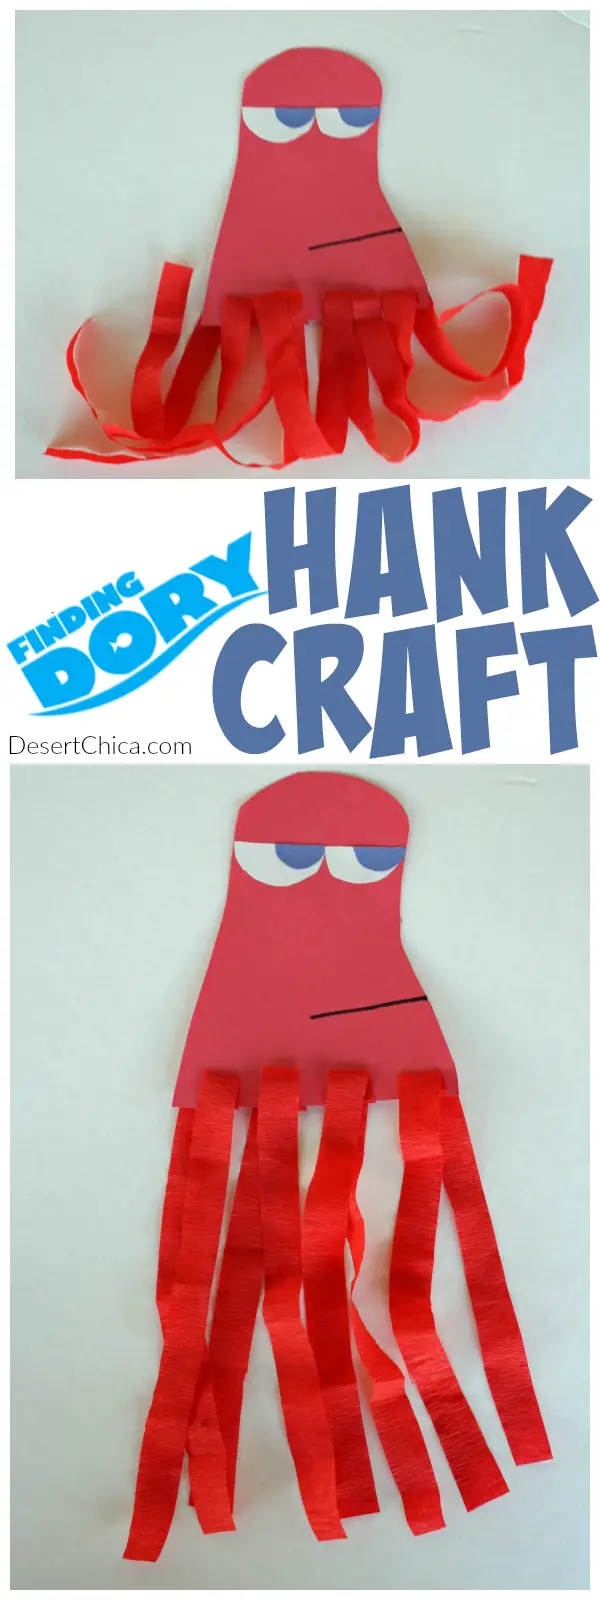 Source: By Karen @ Desert Chica, “Finding Dory Craft: Hank the Octopus” (https://desertchica.com/finding-dory-craft-hank-the-octopus-craft/)This next artwork is for people who like the caring and disguise-master septopus, Hank. You can also share this activity with your kids or younger siblings. Its simplicity is what makes it an excellent activity for children. Take out your art supplies! Here are the following materials you need to create this artwork.
- Construction paper (preferably in blue, red, and white)
- Black Marker
- Crepe paper
- Scissors and glue
- Hank’s photo for reference
Make Hank’s HeadLet’s start by drawing or tracing Hank’s octopus head on red construction paper. You can try to wing it or print a cutout and trace the shape. Glue Facial ExpressionsSince Hank’s eye expression is a little bit droopy, we can also make it droopy by cutting two “B” shapes. Use the white construction paper for this one. After that, cut out blue irises from the blue construction paper and paste them into the empty white space. Don’t forget to draw Hank’s signature Pokerface lips. Attach The TentaclesLastly, cut out strands of crepe paper or red construction paper and attach them to Hank’s body. Make sure only to use seven strands because hank is a septopus.
3. Finding Dory Paper Plate Craft
 Source: By Michelle @ Crafty Morning, “Finding Dory Paper Plate Craft” (https://www.craftymorning.com/finding-dory-paper-plate-craft/)Most of Finding Dory’s story happened in water, making it a popular addition to artworks. In this activity, you can use blue paint to simulate the look of the movie.Prepare the following materials for this artwork:
- 2 paper plates
- Glue or tape
- Black marker
- Saran wrap
- Blue paint
- Blue, yellow, and white construction paper
- Sand and green pipe cleaners
Create The BackgroundCut a large hole in one of the paper plates and cover it with saran wrap. Sponge-paint the other paper plate with blue or sky blue paint. After this, you’re partially finished with the background.Draw And Glue DoryNext, it’s time to create or cut out the main character: Dory. You can use a printed image of Dory or draw your own artwork. When doing the second option, use blue, yellow, and white construction paper. Add The EnvironmentPaint some glue on the bottom of the paper plate (without the saran cover) and sprinkle a bit of sand on it. Use bent green pipe cleaners as aquatic plants, and tape them in the background. Final ProductGlue the cutout Dory in the background paper plate. Make sure to keep the whole thing as flat as possible. Finally, add the cover at the top of the mosaic. The saran wrap will keep all of the materials in place.
4. Finding Dory Shell-made Fishes
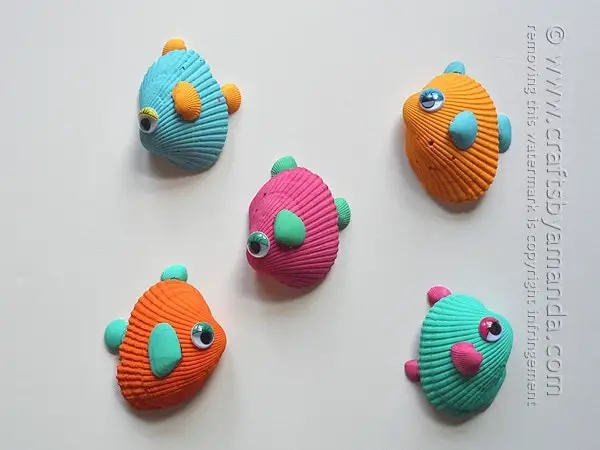 Source: By Amada @ Crafts by Amanda, “Tropical Seashell Fish Craft” (https://craftsbyamanda.com/tropical-seashell-fish-craft/)For a more authentic ocean art experience, your best bet is to use something from the sea as a material for your art. In this artwork, you will need to use a hot glue gun. Parents should help children in attaching the materials to avoid injuries. Venture out to the ocean and collect the following materials:
- Seashells (both big and small)
- Googly eyes
- Paint
- Hot glue gun
Sort Out Size And ShapeIn this artwork, you need both big and small seashells for the body and fins. Separate the big shells from the small ones, and group out which shells would work perfectly with other ones. Add ColorAdd the appropriate colors of the fish by using your paint and paintbrush. As usual, the blue, yellow, and white paint colors would work great for Dory. But you can use any colors that you want for your design. Attach The Fins And Googly EyesLastly, attach the fins to the fish’s body using the hot glue gun. Don’t forget to also add the googly eyes properly. The shell’s connected clamp should be where the mouth of the fish is.
5. Finding Dory Bookmarks
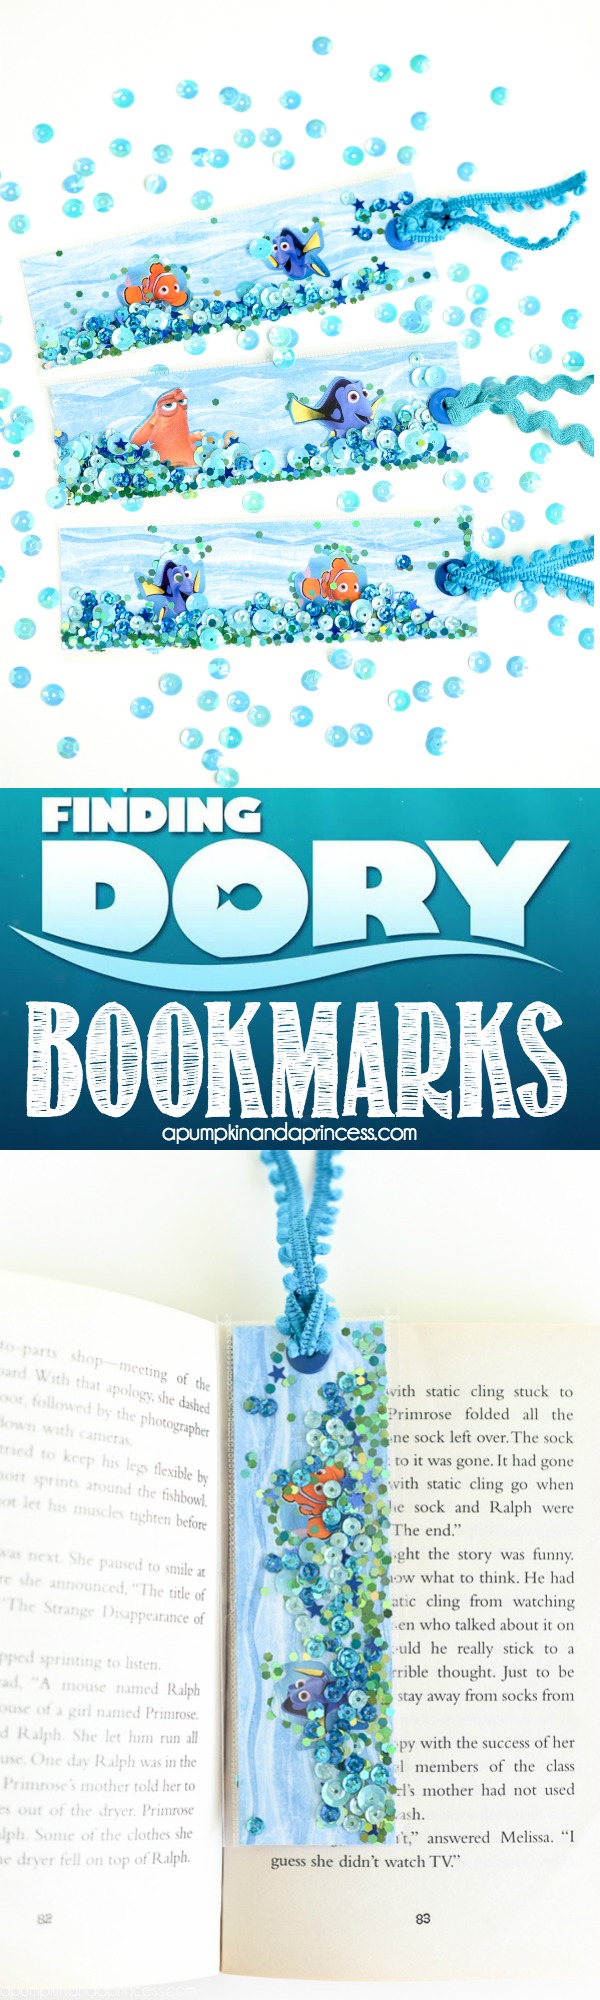 Source: By Crystal Owens @ A Pumpkin & A Princess, “Finding Dory Bookmarks” (https://apumpkinandaprincess.com/finding-dory-bookmarks)The final artwork for this list is the classic Finding Dory bookmark. This is quite a simple craft to make, and only needs a couple of materials. If you made some of the artworks on this list, the materials might be available to you already.Make sure that all the following objects are available:
- Construction paper (blue, yellow, and white for Dory)
- Black marker
- Scrapbook paper
- Ribbon
- Sequins, glitters, and other things to make your bookmark fancy (optional)
Make the Bookmark BodyCut about 1.75 x 6 inches of scrapbook paper. Make a miniature Dory figure using your black marker and construction paper. Alternatively, you can use any printed cutout that you have. Clear CasePut your decorated scrapbook paper in your clear case or clear sleeves. You might have to use a Fuse tool to keep everything together. The good old tape would also work fine. Ribbon TyingMake a hole with a puncher and tie a piece of ribbon on it.

Comments
0 comments