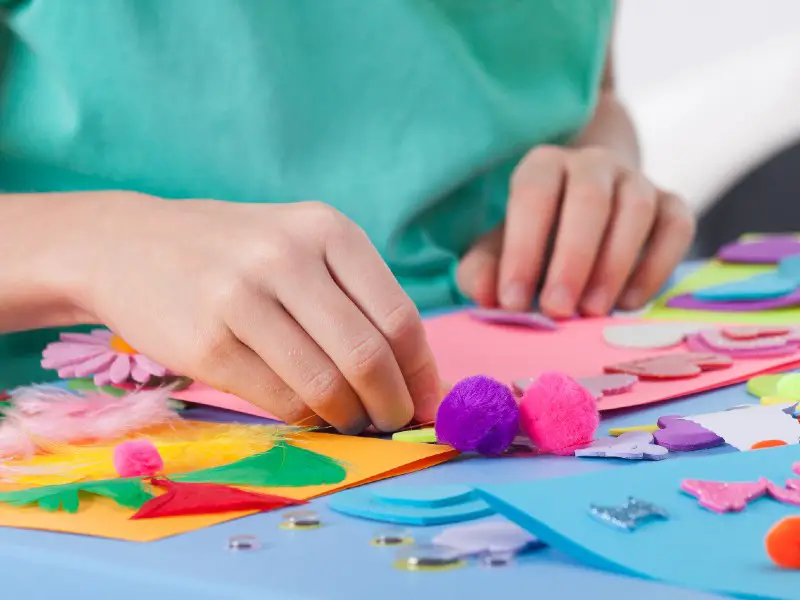
It’s hard to stay bored with these top 15 crafts for 12 year olds!
#1 Personalized Flowerpots
 Source:https://diycandy.com/flower-pot-craft/ This craft is perfect if you want to spice up your 12 year olds’ room and give them a chance to unleash their creativity. It’s incredibly easy so you don’t need any complicated craft skills or experience to get started. Just follow the steps below and you’ll have a beautiful vessel for your favorite plant in no time.
You Will Need:
- Ceramic flower plots – You can find fantastic ones at IKEA (find them here) but craft stores like Hobby Lobby have some too.
- Letter stickers – Make sure they’re big enough to stand out on the flower pots you’ve bought.
- Sharpies – Ensure they’re oil-based.
- Rubbing alcohol
- Paper towels
- Cotton swabs
How to Make It:
- Clean the ceramic pot with rubbing alcohol and a paper towel. Any residue should be removed and all the oil should be washed from your fingers.
- Leave the pot to dry.
- When it’s dry, put the letter stickers onto the pot. Spelling a name is popular but you can choose any word you fancy.
- Now, grab your Sharpie and paint dots around the letters. They should be close together when near the letters, and further apart as you travel away from the letters. It’s up to you whether you use one color or more.
- Leave the ink to dry completely.
- Pull the letter stickers off the pot.
- If any ink has leaked through the stickers, use a cotton swab and rubbing alcohol to remove it.
- You’re finished!
#2 Marbled Phone Case
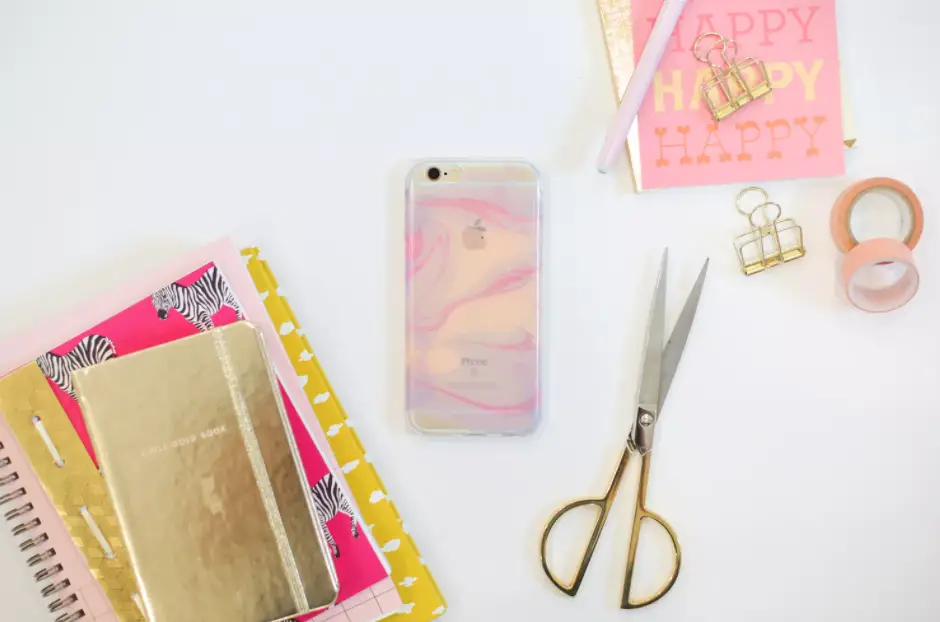 Source:https://www.thesprucecrafts.com/diy-marbled-phone-case-4141095 Having a cellphone case is a must – after all, you don’t want to break your phone! But, customizing it to match your style is a super fun, unique opportunity. So, why not create a one-of-a-kind marble look?
You Will Need:
- Clear plastic phone case – Of course, make sure it fits the phone!
- Nail polish – Choose three different colors or shades to get a proper marbled effect.
- Toothpick and/or paintbrush
- Bowl of water
How to Make It:
- Place the bowl of water on a flat surface.
- Use the brush in the nail polish to put a few drops of your first color onto the surface of the water. Preferably, you need to work quickly but gently. Drop the polish into the bowl from an inch above the surface. If you drop it from a great height, it will sink.
- Add the second nail polish color in the same manner. Try to land each drop on top of the first color. They’ll start to swirl around.
- Do the same with the third color.
- Use the toothpick or the paintbrush handle to carefully swirl the polish around. This creates a marbled look on the surface.
- Hold the cellphone case above the water with the outside facing the surface.
- Carefully touch the case to the surface of the water so the nail polish starts to stick. You don’t need to submerge it.
- Once you’re happy, removed it from the water and leave it to dry.
- Insert your phone and you’re finished!
#3 DIY Cupcake Lip Balm
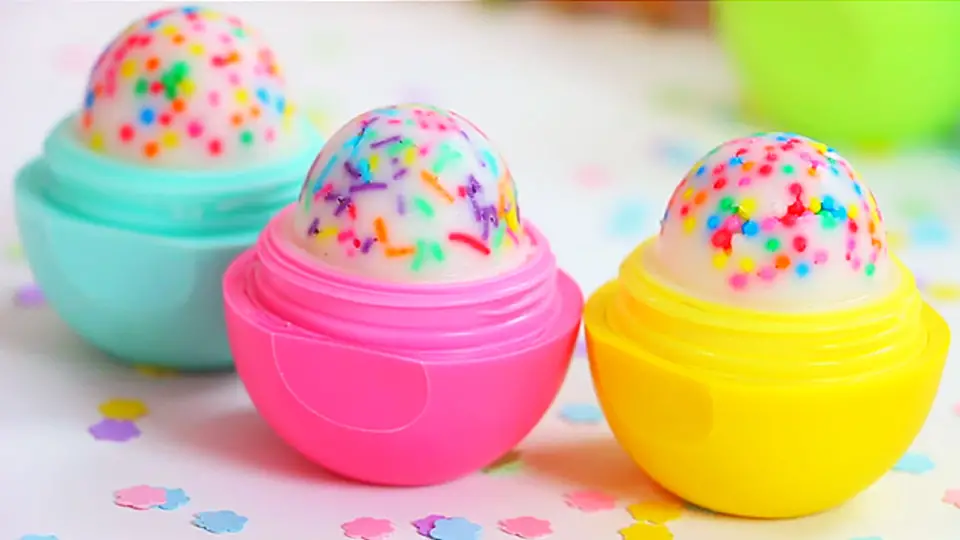 Source:https://diyprojectsforteens.com/diy-eos-lipbalm-cupcake/ You’ll be the envy of all your friends with this moisturizing, cupcake-scented lip balm!
You Will Need:
- EOS lipstick container
- Small bowl
- Vaseline
- Knife – A butter knife or plastic knife, whichever you’d prefer.
- Sprinkles
- Cotton swab
- 1 tbsp Coconut oil
- 1 tbsp Beeswax
- Vanilla
- 1/2 tsp Vitamin E capsule
How to Make It:
- Cut the excess lip balm out of the EOS container.
- Take the center disc out of the EOS container.
- Take the lip balm out of the crate.
- Apply a thin layer of vaseline to the lid of the EOS pot with the cotton swab.
- Add the sprinkles to the vaseline layer.
- Put the beeswax, coconut oil, and vanilla into the bowl.
- Prick the Vitamin E capsule and put the contents in the bowl.
- Put the bowl into simmering water.
- Once everything has melted, pour the lip balm into the EOS lid over the sprinkles.
- Put the middle part back into the container and add more lip balm to ensure it’s full.
- Put it into the fridge.
- Leave it for a few moments to set.
- You’re finished!
#4 Jazz Up Those Keys
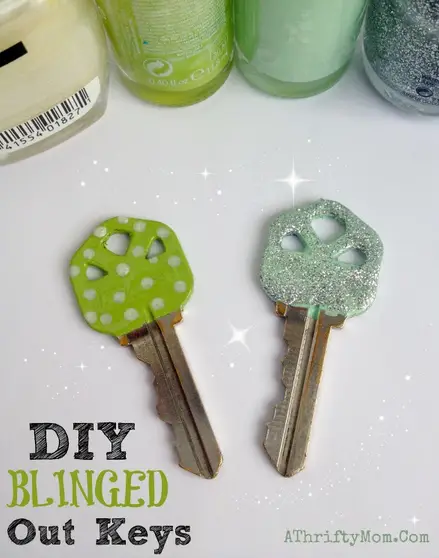 Source:https://athriftymom.com/diy-blinged-out-keys-tutorial-stay-organized-with-a-little-sparkle-hacks/ Getting a house key for the first time is a memorable occasion. But, you can make it even more special by jazzing it up a bit.
You Will Need:
- Key – Typically, this will be a house key.
- Toothpick
- Bobby pins
- Nail polish
- Tape
- Rubbing alcohol
How to Make It:
- Clean the key with rubbing alcohol.
- Let the key dry.
- Tape the section of the key that you do not want to paint. This will help stop any drips.
- Put the nail polish on both sides of the key. This will take a couple of coats usually.
- Put your key on the bobby pin and hang it up to dry.
- Once it is dry, use a toothpick to create designs.
- Leave it to dry.
- You’re finished!
#5 DIY T-Shirt Tote
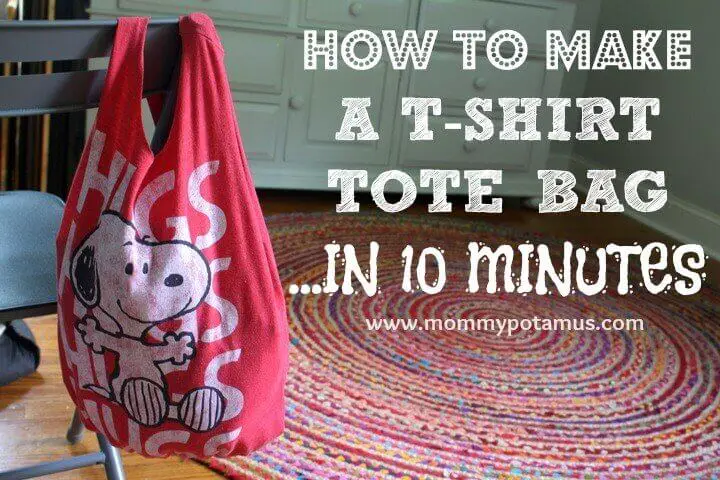 Source:https://mommypotamus.com/no-sew-t-shirt-tote-bag-tutorial/ Don’t want to splash the cash on a school bag? Make your own out of an old t-shirt!
You Will Need:
- Old t-shirt – The fabric should be thick to ensure the tote bag is sturdy.
- Fabric scissors
- Fabric marker
How to Make It:
- Lay the t-shirt flat on a hard surface.
- Cut the sleeves off the t-shirt. Folding the top in half will make this easier so you can cut both at the same time.
- Turn the t-shirt inside out.
- Trace the outline of a bowl on the neckline with the marker.
- Cut the neckline area.
- Figure out how deep you want the bag to be.
- Use your marker to trace a line across. Remember, it’s likely to stretch.
- Cut from the bottom of the t-shirt up to the line you drew, creating 1-inch strips along the bottom.
- Cut both the front and back layers at the same time to ensure they match.
- Take the first pair of fringe and tie it into a knot.
- Tie two more pairs like this.
- Take one strand from the middle pair and tie it into a knot with one strand from the left set.
- Take the other strand from the middle pair and tie it with one strand from the right.
- Take the leftover strand on the right and tie it to the next set of strands. Do this until all the strips are tied.
- Turn your t-shirt tote right side out.
- You’re finished!
#6 Emoji Bookmarks
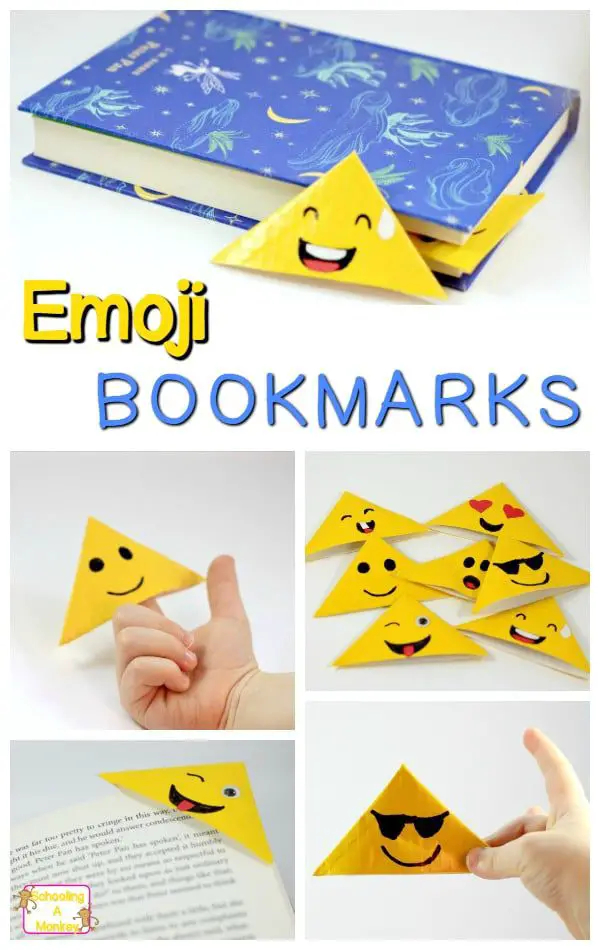 Source:https://www.steamsational.com/duct-tape-emoji-bookmarks/ If you’re constantly dog-earing your book pages, this cute emoji bookmark is the craft for 12 year olds for you. The best part is it’s super easy to make!
You Will Need:
- White paper
- Scissors
- Pencil
- Googly eyes
- Red paper
- Yellow duct tape
- Scotch tape
- Permanent marker
How to Make It:
- Fold the white paper in half.
- Draw a 2-inch isosceles triangle along the fold.
- Cut the triangle. Make sure you leave the folded edge alone.
- Tape the short end to create a triangular pocket.
- Cut a strip of yellow duct tape longer than the triangle.
- Put it on the table, sticky side up.
- Put the triangle on the duct tape so one side is completely covered.
- Wrap any leftover ends around the paper.
- Repeat the same process on the other side.
- Cut any extra tape off.
- Ensure the bookmark can open. If not, unstick the duct tape and cut the excess.
- Use googly eyes, permanent marker, red paper, and white paper to create your favorite emoji face.
- You’re finished!
#7 Yarn Wrapped Letter Decorations
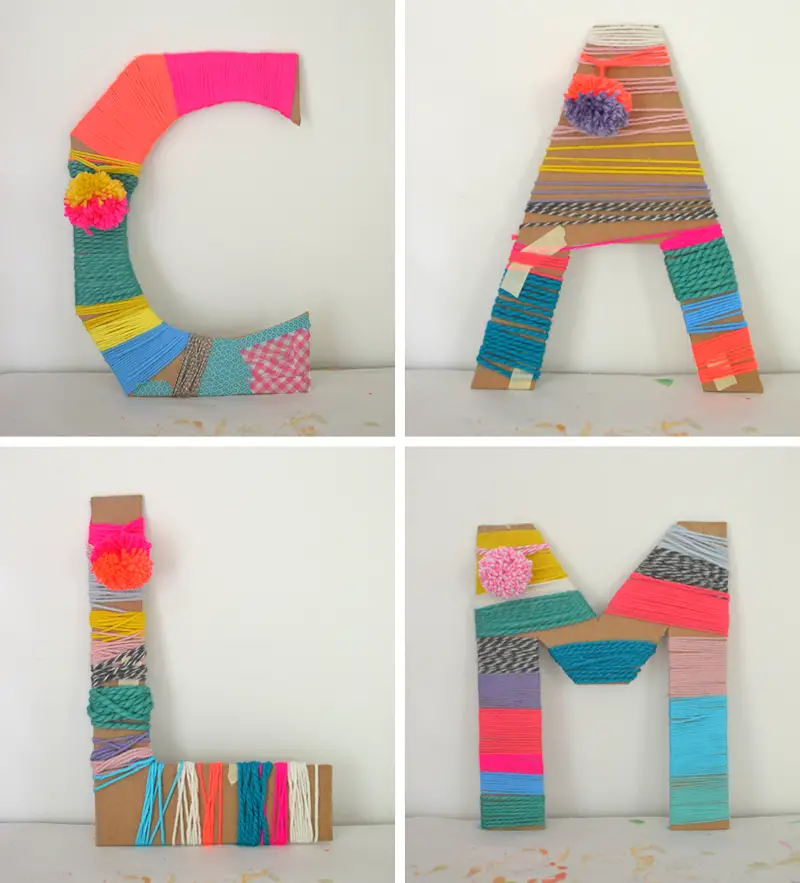 Source:https://www.artbarblog.com/yarn-wrapped-cardboard-letters/ Not only are these fun to make but they are a decorative addition to any bedroom wall.
You Will Need:
- Cardboard
- Sharp scissors
- Yarn – You can find some spools on Amazon or visit your local craft store. The more colors the better!
- Pen or pencil
- Masking tape
How to Make It:
- Draw the letter on the (typically the first letter of your name) onto the cardboard. You can make it as big or as small as you like.
- Cut out the letter.
- Pick your first yarn color.
- Tape the end of the yarn to the back of the letter.
- Start wrapping the yarn around and around until you can’t see the cardboard anymore.
- You can switch colors whenever you like by cutting, taping, and repeating the process above.
- Once you can’t see any of the cardboard, you’re finished!
#8 DIY Fluffy Bubblegum Slime
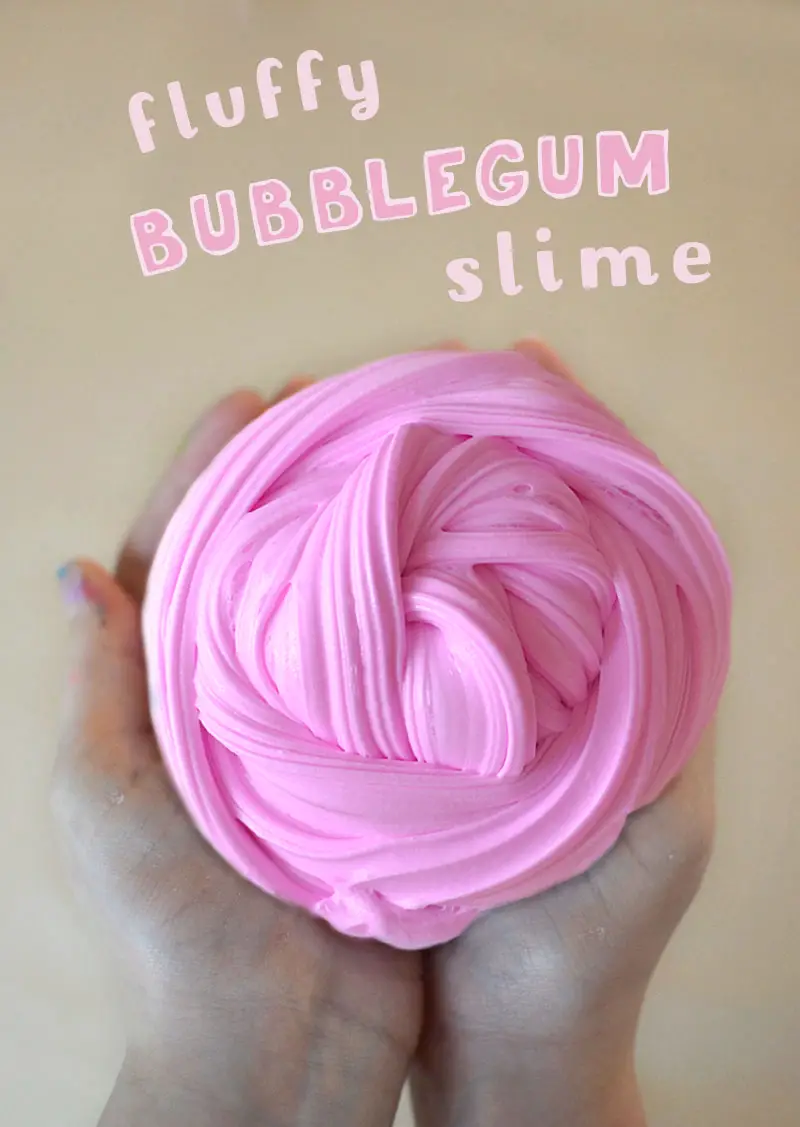 Source:https://www.artbarblog.com/fluffy-bubblegum-slime/ Slime was a massive trend for a while (as we’re sure you know). But, just because you don’t see people raving about it anymore, doesn’t mean it’s not ridiculously satisfying to make and play with.
You Will Need:
- 240ml PVA glue
- 240ml shaving cream
- Few drops of food coloring
- 4 to 5 tsp corn starch
- 5 to 6 tsp activator – This is just 1 tbsp of Borax one cup of hot water mixed together.
How to Make It:
- Mix the glue with half of the shaving cream.
- Add 4 tsp corn starch and mix well.
- Add the color.
- Mix.
- Add the activator one teaspoon at a time. Make sure you mix very well between each teaspoon. You will know if you’ve added too much since it starts ripping instead of being stretchy.
- Add the rest of the shaving cream.
- Mix well (again!).
- After that, you’re finished! This fluffy slime makes a wonderful crackling sound due to the air bubbles in the shaving cream.
- Store it in a plastic container to give you hours of fun!
#9 Colorful Lollipop Soap
Source:https://diyinspired.com/kids-soap-making-projects-soapsicles/ Showering will never be boring again with these DIY colorful lollipop soap sticks!
You Will Need:
- Soap coloring – You can find a bunch of colors on Amazon.
- 1 bar clear glycerine soap
- Grater
- Microwaveable bowl
- Popsicle mold
How to Make It:
- Grate the bar of soap into a soap pot (or any microwaveable bowl).
- Put it on the stove to make the soap. If you’re using the microwave, take it out every 10 seconds to stir it.
- Once it’s melted, add the coloring and mix until the color you want is achieved.
- Let it cool.
- Pour it into your popsicle mold.
- Keep the mold upright and watch as it hardens.
- When it’s slightly hard, insert a popsicle stick.
- Once it has completely set, push it out of the mold.
- You’re finished!
#10 Nebula Jar
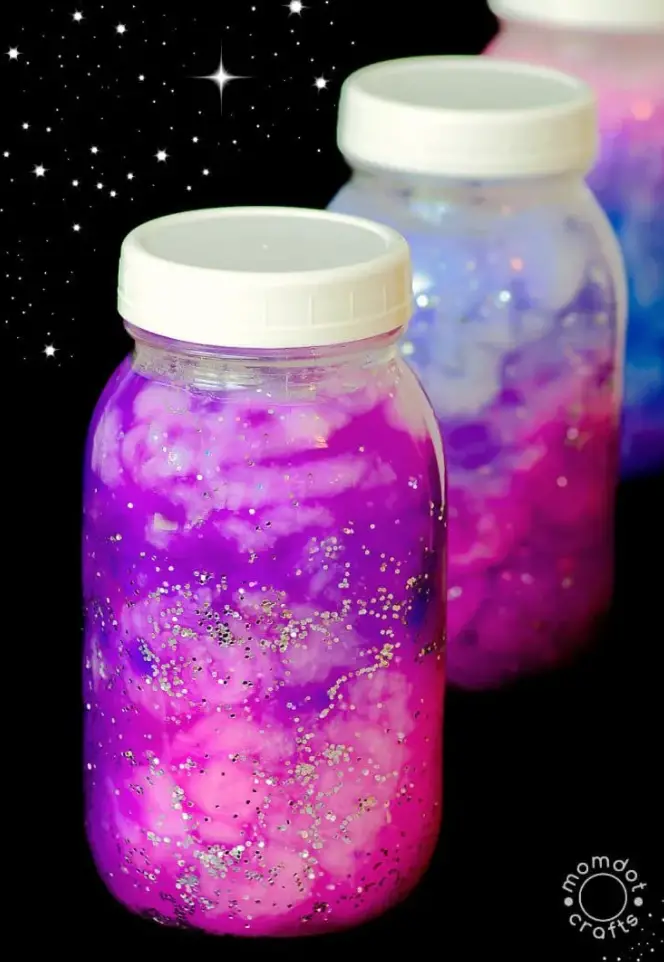 Source:https://www.momdot.com/diy-nebula-jar-instructions/ We can’t get enough of these galaxy jars. They are incredibly easy to make and we’re sure you’ll be hooked. Not to mention that they are fabulous decorations.
You Will Need:
- Glass mason jar
- Cotton balls
- Tempera paint – You need more than 2 colors to create a galaxy effect.
- Fine glitter
- Water
How to Make It:
- Fill the jar with water until it is one-third full.
- Place a few drops of paint into the water.
- Put the lid on the jar.
- Shake, shake, shake!
- Add some fine glitter. These act as the stars.
- Stretch the cotton balls.
- Put them into the water, making sure they settle at the bottom. Don’t stop adding elongated cotton balls until the entire bottom level is covered.
- Pour some more water into the jar until it is â…” full in total.
- Add a different colored paint into the jar.
- Repeat steps 3 to 4.
- Add the final â…“ of water and repeat steps 2 to 4.
- You’re finished! It will create a wonderful galaxy (or nebula) effect!
#11 DIY Snowglobe
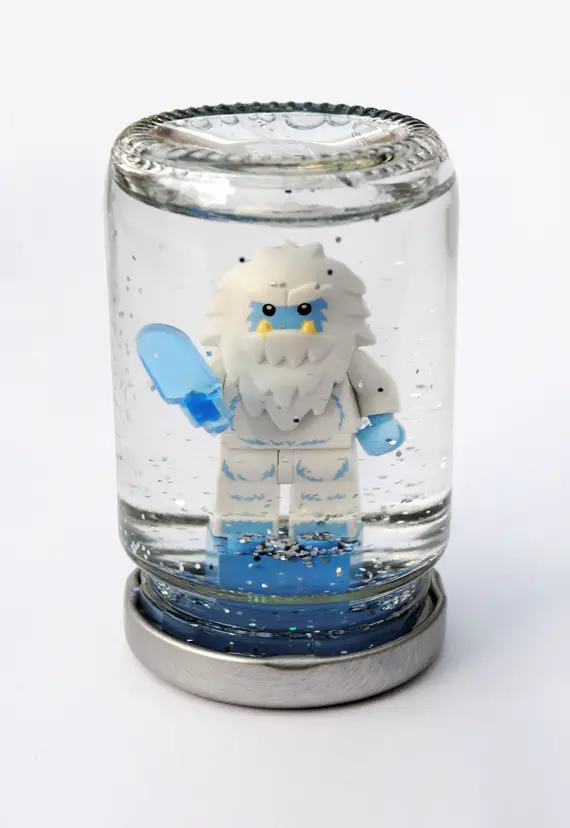 Source:http://www.minieco.co.uk/lego-snowglobes/ If you’re ever stuck for gift ideas. This craft for 12 year olds makes the perfect present!
You Will Need:
- Glass jar with a lid
- Lego figure
- Lego blocks
- Glitter – Don’t use fine glitter as this won’t swirl like snow. Instead, it will just float.
- Glycerine and bathroom sealer – Both of these are optional.
- Superglue
How to Make It:
- Put your lego figure onto the lego blocks. Make sure it fits inside your jar.
- Make sure all the labels are off the jar.
- Place a teaspoon of glitter into the bottom of the jar.
- Put the superglue onto the underside of the lego block. Adults will need to help with this as it could all get a bit sticky otherwise!
- Stick this to the underside of the lid.
- Let it set.
- Fill the jar with water. Make sure it is as full as possible to stop increase the airtightness.
- Screw the lid on tightly.
- You’re finished!
Optional: If you fancy making it super safe, run a waterproof sealer around the joint between the lid and the jar.
#12 Scrummy Rainbow Rock
Who said crafts can’t be tasty? This rainbow rock looks and tastes amazing – most of all, it’s easy to make!
You Will Need:
- 120ml light corn syrup
- 120ml water
- ½ tsp flavored oil
- 400g granulated sugar
- Food coloring
- Powdered sugar
- Cooking spray
- Candy thermometer – This is optional. However, it will be a big help.
How to Make It:
- Spray a baking sheet with cooking spray.
- Put the sugar, water, and light corn syrup into a big saucepan.
- Place the saucepan over medium heat and stir until completely combined.
- Leave it on the stove until it reaches 300 degrees Fahrenheit. It’s worth purchasing a candy thermometer to do this properly.
- Take off the heat.
- Add food coloring and flavored oil.
- Stir well.
- Pour the mixture onto the baking tray.
- Let it cool for half an hour.
- Release the candy from the sheet.
- Brush both sides with powdered sugar.
- Crack the sheet into pieces and store it in an airtight container.
- Repeat for every color of the rainbow!
#13 Paper Bead Necklace
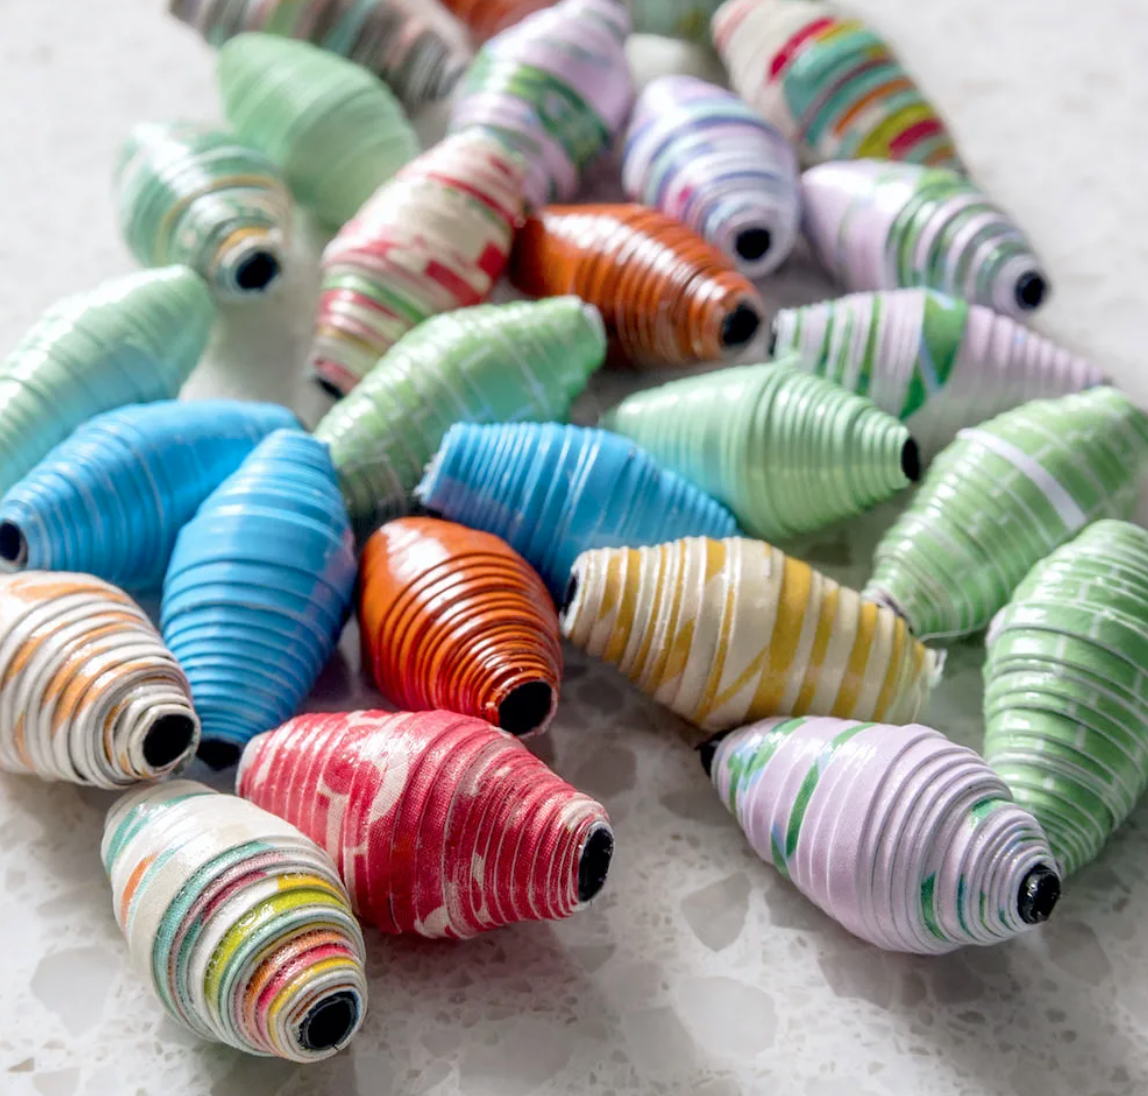 Source:https://modpodgerocksblog.com/paper-beads/ These beads can take a little time to get that hang of but once you do, the effect is amazing.
You Will Need:
- String
- PVA glue
- Corrugated card
- Straw
- Ruler
- String
- Scissors
How to Make It:
- Cut the paper into long strips.
- The bigger the strips, the bigger the beads will be.
- Put some glue along the strip.
- Use the straw to help roll the strip into a bead shape.
- Let it dry for a couple of minutes before taking the straw out.
- Repeat this process until you have as many beads as you want.
- Grab the string and thread your beads onto it.
- Tie a knot and you’re finished!
#14 Weave a Wall Hanging
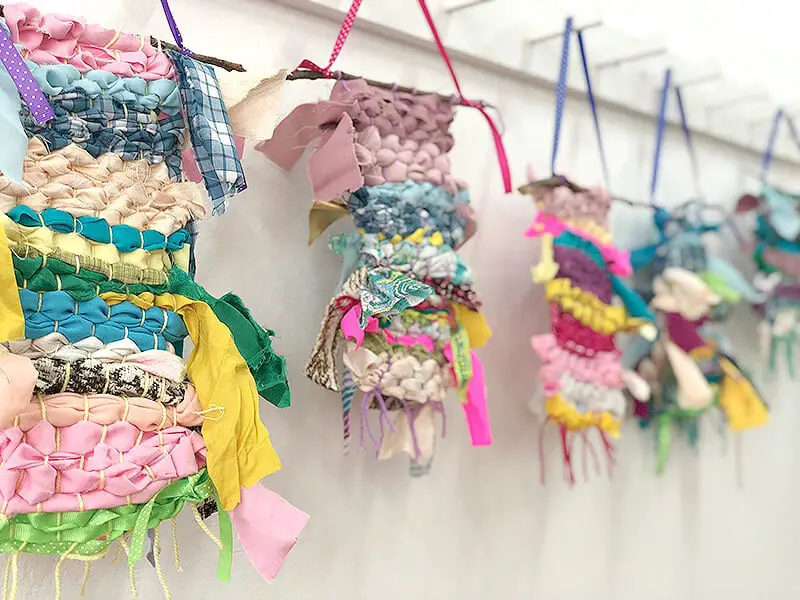 Source:https://artfulparent.com/how-to-create-simple-weaving-for-kids/ Even if you don’t have a loom, you can still weave a fantastic wall hanging with the help of cardboard. See how below.
You Will Need:
- Cardboard
- Colored yarn
- Pencil
- Scissors
- Tape
- Colorful beads
How to Make It:
- Cut out a circle from the cardboard.
- Cut notches around the circle. It doesn’t matter how many you cut.
- Tape yarn to the back of the circle and run it across to the adjacent cut. Continue doing this until all notches are connected to their opposite.
- Tape ending yarn to the back.
- Start weaving by tying the yarn into the center.
- Go under the first and over the second strand. Keep going until your piece is as big as you like.
- Once you’re finished, tape the yarn to the back of the circle and that’s it!
#15 Atmospheric Suncatchers
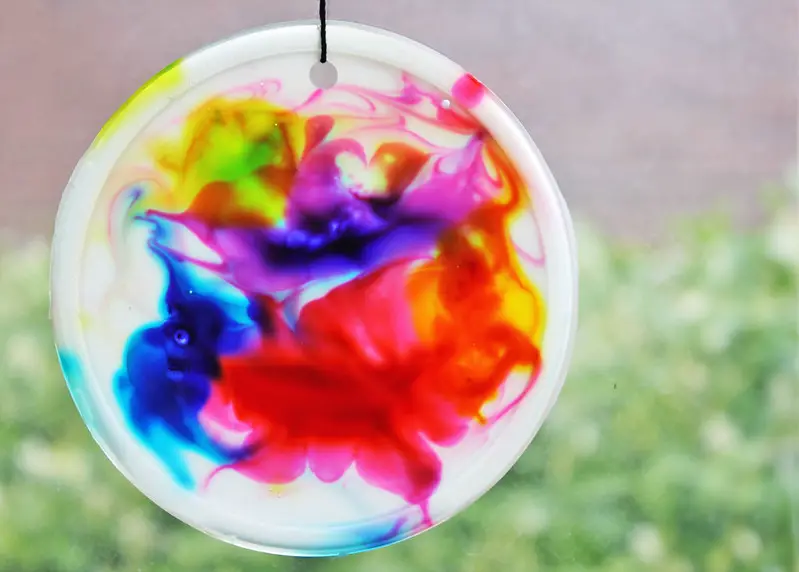 Source:https://babbledabbledo.com/art-for-kids-cosmic-suncatchers/ Decorate your garden or bedroom window with a unique colorful suncatcher plate.
You Will Need:
- String
- Hole punch
- Toothpicks
- Plastic lids
- White glue
- Food coloring
How to Make It:
- Put glue into one plastic lid and make sure it covers the whole surface.
- Put drops of food coloring around the glue. Use as many colors as you like.
- Swirl the colors with a toothpick.
- Let it dry.
- Once dry, peel the suncatcher offer the lid.
- Punch a hole in the top.
- Add string.
- Hang wherever it’s sunny!

Comments
0 comments