

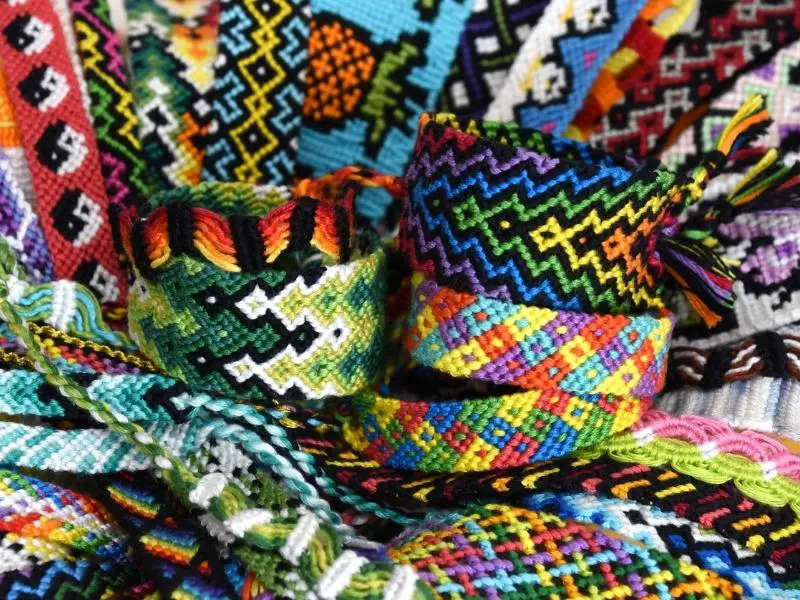
Friendship bracelets are a way to carry a reminder of your people around on your wrist. Here are 26 friendship bracelet patterns, from a three-strand braid you can finish in minutes to alpha patterns with pictures, with skill level, ages and a link to a tutorial for each.
Whether you want a sophisticated bracelet, an old-school summer camp one, or something a bit different, there is a pattern for every level. If you are new, start with #3, #6, #11 or #18.
Friendship Bracelet Basics
- Materials: cotton embroidery floss, scissors, tape or a clipboard to hold the start, and optional beads. Cut strands around 24 to 36 inches for simple patterns; some tutorials call for strands 60 inches or longer, so check the one you pick.
- The four basic knots: forward knot, backward knot, forward-backward knot and backward-forward knot. Each is made of two half-hitches. Most knotted patterns here use some mix of these.
- Getting started: tie the strands together in an overhand knot near the top and tape it down.
- Safety: beads, buttons and charms are choking hazards for children under 3. Keep scissors child-safe, and don’t tie bracelets so tightly that they cut off circulation.
1. Diamond Pattern Friendship Bracelet
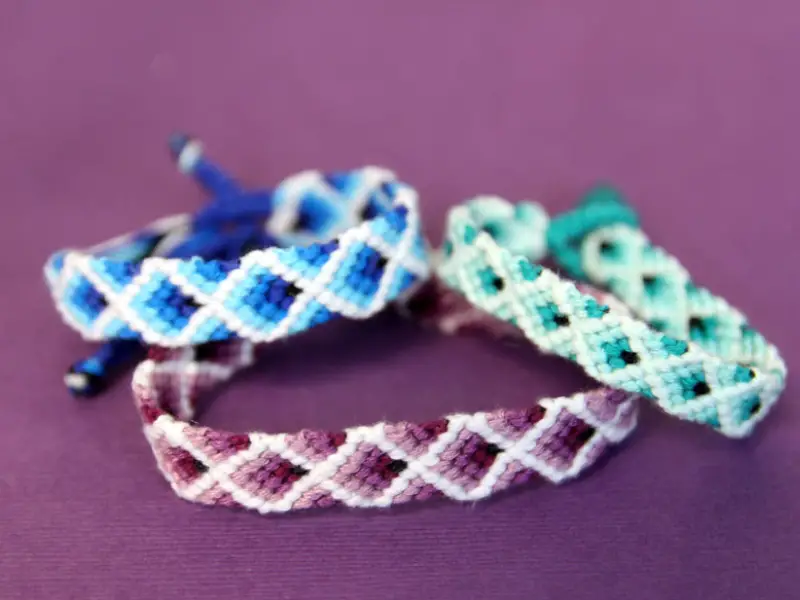
Medium | Ages 10+
Diamonds are a classic knotted pattern. Once you see the logic, you can stop checking the instructions.
You need: Embroidery floss in 2-4 colors, tape or a clipboard.
Read more at momsandcrafters.com
2. Alternating Knots Bracelet
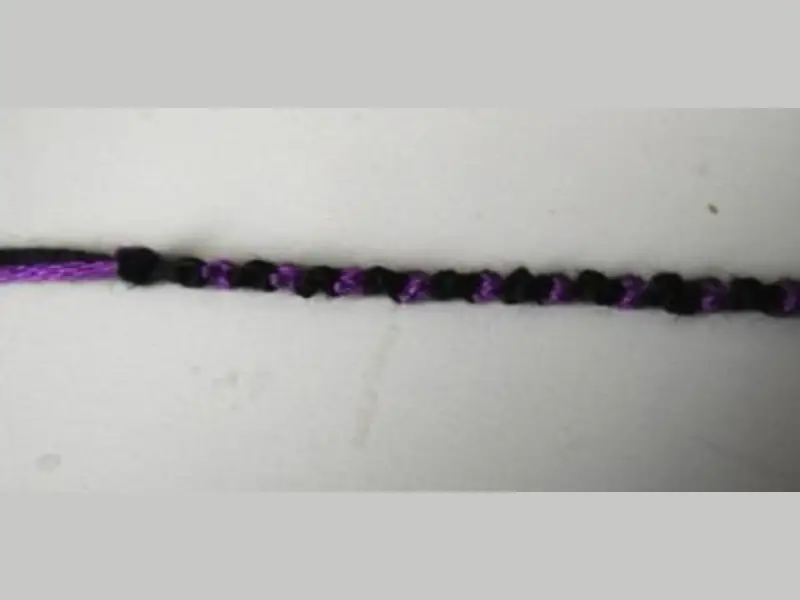
Easy | Ages 8+
Two colors make a neat pattern. The tutorial uses forward knots only, and the result is slim.
You need: Embroidery floss in two colors.
Instructions at braceletbook.com
3. Three-Strand Braid
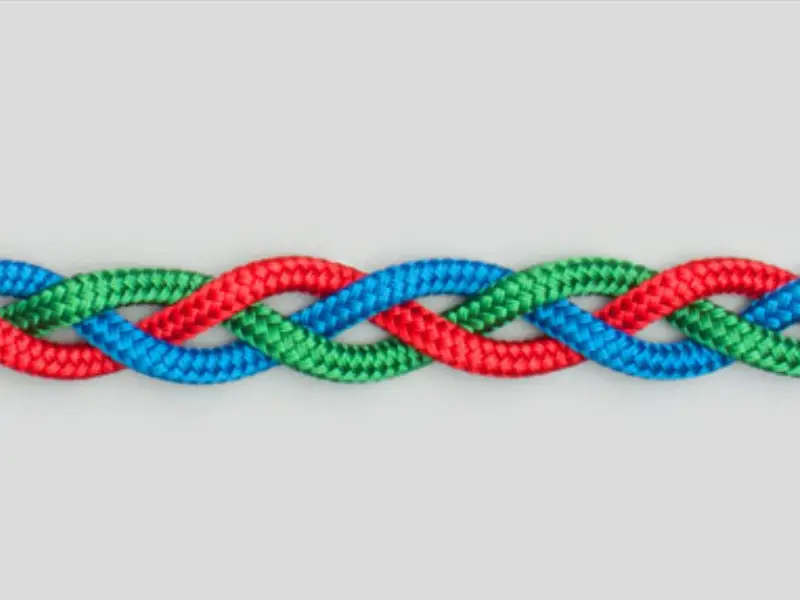
Easiest | Ages 5+
A plain braid in three colors uses up leftover floss. If you have ever braided hair, you know the move. There is a video to follow.
You need: Three colors of embroidery floss or yarn.
- Cut three strands about 24 inches long and tie them together near the top.
- Tape the knot to a table or clipboard.
- Braid by crossing the right strand over the middle, then the left over the middle, until the braid is wrist length.
- Knot the end and tie the bracelet on.
Make it with animatedknots.com
4. Chevron Friendship Bracelet Pattern
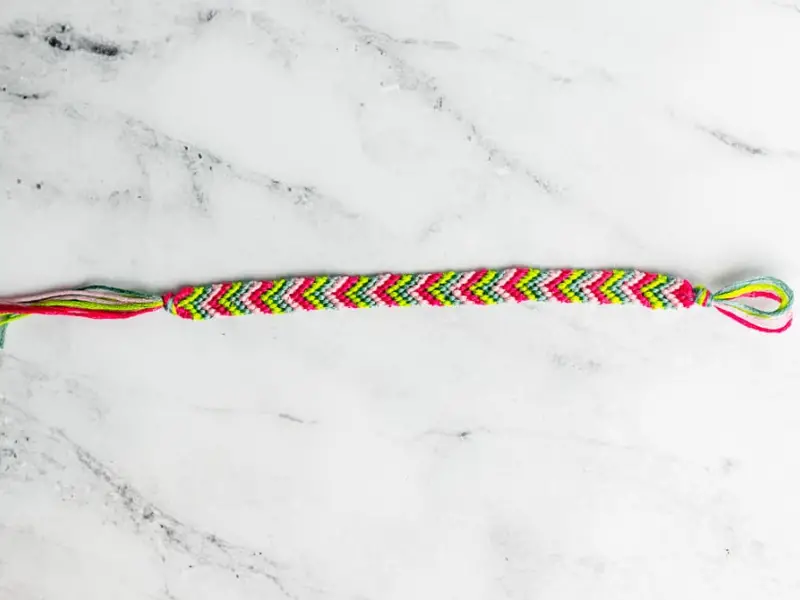
Medium | Ages 10+
The chevron is a classic and good practice for forward and backward knots. It is easy to memorize and looks detailed.
You need: Embroidery floss in several colors (often each color is used twice, once on each side).
Get the details at sarahmaker.com
5. Skinny Chevron
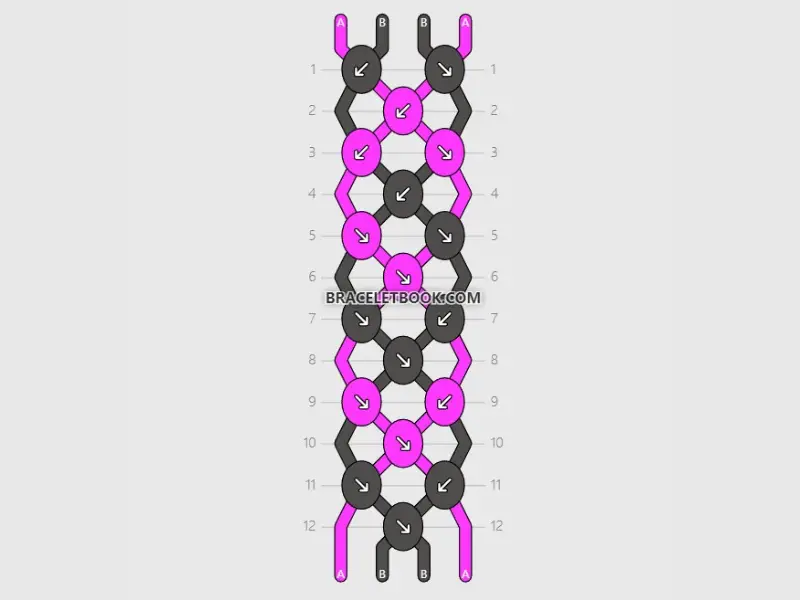
Medium | Ages 10+
A slimmer chevron with only four strings, so it works up faster than the full version.
You need: Four strands of embroidery floss.
Browse patterns at braceletbook.com
6. Chinese Ladder Friendship Bracelet Pattern
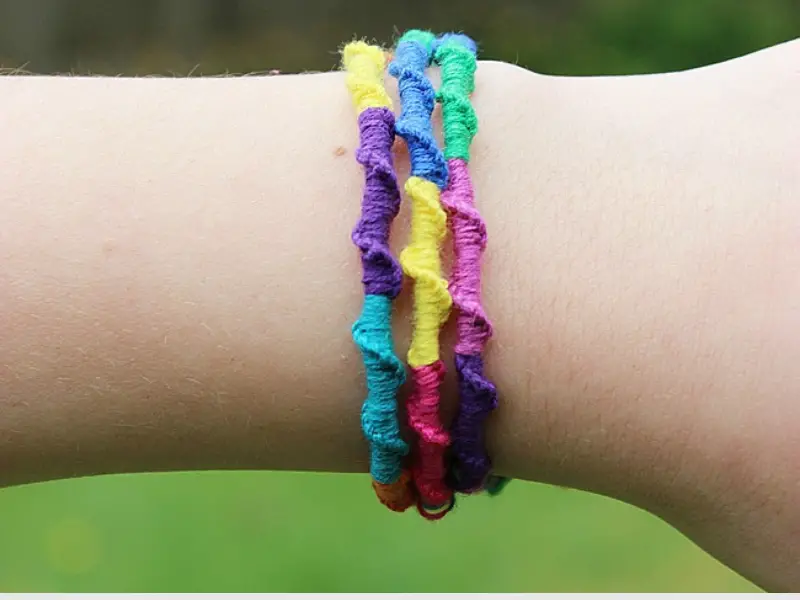
Easy to medium | Ages 8+
Also called the Chinese staircase or spiral staircase. Basic forward knots around clusters of strings make a spiral. Use any color mix.
You need: Embroidery floss in two or more colors.
Instructions at designdazzle.com
7. Zig Zag Friendship Bracelet
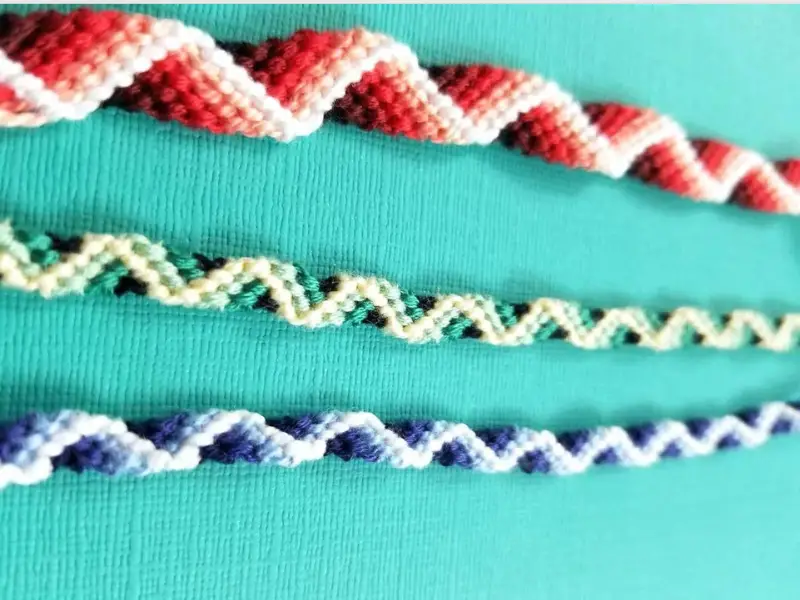
Medium | Ages 10+
Use shades of one color for a graduated effect, or neighboring colors for a ribbon look. It uses the four basic knots, which the tutorial explains.
You need: Embroidery floss in shades of one color or neighboring colors.
Learn it from momsandcrafters.com
8. T-Shirt Bracelets
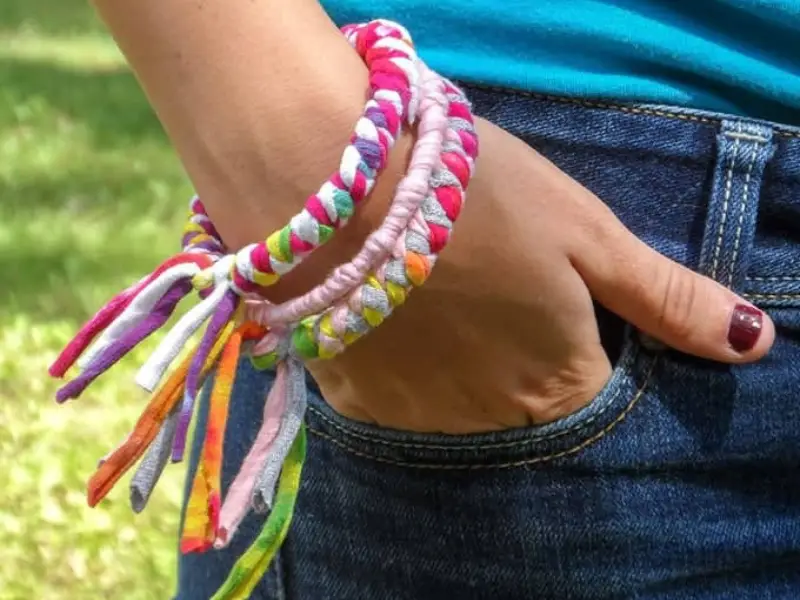
Easy | Ages 8+
Cut old t-shirts into strips to make t-shirt yarn and use it in place of floss. It works up quickly, and bangle bracelets give the finished piece volume.
You need: Old t-shirt, scissors, optional bangle bracelets.
Read about it at craftsbyamanda.com
9. Zipper Bracelet
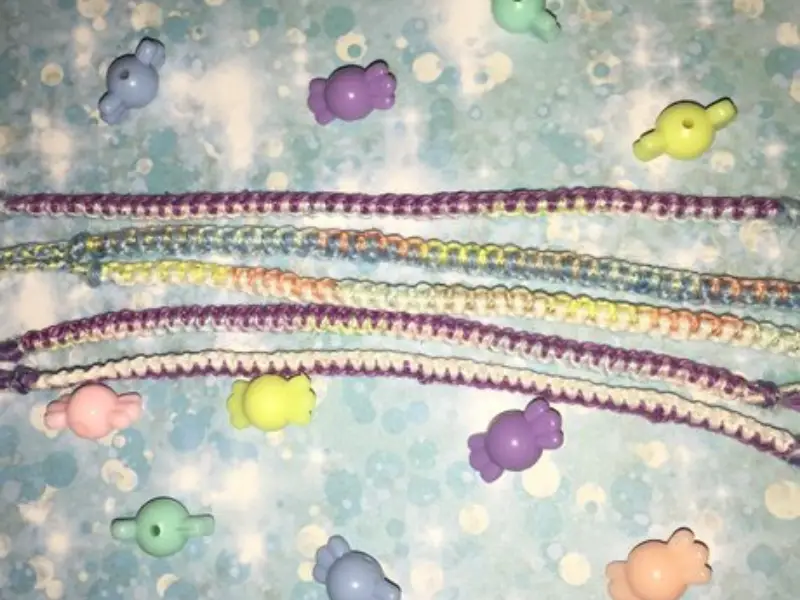
Easy to medium | Ages 8+
The tutorial uses three strings: one center string and two outer ones. For a chunkier look, switch the floss for thick hemp or yarn.
You need: Embroidery floss, or thick hemp or yarn for a chunky version.
Instructions at braceletbook.com
10. Heart Friendship Bracelet Pattern
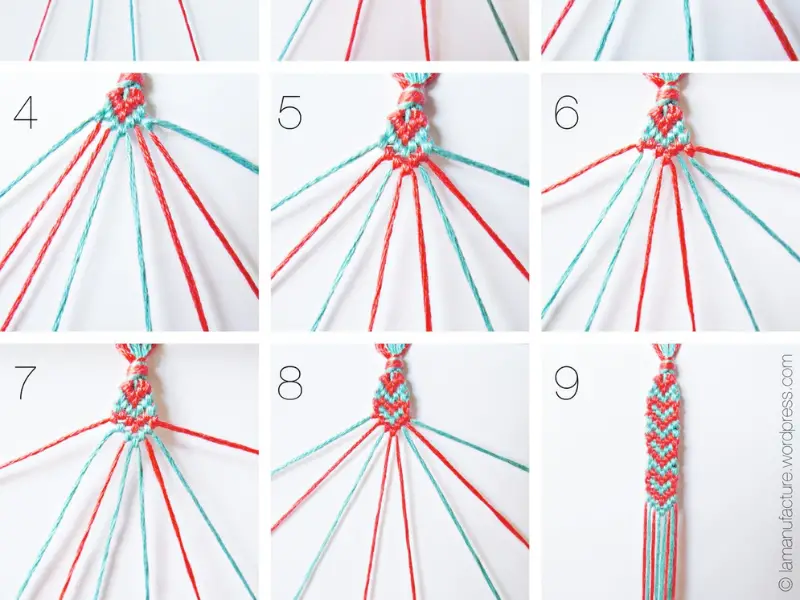
Medium to hard | Ages 12+
Hearts come easily if you know the chevron basics, and the tutorial teaches them if you do not. Two colors are enough.
You need: Embroidery floss in two colors.
Read more at lamanufacture.wordpress.com
11. Fishtail Braid Friendship Bracelet
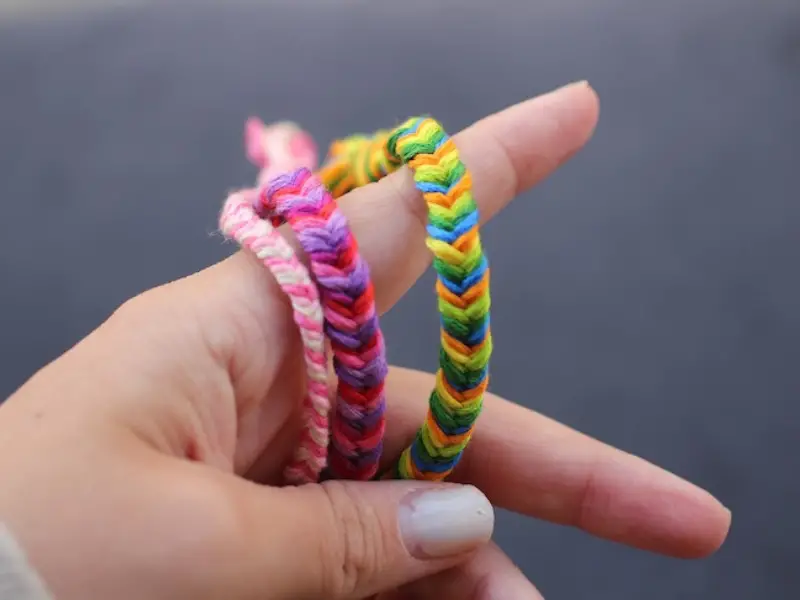
Easy | Ages 8+
A fishtail braid in embroidery floss is sturdy and quicker than knotting.
You need: Embroidery floss in two or more colors.
- Divide your floss into two bunches and knot at the top.
- Take a thin strand from the outside of one bunch and cross it to the inside of the other.
- Repeat from alternating sides, pulling snug.
- Knot the end when long enough.
Details at thestripe.com
12. Jellyfish Bracelet
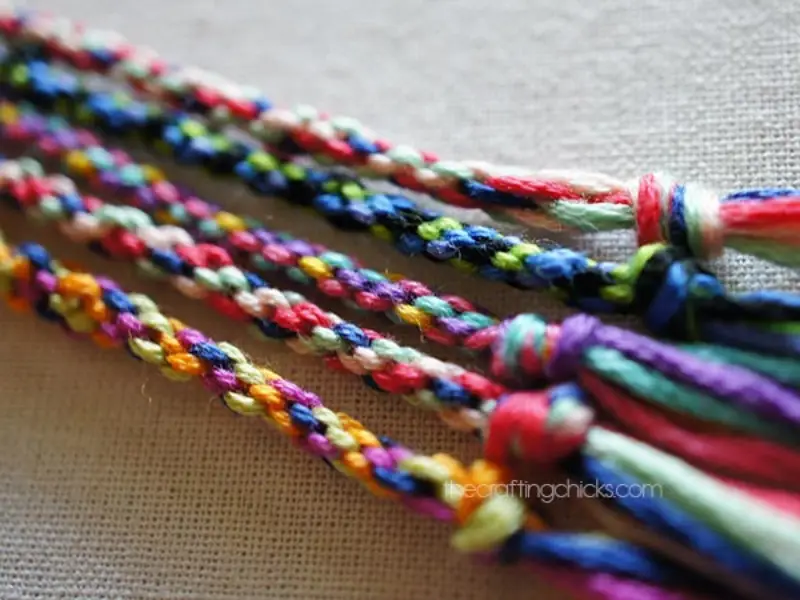
Medium to hard | Ages 12+
Seven strands and long dangling threads give it its name. You need a paper wheel (a braiding disc), and the tutorial shows how to use or make one.
You need: Seven strands of embroidery floss and a paper wheel or braiding disc.
Learn about it from thecraftingchicks.com
13. Fancy Friendship Bracelets
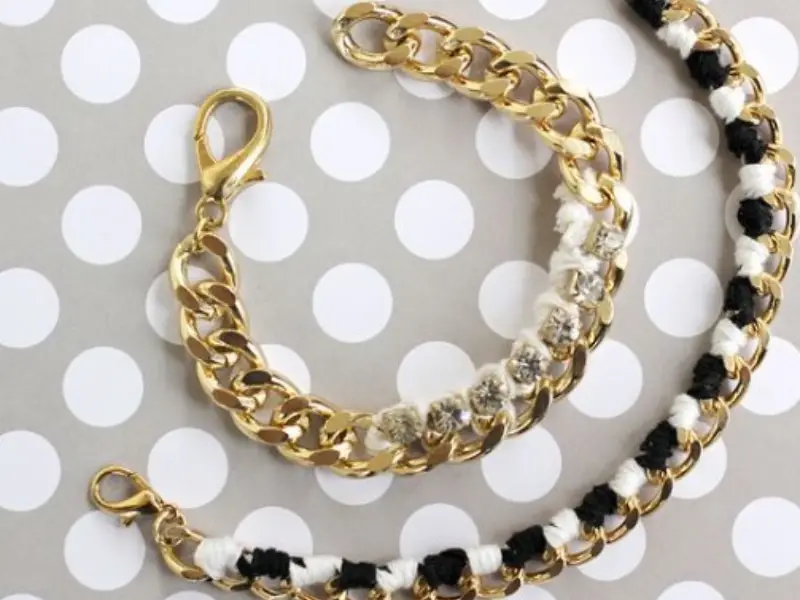
Medium | Ages 12+
A grown-up take: weave in jewels or jewelry chain. Swap pieces with friends for a craft night. Small jewels and chain are choking hazards for young kids.
You need: Embroidery floss, small jewels, jewelry chain.
Find out how at abeautifulmess.com
14. Classic Diagonal Stripe Friendship Bracelet
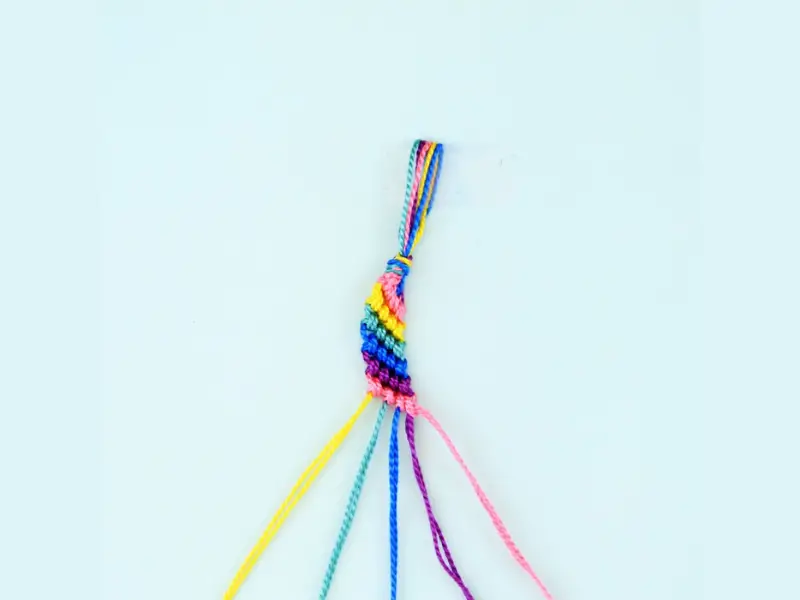
Medium | Ages 10+
A picture guide walks you through it. You control length and width, and you can use many colors, two, or one.
You need: Embroidery floss in one to several colors.
Read about it at craftjam.co
15. DIY Round Braid Leather Friendship Bracelets
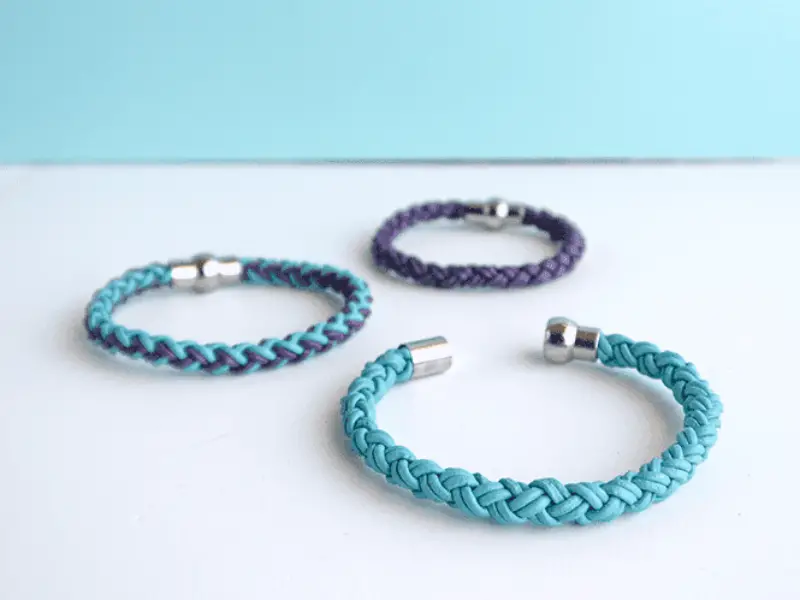
Medium | Ages 12+
A four-strand round braid in colored leather cord, either one color or several.
You need: Four lengths of colored leather cord, plus glue or clasps to finish.
Details at curlymade.pt
16. Easy Braided Friendship Bracelet Patterns
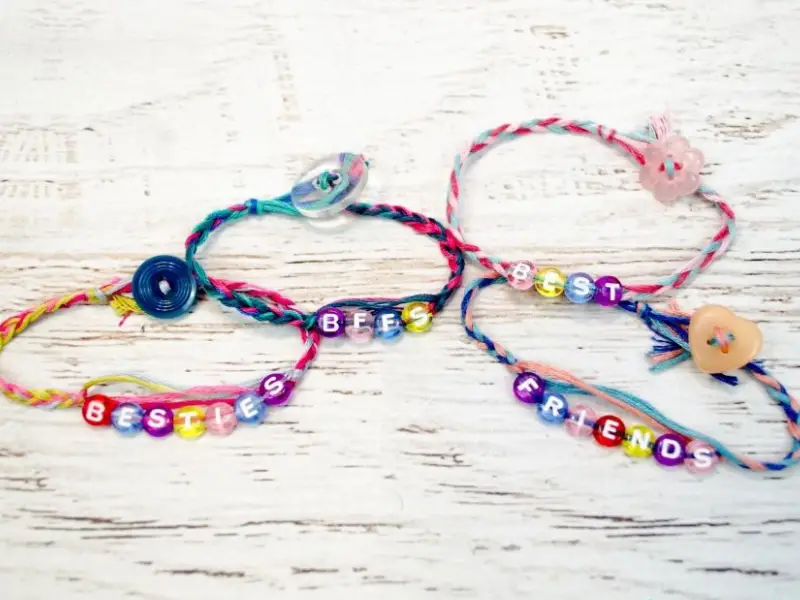
Easy | Ages 6+ (beads under adult watch)
A simple braid with letter beads and button closures, good for little crafters. Swap the button for a knot for a more grown-up look. Buttons and beads are choking hazards under age 3.
You need: Embroidery floss or cord, letter beads, a button.
Learn it at projectswithkids.com
17. The Crazy Complicated Friendship Bracelet Pattern
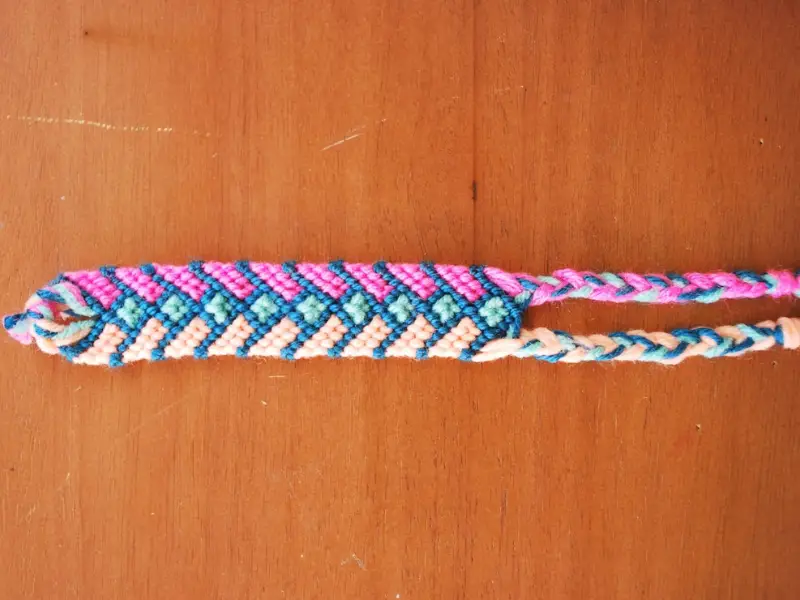
Hard | Ages 13+
A test for confident chevron makers. The look is chunkier, with cool colors and an artistic pattern.
You need: Embroidery floss in many colors.
Read more at heywanderer.com
18. Candy Stripe Friendship Bracelet
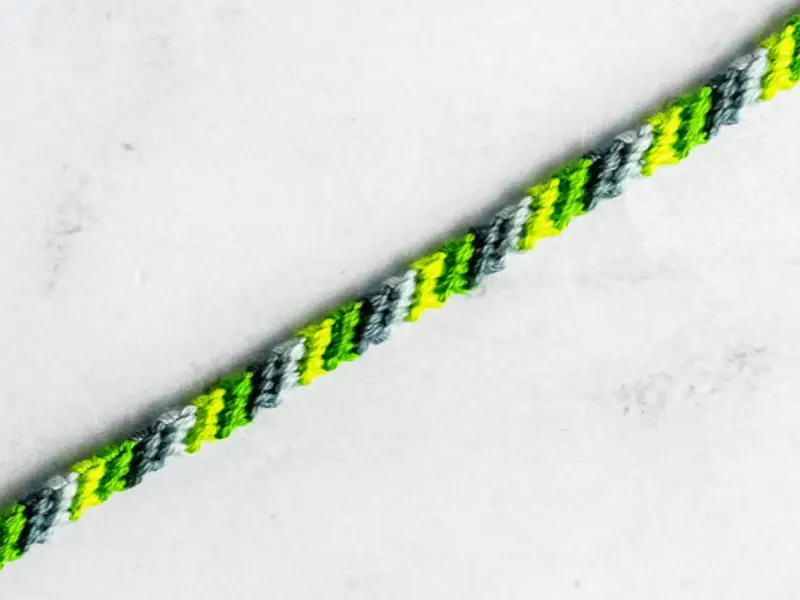
Easiest knotting pattern | Ages 8+
A good first bracelet. You only learn one knot type. Use four to eight strings, depending on how thick you want it.
You need: Four to eight strands of embroidery floss.
- Cut four colors of floss, about 36 inches each, and knot them together at the top. Tape down.
- Take the leftmost strand and make a forward knot over the strand next to it, then over each strand across the row.
- Repeat with the new leftmost strand. The stripes angle down in a diagonal.
- Continue to wrist length, knot the end and trim.
Details from sarahmaker.com
19. Sliding Knot Beaded Friendship Bracelets
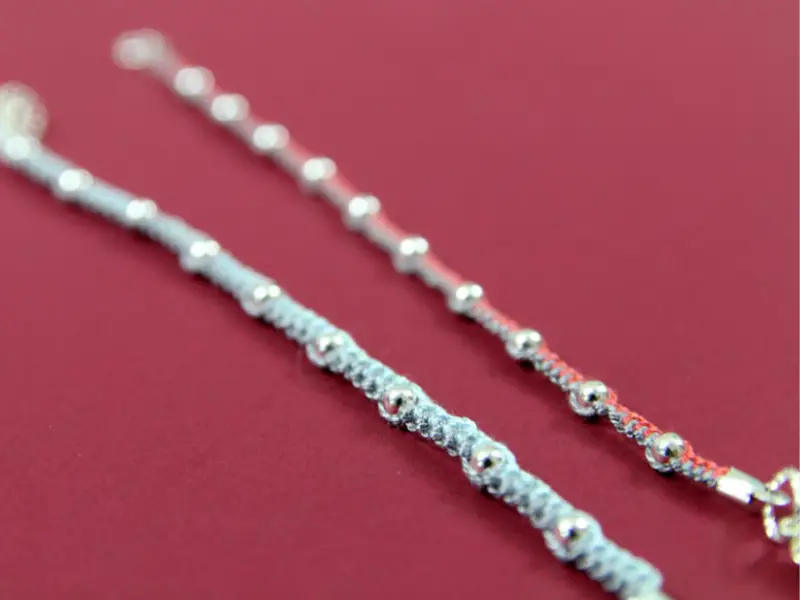
Easy | Ages 8+ (beads under adult watch)
Once you learn the sliding knot on the center string, the rest is knot, bead, repeat.
You need: Embroidery floss, beads.
Learn it from momsandcrafters.com
20. Rainbow Zig Zag Pattern
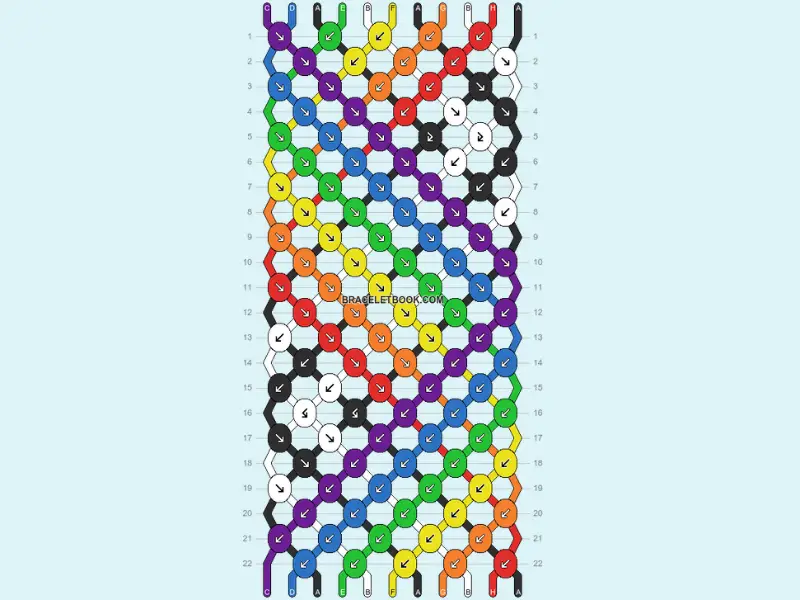
Medium | Ages 10+
A retro zigzag in a full rainbow palette.
You need: Embroidery floss in rainbow colors.
Read about it at braceletbook.com
21. DIY Bracelet Buckle Tutorial
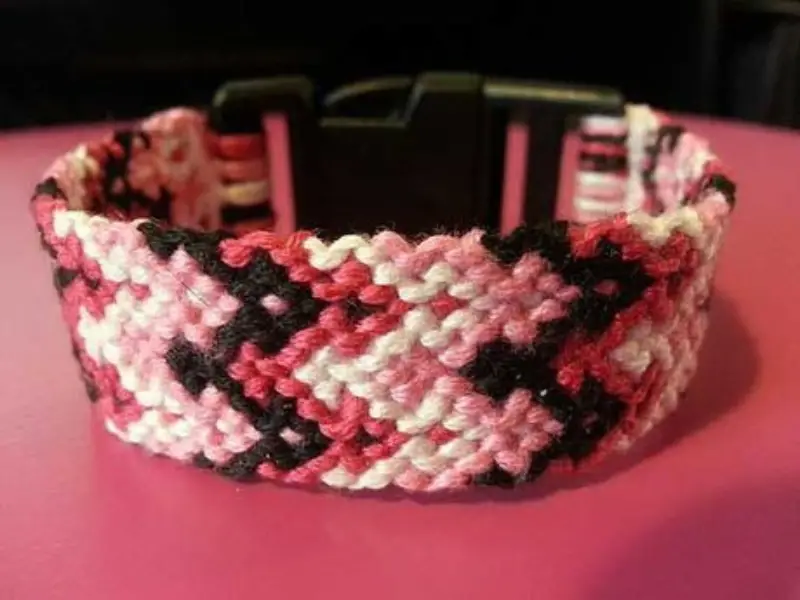
Medium | Ages 12+
A buckle closure means no safety pin or leftover floss to hold your bracelet on.
You need: Embroidery floss and the buckle supplies listed in the tutorial.
Make it with braceletbook.com
22. Fabric Scrap Friendship Bracelet
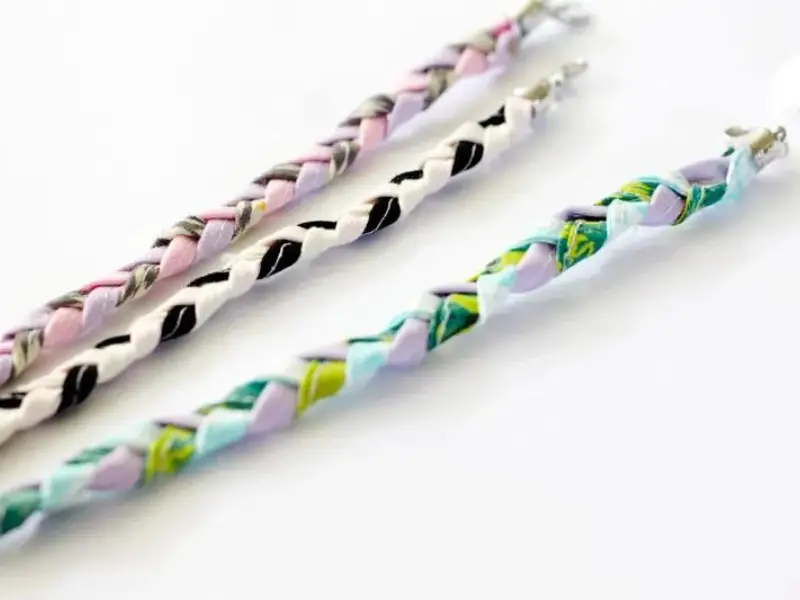
Easy | Ages 8+
When you are short on floss, braid three fabric strips and finish with jewelry end caps for a neat gift. The texture is less chunky than t-shirt scrap bracelets.
You need: Three strips of fabric scrap, jewelry end caps, glue.
- Cut three strips of fabric about 1 inch wide.
- Knot them together at one end and braid them.
- Attach a jewelry end cap at each end with glue or by crimping, as the tutorial shows.
Go to skiptomylou.org for a full guide.
23. Chain Link Bracelet
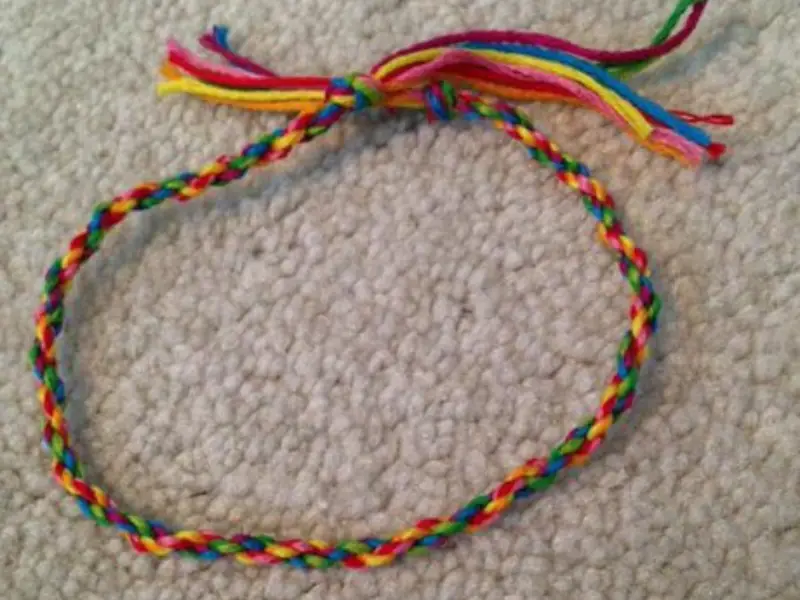
Medium | Ages 10+
Two main lines attach at even intervals, making an open, 3D design that is different from a typical friendship bracelet.
You need: Embroidery floss in two colors.
Details from braceletbook.com
24. Striped Friendship Bracelet Pattern
Medium | Ages 10+
Many bracelets run on a diagonal, which can be tricky. This stripe pattern goes straight across. Try going from dark to bright shades of one color.
You need: Embroidery floss in shades of one color.
Go to kaijumaddy.com
25. Friendship Bracelets for Grown-Ups
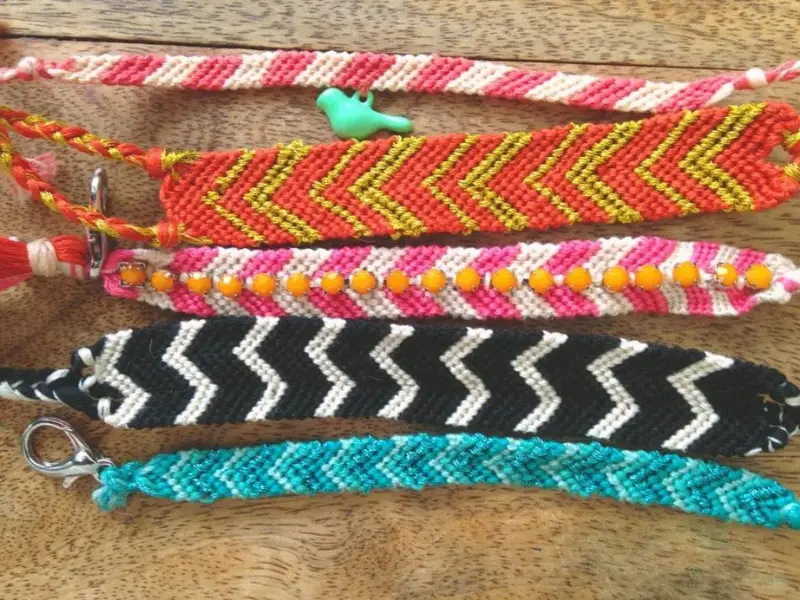
Medium | Ages 13+
A chevron variation with tassels, beads, rhinestones and metal closures, for older teens and adults.
You need: Embroidery floss, tassels, beads, rhinestones, metal closures.
Read more at goodinthesimple.com
26. Alpha Patterns
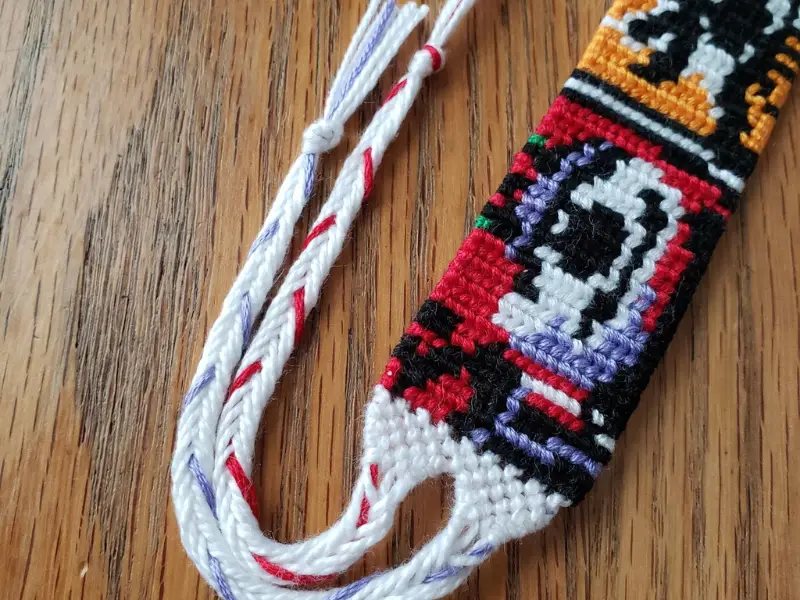
Hard | Ages 13+
Alpha patterns are drawn on a grid, so the pictures can be quite detailed, like this sunflower on a dark background. There is no video, only an illustration, so try it after you have several bracelets under your belt.
You need: Embroidery floss in several colors and a printed alpha chart.
Details at braceletbook.com
Friendship Bracelet Questions
What are the rules for friendship bracelets?
The traditional custom is that a friend ties the bracelet on your wrist, you make a wish, and you wear it until it falls off on its own. At Taylor Swift concerts, fans also trade bracelets with strangers, often beaded with lyrics.
What is the Taylor Swift friendship bracelet thing?
It started with a lyric in her song “You’re On Your Own, Kid” about making friendship bracelets. Fans at the Eras Tour make beaded bracelets with song titles and lyrics and trade them with each other.
What are the different types of friendship bracelet patterns?
The main families are knotted patterns (chevron, diamond, candy stripe, zig zag), braids (three-strand, fishtail, round braid), beaded bracelets and alpha patterns that show pictures or letters. For a huge searchable pattern library, see braceletbook.com.
Overall, our favorite friendship bracelet patterns feature something for everyone. Some are vibrant, others simple, so pick your skill level and start tying.
See also: Sun and Moon painting ideas.
Comments
0 comments