It’s a well-known fact that kids love bugs ““ and that extends to lovely grass-green caterpillars. Caterpillars are also a great opportunity for kids to learn more about the life cycle and understand different phases, and they are constant characters in children’s books, representing rebirth and growth.With all that in mind, let’s find some caterpillar crafts for preschool kids that will let them create some of these beautiful creatures themselves.
Paper Chain Caterpillar
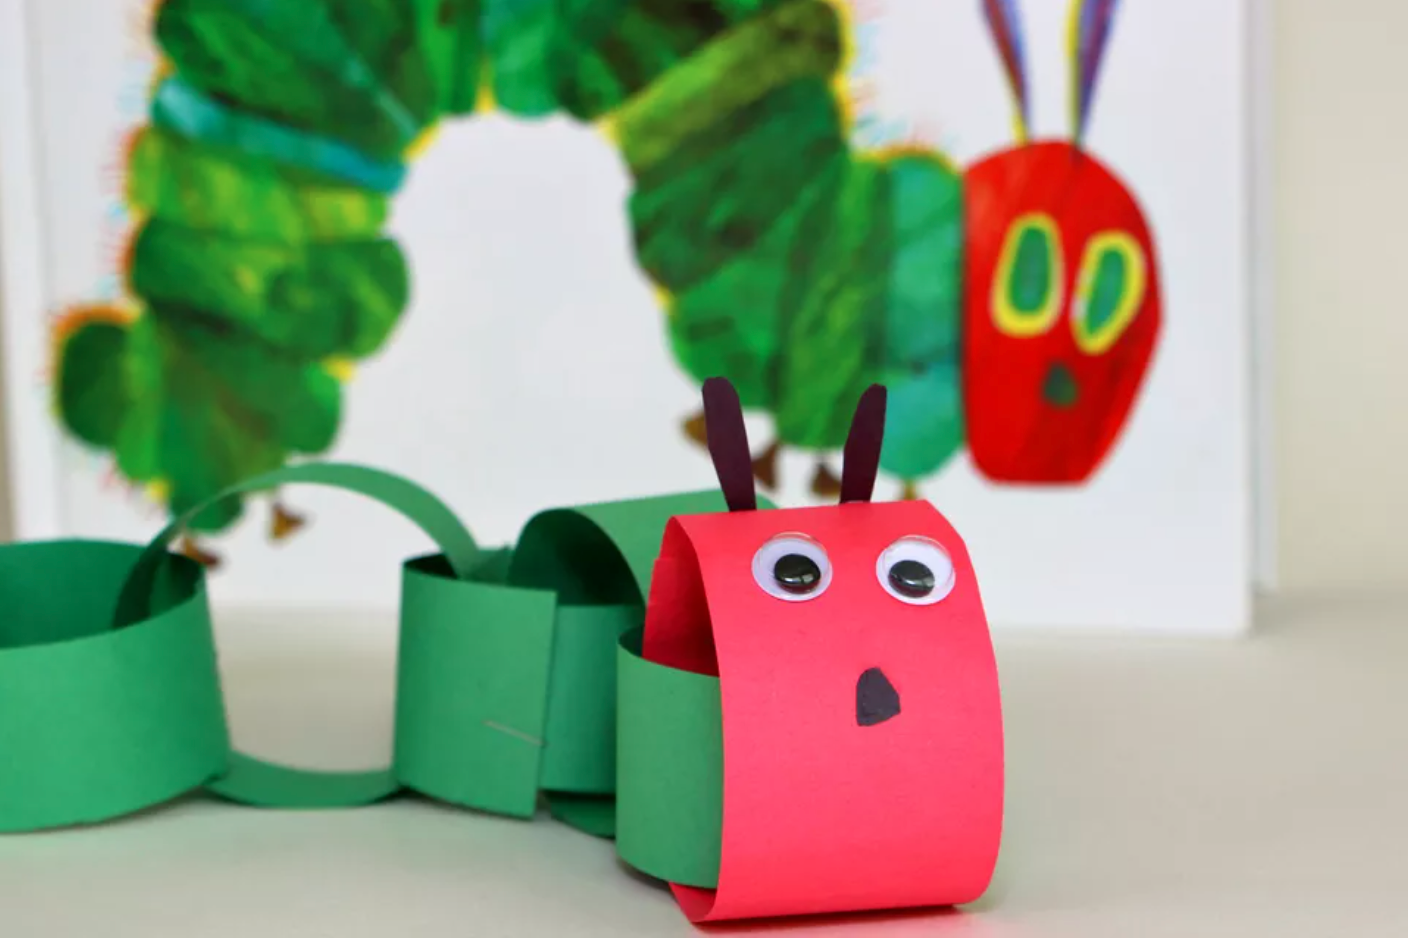 Source: https://www.thesprucecrafts.com/diy-caterpillar-craft-for-kids-4125131Paper chain caterpillars are fabulous 3D art that requires minimal materials and are very easy to make. You don’t even need many materials, and you can drape these along window ledges or bookshelves to bring a splash of green to any room.
Materials
Paper chain caterpillars require:
- Green paper
- Black paper
- Yellow or red paper
- Googly eyes
- Scissors
- Glue
- A stapler
- A black pen
Step 1: Cut Paper Strips
The first step to making paper chains is to cut some paper strips. If your child is old enough, they may be able to help you do this as long as they are careful with the scissors.You can vary the length of your paper chain by adding more strips. When you are happy that you have enough, cut one strip from your red or yellow paper to make the head. Using red will make it look like a particularly distinctive popular book character.
Step 2: Make The Chain
Take the first green strip and bend it into a circle with the two ends overlapping. Staple it. You can also use glue if you don’t have a stapler handy, but you’ll need some paper clips to hold the strips in place and the caterpillar will need to be set aside for a bit while it dries.Take your next piece of paper and thread it through the link you have made, and then overlap the ends and staple or glue them in place. This will form a chain going the other way.Loop the next circle through, and keep doing this until the chain is as long as you want. Finally, take your red and yellow strip and link it through the last green link. This is going to be your caterpillar’s face.If you want to, you can help your child decorate the caterpillar’s face before you turn it into a circle; this may make it a bit easier to decorate. It’s best to decorate with the strip horizontal as a vertical face is a bit narrow and may not look quite as good.
Step 3: Add The Googly Eyes
Put two little spots of glue at the front of the caterpillar’s face and help your child to glue the eyes onto the face. You can then draw a little smile underneath, add eyebrows, or color in a nose.
Step 4: Add The Antennae
Cut some little black ovals out of the black paper; these can be stuck to the caterpillar’s head once the circle is fastened to the chain. Add a little dab of glue and angle them to the sides. You can also cut out a mouth or something similar if you don’t want to draw one.Your kid’s caterpillar is now complete! Your child might enjoy writing their name on the under links or drawing some patterns on the caterpillar’s body, but it is now finished and ready to adorn a bookcase.
Egg Carton Caterpillar
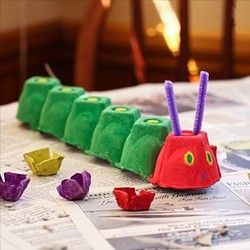 Source: https://www.preschoolactivities.us/caterpillar-craft-idea-for-kids-2/egg-carton-caterpillar-craft-3/Egg carton caterpillars are also very cute and easy to make, and you probably have most of the materials already to hand. Your kid will love creating the caterpillar, and this is a great way to use up old egg cartons rather than just recycling them!
Materials
For this project, you’re going to need:
- Green paint
- A paintbrush
- A black marker
- Several black pipe cleaners
- Yellow paper
- Glue
- Scissors
Step 1: Cut The Egg Carton
Cut out several sections of the egg carton, smoothing off the edges with the scissors. Each section will be a ridge of the caterpillar’s body. When you are happy with your sections, glue the different pieces together in a long line.
Step 2: Help Your Child Paint The Carton
Get some green paint out and help your child paint the egg carton. You can paint the head in a different color if you want to, or just paint it green like the rest of the caterpillar.
Step 3: Add The Face
Your little carton caterpillar now needs a face, so cut two little ovals out of your yellow paper, draw in pupils, and glue them in place on the caterpillar’s face (the front egg cup).Alternatively, if you don’t want to cut out the eyes, you can just grab the marker and help your child to draw eyes and a mouth to the egg carton at the front.Cut two small lengths off one of your black pipe cleaners and stick them to the back of the caterpillar’s head. You can also use a black card for this if you don’t have pipe cleaners.
Step 4: Make Legs (Optional)
Cut the rest of your pipe cleaners into short pieces and get your child to help you glue these along the length of the caterpillar’s body. You may want to curve them a bit to make them look like legs.This is a good opportunity to talk to your child about how legs work in pairs and discuss the operation of an insect’s body in more depth.You can add as many legs as you like; while real caterpillars only have six, it won’t matter if your caterpillar craft has rather more!
Conclusion
Caterpillar crafts are great fun for all ages, and you can recreate much-loved characters or build your very own caterpillar character. These ideas suggest using green paint as most caterpillars are green, but you can recreate them in any array of colors that you like, from pinks and reds to blues and yellows, or even rainbow.If you pair caterpillar crafts with butterfly crafts, you have a wonderful chance to explain the metamorphosis process to your child, and you might even want to take them to a butterfly house to see the butterflies there.
Comments
0 comments