Every little girl dreams of being a princess, living in a big pink castle, and wearing a beautifully ornate tiara or crown adorned with diamonds and sparkling jewels. Children also love to get messy and make arts and crafts projects at home both by themselves and with their friends and loved ones.So, what better way to spend a day than making a castle craft arts and crafts project at home? You can choose to make the craft either with your child or to let them have a ton of fun figuring it out for themselves.However, you may still need to supervise them depending on their age and the tools and materials that you have on hand (for example, if you do not have any child-proof scissors then you may want to do this part for them!)The beauty of this art project is that you can customize the castle to include anything that you like! If your child is particularly fond of glitter then the more glitter the better! Do they love the color blue? It can be blue! Pink? It can be pink! You can use whatever you have lying around at home to make this craft! There is no need to run out to an arts and crafts shop to spend a lot of money on supplies – whatever you have at home you can make it work!So, let’s get started…
Materials you will need
As we have said you can use whatever you have spare at home to make this craft, but below we will outline a few examples of things that you can use or will need!Materials:
- Cardboard (plain)
- Cardboard tubes
- Paper (colored or plain)
- Glitter/stickers/beads/gems (optional)
- Any other decorative materials you like
- String (optional)
- Paints
Tools:
- Scissors
- Pen or pencil
- Glue
- Sticky tape
Method:
 Step 1 – Building the Base
To begin with, you will need to make the base for your castle. To do this, there are several ways. Essentially, you will need to make a cardboard box.If you are starting with sheets of cardboard then you will need to paint them the color of your choice. You can either choose to leave them blank, giving your castle craft a natural, medieval and rustic look or you can choose to paint them a wonderfully bright color. The choice is yours!If you are starting with a box, such as a cereal box, then you will need to tear open the glued sections so that you have one big flat piece of cardboard. Then, just as if you had several flat pieces of cardboard you can either choose to paint the cardboard or to leave it as it is.Once the paint has finished drying you will then need to make the cardboard into a box shape. To do this you can either glue the edges together or you can just use sticky tape to secure the edges together. Once you have done this you should have a cardboard square that is open at the bottom and at the top.Additionally, if you wish to give your castle a floor you can also attach a piece of cardboard to the bottom of the box with either glue or sticky tape. This will mean that now only the top part is open, giving you room to place decorations inside of the castle.
Step 2 – Decorating the Inside
Now that you have constructed the base of the castle it is time to add decorations to the inside if you like! You can either add small decorative pieces of furniture, much like in a doll’s house, you can add felt for the carpet, stickers as tiles – whatever you like!The wonderful nature of this castle craft is that you can customize it to make it completely your own! You can even make it look like your own house if you want!
Step 3 – Adding the Roof
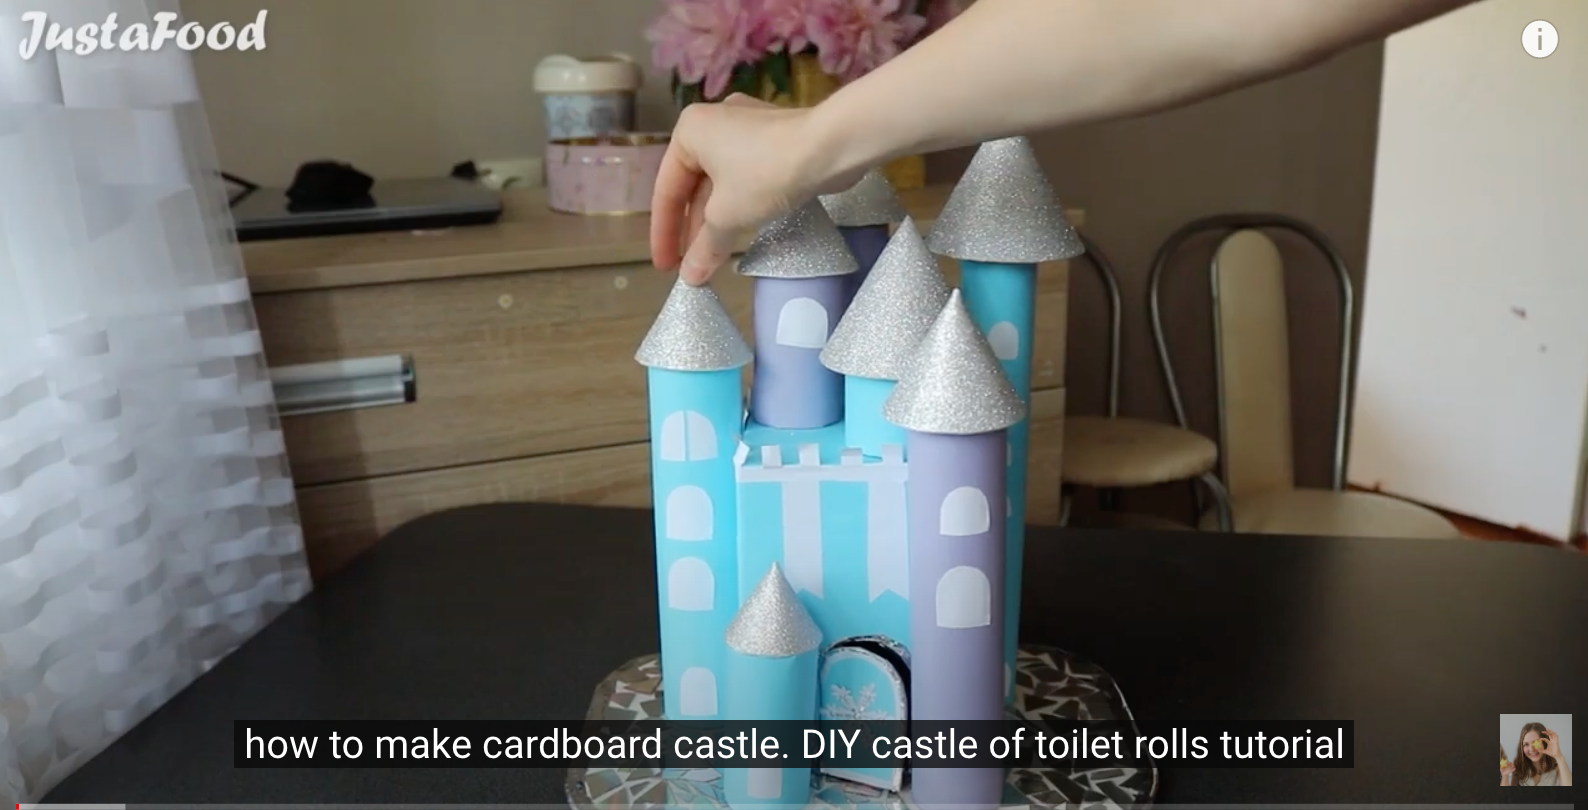
Now that the main part of your castle is complete you will need to add the roof and the turrets. This will really take your craft to the next level and identify it as a castle to anyone who looks at it!Firstly, to make the turrets you will need cardboard tubes. You can either buy these from a craft store or you can simply take the cardboard inside from paper towels. Either version will work fine! Depending on how tall the base of your castle is (i.e. how high your cardboard box is) you may need several cardboard tubes. Place the cardboard tubes on each corner of your castle and glue or stick one on top of another if you need extra height. They should reach just above the height of your cardboard box.Then secure the cardboard tubes to the cardboard box either with glue or tape. Now you can choose to either paint the turrets (either the same color as your base or a different contrasting color) or to leave them blank. Again, the choice is completely up to you!Once the paint is all dry we can finish adding the roof! To make the roof you can either choose to use more cardboard or paper. Again, plain cardboard or paper is fine, but you can also make it as colorful as you like!We suggest, at the very least, drawing on tiles with a pen or pencil to make the roof more realistic and look like it has tiles!Fold the piece of cardboard or paper in half lengthways. Then attach each of the long edges to the top of your castle base. Essentially, you should end up with an upside-down “V” shape on the top of your castle, forming the roof.Finally, to complete the roof we will need to add tops to the turrets. To make these tips cut a circle out of a piece of paper – you can either do this freehand or you can choose to draw around something circular in shape, like a glass, and then cut this shape out.It does not matter if you choose plain white paper or a colored piece of paper – the choice is up to you!Now, cut a straight single line from anywhere on the outside of the circle to the center. Fold the two cut edges over one another until the flat circle rises in the middle forming a point. Once you have the desired height secure this with glue or sticky tape.Repeat this step for all four turrets. Attach these turret tops to the top of the turrets using glue or sticky tape. If desired you can also draw on tiles to match the roof – as you like!
Step 4 – Adding the Details
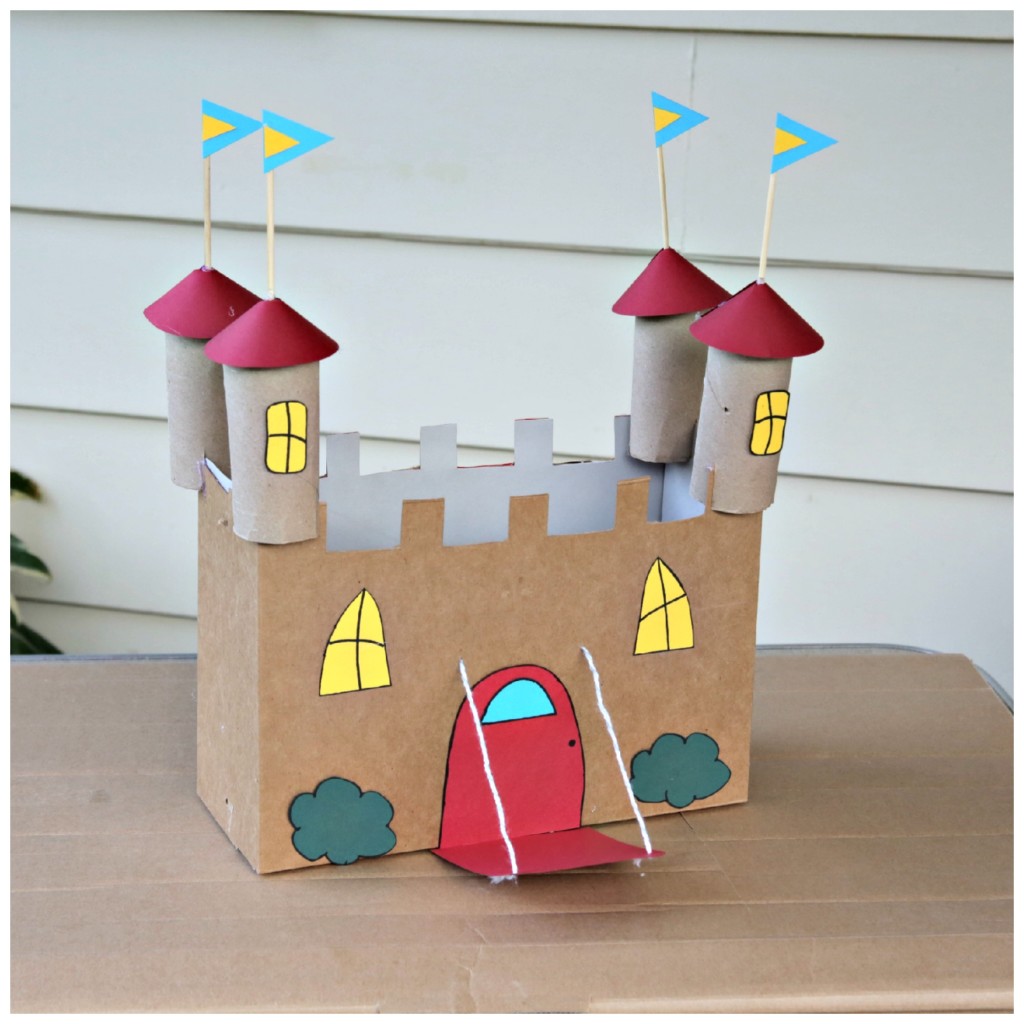
 Now comes the real fun! It is time to decorate! You can do whatever your heart desires! You can add feathers, glitter, stickers, jewels, gems, or draw on little additions to really make the castle your own! Add anything you like!If you want a more traditional-looking castle then you may want to consider drawing on windows, both traditional shapes and in the form of crosses, as well as a front door!If you want to get very fancy with your castle craft then you can add a moat door! To make this you will need to draw an arch shape on the front of your castle and draw the same shape on a piece of cardboard or paper. Then cut out this shape from the cardboard or paper.Glue the bottom of this card or paper arch to the bottom of the arch on the castle. You can then cut two small pieces of string and attach them to the top of the arch on the castle and the top of the arch on the card or paper.This will then create the illusion that the castle door is in the middle of being opened across a moat!You can continue to add decorations and details as you like, you can even make banners and flags. You can make your castle as simple or as complex as you like!
To Finish
We hope that you will very much enjoy making this wonderful castle craft. The versatility of the craft project means that you do not need to run to the arts and crafts store to buy any materials as the majority of people will have these lying around at home being unused. Basically, you can make something beautiful and have a fun time doing so whilst using up things that you already have and are not using! You can add as much or as little as you like. The castle can be as big or as small as you want – the choice really is completely up to you!If you are planning this craft for a young child please make sure that you take all the proper safety precautions such as not giving them scissors, glue, etc., and that they are supervised at all times. Enjoy!
References:
Comments
0 comments