Kids love butterflies ““ it’s a well-known fact. Butterflies are also very good for crafting, because they are such bright and beautiful colors, and they provide you with an opportunity to teach your kid a bit about symmetry and different shapes.If you’re interested in finding some great butterfly crafts for kids, we have plenty!
Egg Carton Butterflies
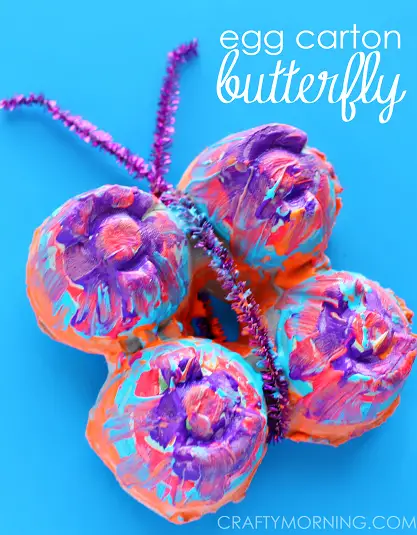 Source: https://www.craftymorning.com/colorful-egg-carton-butterfly-craft-kids/Egg cartons are wonderful for crafting, because most people have them in their recycling bins, and they’re totally free! You can make a really beautiful butterfly with an egg carton, and you don’t even need to do that much yourself. This is a great “hands-off” craft.This is also a good craft for really little ones, though you may want to replace the paints with colored pens or crayons to minimize mess or accidental consumption.
Materials
To make an egg carton butterfly, you’re going to need:
- An egg carton
- Paints in lots of colors
- A sparkly and pretty pipe cleaner
- Scissors
- A paintbrush
- Clear fishing line
Step 1: Cut The Egg Carton Down To Size
Your child’s butterfly needs four wing sections, so cut your egg carton down to just four cups. Take off the top of the carton, and trim the edges so that they are smooth and neat. You don’t need to take too much time over this.
Step 2: Let Your Child Paint
Fill the pallet cups with some colors and let your child have as much fun as they want. They can paint the wings all one color and then add layers on top, or simply splotch and flick and splodge. Make sure they’re wearing old clothes and there is some newspaper down to protect the painting surface.If your child is old enough, encourage them to paint symmetrically or try to help them make distinctive shapes, but if they’re having fun just painting their butterfly at random, let them go wild!
Step 3: Twist On The Pipe Cleaner
Once the egg carton butterfly is finished and the paint has fully dried, you’re going to add the pipe cleaner. Stick one end of it up above the carton as the first antennae, and then lay the pipe cleaner down the center to be the butterfly’s body.Wrap it around the egg carton and up the other side, and twist it to hold the pipe cleaner in place. The other end forms the second antennae. You may find you need two pipe cleaners if they are quite short ones, but it doesn’t matter even if you have to use two different colors ““ the butterfly will still look magical.A few dots of glue can help to hold the pipe cleaners in place if they wiggle.
Step 4: Hang It Up (Optional)
If your child wants their butterfly to fly, punch a little hole in the top and thread it through so that you can hang the butterfly in a window. It can then turn and show off its pretty wings, making your child’s bedroom beautiful.
Pasta Butterflies
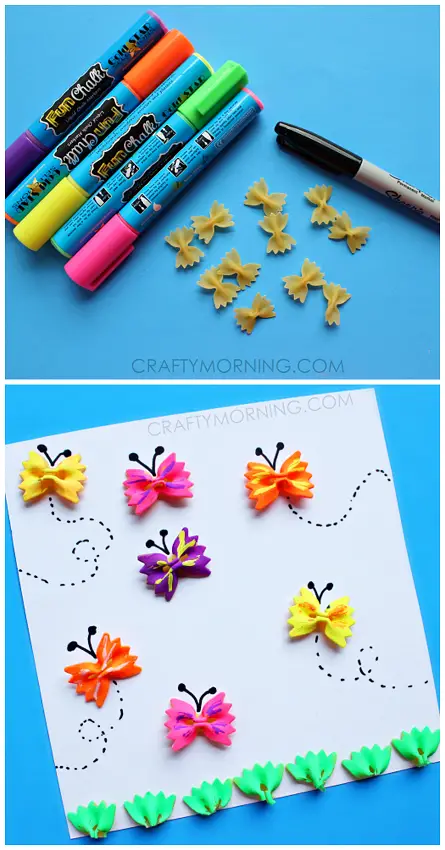 Source: https://www.craftymorning.com/bow-tie-noodle-butterfly-craft-for-kids/If you have some of that bowtie pasta around, you can quickly and easily turn it into beautiful butterflies. Your child could craft a lovely card based on these, intended for a special person, or for that coveted spot on the fridge. This can look really effective.
Materials
In order to make your bowtie pasta butterflies, you need to find:
- A handful of bowtie pasta
- Chalk markers or bright paint
- A black marker
- White card
- Glue
Step 1: Get Your Child To Color The Bowties
If you have chalk markers, this shouldn’t be too messy. If you don’t, you should prepare for painty fingers and painty clothes, but it’s still a great craft to do.Let your child color the bowtie pasta into lots of different bright hues, and then set the newly created “butterflies” aside to dry (if necessary).
Step 2: Fold Your Card
Fold the white card in half to create an opening card, and then sit and discuss what sort of scene your child wants to draw. Do they want to color some grass at the bottom of the card? Maybe add some flowers or a sun shining down?Let them make the card pretty using pens or their markers, and then it’s time to add the butterflies.
Step 3: Glue The Butterflies On
It may be quicker to do this using a glue gun, but you can also do it with white glue. Arrange the bright butterflies on the card so they are all at different angles, and look as though they are flying around.Once they are stuck in place, they will need some antennae. If your child is old enough, let them draw these on, or give them a hand using a black pen and just adding little black lines on the card above the butterflies’ bodies.You can also add hints at their flight paths, or just leave them as they are. You now have a beautiful, bright, butterfly card!
Leaf Butterflies
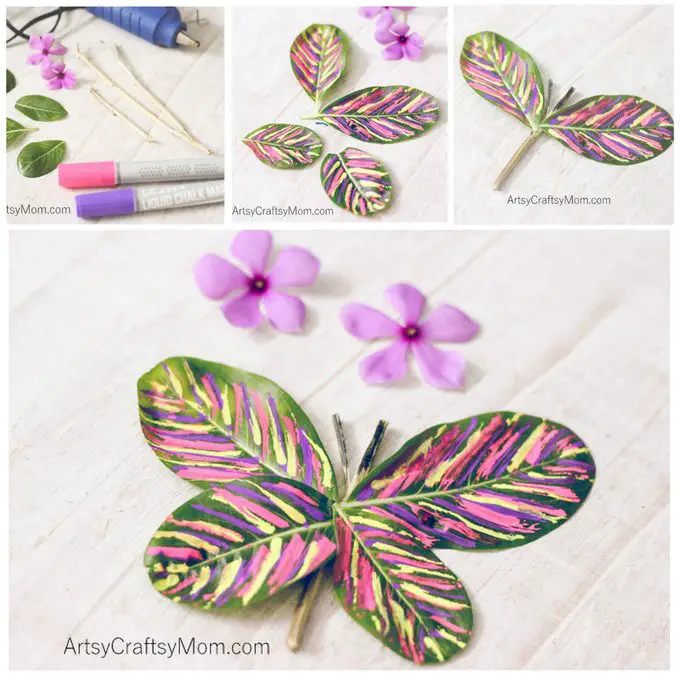 Source: https://artsycraftsymom.com/stick-leaf-butterfly-nature-craft/These are a gorgeous way to incorporate a bit of the garden into your child’s crafts, and they look stunning.
Materials
To make a leaf butterfly, you’ll need:
- Four similarly-shaped leaves, two large and two small, big enough to paint on
- Chalk markers or acrylic paint in different colors
- A paintbrush
- A large sheet of paper
- A couple of thin, straight sticks
- A glue gun
- A black pen
Step 1: Collect The Leaves
Two of the leaves are going to form the butterfly’s upper wings and two the lower. You may have to help your child find some suitable leaves. They don’t have to be perfect, but leaves that have big holes or missing ends will not look quite as good on the finished butterfly.
Step 2: Chalk The Leaves
Choose some chalk markers in complementary colors. Blues or yellows will often look good on leaves, but greens will not show up very well. Bright pinks and purples can also look very effective.Get your child to color the leaves however they would decorate a butterfly’s wings. If you don’t have chalk markers and you wish to use paint instead, make sure the paints aren’t too wet or they will just run off the leaves.
Step 3: Add The Sticks
Glue your two sticks together to make a “V” for the butterfly’s antennae, and if your child wants to color them, let them add some more chalk or paint to make the butterfly’s body pretty. Next, glue the wings to the stick. You can also use a black pen to make the antennae and body look realistic if your child wants to.
Step 4: Glue The Butterfly To The Paper
Glue your butterfly carefully down to the sheet of paper or leave it as a freestanding piece of art. You could even hang it up on a colorful thread to let it twirl and dance in the breeze, or add some glitter glue to make the butterfly’s wings sparkle.
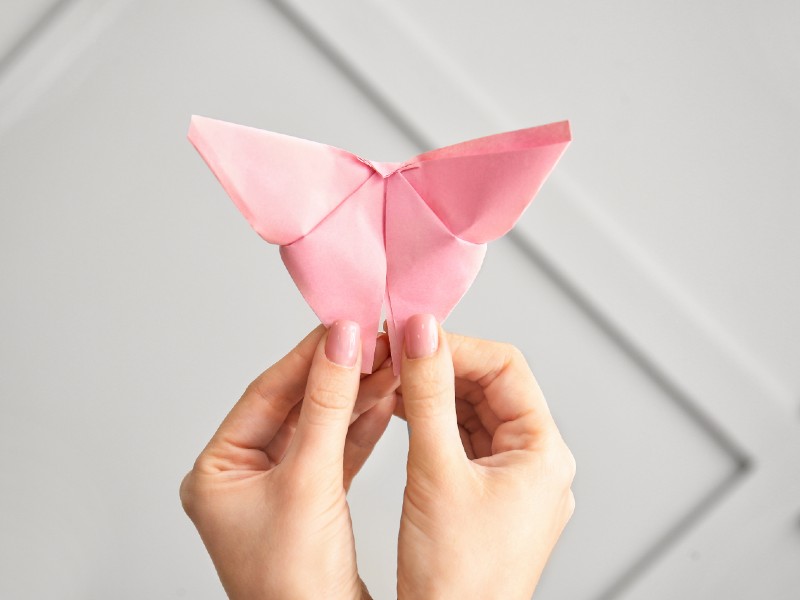
Simple Painted Butterfly
If you want to do a very simple lesson in symmetry, this is the way to go!
Materials
To make a painted butterfly, you’ll need:
- Paint in different colors
- A paintbrush
- A large sheet of paper
- A black marker
- Masking tape
Step 1: Draw The Outline
Draw a butterfly outline using a thick black marker pen. You can also print out a template from the internet if that’s easier or faster. You may want to cut your butterfly outline out as this will make the third step easier.
Step 2: Paint One Side Of The Wings
Get your child to paint one half of the butterfly, just one wing, in all different colors and shapes. It is okay if they put quite a thick layer of paint on as this will add to the effect. It may help to put masking tape on the butterfly’s body where you want them to stop painting as this will serve as a reminder to them to stop.
Step 3: Fold The Butterfly In Half
Help your child fold the butterfly over and show them how to gently press so that the paint gets transferred to the other side of the butterfly and makes a symmetrical pattern on the other wing. Carefully unfold it again. This will not only make a beautiful painted butterfly but will help your child to better understand how symmetry works.You can then hang this butterfly up in a window, or even repeat the experiment on the other side (once the paint is dry) so that they can have another go at it after seeing the process in action.
Conclusion
Butterfly crafts can be enormously varied, and as complicated or as simple as you want them to be. Add lots of colors to make the most of these bright and beautiful insects, and talk to your child about the process that butterflies go through to transform from caterpillars into cocoons and then into butterflies.Pair the crafts with researching butterflies online and discuss how their wings work and what purpose the different patterns on them serve.
Comments
0 comments