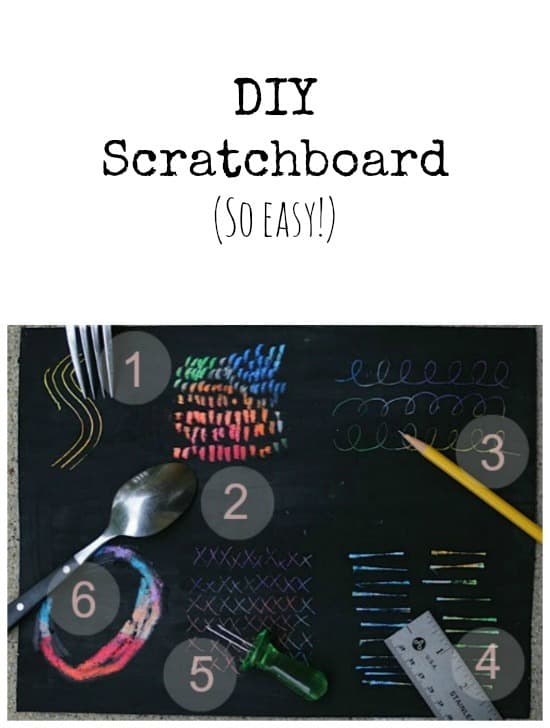
It’s totally easy to DIY scratchboard, so let’s get down to it.
Recipe:
- 1/4 cup black tempera paint
- 1/4 cup dish soap
That’s it! Mix it up and paint it on some heavyweight paper, like watercolor paper. Let the first coat dry and then slather on the second coat. I really do mean slather, too. It looks weird when you first paint it on, like it doesn’t completely cover everything. This is why you do 2 coats, and it helps if you use a wide, soft-bristled brush.

You can leave your paper white underneath, or fancy it up by covering it with oil pastels before you paint the black on.
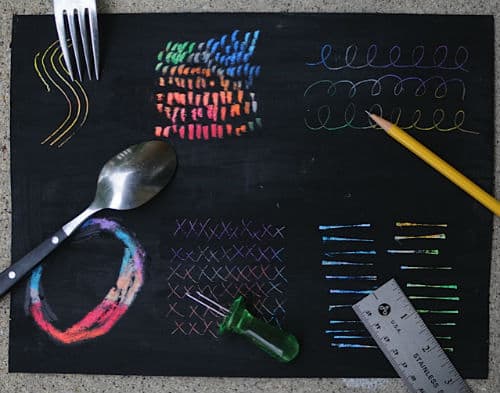
There are, of course, tons of different tools you can use to draw/scratch with, and you really don’t need to buy anything new- you probably have a myriad of tools in your home already.

Tool Ideas
1. Forks can give you nice, evenly spaced lines all over the place.
2. Use a spoon tip to sort of gouge little bits out of the paint.
3. Is that a regular old pencil? Yep, just draw on the paint to scratch it.
4. The short edge of a metal ruler makes some cool tribal-looking marks if you gently wedge it into the paper.
5. Corn holders have fine points for fine lines.
6. It’s the spoon again- use the edge of the spoon for fatter lines.
Here’s Fen’s final product; she decided to leave the background white. This is one happy looking polar bear, don’t you agree?


Comments
0 comments
Very cool. I want to try this!
Yay! It’s pretty fun to scratch all that stuff away.
So cool!
Hi!
Do you put the oil pastel on first?
Thank you!
Yes! You cover your paper with them first, then paint the black over it. Thanks for the question- I updated my post to show this. Have fun!
Thanks for this post! If you want to leave it white underneath, do you have to use white crayon over the whole paper before covering it in black? Or did you just paint the black/soap mixture directly into the white watercolour paper? Thanks so much!