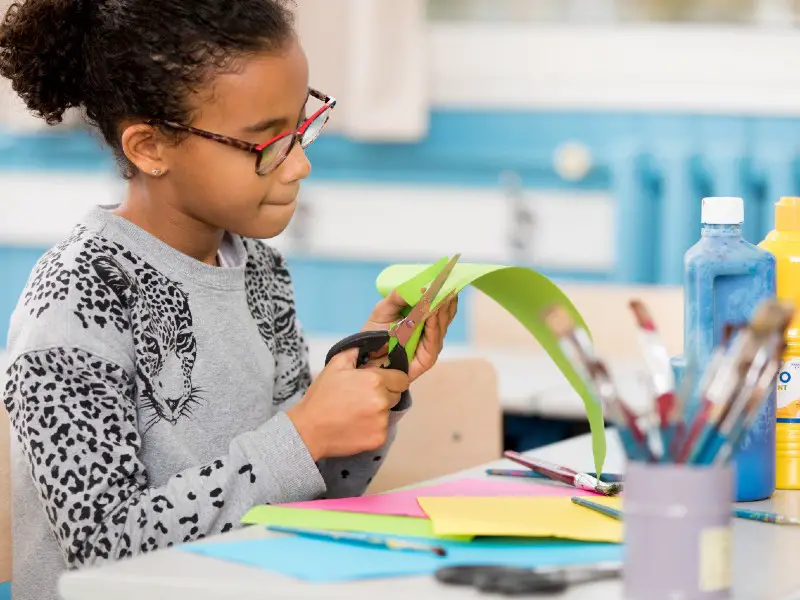
Most tweens are still of an age where they love arts and crafts, but finding the right crafts can be a challenge, even for the most willing parent. We’ve compiled some of the top summer crafts for tweens to help keep them off the screen and actively creating during those long summer vacations.
Sparkly Homemade Lip Balm
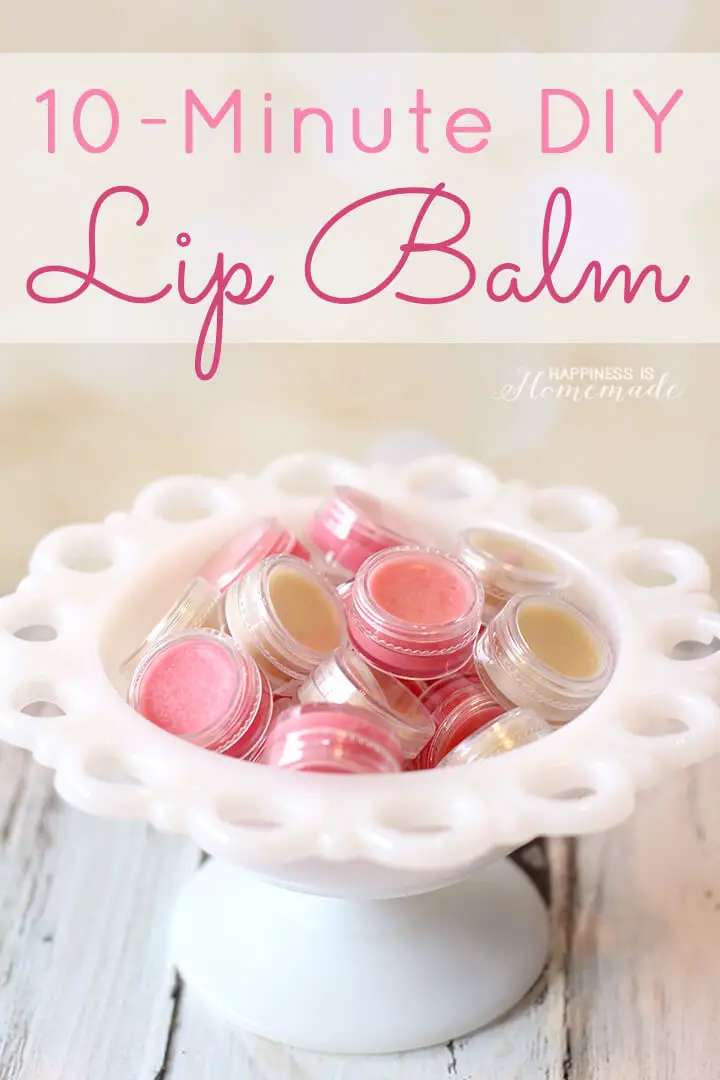 Source: https://www.happinessishomemade.net/10-minute-diy-lip-balm/If your tween often suffers from chapped lips (summer or winter, it can happen to anyone!), this will be a very welcome craft for them, and these mini lip balms also make great party favors if you’re hosting a tween party or backyard barbecue. You can make them plain or add a bit of sparkle, depending on your preference.
Materials
For sparkly homemade lip balm, you will need:
- 4 tablespoons of coconut oil
- 2 tablespoons of shea butter
- 3 tablespoons of beeswax pellets (food grade)
- Fine glitter
- 1 glass bowl
- Little tins or plastic containers to put the lip balm in
Step 1: Add The Ingredients To A Bowl
Add the coconut oil, shea butter, and beeswax pellets to a glass, microwave-safe bowl (don’t add the glitter). Mix it up a bit.
Step 2: Microwave
Microwave the mixture on medium heat for thirty seconds, and then take it out and stir it around. Microwave for another thirty seconds, and then take it out and stir. Keep doing this until everything has melted and it is fully combined.You can add a drop of flavor oil at this point if you want to, or leave it plain. Stir in a small sprinkling of the very fine glitter, too.
Step 3: Decant Into Tubs
Pour it into little tubs before it cools, and then leave it to set. If it’s a hot day, put it in a cool cupboard. You can also make colored lip balm by adding a bit of lipstick before you melt the ingredients. Once the lip balm is cold, it’s ready to use!
Make A Duct Tape Wallet
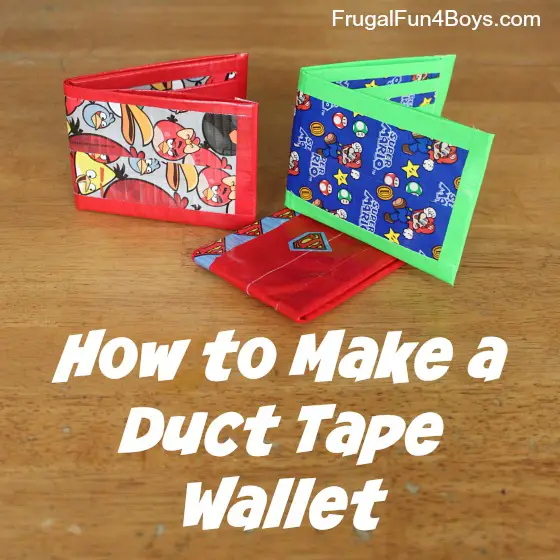 Sources: https://www.craftynest.com/2010/07/camp-craft-duct-tape-wallets/ and https://frugalfun4boys.com/how-to-make-a-duct-tape-wallet/Chances are, by the time they hit tween years, your kids are starting to understand the value of money, and they probably have or want a wallet ““ and they can very easily make their own highly stylish wallet with pretty much any design they want on it.They will love showing this off at the summer fair or outdoor events with friends.Tip: it is much easier to tear duct tape than to try and cut it. Make sure you tear, rather than gumming up the scissors!
Materials
A duct tape wallet requires:
- Wide duct tape (you can get almost limitless designs and choices)
- A ruler
- A craft knife
- A cutting board
- Scissors
- A card to use to get the right size
Step 1: Make The Wallet’s Body
Your tween wants to cut 8 strips of duct tape, each one about 9 inches long.Stick the first four pieces together, overlapping each about ½ inch over the last. You are sticking them vertically, not horizontally, adding to their width.Now, do the same with the other four pieces. Next, stick these four pieces to the first four, but about ½ inch from the top. Fold the overlap over on itself, so that you no longer have any sticky edges.
Step 2: Cut The Body
Grab your craft knife and cutting board, and use the edge of your ruler as a guide to cut the wallet down to approximately 8.5 inches by 6 inches. This should be big enough to fit in credit cards, but small enough to stash in a pocket.
Step 3: Make Credit Card Pockets
You are now going to make some pockets for the credit cards. Tear off two 5 inch strips and layer them as you did to make the body of the wallet. Stick another two 5 inch stripes to their sticky side, again with an overlap that you can fold over, as you did in step one.Next, trim the edges so that the pocket is about 4 inches wide.You can make several of these pockets so that the wallet will hold different cards separately. If you want smaller pockets, you can fold your piece of duct tape in half width-ways instead of layering it up, and cut it to 4 inches long.
Step 4: Layer The Pockets
Put the pockets on top of each other. If you make one of the pockets larger than the others, this should go at the back, but you don’t have to do this. Use a strip of duct tape to join them together.Check that credit cards will fit into the pockets, and then move onto the next step.
Step 5: Attach The Credit Card Pockets
Pick up your large piece that will make the main body of the wallet. Place it so that the outside is facing up, and then place the credit card pockets on the top right-hand corner. Tear off a long strip of duct tape and secure the pockets along the length of the wallet’s top edge.
Step 6: Fold The Wallet And Finish
Fold the wallet in half. Take the bottom edge and fold it back behind the half that the credit card pockets are attached to. Use duct tape to secure either end of it, and you now have a long back for notes to be tucked into. Make sure the tape at the ends is firmly stuck so that notes won’t fall out.The wallet is essentially done. Add a last strip of tape to the bottom of the wallet, fold the side over the credit card pockets, and admire it.You will find that the wallet tends to spring open at first; to solve this, simply put it under a heavy book for a day or two. This will help to form a crease that will keep it closed after a while. Alternatively, having it in a back pocket for a few days will also do the trick.
Sharpie Tie-Dye T-Shirt
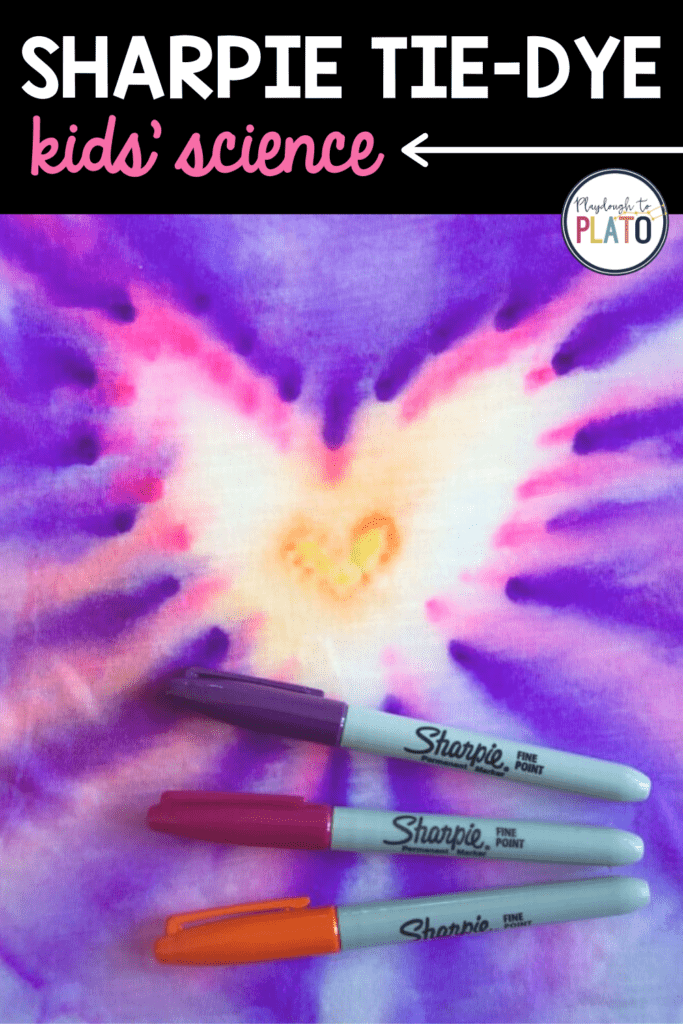 Source: https://www.playdoughtoplato.com/sharpie-tie-dye-science/What is better summer clothing than a t-shirt? These are just perfect for a summer craft, especially if your tween is keen on the tie-dye craze.Using markers is a great alternative method that gives you more control over how the tie-dye turns out. It’s also not too tricky for tweens to do this independently, with very little adult input.As this uses strong chemicals, it’s best for your tween to work in a ventilated space, or even outdoors on a hot day.
Materials
You’re going to need:
- A plain white t-shirt (it may be a good idea to have several so they can do multiple designs)
- Good quality marker pens
- Scrap cardboard
- An eyedropper
- A spray bottle
- Isopropyl rubbing alcohol
Step 1: Design The Picture
Get your tween to decide on a picture before they begin. There won’t be any changing it after the sharpie has been added (except by starting with a fresh shirt!), so get them to think hard and consider sketching the design on paper before they actually start.
Step 2: Ink The Shirt
Put the scrap cardboard inside the shirt to prevent any ink from bleeding through. Use the marker pens to create a design on the shirt. Your tween can press down for long periods to get a brighter, more vivid effect with the colors.Remember that the alcohol is going to spread the color out, so it’s best to work in dots, rather than blocks of color. Encourage them to think about what colors will blend well, and which may create a muddy brown rather than a nice rainbow.
Step 3: Add Alcohol
Use the eyedropper to drip alcohol onto the design. The ink will instantly start to spread and blossom out across the shirt. To cover larger designs, use the spray bottle, but remember that the dropper will give more control.If your tween wants to stop bits of the design from spreading over each other, allowing one part to dry first is crucial. About 15 minutes should be enough for the alcohol to dry completely, and then the craft can continue.Remember that adding too much alcohol will make the colors spread out and lose a bit of their brightness.
Step 4: Touch Up The Design
Your tween can keep adding more colors or lines and little drops of alcohol until they are pleased with the outcome, but they probably shouldn’t overdo it; it’s better to keep designs simple and let the colors blur naturally. A few little additions are fine, however.
Step 5: Seal The Design
Once the tween is happy with the design, it needs to be left to dry for half an hour or so in a well-ventilated space. Once it is completely dry, run it through the dryer several times for 10-minute bursts to make sure the colors have set.Finally, ensure you wash the shirt on a delicate wash and away from other clothes for the first few washes, to avoid any potential mishaps with bleeding inks.
Conclusion
Finding crafts that tweens can enjoy can be a little tricky, but there are still so many options for them to get creative without feeling uncool. Try to think about the things that interest them and turn these into crafts that reflect their age and personality.

Comments
0 comments