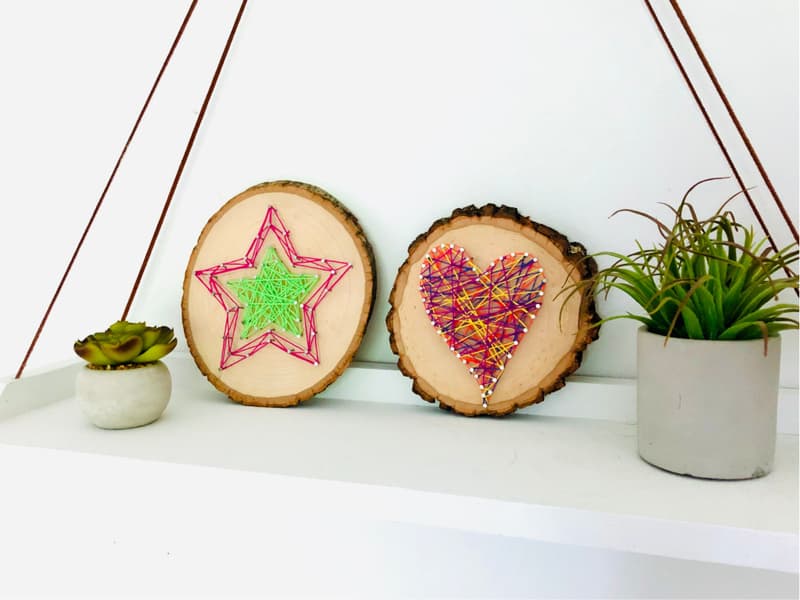
String art is the ultimate summer craft for kids and adults. It can be super simple or complicated and planned-out. You can choose to choose one color, a few pastels, or go all crazy with all the colors of embroidery thread you have.
If you are making string art with kids, they can do most of it themselves. Younger kids will probably need some help pounding in the little nails.
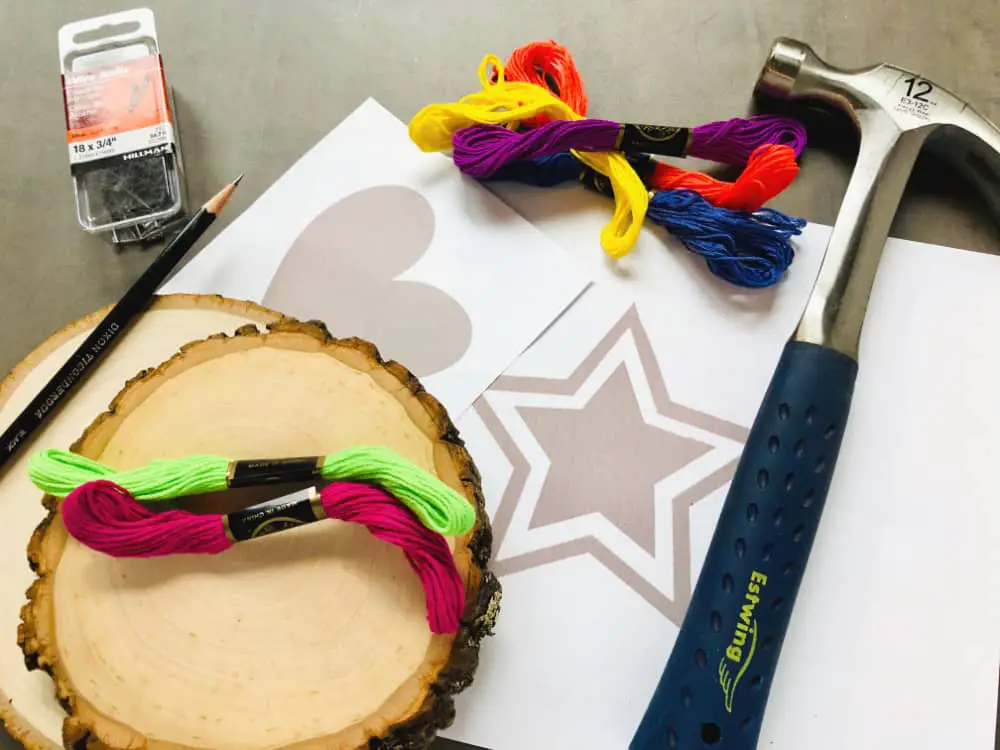
Supplies for String Art
3/4″ wire nailsEmbroidery threadWood slice
or other wood piece
Hammer
Pencil
Star and heart download (if you want to use these)
Directions
You can absolutely draw your own shape on the wood if you’d like, otherwise download and print out this heart or star and size it according to the size of your wood.
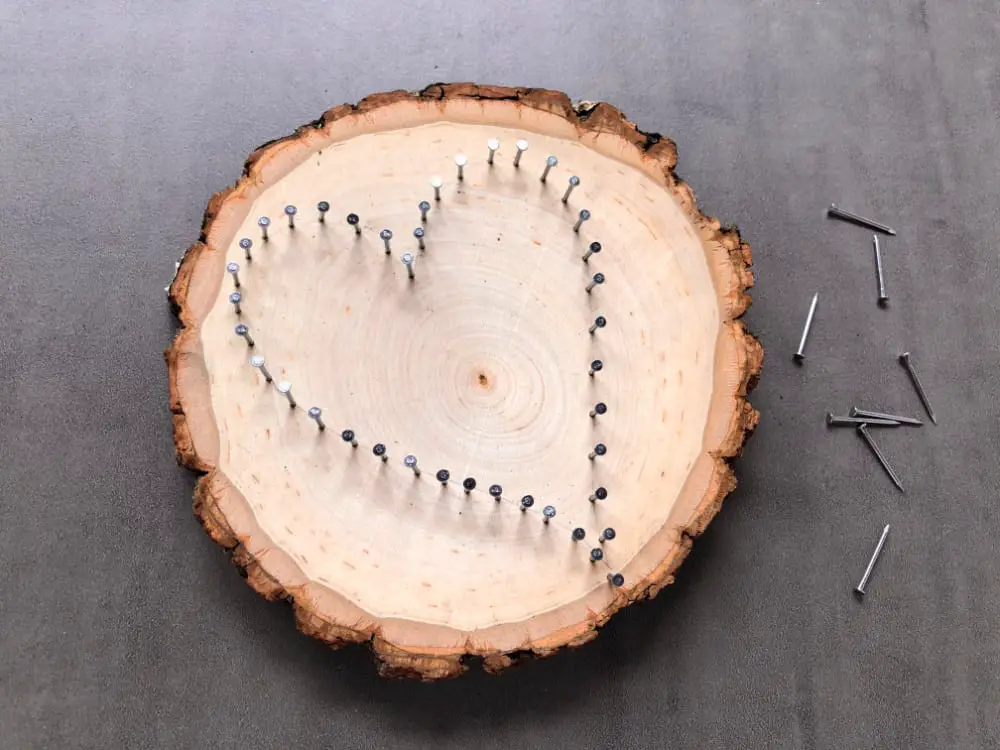
We used wood slices that were about 6″ in diameter, but you can use whatever size you want! We sized the shapes at about 5″, so I would give yourself about 1″ around the perimeter of your shape.
We traced around the shape with a pencil onto the wood, and then pounded in nails evenly spaced on the lines. Don’t get too hung up on making them perfectly spaced; you can eyeball them as you pound them in.
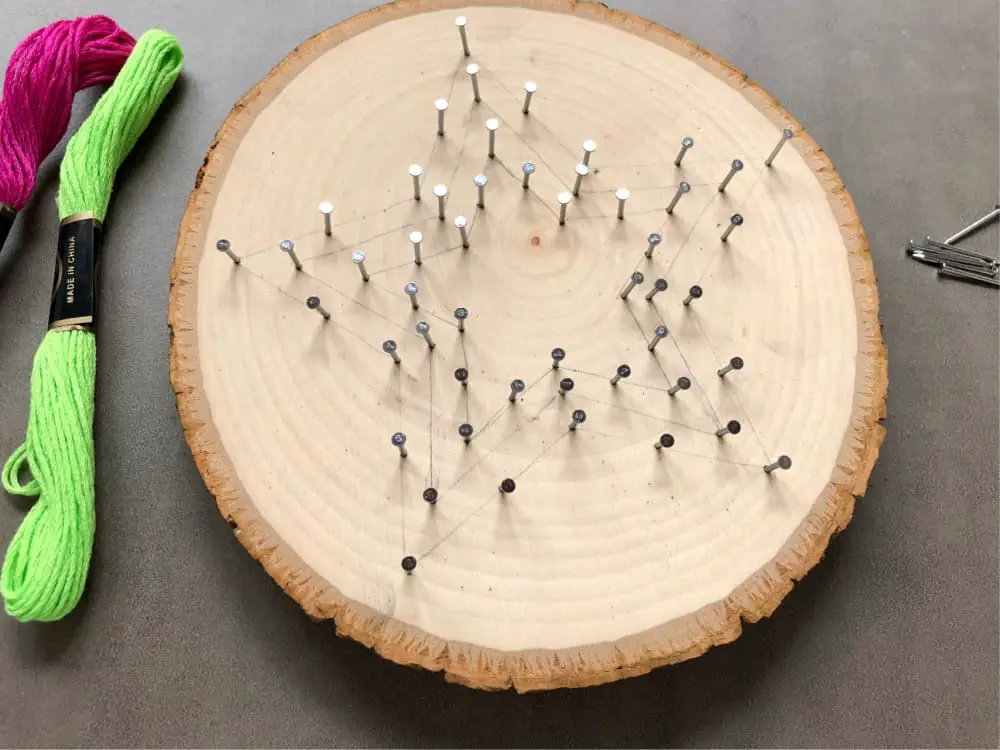
After the nails are in, it’s time to do the string art.
Choose the colors of embroidery thread you want to use for your design. For the heart we used all sorts of fun colors, in random lengths, and tied them off on a nail when we wanted to start a new color.
We pulled the embroidery thread across to different nails randomly, just filling the heart until it looked pretty.
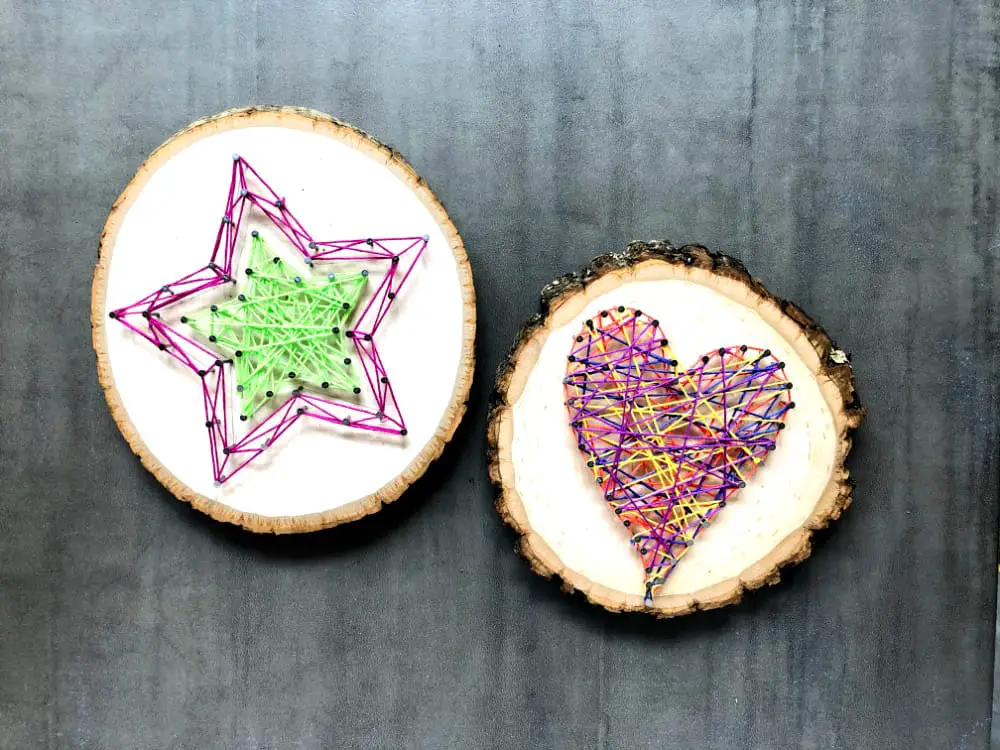
For the star, we wanted to make it cleaner-looking, so we strung the green color across the inner star. Then we used pink for the outer star by stringing it around the outer set of nails. The beauty of this is that you can come up with a pattern on your own to pull the thread across the nails, or do it randomly.

When you’re finished stringing, tie off the embroidery thread on a nail, and tuck in the cut end as best you can. You can then prop your string art up, or hang it on the wall by attaching a picture hanger to the back!
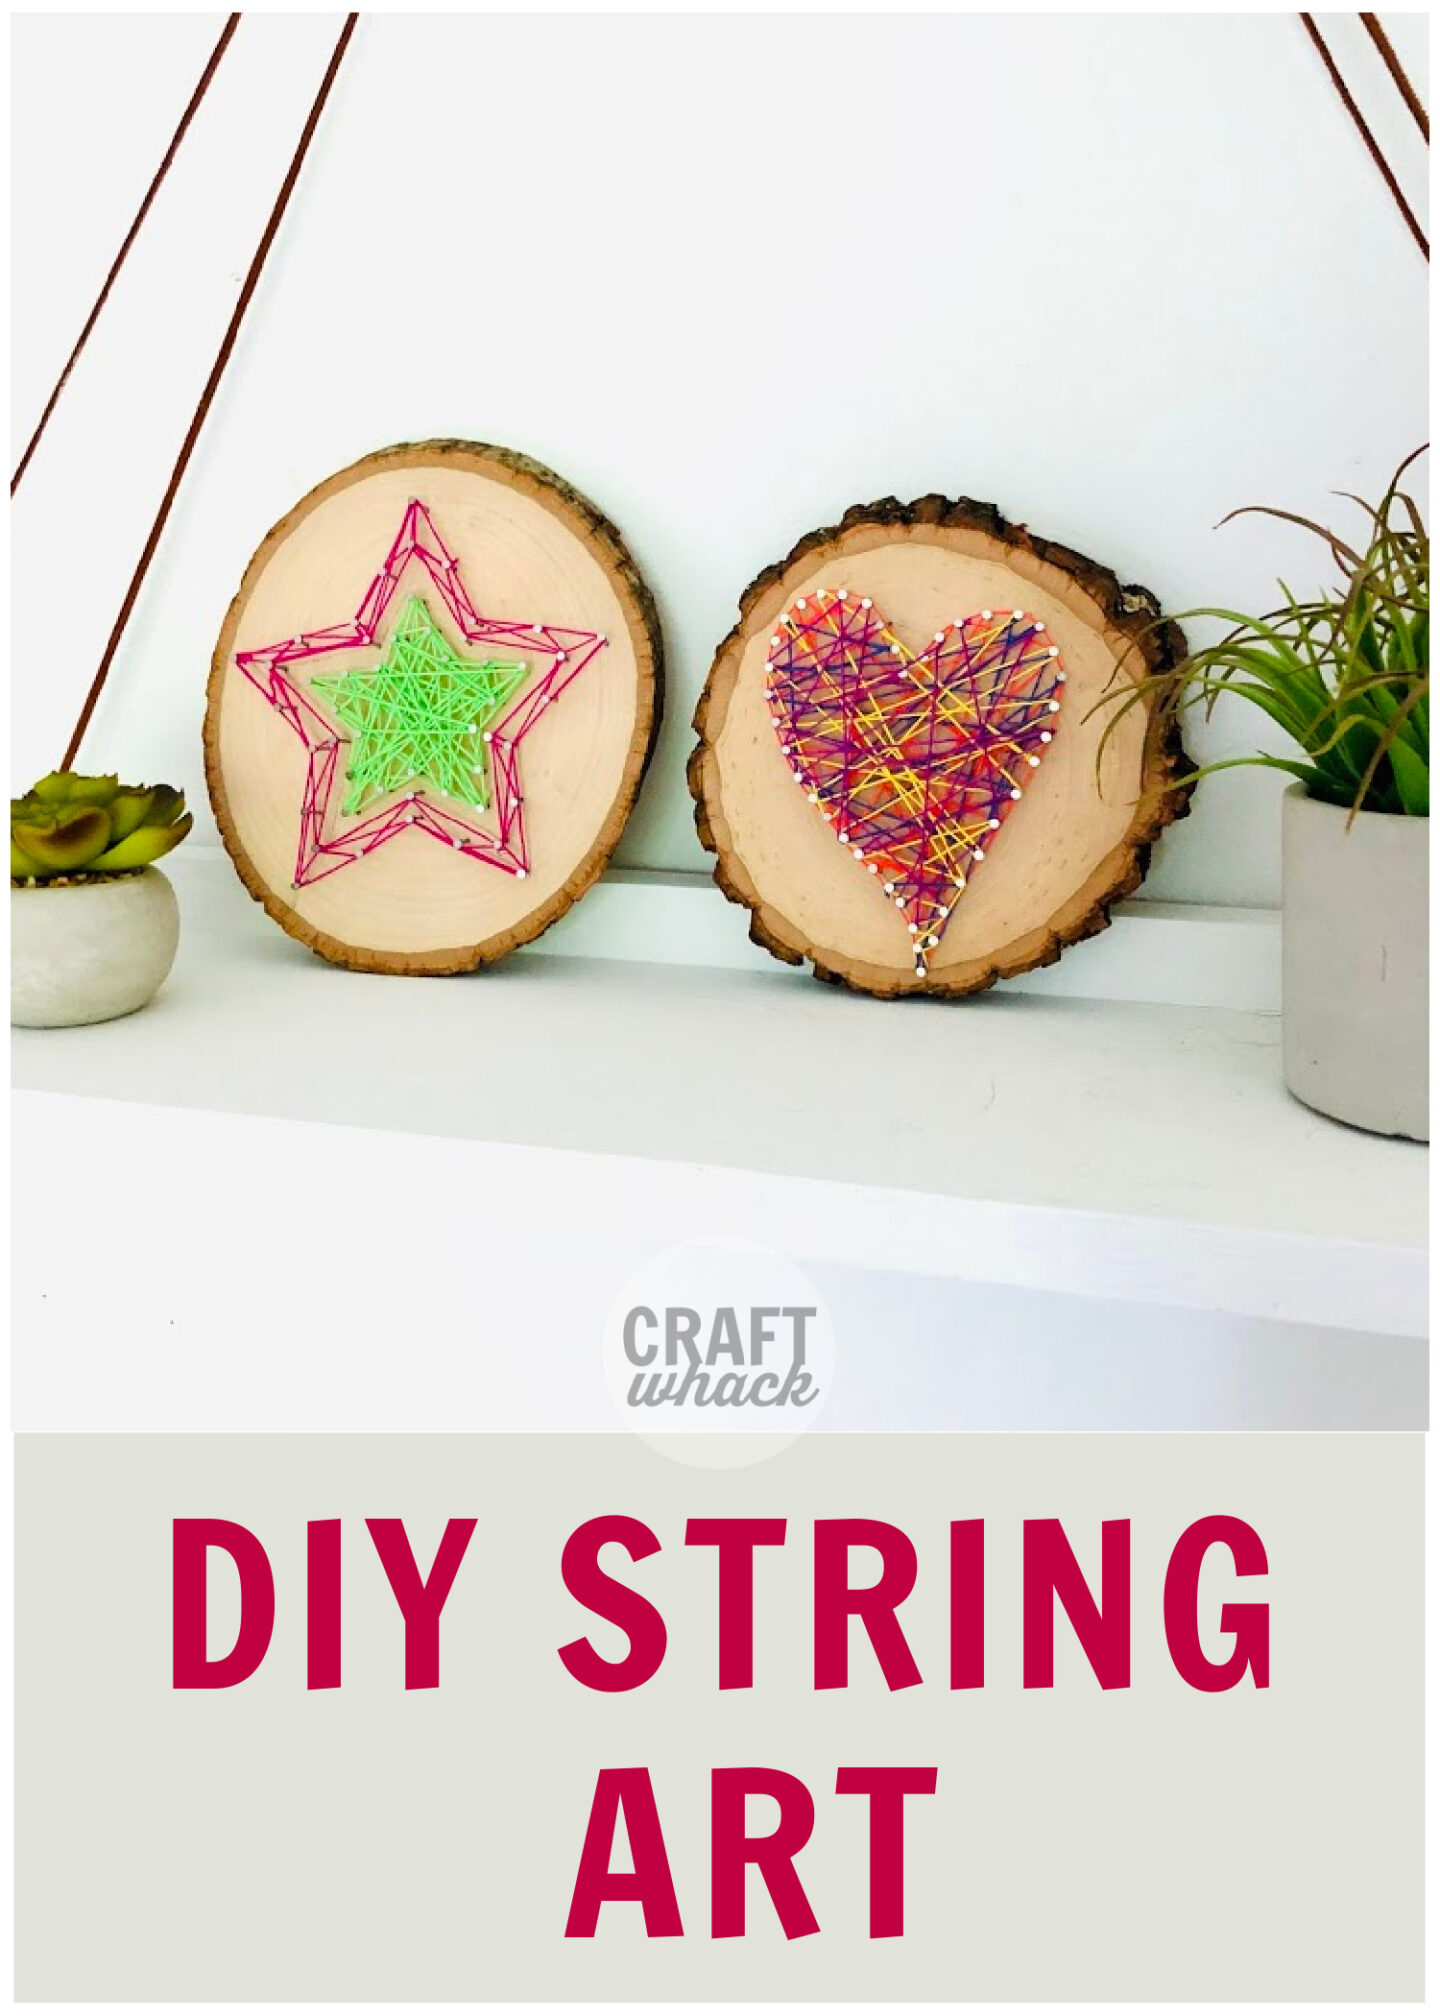
Pin it For Later
Comments
0 comments