 Source: https://drawcentral.com/2012/05/how-to-draw-bear.html
Bears are far from the easiest things to draw. They are awkward shapes, lumpy, and getting anything that looks even vaguely realistic can be a major challenge. However, there are lots of reasons you might want to draw a bear, so let’s look at some bear drawings and the techniques you can use.
Materials
In order to draw a bear, you’ll want:
- A sharp pencil
- A nice black fine liner
- Plain white paper
- A flat surface to lean on
- A ruler
- An eraser
Let’s get drawing!
Step 1: Draw A Rough Oval For The Body
Drawing a bear from the side will often produce the best results. Draw yourself an oval that bulges out just slightly at the bottom. It doesn’t matter if your lines are a bit sketchy; this will just look like fur.
Step 2: Draw The Head
About half a centimeter from your bear’s body, you should draw a second circle for the head. This wants to be slightly flattened on the lower edge, which is where the bear’s snout should end up.The head should be about a third of the size of the body, and you should aim to have it approximately level with the midpoint of the bear’s body. It may help to glance at a photo or two of a bear as you work.Next, put your pencil on the bottom edge of the head you’ve drawn, where it is slightly flattened. You’re now going to draw the bear’s snout. This should be a small rectangle, but you want to curve the lines a little to make them natural. The “underside” of your rectangle, where the bear’s chin will be, should be a softer curve than the top edge, where the bear’s nose will be.
Step 3: Draw The Bear’s Foreleg
Starting a little bit above the bear’s back, draw a large oval that slightly overlaps with the bear’s head and with the first 1/3rd of the bear’s body. This should be angled a little back so that the bear’s foot will end up under the bear’s body.Sketch a small oval at the bottom for the bear’s front paw.You can now join your head and the body by drawing sloped lines up from the back of the bear’s head, over the top of the shoulder joint, and then back down to the top of the bear’s back.
Step 4: Draw The Second Foreleg
Beneath the bear’s snout, draw a second half oval, so that the bear looks as though it is stepping forward. Add the paw at the end.
Step 5: Draw The First Rear Leg
Put your pencil just below the top of the back edge of your bear’s body, and sketch a rough oval for the back leg, coming down to the same point as your front leg so that the bear will be standing on a flat surface.It’s best to widen the top edge of the bear’s back leg to create a “hip.” The front part of the leg should be a bit curvier and bulkier than the back of the leg.Add a paw at the bottom, and the first of the rear legs are complete.
Step 6: Draw The Second Rear Leg
In between the front leg and the rear leg, you should now have a space available. Here, you want to draw a small half oval, again going to a similar level so that the paws will line up. This is the final leg.Put the paw in place at the end of the leg, and you’ve got the basic outline for your bear!
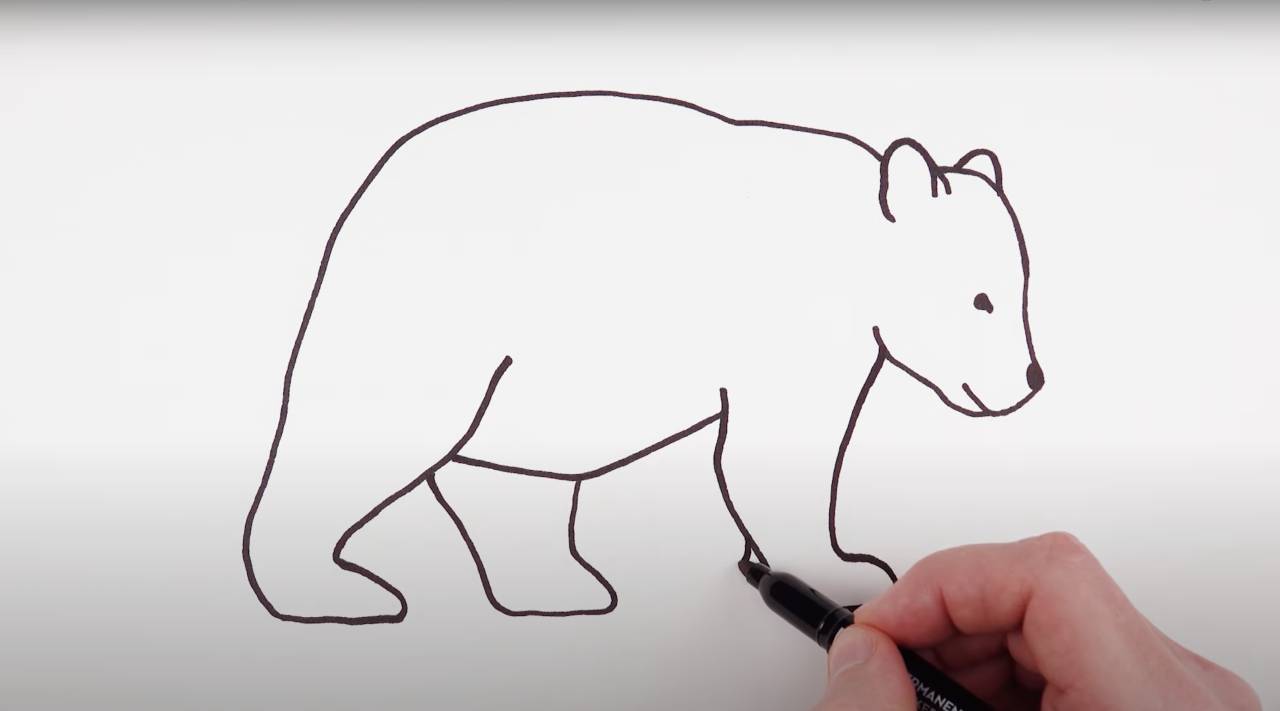
Step 7: Time To Erase!
You may not have expected a direction to rub out your hard work, but you’re now at the point where you can start taking out some of the guiding circles that you’ve put in. Before you do this, fill in any places where you’re lacking continuous lines that will make your bear’s shape.This might be the neck, where the bear’s chin needs to meet with its head, and between the back legs.Once you’ve finished doing this, erase all the lines inside your bear’s body, apart from the one that defines the front foreleg from the back foreleg, and the one that shows your rear leg in front of the stomach.You should also leave the line that defines the front foreleg from the stomach.Erase the lines between the paws and the legs, and you’ve got a great bear outline.
Step 8: Add The Ears And Face
Your bear now needs two cute ears. Tuck a small semi-circle (drawn roughly to make it look natural) behind the bear’s head, and draw the other rough semi-circle level with it, but further over. Next, draw a little eye (bears have tiny eyes) and a nose at the end of the bear’s snout. Draw a little line to open the bear’s mouth, and erase the very end so the mouth is open.
Step 9: Make The Fur Shaggy
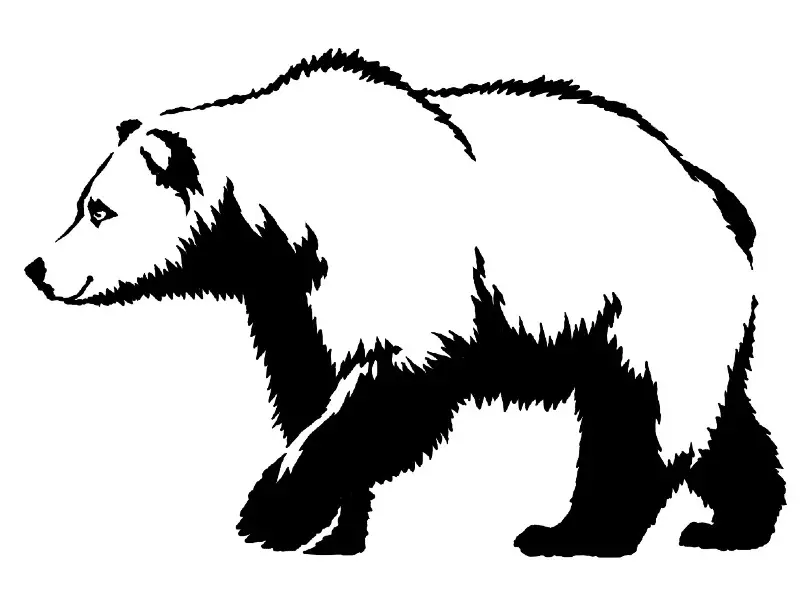
Use your pencil to add shagginess to the bear’s fur. This can emphasize the bear’s limbs, and be used to add some shadow around its legs, stomach, and back. You can also add some claw detailing, a bit of definition to the top of the bear’s head, and dots to the nose.
Step 10: Outline Your Bear
Once you’re happy with your bear’s overall shape and look, grab your fine liner and fill in the outline! You can vary between the pencil and the fine liner to make the most of the contrasting darkness and silver lines.
Conclusion
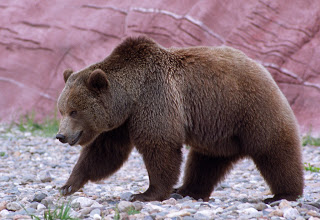
If your bear doesn’t look perfect, don’t worry! You can always have another go at it. Hopefully, you’ve got something that you’re proud of, even if you think you can do better next time.If you’re still struggling, try looking at some photographs of bears online and study the shape of their bodies, comparing them to your drawing. Don’t give up; art is a process and you can only improve, so keep trying!
Comments
0 comments