Hooded scarves are both practical and gorgeous, and making your own has to be one of the most satisfying things you can do with your time. What could be better than snuggling into a garment you have made yourself?
Anyone who crochets will know what a pleasing and relaxing activity it is to spend your time doing, and making a scarf is a great activity for someone who hasn’t been doing it for very long, as it’s relatively simple.
This scarf has both a hood and a practical pocket at each end of the scarf, making it perfect winter wear for you ““ or a lucky loved one! If you haven’t made one of these before and you intend it as a gift, give yourself plenty of time to make it and experiment
Materials
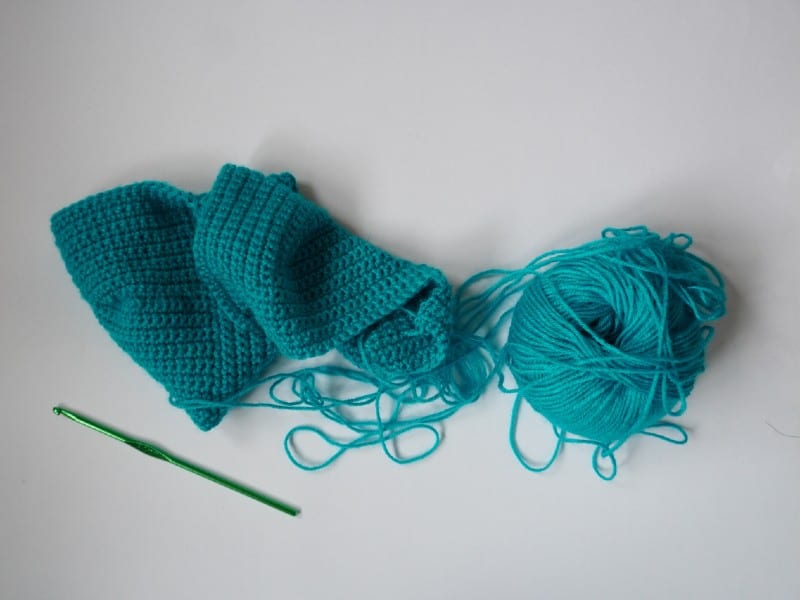
 For your crochet hooded scarf, you’ll require:
- A 7 mm crochet hook
- 3-4 skeins of yarn (size 5) in the color of your choice
- Scissors
- Stitch markers in several colors (these will make it much easier to keep track of this project)
- A yarn needle (for weaving the ends in)
Abbreviations
In case you need to double-check any of the standard abbreviations for crochet, here they are:Double crochet = dcHalf double crochet = hdcSingle crochet = scSlip stitch = sl stChain = chHowever, for convenience for beginners, this guide will not use abbreviations, but the full terms throughout.
Row 1: Start The Chain
Start by creating a slip knot in your yarn and putting it on the crochet hook. Chain 237 stitches for your first row. Try to keep your stitches even, and don’t pull any tight or leave any loose. This will give you a nice edge to the scarf and make it easier to keep the following rows straight and tidy. It will also make it easier to see if you have dropped a stitch anywhere.
Step 2: Move Onto The First Row
For the first row, you are going to do a single crochet into the second chain along from your hook. Work right along, counting as you go to make sure you don’t lose or drop stitches. This can be easier than trying to count at the end, especially if you are a beginner.
Step 3: Start Row Two
For your second row, chain one stitch. Next, you’re going to start working in the back loop of your stitches. Take your crochet hook and do one single crochet into the back loop of the first stitch. Again, hold your yarn tense, but do not pull it tight, or you will make it very hard to keep crocheting further rows. Repeat this for the next 16 stitches, so that you get single crochets in the back loop of the first 17 stitches of the row.You may find it useful to put a stitch marker on the 17th stitch so that you know when to change the style and don’t accidentally run past the mark. When you get to the marker, move it into the stitch you’ve just created (the 17th) so you can find this on the next row as well.You do not have to use stitch markers if you don’t have them, but they will really help you during this project. It may help to use color-coded ones (e.g. blue stitch marker = stitch seventeen). You can easily get colored stitch markers that are perfect for this kind of project.
Step 4: Continue Row Two
When you have got to the 17th stitch and moved your marker, you’re going to change your approach. Now, chain one stitch. Skip the next stitch, and put a single crochet in the stitch after it. Repeat this by chaining one, skipping a stitch, and putting a single crochet into the next stitch.Keep doing this all the way along with the scarf, until there are 17 stitches left. Again, a stitch marker may help you with judging this and not overshooting. If you do go too far, simply undo a few stitches until you’re back where you should be.
Step 5: Finish Row Two
When you reach your “17” stitch marker, single crochet into the back loop of the next stitch, just as you did in Step 3. Put your stitch marker in the first stitch of this style so you can find your place easily on the next row.Carry on doing single crochets in each chain until you reach the end of your row. You have completed the second row and set up the pattern for the scarf now!
Step 6: Start Row Three
Begin the next row by chaining one. Turn your crochet so you can continue to work on it. Put single crochets in the back loop of your first 17 stitches, as you did in the last row. Remember to move your stitch marker up to mark the new stitch 17.
Step 7: Continue Row Three
When you reach your stitch marker, chain one, and look at the next stitches. You need to skip your first single crochet and put your single crochet into the chain one space instead ““ not the stitch. This might look like a bit of a big gap, but it is correct; don’t worry.Chain again, skip the next single crochet, and create a single crochet in the chain one space. Repeat this all the way along your row until you hit your stitch marker.
Step 8: Finish Row Three
As before, you should be working your last 17 stitches with a single crochet in the back loop of each stitch. Remember to move your stitch marker when you have completed the first of these 17 stitches, so you can find your place on the next row.
Step 9: Repeat This Pattern
This is the basic pattern for most of your scarf, so you should now work on repeating this pattern over and over again for the next 14 rows. With a total of 16 rows, this will make you quite a wide scarf, so you can choose to reduce or increase the number of rows slightly, depending on your preferences. As you approach row 16, pause and look at the scarf, and decide if you want to add more rows or stop. You can even wrap it around your neck to test how it feels if you can’t decide. A scarf that is too wide won’t be comfortable, and a scarf that is very narrow won’t keep you warm, so think about this.
Step 10: Start Row 17
It’s time to start the hood part of your scarf off. Begin by doing your usual single chain and turn. Next, for the first 17 stitches, do exactly what you have been doing thus far. Single crochet into the back loop of the stitches.
Step 11: Continue Row 17
When you reach your stitch marker, take it out and set it aside. You are now going to do a single crochet into the next stitch.Next, do a single crochet into the next chain. Do a single crochet into the next stitch, and a single crochet into the next chain.Keep doing this until you have done a full 60 stitches and chains. This will create a nice, even edge to your scarf.
Step 12: Start The Hood’s Edge (Row 17)
When you have completed the 60th stitch, you are going to carry on doing the same thing, but grab your stitch marker and mark the 61st stitch. This will show you where your hood is going to start, so it’s important to keep note of.Work the remaining seven stitches.
 Step 13: Continue The Hood’s Edge (Row 17)
When you have the first eight stitches of the hood done, chain one stitch and then skip a stitch and single crochet into the next stitch. Chain one, skip a stitch, and then single crochet in the next stitch.You should do this a total of 33 times, forming the inside of the hood.
Step 14: Finish The Scarf Edging (Row 17)
Glance back at Step 11. You are now going to do eight single crochets in the stitches and the chain spaces to finish off the scarf’s edging.Put a stitch marker in your eighth single crochet. Now continue the single crochets in the stitches and chain space for the next 60 stitches, just as you did on the first half of this row. This will take you back to your stitch marker that marks the 17th stitch.
Step 15: Ending Row 17
Do the final 17 stitches by single crocheting into the back loop of each stitch. This will take you back to the end of your scarf. You are now going to fasten off the scarf.Stretch out a few inches of yarn beyond the needle and cut it. Put the yarn over your hook and pull it through your last stitch to make a knot. Don’t trim it short; you will want to weave it in later. Simply make sure that the knot you have made is holding (you don’t want to find all your hard work unraveling!) and move on to the next step in the process.
Step 16: Starting The Hood
Take the stitch marker that marks the 78th stitch (or count it out if you aren’t using stitch markers). Slip your crochet hook through this stitch, and slip stitch into it with the end of yarn still attached to your skein. If you are almost at the end of a skein, you may wish to start a new one at this point. Chain one, and then work in the back loop of the next eight stitches, doing a single crochet in each. When you get to the eighth stitch, mark it with a stitch marker so you can find it again.
Step 17: Continue The Hood
Chain one, skip a stitch, and then single crochet into the chain one space. Chain one, skip a stitch, and single crochet into the chain one space. Repeat this until you have done thirty-three stitches.You should then be eight stitches away from your next stitch marker. Return to doing single crochets in the back loops of the next eight stitches, until you reach your stitch marker. Move the stitch marker to your eighth stitch in the new row.
Step 18: Carry On Crafting The Hood
Single crochet in the back loops of the first eight stitches, and then chain one, skip a stitch, and single crochet into the chain. Continue for 33 stitches until there are just eight stitches left, and then single crochet in the back loop of the last eight stitches.
Step 19: Repeat The Above For 48 Rows
You should continue crafting your hood by single crocheting into the back loop of the eight stitches, chaining one, doing your skip a stitch and single crochets for 33 stitches, and then doing the single crochets into the back loop of the last eight stitches.You should do this until your hood totals 49 rows (including the first one). If you like, you can go a little bigger by adding a few more rows, or a little smaller by reducing them, but 49 rows should fit most people comfortably.When you get to the 49th row, cut yourself a very long tail of yarn to work with ““ go for at least 15 inches, because you’re going to use this to sew up the hood.
Step 20: Sew Up The Hood
Thread your yarn end onto your yarn needle. Fold the hood in half, and then you are going to stitch the two halves together.Take the needle in one hand and hold the two halves of the hood together. Hold the side that the yarn is attached to in your right hand, and the side that the yarn is not attached to in your left (or the other way around if you find it easier, but remember to reverse these instructions).Thread the needle through the first stitch on the left-hand side (or the side that your yarn is not attached to) and pull it through.Go through the top loop of the second stitch on that side, and then through the second stitch on the opposite side (where your yarn originally came from).Next, go through the third stitch on the right-hand side, and then cross to the third stitch on the left. Go through the fourth stitch on your left-hand side, and the fourth stitch on the right. Continue doing this, creating a pattern where you go through the stitch on one side, the corresponding stitch on the second side, and then the next stitch on the second side, and then switch back.This will create a nice even sort of ladder that should be totally invisible once you have finished.Sew all the way down the hood, and it’s finished!
Step 21: Create Pockets (Optional)
You may think that the scarf looks too long; that’s because we have created the capacity for pockets. It’s time to stitch them.Take one of your scarf’s ends and fold it so that the end of the scarf lines up with the change in your stitch. Cut yourself a new length of yarn and thread it through the needle, and then use a running stitch to go right down from the top of the pocket to the very bottom, and then back up again.To do a running stitch, simply go from side to side of your scarf, working through both layers of the yarn in a stitch that weaves down. When you reach the bottom, reverse the stitch so that you are adding yarn in each gap you left on the way down, and leaving a gap in each stitch you created on the way down.This will create a nice edge with no gaps for things to get stuck in or fall through.Do this on both sides of the pocket for both sides of the scarf, and then simply weave in the loose ends.
Step 22: Weave In Remaining Loose Ends
If you have any remaining loose ends on the hood or scarf, you should now take your yarn needle and weave them into the yarn so that they disappear. Don’t leave any dangling as this will spoil the look of your project and leave it messy.
Conclusion
You now have an amazing hooded scarf, complete with pockets, that you can show off. Making it yourself is an incredible achievement that you should be extremely proud of, and once you’re a bit more experienced, you can experiment with different colors and designs, or even try adding ears to the top.These make wonderful gifts, especially in winter, and are so snug. They will keep your hands nice and toasty, and the pockets are the perfect size to slot a smartphone into, so they are practical as well as warm.Choose a thicker yarn if you want a very dense knit, but remember that you will need more skeins and you might struggle slightly if the yarn is too thick for your hook.Source: https://www.windingroadcrochet.com/woodland-hooded-scarf-crochet-pattern/

Comments
0 comments