Hedgehogs are adorable and kids are always fascinated by them. We’ve got some cute hedgehog craft template ideas that you can put together in no time so you can have your very own hedgehog or hedgehog family.
Paper plate hedgehog
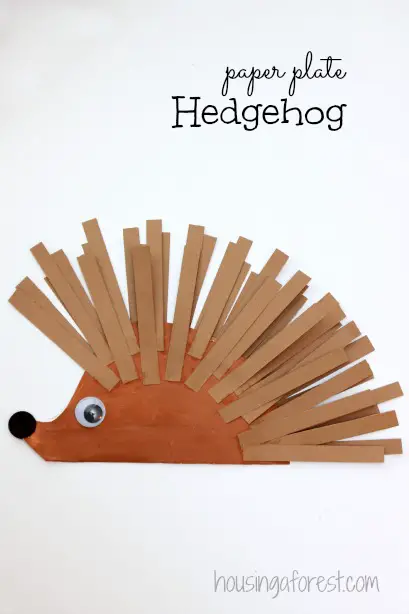 Source:http://www.housingaforest.com/paper-plate-hedgehog/This craft activity is so simple but effective. Your kids will love making these hedgehogs and will be able to do most of the steps on their own if not all depending on how old they are.
Supplies you’ll need
- 1 Paper plate
- Pen or pencil
- Brown paint (and paintbrush) or brown crayon or marker
- 1 Piece of brown paper
- 1 Piece of black paper or a black pom-pom
- Scissors
- Glue
- 1 googly eye
- Newspaper or old sheet
Step-by-step tutorial
- Prepare your work area by laying down newspaper pieces or an old sheet.
- Fold your paper plate in half so that the top side of the plate is on the outside with the slightly raised edges pointing toward you, rather than into itself.
- You will need just half a plate per hedgehog. Cut down the fold in the middle you just made.
- Now, you want to draw the outline of the hedgehog. You will use most of the plate except for a small portion on the right, where the nose and face will be. Draw a little indent for the nose and face so its nose is pointy and facing up toward the sky.
- Cut around the outline you just drew.
- Now, you can choose to paint or color your hedgehog shape brown. Cover the entire figure in brown on the top side of the plate. If you paint it, you will need to wait until it has dried before you glue anything on. In the meantime, you can start on step 7.
- Take your brown paper and cut 15 strips ½ inch x 4 inches long. These will form your hedgehog’s quills.
- Glue these on the top of the plate on both sides so you have more room to work with.
- Now you need to add the nose tip which will be a black circle. You can cut out a small circle (approximately 1 inch in diameter) or use a small black pom-pom. Glue your nose on the furthest tip you already cut around.
- Take your googly eye and glue this onto your hedgehog slightly higher than the nose and on the main section of the plate so that it’s about 2-inches from the nose. Give the nose and eye some time to dry before playing with it.
That’s it, your adorable little paper plate hedgehog is ready and you can display it as artwork or give it a name and play with it!
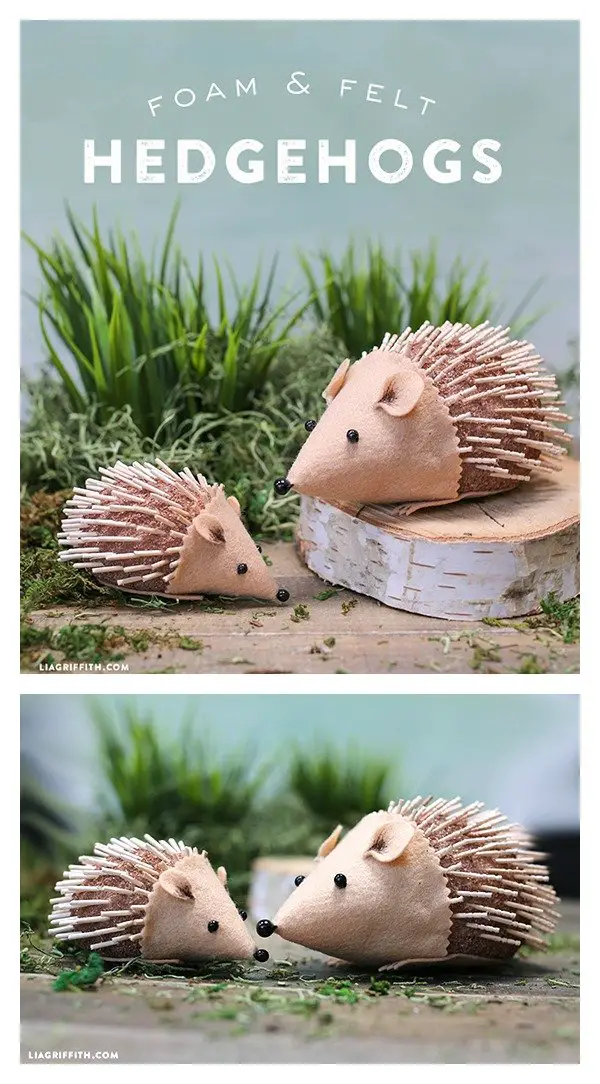
Styrofoam hedgehog
 Source:
https://coolcreativity.com/kids/diy-hedgehog-craft-kids/
These hedgehogs are so convincing and cute. They will be a little spiky, so they are better as pieces of art rather than as a playmate. It’s lovely if you can make a family of hedgehogs if you have different size styrofoam pieces.
Supplies you’ll need
- Egg-shaped styrofoam balls
- Brown paint (plus paintbrush) or spray paint
- Toothpicks
- Brown felt
- Scissors
- Pinking shears (optional)
- Black marker
- Cotton wool
- 3 Small black beads
- Black thread
- Needle
- Hot glue gun
- Newspaper
- An old sheet
Step-by-step tutorial
- Set up your work area by laying down newspaper pieces or an old sheet.
- Push in one side of the egg-shaped styrofoam ball so that it’s flat. This will make its base and you don’t want it to roll over.
- Take your styrofoam ball and stick one toothpick in the underside, which you will use to spin it over when you’re done painting one side. You need to cover the whole ball in brown and you can do this with paint and a paintbrush or spray paint. Paint one side then flip it over using your toothpick. Paint the other side and let it dry.
- Now, you will make its face using your brown felt. Draw a semicircle so that it will be large enough to fit over one of the narrow ends of your styrofoam once it’s folded over itself (it will need to be just over double the width).
- Cut out the semicircle using pinking shears if you have them or you can use regular scissors.
- Fold the felt piece so that you end up with a cone shape. Hold it together by folding it slightly over itself and putting a line of hot glue in between so it stays. Wait for it to dry.
- Now, you will take your black beads and thread these onto the face (felt cone). Using black thread and a needle attach one of the beads to the very tip of the cone so that it makes your hedgehog’s nose. You want to do the same thing with the eyes, which you will sew next to each other above the nose (keep the side with the join down).
- To make the ears, draw two teardrop shapes and then cut these out of the felt with regular scissors.
- Using your glue gun, add a drop of glue on the pointy ends of the teardrop felt shapes and pinch these in with your fingers so they form the curve of the ears. Glue the ears onto your cone face just above the eyes.
- Now, you’re ready to assemble the face onto the body. Fill the head with cotton wool to pad it out so it doesn’t collapse. Attach the face using your hot glue gun to draw a line around the inside edge of the face and stick it onto the body.
- To make the feet, draw two long strips on your brown felt. You will need enough length so that you can glue the feet underneath and still have ½ inch to 1 inch sticking out from the front part of the body. Draw three toes at one end of the strips and cut out the feet. Attach them to the under part of the body with glue.
- You’re ready to stick in the quills which you will create with toothpicks. From behind the head stick toothpicks facing away from the face all around its body. If you’re using smaller balls you may want to cut the toothpicks in half first.
Your ridiculously cute hedgehog or hedgehog family is ready. You could place them on green paper (for grass) and even leave them a few greens to eat, making this scene completely photo-worthy.
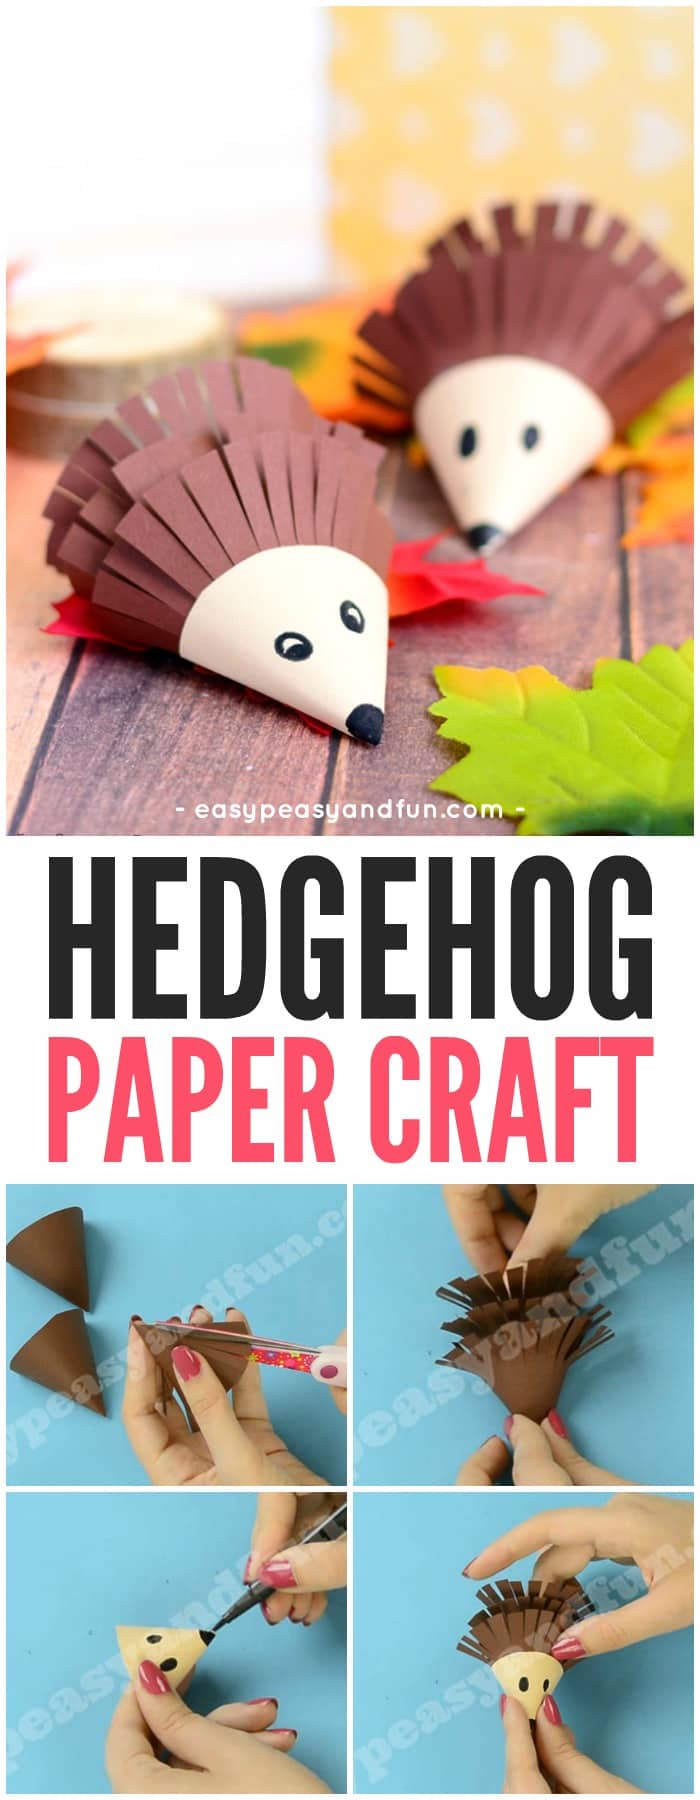
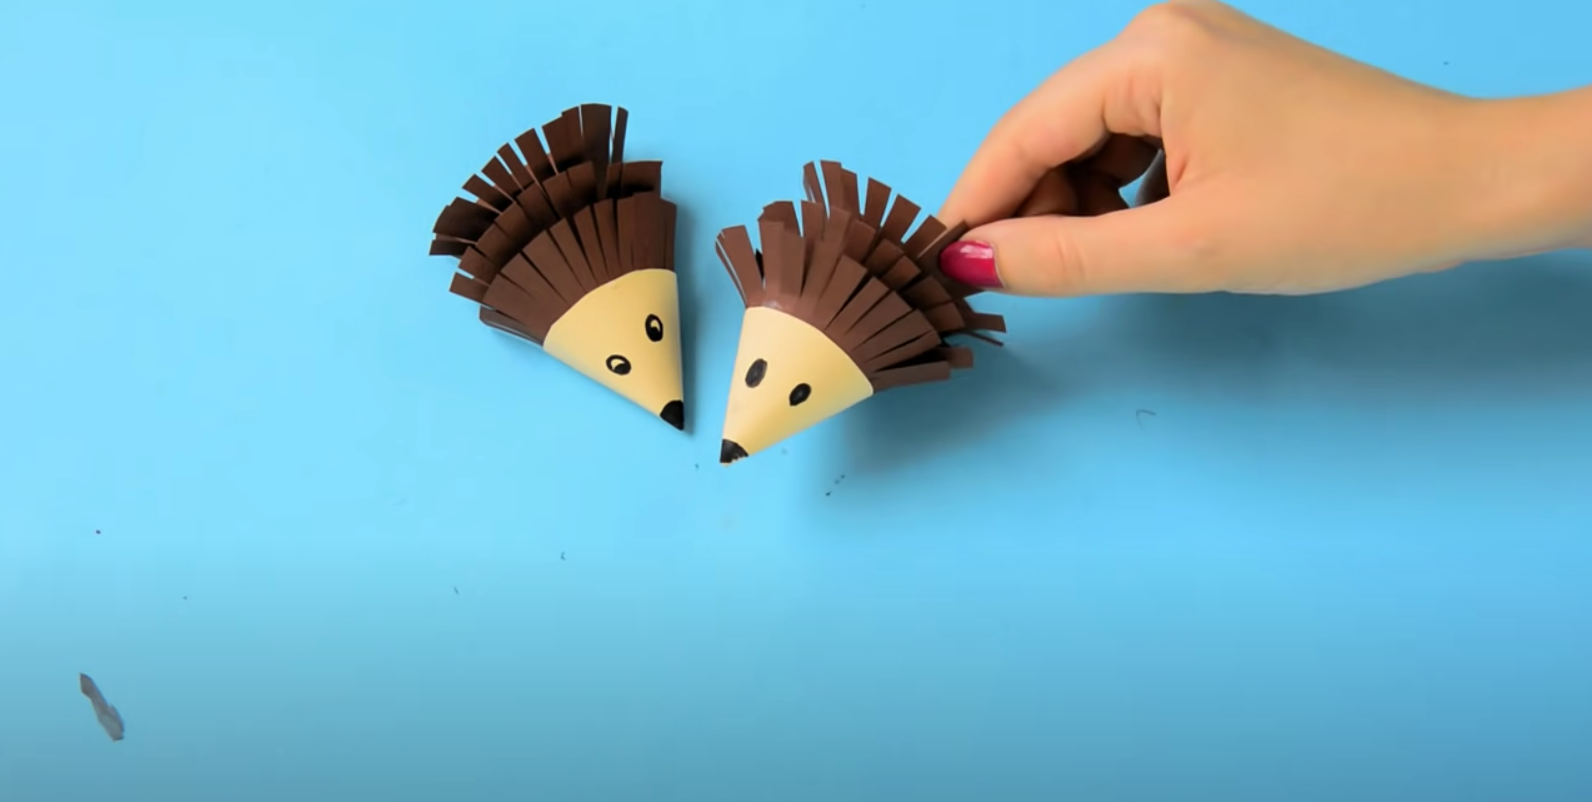
Paper Hedgehog
 Source:https://www.easypeasyandfun.com/cute-hedgehog-paper-craft/
What could be better suited to fall than a hedgehog and some gorgeous fall leaves, both combined into an adorable and simple craft? Most parents love doing paper crafts with their kids because these are low-cost, low-mess, and lots of fun.
You also get a wonderful project at the end that you can hang on the fridge or gift to relatives or friends for a particularly special Thanksgiving or Christmas.
Hedgehogs are very popular animals with children, who love all their prickly spines and their incredible ability to roll into a ball. That means that this hedgehog craft is bound to be a hit with the little ones.
You can encourage them to give their hedgehogs inventive names, and let them choose different colored pom poms for the noses so that every hedgehog is unique. The hedgehogs can also be made in different sizes, allowing you to create an entire family in bright fall colors.
This craft will need a bit of adult input if you are cutting out the leaves by hand, but it is generally a pretty simple one, and once you have some leaves ready, you can let your child get busy with the sticking ““ the bit they will find the most fun.
One of the great things about the hedgehog craft is you don’t have to be neat or tidy to get good results; it will look wonderful whatever the child does!
Comments
0 comments