
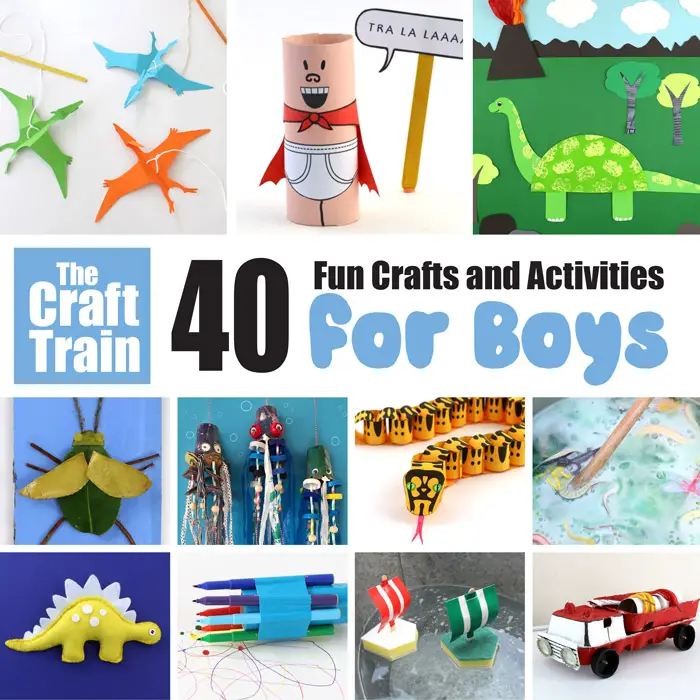
If you have a little boy who’s into arts and crafts, you might be looking for some fun crafts for boys, and the good news is ““ there are hundreds! Whatever your boy is into, you’re bound to be able to find some great art projects to undertake with him.Try and choose crafts based on his interests, and you should be able to have loads of fun and make some really unusual projects together.
Knight’s Shield
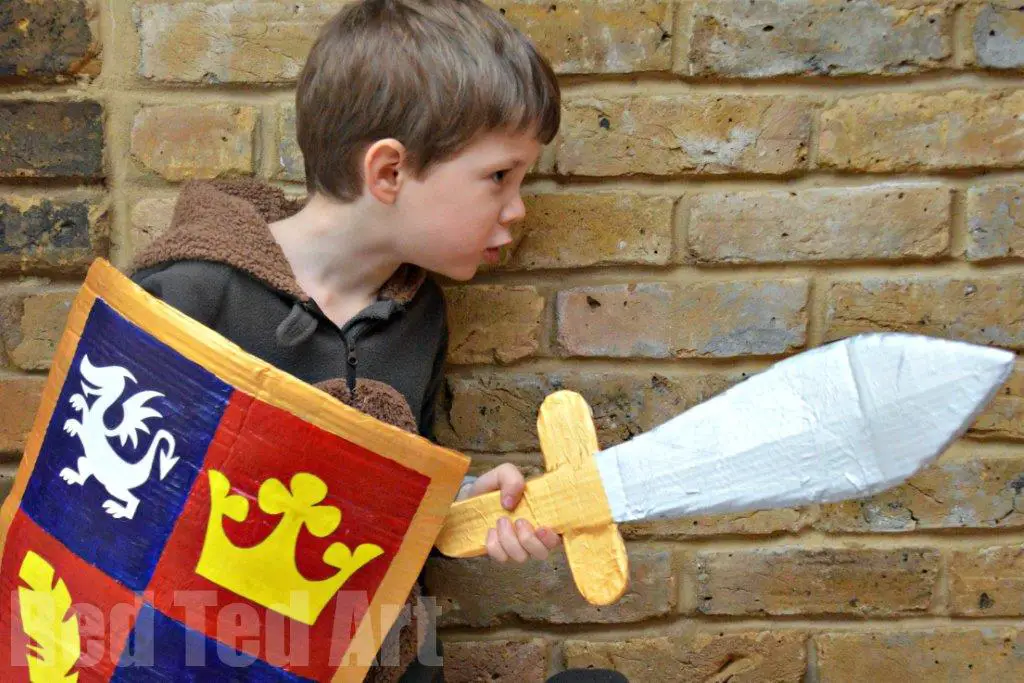 Source: https://www.redtedart.com/make-knights-shield//If your son is enthusiastic about knights and medieval history, a knight’s shield is a fantastic prop that they can have great fun with for hours on end. You can also get a lot of enjoyment out of designing a suitable crest for your little knight’s “house” and applying it to the shield.
Materials
A knight’s shield will need you to the source:
- 1 large cardboard box
- Acrylic paint
- Paintbrush
- Glue gun
- White paper
- Pencil
- Craft knife
- Scissors
- Newspaper
- White glue
Step 1: Design The Crest
The first thing your child should think about is what design they would like to appear on their shield. They might like a crown, a dragon, a lion, or something else entirely. Help them draw whatever pattern they like on the white paper, or download one from the internet.
Step 2: Cut Out Your Shield
You are going to cut at least two shields, preferably three, to glue together. This will give your shield rigidity and stability. Use the pencil to draw the outline of one first, and then cut this out and draw around it to make the others.Cut your cardboard in different directions if possible, so that weaknesses in the box end up crisscrossing with each other, rather than aligning. This will help to make your shield strong.Get your son to help you glue the three pieces together using the glue gun.
Step 3: Add Straps
The shield needs to be able to fit over your son’s arm, so now you need to cut another four strips of cardboard. Two should be long enough to fit comfortably over the wide part of your son’s arm, by the elbow, while the other two can be shorter as it’s where his hand will grip the shield.Glue the two long strips together, and the two short strips together, and then glue them to the back of the shield. Check for the fit and remember that the shield will be worn on your son’s non-dominant arm most of the time.
Step 4: Add Newspaper
A few layers of newspaper will add rigidity and durability to the sword. Add a little water to some white glue and mix it up, and then apply some newspaper to the back and front of the shield. The more paper you add, the stronger the shield will be. Try to make sure that the surface stays reasonably smooth; it will be hard to cover up wrinkles with paint, so it’s best to paste the paper down flat. Cover the edges as well as the front and back of the shield. If your son is old enough, he can do this part of the craft independently.Once the shield has been covered in the newspaper, you will need to leave it to dry. Before doing so, curve the shield gently so that it will dry in a shaped position.
Step 5: Paint The Shield
Think about the design of the shield and help your son choose some paint colors. If he wants straight lines, use masking tape to help, and let the paint dry thoroughly before changing color.Once he is happy with the background of the shield, cut out your templates and help your son to paste them to the front of the shield. If he wants to color or paint them, do this before adding glue.When adding the glue, water it down a little and add it in small quantities to stop the paper from getting too wet. You may need several coats.
Step 6: Make A Sword (Optional)
What knight is seen without a sword? You can easily create one using the same method of layering up cardboard and gluing it and then adding newspaper for rigidity. Next, simply paint the sword and let your little knight run around challenging enemies of the realm.
Viking Boat Sponges
 https://www.thecrafttrain.com/wp-content/uploads/2020/04/Crafts-for-boys-pin2.jpgNot many crafts are suitable to take in the bath, but this one is ““ and it’s a great one for any boy who loves Vikings.
Materials
For a Viking boat, you’re going to need:
- 1 green and yellow scourer
- A scrap of striped vinyl
- A handful of Popsicle sticks
- Scissors
- Glue gun
- Ruler
- Lego people (optional)
Step 1: Cut Out Your Boat
To make the basic boat shape, simply cut the front two corners of your scourer off, leaving a “v” at the front of the boat. That’s all! You should use a ruler and very sharp scissors to get a clean-cut, but your boat is now ready to go.
Step 2: Add A Sail
Get your son to choose a pattern of stripy vinyl (or another stiff fabric, but vinyl is best) and then cut a rectangle that’s a little bigger than your boat.Cut a small slit in the top and bottom of this, and slide a Popsicle stick in. Use your glue gun to secure the sail with a curve in it, and then cut a slot in the top of your scourer and glue the Popsicle stick firmly in place.
Step 3: Make Oars
What Viking longboat lacks oars? You can just cut your Popsicle sticks in half and glue them in a line on either side of the boat, or you can split them lengthways as well to make thinner oars.
Step 4: Man The Boat (Optional)
When bathtime rolls around, make sure you take a handful of Lego people (or any other small toys that your son has) and populate the boat. You could add plastic dinosaurs or farm animals. As long as the toy won’t mind getting wet, it can have a trip on the Viking galley.Make a few boats, and your son can stage Viking wars at sea.This is one surefire way to get your son to look forward to bathtime, at least for a day!
Superhero Mask
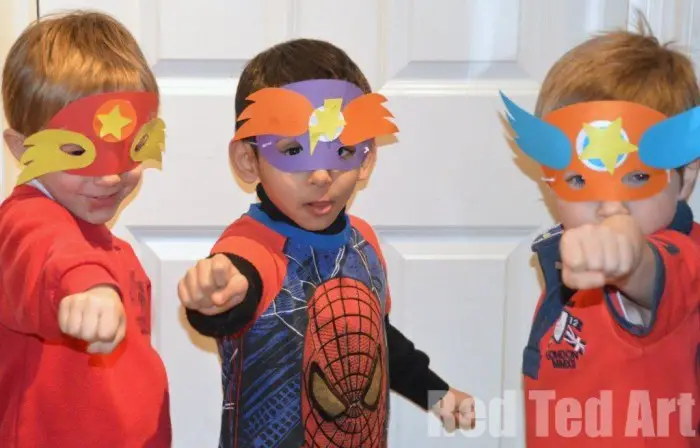 Source: https://www.redtedart.com/superhero-mask-template-party-activity/If your boy is more into superheroes, you can have amazing fun whipping up a super simple superhero mask for him to conceal his true identity with.
Materials
You’re going to need:
- Some colored card in your son’s choice of colors
- A black marker pen
- A hole punch
- A glue gun
- Thin elastic
- Scissors
- A pencil
- White glue
- A tape measure
- Tape
Step 1: Make The Mask
Measure your son’s face from ear to ear using a cloth tape measure. Next, measure from cheek to forehead. You should aim for slightly too big rather than slightly too small; it won’t matter if the mask is a little long (you can easily trim it down), but it shouldn’t be too short.Use the measurement to mark the edges of the mask on a piece of paper, and then draw a mask outline using the pencil. Remember that superhero masks usually just cover the forehead, the eyes, and the bridge of the nose; you don’t need to cut a full face mask.Cut around your outline, and check it fits your son’s face properly. Trim it if necessary.
Step 2: Cut Out The Eyes
Use your tape measure and measurement done by eye to work out where the holes in the mask need to go. Draw two eye holes, and then put your mask against a cutting board and punch through with your scissors and cut neat edges. Pause to measure every so often; you can always trim a bit more off, but you don’t want to make the holes too big.
Step 3: Add The Elastic
Once you’re satisfied with the basic shape of the mask, use the scissors to make a little hole in either side of the mask, near the bottom. Don’t go too close to the edge or the card may tear.Slip the end of your elastic through and tie two knots on the far side so it cannot come out of the hole. Add a little bit of tape to help the card hold. Next, add a dot of glue gun glue to secure the elastic.Your knot and the tape will be on the front of the mask but will be covered up with decoration later, so don’t worry about them showing for now.
Step 4: Design The Mask
Get your child to decide what they would like on the mask, and cut out some shapes for them. Adding wings to the eyes of the mask makes them look dramatic and will hide the elastic. It also adds to the idea of the superhero being able to fly.To make wings, draw an oval that leads up to a point (a little like a teardrop), and then turn the pointed edge into feather-like spikes. These don’t need to be perfect; your son will love them.Other great things to include are star-shapes or their initial or codename initial cut out of colored cards. Look at superhero designs online if you need more inspiration or your son wants to be a particular character.
Step 5: Glue The Decorations
Help your son to arrange and glue the card decorations into place. It’s fine to stick something over the eye holes; once the glue is dry, you can simply turn the mask over and use the original holes to guide you on where to cut out the new ones.When the mask is dry, your son can don it and transform into a superhero ready to save the world! Add a wide scarf for a cape, and he’ll be away!
Toilet Tube Rocket
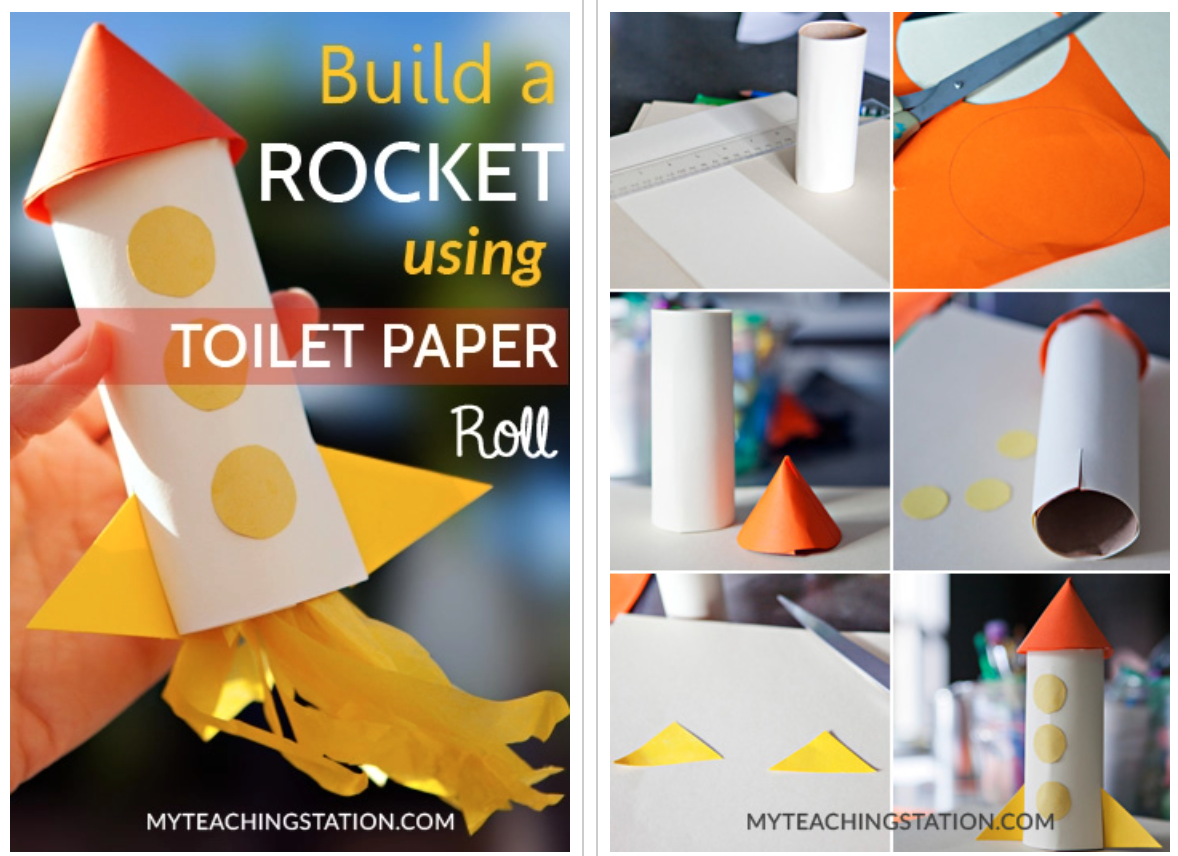 Source: https://www.myteachingstation.com/make-a-rocket-using-toilet-paper-rollMost boys are passionately keen on space, and you can make a fantastic rocket out of toilet tubes and cardboard, either as part of a big space display or just for fun!
Materials
You’re going to need:
- 2 empty toilet tubes
- Silver paint
- Paintbrush
- Colored cards in 2-3 colors
- Red tissue paper and yellow tissue paper
- Scissors
- Glue gun
- White glue
- Aluminum foil
- Clear fishing wire
Step 1: Paint And Glue The Rocket
Help your son to paint two toilet tubes using silver paint (or another color if he prefers) and then use your white glue to join the two parts. A bit of masking tape will hold them together while they dry if necessary. Set them aside to dry.
Step 2: Make The Rocket’s Top
Your rocket needs a pointed tip, so you’re going to help your son cut a wide circle of cards, and then slit up the middle and curl it in on itself to create a cone. You can staple this or use the glue gun to fasten it, and then trim the bottom so that it is neat.
Step 3: Make The Rocket’s Base
Choose one of your colored cards for the triangles at the bottom of the rocket, and get your son to cut three triangles out of the card. Next, cut three slits around the body of the rocket, and glue these triangles into place.Once the top is dry, glue it to the other end of the rocket, and you’ve got the main body complete.
Step 4: Decorate The Rocket
Ask your son how he’d like to decorate the rocket. Does he want windows? Big shiny buttons? A doorway?You should have one or two more kinds of colored cards at your disposal, as well as the aluminum foil. You can use both of these to very effectively decorate the rocket’s body, or you can add other decorations like buttons or stickers. Your son could use yellow cards to create windows, and then draw little people looking out of them, or he could cut circles of foil to make the body shiny.
Step 5: Add Flames
Get your son to tear some strips of red and yellow tissue paper, and then help him glue these to the inside of the rocket. You can get a wonderful effect of fire powering the rocket forward here. If you don’t have any tissue, cut some flames out of red and yellow sheets of card and glue them inside the tube.Leave the glue to dry.
Step 6: Suspend The Rocket
Ask your son what angle he’d like to hang his rocket at. Is it powering straight up into the atmosphere, or beginning to arc around, or even horizontal?If he wants it hanging straight up, glue your length of fishing wire to the tip of the rocket. If he would like it arcing, any point between the tip and halfway point of the body will work. If he would like the rocket to hang horizontally, simply glue the fishing wire at halfway (or just slightly above it, if your rocket is bottom-heavy), and then you can hang the rocket up.
Conclusion
Whatever your son enjoys, there are many wonderful craft projects you can get him to engage with, creating great toys or decorations for his bedroom. Most of these can expand into other projects, and serve as learning opportunities for both of you ““ and you’ll end up with very fond memories of spending time together.
Comments
0 comments