
There is something so majestic and beautiful about the elephant. Children and adults alike just seem to love and admire them. Their floppy ears, giant trunks, and sensitive eyes make them a favorite of people everywhere. Although they are the biggest land mammals, there is something so cute about these gentle giants. Especially the babies! And their trunks are so amazing. Did you know that they can pick up anything from a tiny peanut to a log with that silly trunk? They also use their trunks to love and establish dominance. And elephants are one of the only animals that grieve for their dead. They are truly remarkable. If you have ever taken your kids to the zoo to see the elephants or plan on it, you will enjoy these elephant crafts for kids.
Newspaper Elephant Craft
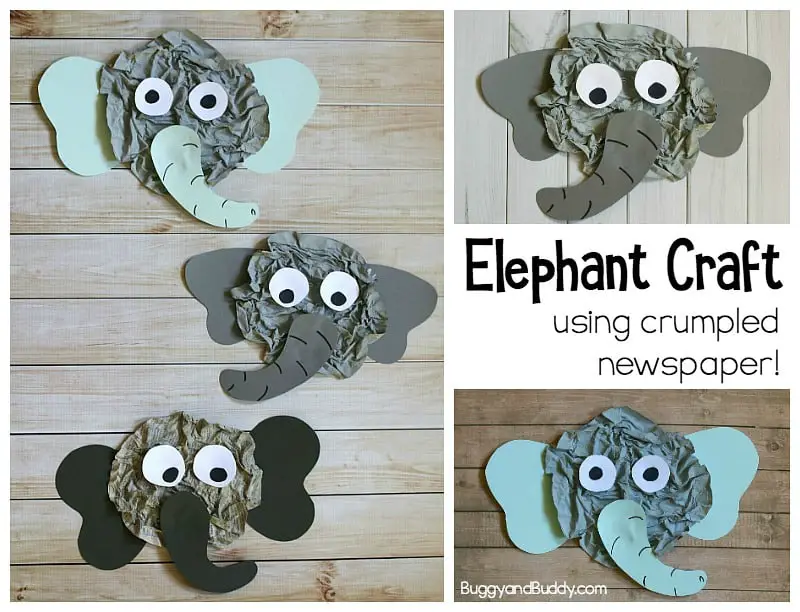 Source: By Chelsea @ Buggy & Buddy, “Elephant Craft for Kids Using Crumpled Newspaper” (https://buggyandbuddy.com/elephant-craft-newspaper/)This newspaper elephant craft is a blast for kids to make. Using newspaper, children use a really neat technique to create a wrinkled effect that looks like the elephant’s skin. This is also a fun sensory project. It’s perfect for a lesson on zoo animals or to make along with reading a book about elephants.
What You’ll Need
- Scissors
- Newspaper
- Flour
- Paintbrush
- Water
- Black marker
- Construction paper (white, gray, or light blue work best)
- Glue
- Gray paint
Directions
From the newspaper, cut out two circles with a diameter of 7-8 inches. They don’t need to be perfectly round as you will be crumpling them up.Using the flour and water (about 1/4 cup each), create a paste by mixing them together.With the paintbrush, spread the flour paste over one of the newspaper circles. Don’t be afraid to use a lot. Place the second newspaper circle over it, so you have created a sandwich of sorts.Press the two circles together firmly to be sure they are stuck together. Now is the fun part, making your elephant’s wrinkles!Crumple the newspaper sandwich up and then un-crumple it. Do this several times. The more you pinch and squeeze, the more you will create wrinkles.The newspaper will need to dry overnight, so it’s best to do this step before starting the project in full. The next morning your newspaper should be hard.You can now paint your newspaper with gray paint. If you don’t have gray, have your children mix black and white. They will love mixing it!With the construction paper, cut out a trunk and two ears for your elephant. Glue them to the newspaper face. With the white construction paper, cut out two white eyes and give them black centers. Glue these to your elephant’s face. Your adorable newspaper elephant craft is now ready to display!
Balloon Elephant Card Craft
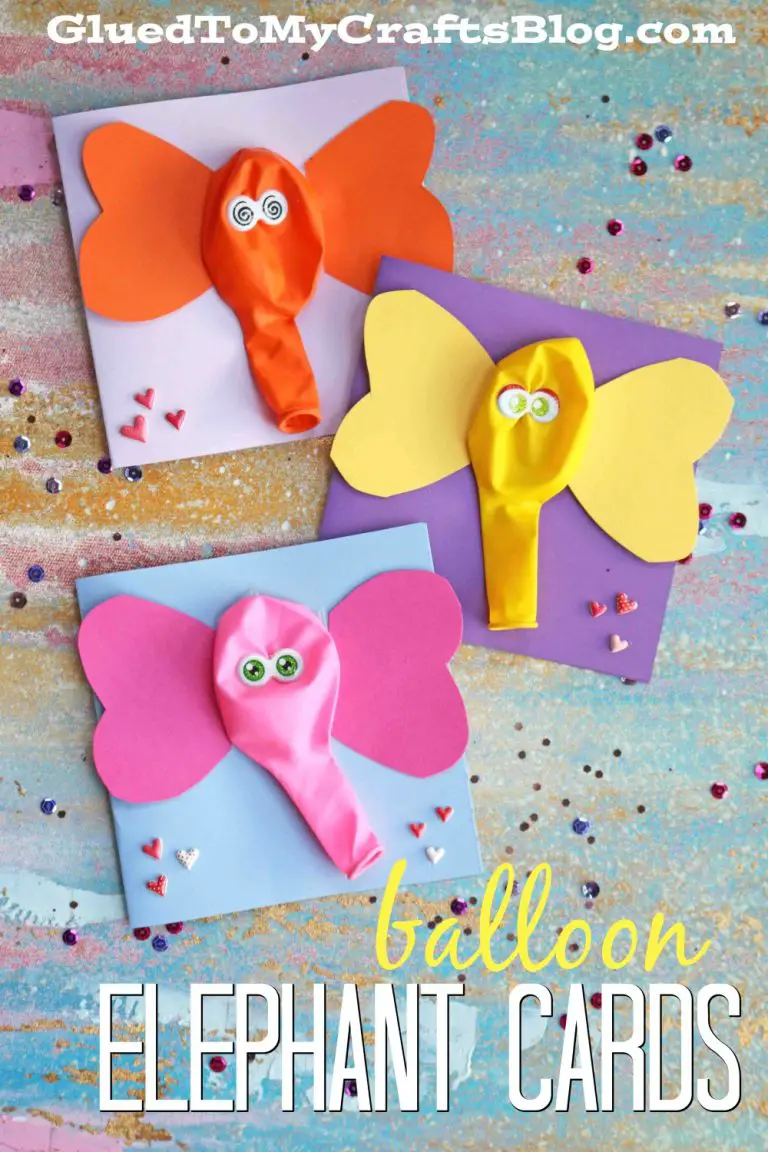 Source: By Stacey Gibbon @ Glued to My Crafts, “DIY Balloon Elephant Card ““ Unique Kid Craft Idea” (https://www.gluedtomycraftsblog.com/2017/02/balloon-elephant-card-kid-craft.html)Grandparents especially love receiving handmade things, and handmade cards take the cake. This darling little card is a Valentine’s Day card and cute party favor all in one. Just keep in mind that younger children should be supervised so that they don’t try to eat the balloons.
What You’ll Need
- Glue dots or tape
- Latex balloons (any color will do)
- Scissors
- Cardstock (any color will do)
- Glue stick
- Googly eyes
- Glitter or stickers etc. These are optional
Directions
Fold a single piece of cardstock in half to make a card.Using the glue dots, glue your balloon to the front of the card. This creates the head and trunk of your elephants.With the other piece of cardstock, cut out a set of ears to go on the sides of the balloon, making a heart shape. Glue them to the front of the card.Glue the googly eyes to the front of the balloon. If you have glitter or stickers, add other embellishments before giving your card to a loved one.
Paper Plate Elephant Craft
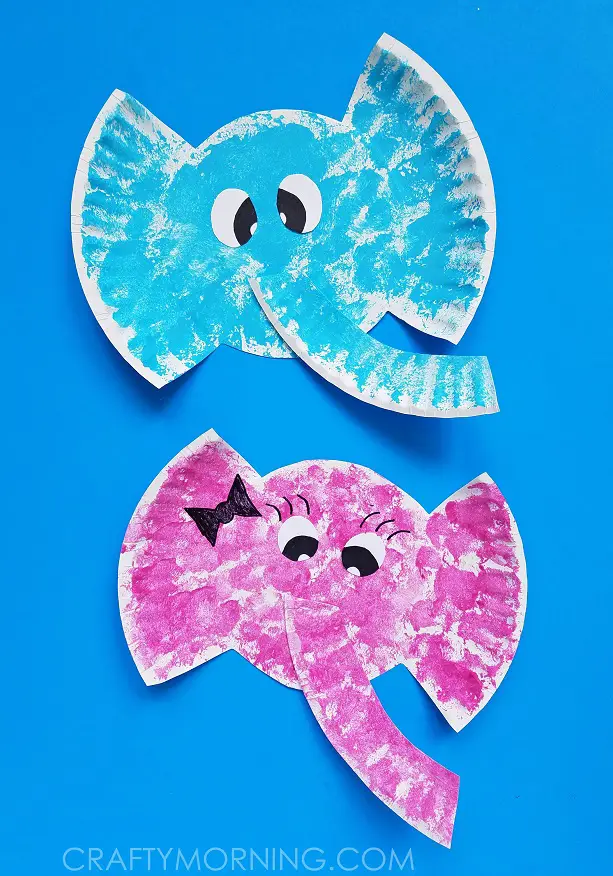 Source: By Michelle @ Crafty Morning, “Paper Plate Elephant Kids Craft” (https://www.craftymorning.com/paper-plate-elephant-kids-craft/)Paper plate crafts are always fun and easy for kids of all ages. These adorable little elephant paper plate crafts are fun to do with bold colors.
What You’ll Need
- Scissors
- Paper plate
- White paper
- Glue
- Paint
- Sponge
- Black Sharpie
Directions
Cut the sides off of your paper plate so that the result looks like a bow tie.Paint the plate. Any color works, but bold colors work best. Also, paint the extra pieces of the paper plate that you just cut off. Let dry.From the white paper, cut out two eyes and glue them to your elephant’s face.Using the extra pieces of the paper plate that you cut off, trim it down to make it thinner. Now glue it onto your elephant’s face. This will be his trunk.If your elephant is a girl, you can give her eyelashes with the Sharpie. Even a little bow is adorable. You’re all done!
Elephant Pull Toy
 Source: By Lisa Fyfe @ Hello, Wonderful “How to Make a DIY Elephant Pull Toy” (https://www.hellowonderful.co/post/diy-recycled-cardboard-elephant-pull-toy/)Inspired by vintage pull toys, these are some of my favorite craft ideas. It’s so much fun making them, and children love to be able to decorate them however they wish. A parent or older child should cut out the template to be sure no one gets hurt.
What You’ll Need
- Paint
- Paintbrushes
- Cardboard or cardstock (white is best)
- Pencil
- Scissors or a craft knife
- Elephant template download, which you can get here: https://drive.google.com/file/d/0B9QvFT_A4OYEU1lXZU9TenlSS1E/view
- Small beads
- Small wooden wheels. These can be found at Walmart or Michael’s
- Wood skewers, cut to 2 3/4 inches
- String or yarn
- Glue gun
- Markers, crayons, and colored pencils
Directions
Print out the elephant template and trace it out of cardboard.Paint your elephant and let it dry. Now fold over the bottom flap. Seal the bottom using your glue gun.Paint the wooden wheels and set them aside to dry. Secure a small bead to the end of the wood skewers with a touch of hot glue and put the wheels in place.Using the glue gun, fasten the wood skewer to the bottom of the elephant. You can now glue a piece of string or yarn to the front of your toy elephant. You are now ready to watch your children enjoy all their hard work.
Paper Plate Rocking Elephant Craft
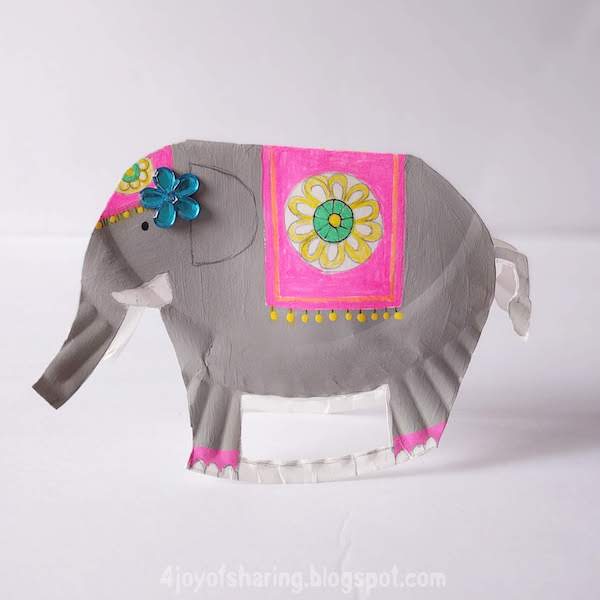 Source: By Joy of Sharing, “Paper Plate Rocking Elephant Craft For Kids” (https://www.thejoysharing.com/2018/06/paper-plate-rocking-elephant-craft-for.html)These cute little rocking elephants are great for preschoolers or kindergarteners. They are also perfect if you are having an elephant-themed birthday party.
What You’ll Need
- Acrylic paint
- Paper plate
- Flower craft gems
- Sharpies
- Scissors
- Pencil
Directions
Begin by folding the paper plate in half. Now trace the elephant’s outline on one side. Paint your elephant the color of your choice and let dry. You can also decorate it to give it a festive look.Now cut your elephant out, leaving the top part intact.Carefully cut out the paper plate part between your elephant’s legs, leaving about .5 inches of the paper plate connected to the legs. This will make the rocker or runner for your elephant.Glue a little flower gem to your elephant’s ear to give her a final touch.Congratulations! You now have an adorable rocking elephant. Your children will just adore this!
Cereal Box Elephant Craft
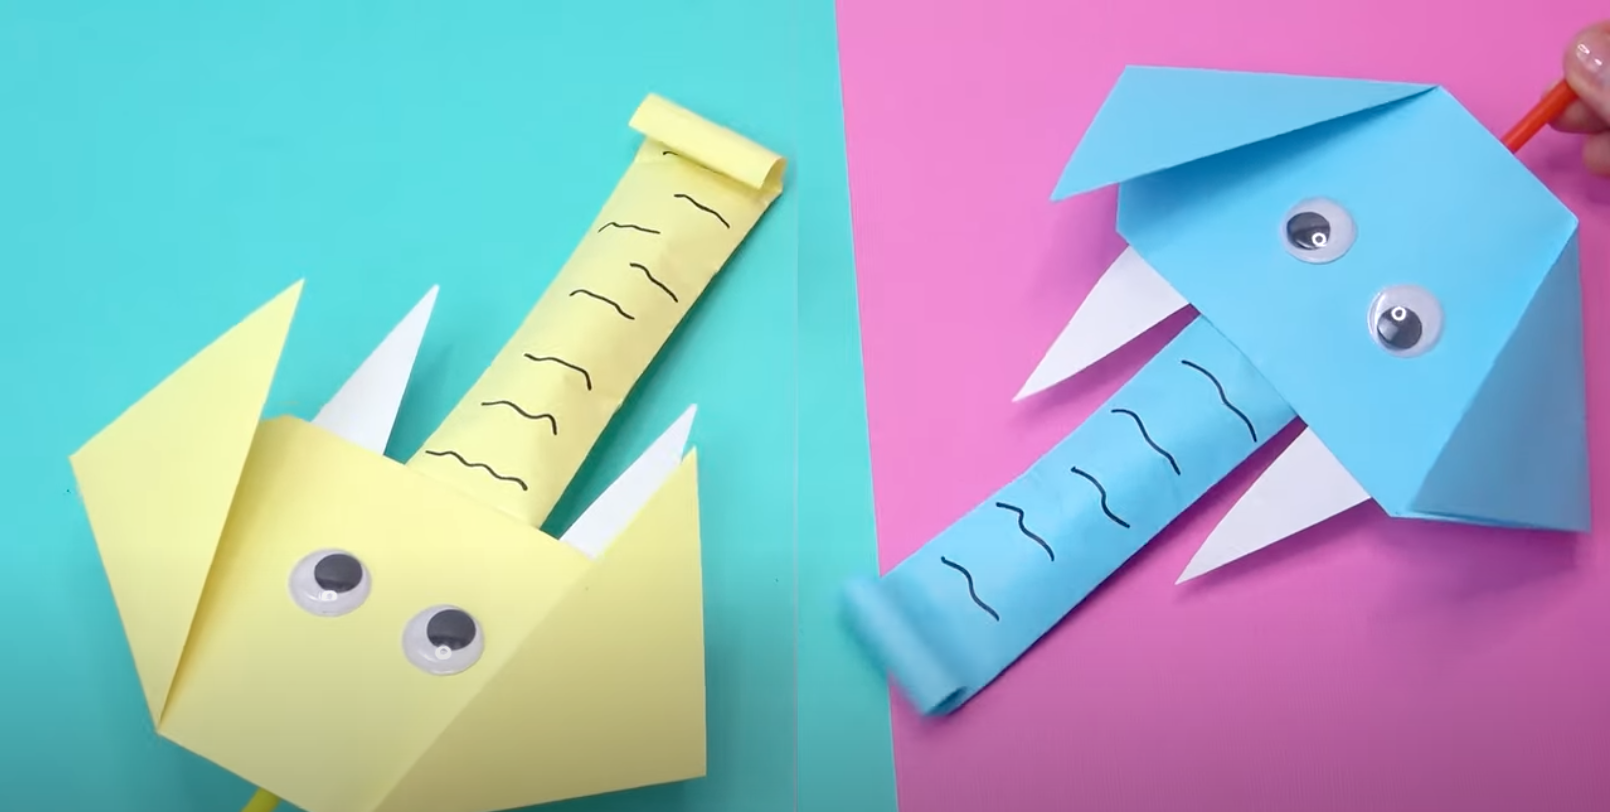
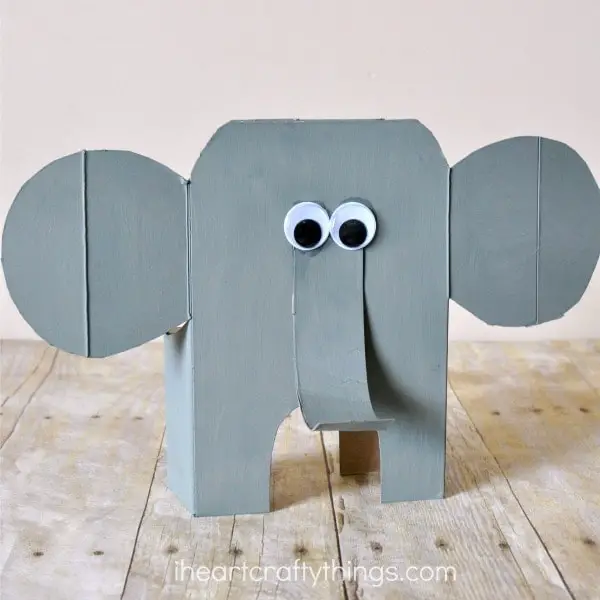 Source: By Caroline @ iHeartCraftyThings, “Awesome Cereal Box Elephant Craft” (https://iheartcraftythings.com/cereal-box-elephant-craft.html)Cereal boxes are versatile and fun to use for all kinds of crafts. You can make a bright pink or blue elephant with silly eyes! This craft is probably best for older kids as it can be a bit tricky.Little ones may have some trouble cutting the elephant out, so an adult can always help too.
What You’ll Need
- Black marker
- Cereal box
- Gray paint
- Scissors
- Googly eyes
- Glue
Directions
Begin by opening the top and bottom of your cereal box. Now cut off all the folding flaps. Save one piece for the trunk.Cut a semi-circle shape out of the middle or the bottom of the cereal box on both sides. Your elephant now has four legs!With your Sharpie, draw the shape of an elephant head and ears on the front and side of the box. Using scissors, cut out the outlines that you drew for her head and ears.Trim off the remainder of the outline of the ears on the back of your box, roughly halfway down the box. The shape of your elephant’s head is done! Paint your elephant with your gray paint, as well as her trunk, and set it aside to dry. Finish your elephant by curling one end of her cardboard trunk and gluing the other end to the middle of the cereal box. Now glue your googly eyes on the top of the elephant’s trunk. She’s all done! Be careful, though; she might walk away!
Baby Elephant Button Craft
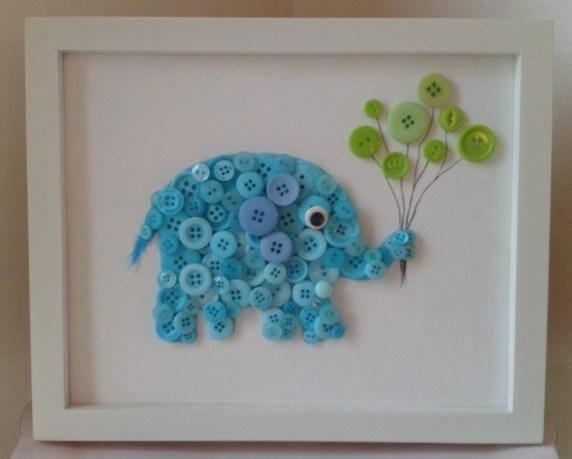 Source: By Cherise Marshall @ Musely, “Crafts With Buttons! Make Anything” (https://www.musely.com/tips/Crafts-With-Buttons-Make-Anything/2356989)These adorable elephant button crafts are sweet and easy to make. They would make amazing baby shower favors.
What You’ll Need
- Buttons
- Hot glue
- Paint
- Canvas board. This can be found at any craft store
- 1 picture frame. This does not need to be expensive
Directions
Using card stock, sketch out a cute, chubby elephant. You can find a pattern easily online if you aren’t able to draw one on your own. Fill in the outline of your elephant with paint and let dry. Gather your buttons and a glue gun. Begin gluing the first layer of buttons over your elephant. Try to cover as much space as possible but stay on the edges. Once the buttons have dried, you can begin your next layer. Try to overlap them along the edges to fill in any gaps. For your elephant’s tail, you can use ribbon or fabric.When doing your elephant’s ears, use buttons that are slightly bigger and darker in color than your base. Add in some button balloons, grass, and any detail you want with a pen. Your cute little pachyderm is all ready!
Horton Hears a Who Craft
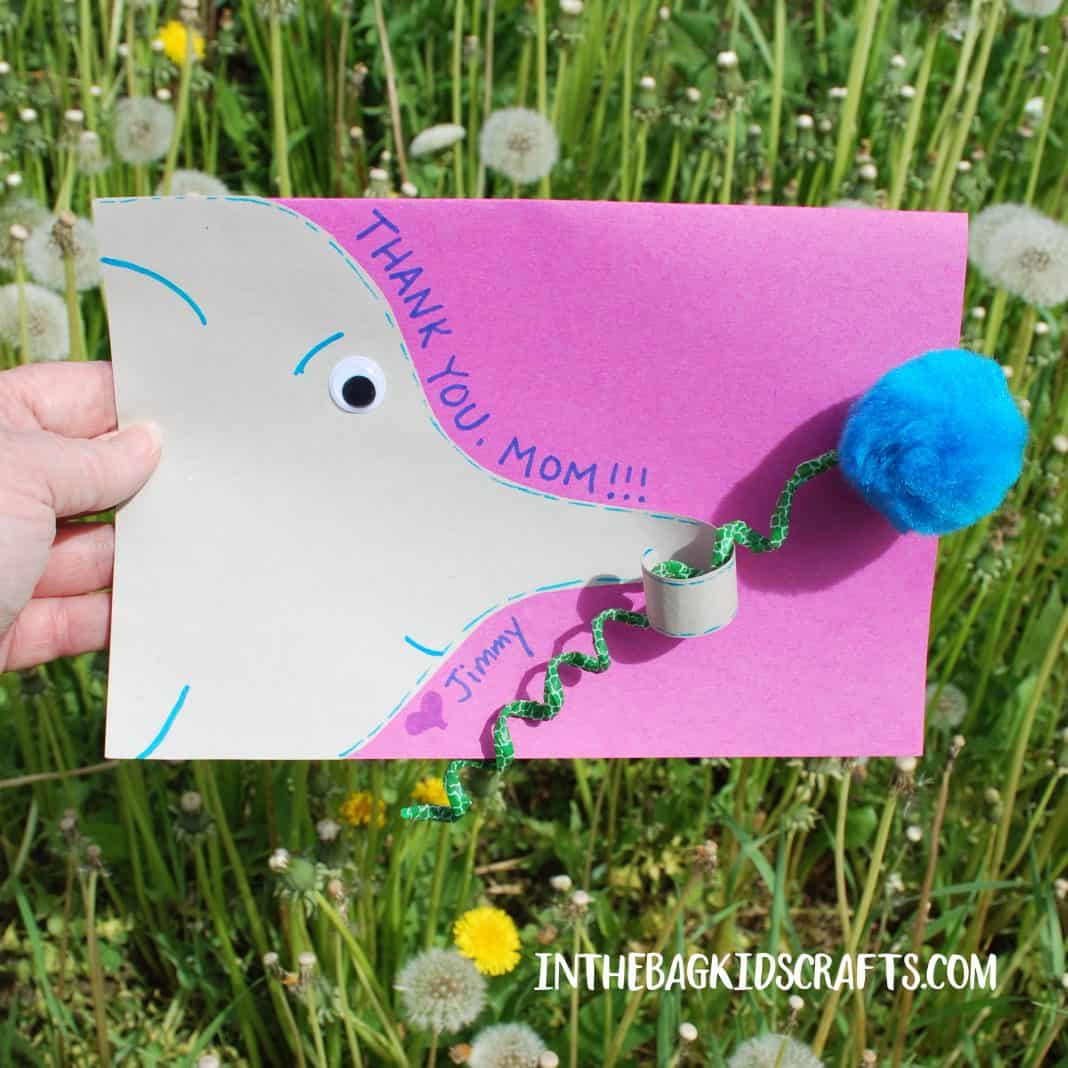 Source: By Joy Cendrowski @ In the Bag Kids’ Crafts, “Horton Hears a Who Craft” (https://inthebagkidscrafts.com/elephant-thank-you-card/)All kids love Dr. Seuss. And if they are familiar with his books, they are sure to know about Horton, the elephants in charge of the Whos. This adorable craft brings him to life right before your eyes.
What You’ll Need
- Scissors
- Gray cardstock
- Glue stick
- Pink pom-pom
- Green pipe cleaner
- Pencil
- Googly eyes
Directions
Cut a 6X12 inch rectangle from your gray cardstock and draw Horton’s head and ears in the center top. Cut along the pencil drawing and cut out half of the rectangle that will be Horton’s back. Fold his ears to make them pop out.To make Horton’s trunk, cut from the cardstock a rectangle about .5 inches wide and 5 inches long. Now roll it around a pencil to give it a curl. Roll and staple to the back to form a cylinder. Glue doesn’t work so well, so you are best using a stapler.With the glue stick, paste the trunk onto the center of his face. Add your googly eyes and let them dry. Use a pom-pom and glue it to the top of the green pipe cleaner to make Horton’s cute little clover. Pull it through the paper trunk to show Horton holding his clover. He is now done and cute as can be!
Cup Cake Liner Elephant Craft
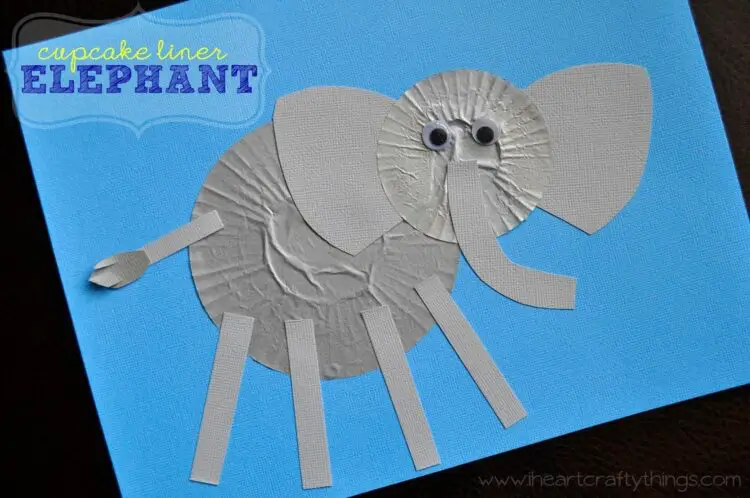 Source: By Caroline @ iHeartCraftyThings, “Cupcake Liner Elephant Craft” (https://iheartcraftythings.com/cupcake-liner-elephant-craft.html)Cupcake liners are cheap, easy to find, and make awesome crafts. This cute little cupcake liner craft will be a sure hit.
What You’ll Need
- Gray cupcake liner
- Blue cardstock for the background. Any color will do though
- One sheet of gray cardstock
- Gray mini cupcake liner
- Elephant ears pattern that you can find here: https://drive.google.com/file/d/0B1xd0e4Gb05tQTB0WFpUY3F1ZDQ/edit
- Googly eyes
- Gluestick
- Scissors
- School glue
Directions
Print out your elephant ears from the pattern. Trace and cut out your elephant’s two ears.Glue your large gray cupcake liner onto your blue cardstock. Now glue the head with ears attached to the blue cardstock. Cut out your elephant’s four legs, tail, and trunk from the gray paper. Glue them to your elephant.Cut out a small tear-shaped piece of cardstock for the end of the tail and cut slits at the end, so it looks like hair. Glue on your googly eyes, and your little guy is ready to go!
Elephant Paper Plate Mask
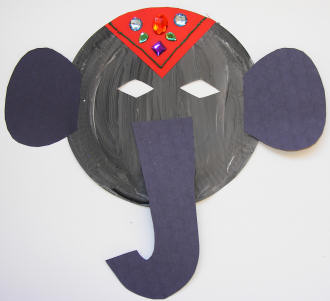 Source: By Activity Village, “Elephant Mask” (https://www.activityvillage.co.uk/elephant-mask)This will be a beautiful mask that will look like an Indian elephant. With its colorful headdress and ears, this is a great project for kids to do. And for them to wear!
What You’ll Need
- Gray paint
- 1 large paper plate
- Gray cardstock
- Paint or gems to decorate
- Colored construction paper
- Glue
- Elastic
Directions
Begin by painting the back of your paper plate gray. Set to dry.After the paint is totally dry, cut out two eye holes.Using your gray cardstock, cut out your elephant’s trunk and two ears. Remember, Indian elephants have small ears. Glue the ears to the opposite sides of her face and glue her trunk to the middle.From the colored paper, cut out a triangle for her headdress. Glue it to the plate, so the point sits between her eyes.You can now decorate the headdress with any gems or crafts you have lying around. Get creative!Now make a small hole in either side of your elephant’s face, pull the elastic through, and tie it.Your beautiful Indian elephant is now complete and ready for fun!I hope you find these elephant crafts as delightful as I have. They should help you fill the time with your children while you learn something as well. These crafts are even great for senior citizens as they can always use help with their manual dexterity. Have fun!
Comments
0 comments