
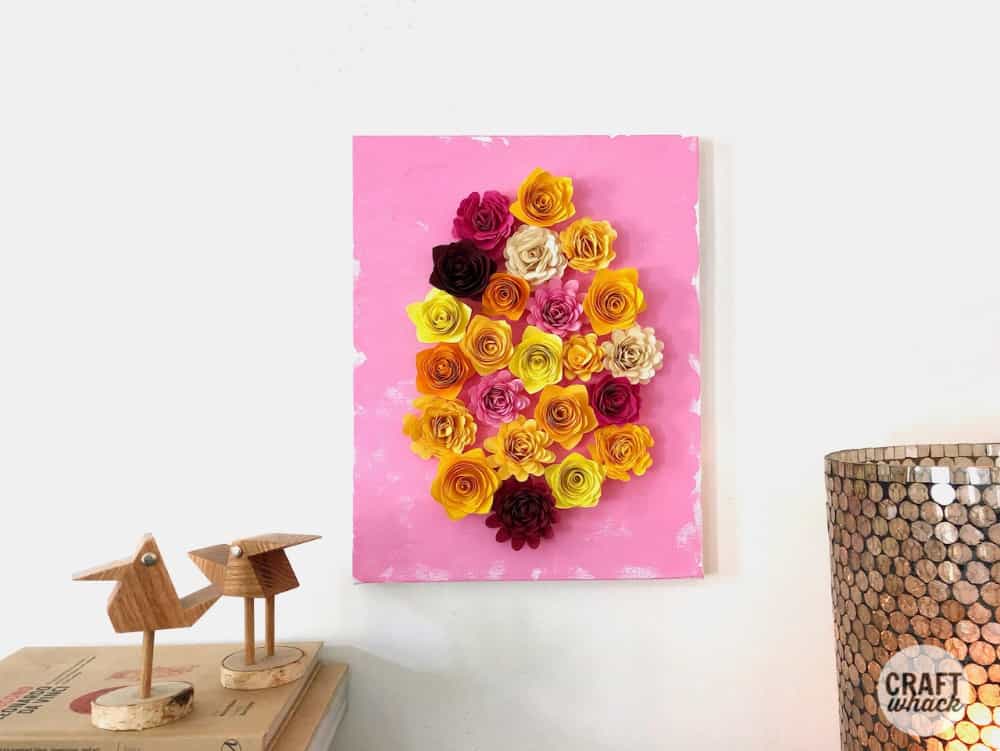
Want to make your own wall art? You can make this fun and flowery 3D wall art easily with the Cricut Maker!
Don’t have a Cricut? You can definitely make something similar if you want to take the time to hand-cut all of the flowers, but wow, is this where the Cricut Maker shines!
You need a lot of little flowers for this project, and by clicking a few buttons, the Cricut will cut your flowers for you while you do something else.
Then all you have to do is quill ’em and glue ’em and you’ve got some lovely flower art to hang up or give a special person in your life.
Love paper projects? Try this bee bookmark Cricut craft next!
Supplies for Quilled Flower Art
and Cricut Access (if you want to use these flowers)
Colored cardstock – I used an array of yellows with a few pinks thrown in
Canvas – primed, 11″x14″
Craft paint – I used a light pink I had, but this one is really pretty.
Hot glue gun and glue sticks
Cricut quilling tool – their quilling tool is so good!
How to Make Beautiful Quilled Paper Flower Art
This is a project in 2 steps: first you have the Cricut machine cut out your flowers, then you can quill them and hot glue them to your canvas.
I painted the canvas a day before I made the flowers so the paint would have enough time to dry. It really should only take a couple of hours for the paint to fully dry if you’re in a hurry. Just don’t paint it on too thick and you should be able to glue the flowers on the same day if you want.
Paint the background of your canvas with pink paint. I squirted some paint out of the tube onto my palette paper and brushed it on loosely, so it didn’t cover the entire canvas fully.
Making Paper Flowers on the Cricut Maker
Go into Cricut Design Space and click on New Project.
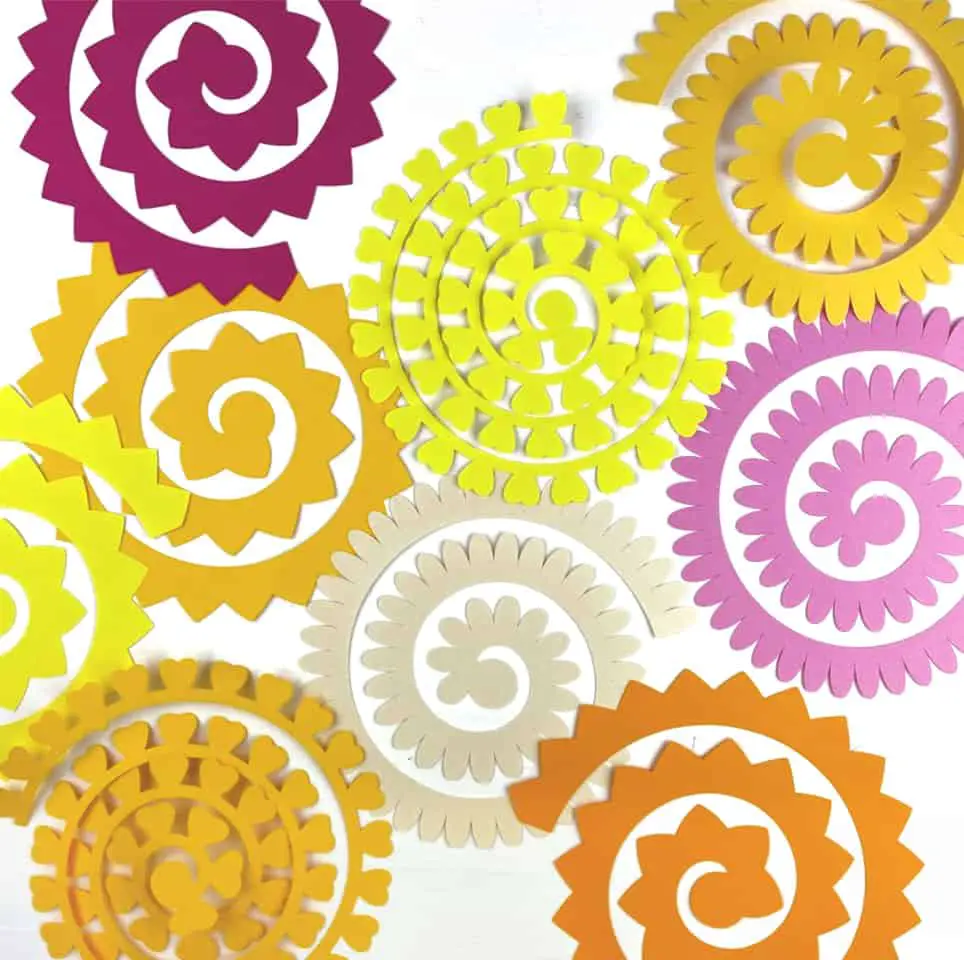
Click in ‘images’, and then ‘image sets’ to search. Type ‘flower shoppe’ in the search bar and hit enter.
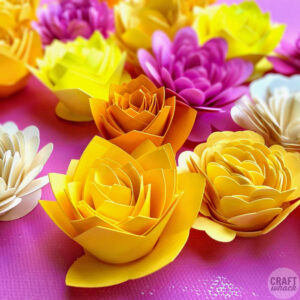
The flowers in flower shoppe that I used were the ones that look like spirals. I used:


You can use any of the spiral-looking flowers for this. P.S. The first pattern is a rose, and was pretty hard to quill (roll up) if you are new to this.
Click whichever flower you want to cut first and then click ‘insert images’ at the bottom right corner.
Drag the arrows to resize the image up to around the 7″ size, then click ‘make it’.
Load your cardstock into the Cricut on your sticky mat. I used both regular grip and light grip mats and the paper came off fine from both. Make around 24-30 flowers, so you have enough to fill the space on the canvas. (I had 3 mats loaded up with cardstock at a time so I could peel one flower off while another was cutting.)
Once you have enough flowers cut, it’s time to quill!
How to Quill Paper Flowers
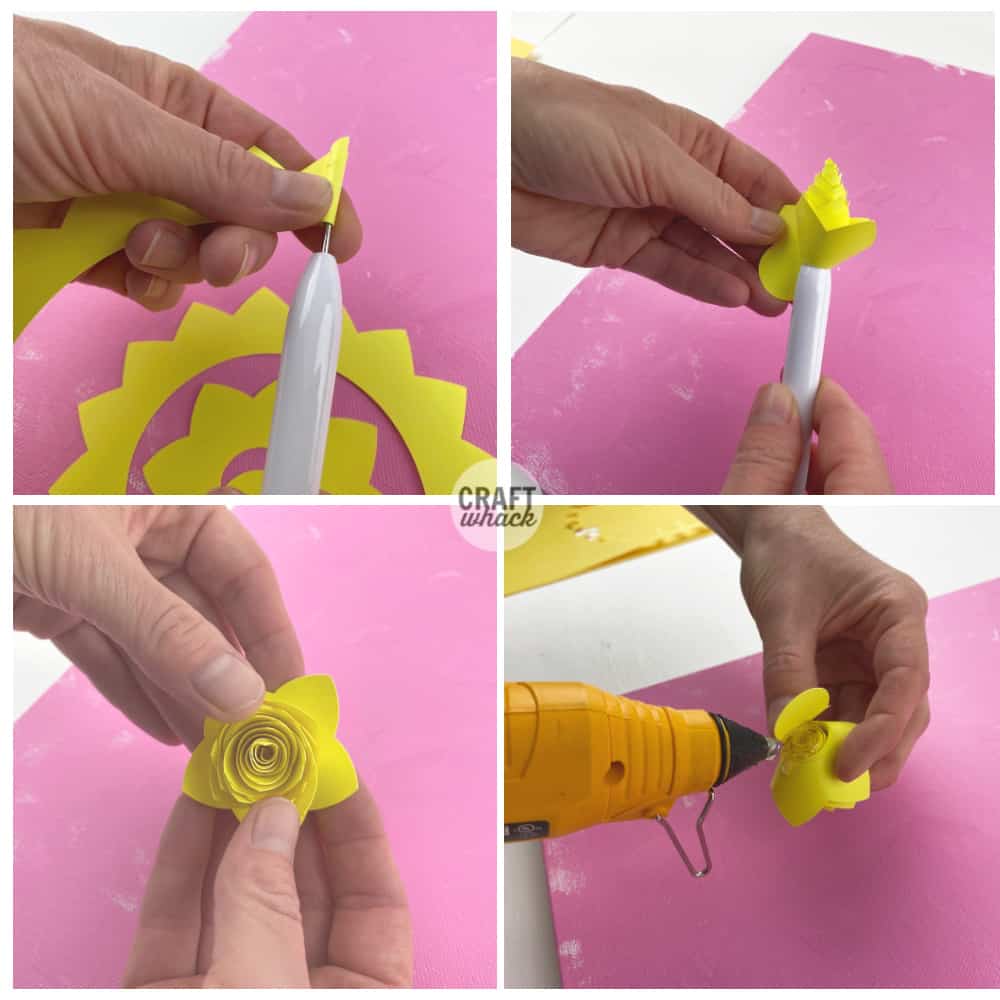
Here’s how to roll the paper flowers around the quilling tool. I love the Cricut quilling tool, because it has a nice little notch to hold the end of your paper, and it feels good in the hand.
Take the outer edge of the flower, slide it in the quilling tool, and start twirling.
Twist the flower all up into a tight spiral.
While you are holding around the outside of the flower, ease up on your grip a bit to let it ‘spring open’.
You can tighten it back up a little or keep it open and full.
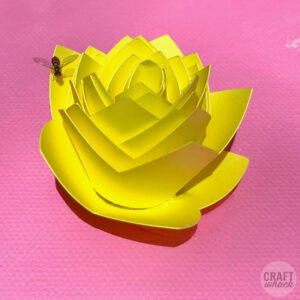
Carefully hot glue the paper circle that is attached to the end of the flower spiral to finish the flower. I globbed the hot glue on the circle, and pressed the flower down onto it on top of freezer paper until it set up for a second or 2.
Once all of your flowers are made, you can glue them to the canvas.
Start at the center and arrange flowers on the canvas how you like them. Then you can hot glue each flower to the canvas. Isn’t it great how quickly hot glue sets up!?
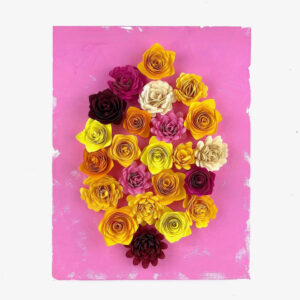
Hang your beautiful art up inside, or give it to someone to brighten their day!
Comments
0 comments