
When the leaves have fallen, and the temperatures begin to dip, the snow will likely start to fall depending on where you live. The winter can be an exciting time for children as they rush out to build snowmen and sled down big hills. It’s a time for hot chocolate and warm fires. But winter can also bring the doldrums and a bit of boredom. Especially where I live in the North East, temperatures can be downright bitter. And in cases like that, it’s best to stay inside to avoid frostbite on little noses. As parents, we sometimes struggle to find things to keep the children entertained. That is why I have put together a list of adorable preschool snowflake crafts that you can do with your child when it’s just not a day for outside play. Each of these crafts, like snowflakes and children, are a little different. It’s a great learning experience as you can help your child understand that everyone is unique, which makes us who we are. I hope you enjoy these easy crafts that you and your little one can make into your own. Have fun and stay warm!
Cotton Ball Rainbow Snowflake
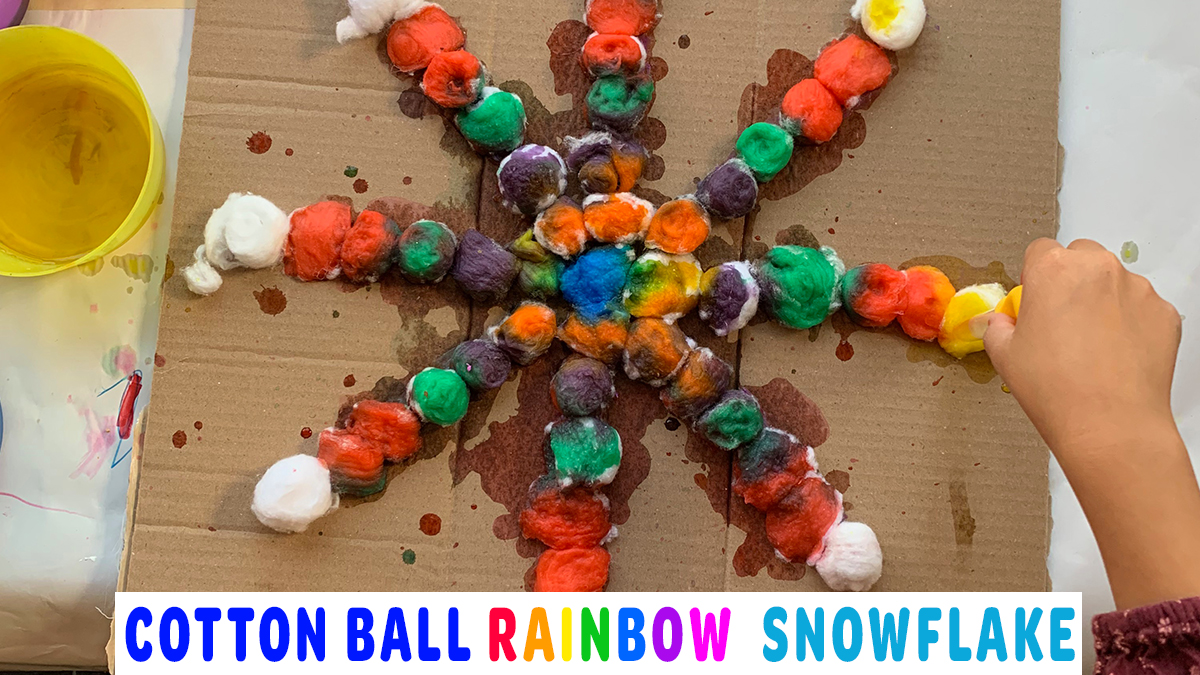 Source: By Mandisa @ Happy Toddler Playtime, “Cotton Ball Rainbow Snowflake” (https://happytoddlerplaytime.com/cotton-ball-rainbow-snowflake-winter-craft-activity/)These cotton ball snowflake crafts are super fun and easy to make. They can get a bit messy, but that is half the fun! Thankfully the cardboard will absorb any runoff paint, so be sure to use a decent-sized piece. You may also want to cover your table with a disposable table cloth first. Craft aprons are also encouraged to protect your little ones’ clothes.
What You’ll Need
- 1 piece of cardboard
- Glue
- Cotton balls
- Pencil
- Several small eye droppers
- Good coloring
- Several plastic cups or bowls
- Water
Directions
On the cardboard, lightly draw out a simple snowflake. This does not need to be complicated. Even just drawing out an X with a horizontal line through the center is fine.Pour a small amount of your glue into a dish and have your child glue down the cotton balls over the lines of the snowflake. Set aside to dry.Fill each plastic cup or bowl with a little water and add several drops of food coloring to each one. Any colors will work, but I did one for each color of the rainbow, so I had six in total. Have your child use the eye droppers to get a little bit of colored liquid and drop it onto each cotton ball. They can use whatever colors they want. Please encourage them to get creative. They do not have to do a rainbow; it’s completely up to them.
Snowflake Sticky Wall
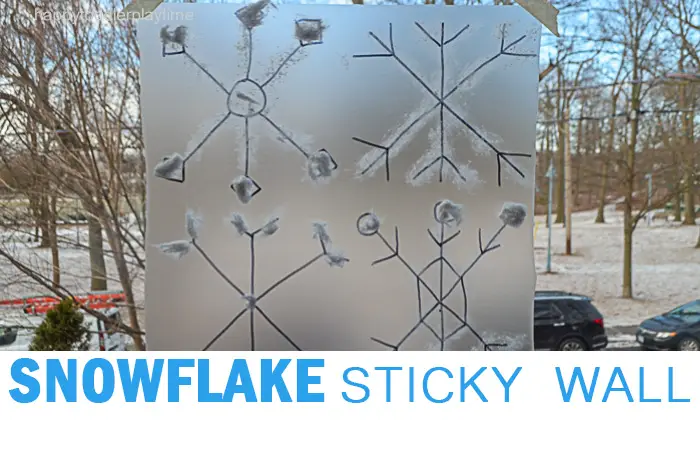 Source: By Mandisa @ Happy Toddler Playtime, “Snowflake Sticky Wall” (https://happytoddlerplaytime.com/snowflake-sticky-wall-4/)This activity has an easy setup and is a great idea for a day stuck inside. And what child doesn’t love using cotton balls? This fun sticky wall is also a great fine motor activity!
What You’ll Need
- Sharpie
- Cotton balls
- Contact paper
- Masking or painters tape
Directions
Using your sharpie, draw the outline of a snowflake (or several) on contact paper. Be sure to draw your snowflakes on the front of the paper, not the part you peel off. These do not have to be perfect snowflakes.Peel off the back of the contact paper, and using masking tape, attach it to the window with the sticky side facing you. You can either trace along with the sticky snowflake with cotton balls and watch part of the cotton stick, or you can just stick whole cotton balls along the lines. Either way, it gives your child the opportunity to get creative.
Cardboard Tube Snowflakes
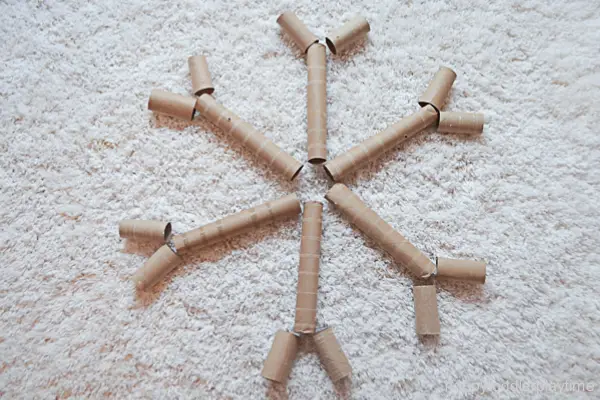 Source: By Mandisa @ Happy Toddler Playtime, “Cardboard Tube Snowflakes” (https://happytoddlerplaytime.com/cardboard-tube-snowflakes/)This activity is not only very easy, but it’s a great STEAM activity for your kids. It makes a great preschool day activity for children.
What You’ll Need
- Paper towel and toilet paper cardboard tubes (as many as you can find)
- Sharpie
- White paper
Directions
This craft is fun because you can adjust it according to your child’s age. You can create half of the snowflake yourself using the cardboard rolls and have your child mirror the other side. This works great if it’s a very young child.Or you can draw a snowflake on a piece of paper and have your child lay out the cardboard to form a snowflake.There really is no wrong way to do this. But it’s a great opportunity to talk about shapes and symmetry and explain that they are trying to mirror your snowflake. You can also just let your child take the reins completely and layout their own snowflake how they like.
Dot Sticker Snowflake
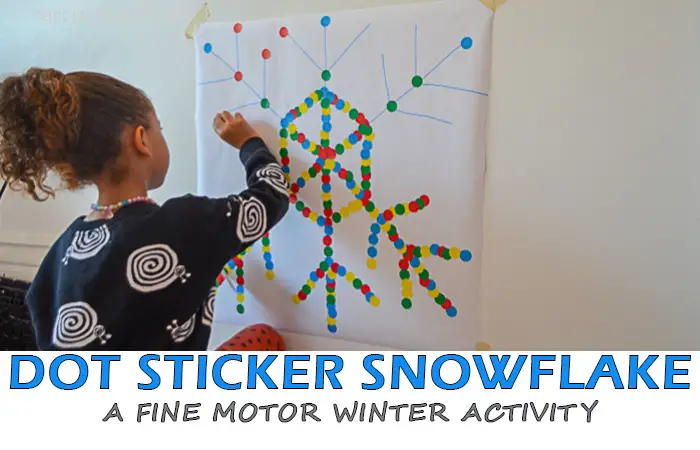 Source: By Mandisa @ Happy Toddler Playtime, “Dot Sticker Snowflake” (https://happytoddlerplaytime.com/dot-sticker-snowflake/)This is an activity that is a bit time-consuming, but it’s great if you need to keep your child occupied. It’s a wonderful indoor winter activity that focuses on fine motor skills. This project works best for kids ages four and up as little ones may not have the attention span. But it’s really up to your child how long they want to participate.
What You’ll Need
- Large sheets of white craft paper
- Dot stickers. These can easily be found at Michael’s or on Amazon
- Blue Sharpie
- Masking or painter’s tape
Directions
On the large piece of paper, draw a snowflake out. There are several easy patterns you can grab off of Google. Again, it does not need to be perfect.The more dot stickers you have, the bigger you can make your snowflake.Tape your snowflake drawing to the wall at the appropriate height for your child. You can then begin by showing them as you peel off each dot sticker and stick it along the lines of the snowflake. This will help with your child’s fine motor skills as she peels and sticks. You can use any kind of sticker too. It doesn’t have to be dotted. There are plenty of cheap stickers at the dollar store.
Q-Tip Snowflakes
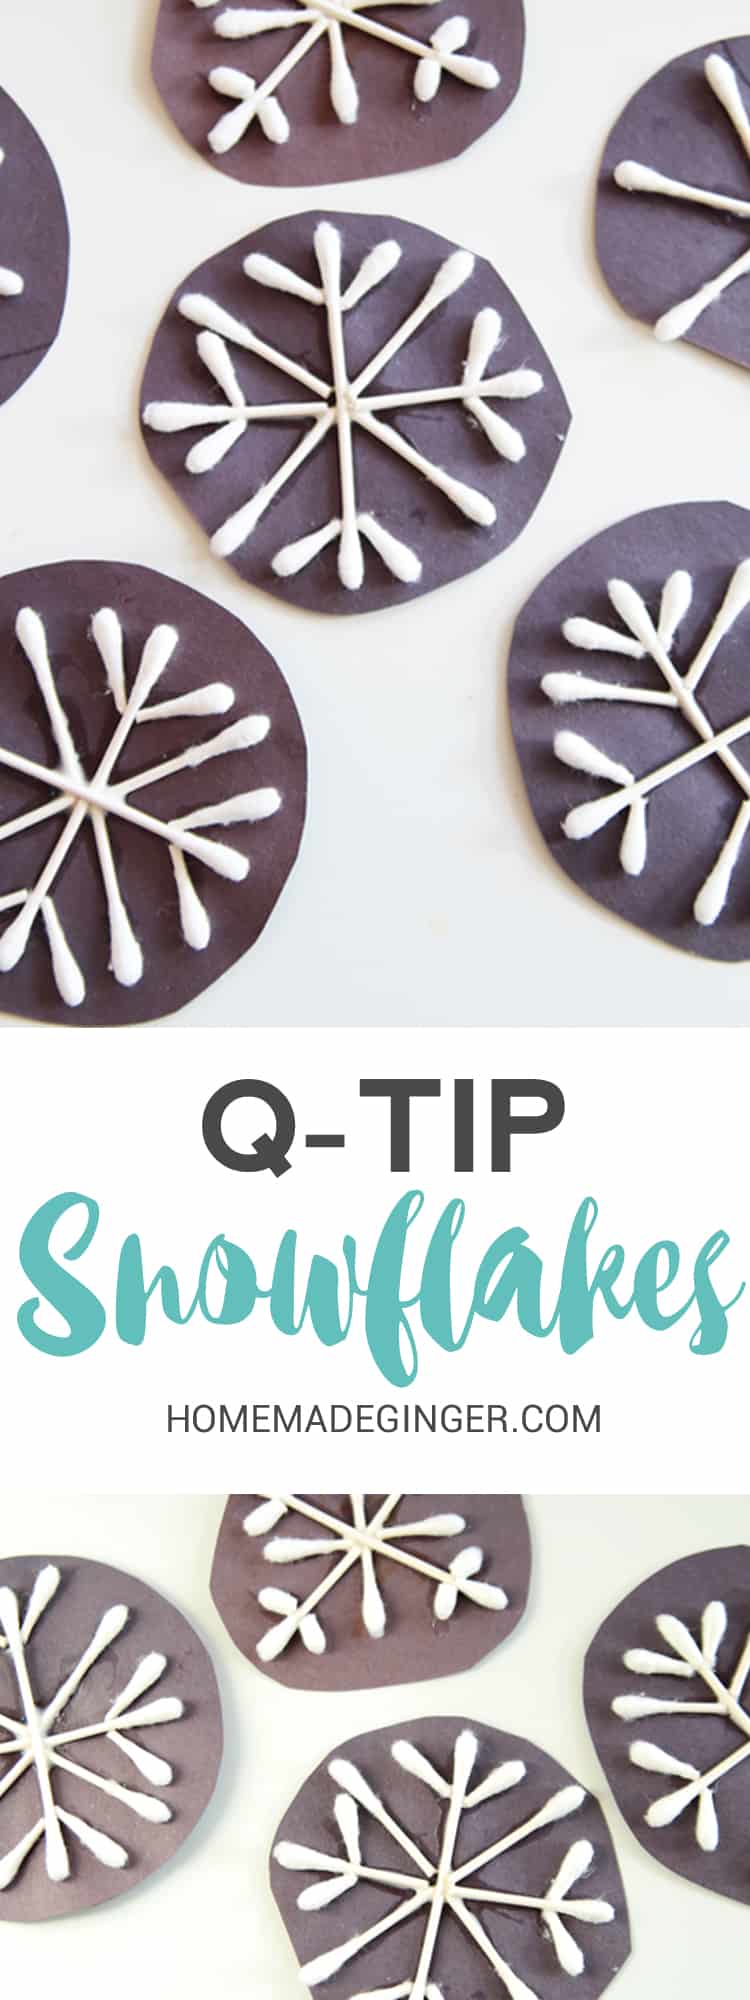 Source: By Megan @ Homemade Ginger, “Q-Tip Snowflakes” (https://www.homemadeginger.com/snowflake-craft/)All kids love playing with Q-tips! This is a great craft that will keep them busy if they are stuck indoors. This craft is really easy and great for all ages, not just preschool. It will turn your little one into a wonderful designer. I personally love this craft because it doesn’t make a mess, and most people have everything on hand.
What You’ll Need
- Black paper
- Q-tips
- Scissors
- Glue
Directions
With your scissors, you want to cut up the Q-tips into different lengths. If you have a very young child, it’s best to do this for them. However, if you have older kids, they should be able to do this on their own.You can now begin gluing the Q-tips down onto the black paper as you create snowflakes. Add on to your snowflake with the different size Q-tips until you get the snowflake you want. Let the snowflakes dry and then cut around them and use them as decorations.
Snowflake Paint Art
 Source: By Amie @ Glitter Meets Glue, “Snowflake Art Lesson for Kindergarten” (https://glittermeetsglue.com/snowflake-art-lesson-kindergarten/)This is an easy craft that takes very little supplies but will create great fun for your little one. It’s also a good introduction to tape resist art!
What You’ll Need
- Watercolors or acrylic paint
- Thick watercolor paper or canvas tiles
- Masking or painter’s tape
- Paintbrushes
- Glitter (optional)
Directions
Make sure you have a nice empty surface to work on, such as a kitchen table. Let your child begin tearing off different lengths of tape for their snowflakes.Because snowflakes are symmetrical, you can take this opportunity to teach your child about symmetry as you create snowflakes with your tape.Press the tape down firmly so that it sticks to the paper as you don’t want any paint to get underneath it. Now it’s time to paint over the tape using your paints. You can mix colors together or stick to just one. Blue works great for the snowflakes, but I also like purple and pink too! It’s totally up to you and your child. Be sure to paint over the entire surface of the paper and right over the tape. Snowstorms are usually a mess of flying snow, so don’t be afraid to get messy with the paint!If you are okay with glitter, then now is the time to sprinkle some over the wet paint before it dries. Let the paint dry completely and then very slowly begin pulling off your masking tape, careful not to tear the paper. Your result will cause beautiful white snowflakes that you and our child designed using tape resist art.
Snowflake Slime
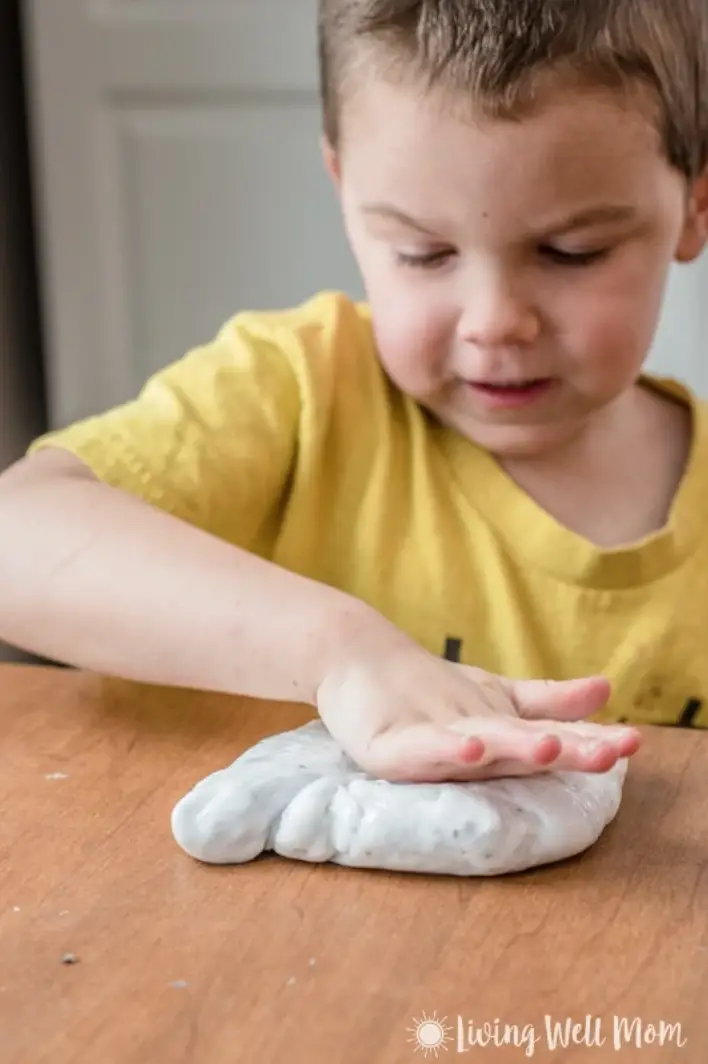 Source: By Erika Bragdon @ Living Well Mom, “How to Make Snowflake Glitter Slime in Just 5 Minutes” (https://livingwellmom.com/snowflake-glitter-slime/)Slime is the new obsession in crafts, it seems. Kids love it, they love to make it, and they love to play with it. A homemade slime recipe is perfect for a day indoors when the weather is too bitter to go out. But even if you live somewhere that does not snow, this is still a great activity and can be done at any time of the year. Whether at home or in the classroom, no child can say no to making slime.Making slime is also a great way to introduce the basics of chemistry as you mix substances and polymers. You can explain to your child about elasticity as your slime stretches and also talk about how the different slime activators work.While this is a great craft for small children, it should be done with supervision.
What you’ll Need
- 1/2 cup of Elmer’s Clear Washable PVA School Glue
- 1/4 tsp of Borax Powder (this is generally non-toxic)
- 1 cup of warm water, divided into 2 1/2 cups
- Glitter and snowflake confetti (optional)
- Good coloring
- Bowl
Directions
Slowly add your glue and water together in a bowl and mix thoroughly. Have your child slowly add in glitter and food coloring until you get the look you want. This step is optional, but most children think this is the best part about making slime.They love to get creative with color and texture. It also gives them more of an opportunity to use their fine motor skills.In the other bowl of warm water, mix the 1/4 tsp of Borax powder. This will make your slime activator solution. When mixed with hot water, Borax creates that rubbery, slimy texture that kids love so much.Now mix your Borax solution with your glue mix solution. Stir it very well until it begins to come together. It won’t take long. If it seems stringy and clumpy at first, that is totally fine!Remove the mixture from the bowl and have your child spend some time mixing everything together as they slowly knead the slime. This is another super fun part for kids, so let them have at it.Your child can play with the slime as long as they want. Just be sure the little ones are supervised. The best part about homemade slime is that you can store it and use it later. Use an airtight food storage container to keep your slime fresh!

Comments
0 comments